abvfx Posted May 14, 2013 Author Share Posted May 14, 2013 Updates eye test with the skin shading (checking the levels). Still have to build waterline geometry. Working on the teeth right now, along with clothes. Quote Link to comment Share on other sites More sharing options...
abvfx Posted June 22, 2013 Author Share Posted June 22, 2013 (edited) I took a little break from this thing, hair was driving me a little stir crazy (wasn't happy with anything i produced). So last night I was reading about Method's KIA Space baby spot and notice they mentioned they rendered everything in PBR. And since it was predominantly a Fur intensive piece, my initial thought was how. I was under the impression that you should never do such a thing. I made this quick groom (yes it still needs a lot of work, its only 90~ mins ) and started some rendering. At the moment i still can't control hair as much as i would like, mid-length hair i think is off the table in Houdini with this method (i already think im pushing it a bit with this current groom). After a test with an Environment light and raytrace shadows (12 mins) I remembered Serg's technique of using volumes with fur. Worked like a charm. I'm going to work more on the groom and try to get better results. Edited June 22, 2013 by phrenzy84 Quote Link to comment Share on other sites More sharing options...
abvfx Posted June 24, 2013 Author Share Posted June 24, 2013 Done some more grooming last night. A little further to go, going to be testing out some more lighting with skin and working on the comp setup. The turntable was 2:40 a frame and the clay was originally rendered at 720 and took 11-12 mins (which is acceptable for me at that resolution) Quote Link to comment Share on other sites More sharing options...
TomRaynor Posted June 24, 2013 Share Posted June 24, 2013 Can you expand on the technique you talk about regarding using volumes with fur? Also you refer to "Volume Shadows" in pbr... What do u mean by that? Quote Link to comment Share on other sites More sharing options...
pelos Posted February 10, 2014 Share Posted February 10, 2014 volumes? Quote Link to comment Share on other sites More sharing options...
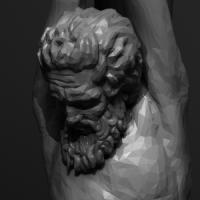
abvfx Posted February 10, 2014 Author Share Posted February 10, 2014 Since there is so much fur, i dont raytrace shadows. I generate a volume from the fur and use that to cast shadows. You can see the volumes in this post http://forums.odforce.net/topic/18903-homeless-man-mild-nudity/page-2#entry116745 BTW i dont know when i will come back to this model. I might just move on to another project. Quote Link to comment Share on other sites More sharing options...
tdu Posted December 6, 2014 Share Posted December 6, 2014 Really great start overall! Here are some notes with the attached paintover (I also tweaked the values to get a better idea of the final product). Red :: There seems to be a hard horizontal line in the specular map running across the noes. Green :: Make sure to give the interior of the mouth some value. You don't want it to go completely black b/c it will make the character feel Magenta :: A little too specy above this upper lip. Tone that down a bit. Blue :: Make sure the material doesn't get too dark in these regions. The lighting will naturally created darkness there once the character is posed and lit. If the material is also dark, that will double down the effectiveness and give the character raccoon eyes. Great job! Very impressive!! Mike www.td-u.com Quote Link to comment Share on other sites More sharing options...
abvfx Posted December 8, 2014 Author Share Posted December 8, 2014 Hey Mike, thanks for the detailed feedback. I agree with pretty much every error you pointed out. I was going for a lip gloss look but it didnt work out. But this is an old project, my techniques have changed a little since then, this might be a project i pick back up in the future but it is something i am no longer working on. But thank you for the constructive feedback, it is always welcomed. -andrew Quote Link to comment Share on other sites More sharing options...
Recommended Posts
Join the conversation
You can post now and register later. If you have an account, sign in now to post with your account.
Note: Your post will require moderator approval before it will be visible.