ajz
-
Posts
41 -
Joined
-
Last visited
-
Days Won
1
Recent Profile Visitors
2,422 profile views

ajz's Achievements
")


-
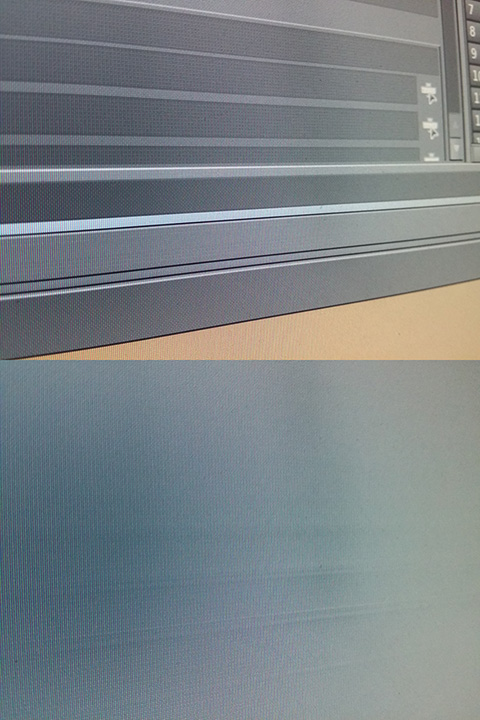
you know that you are a houdini user when...
ajz replied to dyei nightmare's topic in Lounge/General chat
When Houdini's interface has burned into your monitor.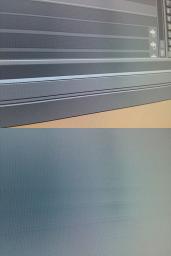
-
Same here. There's the arrow animation once I choose a file, then it stops, but the image doesn't appear.
-
Does the site no longer work on mobile phones?
ajz replied to magneto's topic in Feedback, Suggestions, Bugs
Sounds great! -
Is the only way of painting primitive attribute is to paint point attribute first and then promote it to primitive?
-
Okay, finally the rendering has finished. I edited my initial post to include new images. I hope they're more interesting than the original one. PS. Sorry for large dimensions, but I'm not sure if it's possible to use thumbnails on the forum.
-
Mantra: OpenSubdiv CC much slower than Mantra CC. Why?
ajz replied to ajz's topic in Lighting & Rendering + Solaris!
Indeed, this looks like the culprit! I just made a quick test and OpenSubdiv CC uses a single core only, while Mantra CC takes advantage of almost all cores. Geometry preparation of a scene consisting of about 1.3 million primitives took Mantra CC around 40 seconds, while with OpenSubdiv CC it reached a whopping 11 minutes. This disproportion is quite extreme. A few days ago I submitted a report regarding this issue. Hopefully it will be fixed someday... -
So, I've been doing a lot of rendering recently and have noticed that if I set an object to be rendered as OpenSubdiv Catmull-Clark (via Render Polygons As Subdivision), Mantra takes several times longer to prepare the geometry than if I were to use Mantra Catmull-Clark algorithm. Is it simply because Mantra isn't optimized to use OpenSubdiv, or is there some other reason behind it? I'm just curious.
-
Thanks for the tips. I'll look into those stylesheets, but it appears that they require some knowledge of VEX and CVEX and I still didn't have time to explore them thoroughly. I think for now I'll just mash up a simple script that will traverse through the obj tree and replace shop_materialpath[k] (of each material SOP it comes accross) with links to some predefined material. This should work, unless there are no Python routines dedicated to takes (include/exclude from take).
-
I quietly hoped that there's some easier solution. I'm familiar with takes, but I also assign materials on SOP level. So, unless I'm mistaken, to override all materials in the scene, I'd have to dive into each ObjNode of my candidate objects to make appropriate modifications to their material operators. For each take... I guess for my current scene I can do this, but this will be a helluva tedious process.
-
Is it possible to override all materials present in the scene when rendering with selected mantra ROPs? I'm setting up scene lighting ATM, but for the sake of shorter render times, I'd like to do my test renders with some simple, non-textured material. In Maya I could just create a render layer with material override. What is the Houdini way?
-
This was an excellent video and a good piece of advice. Thanks Marty! I'll be experimenting with different lighting conditions and some detail shots today. I am most definitely going to check out those IES profiles. I'll see if I can come up with something more interesting. Until then, here's the same rendered image, but with some heavier post. Hopefully I didn't overdo it.
-
Thank you all for heart-warming comments. I wouldn't mind hearing some critique too, in order to know what I should pay more attention to in the future. I modelled all objects in arbitrary units and then scaled those objects to fit each other's size inside Houdini. Initially I made the scene to match real-world scale, but due to one problem (unrelated to DOPs) I had to crank up the scale a lot, so now the cooler measures 28 meters in height... However, because the goal of the project was a still image, this didn't matter much for the simulation, which I needed only to scatter objects around the scene in a semi-random fashion. For the purpose of the RBD simulation I replaced all moving models (nuts, screws, washers and motherboard rivets) with their modified low-poly versions. I tried to make them as much convex as possible, while still keeping their overall shape. I used meta balls field mode in their DOPs, and a mixture of volume and ray-intersection modes for DOPs of static colliders. 1/6 Min/Max substeps and an aggressive auto-freeze DOP were enough to make the simulation fast and quite accurate. Generally speaking, I didn't have to do a lot of tweaking to DOPs. Most of them are almost at their defaults. I believe that most time I have spent tweaking meshes of colliders rather than fiddling with DOP parameters. Objects settled down after about 160 frames. I don't remember exactly how much time it took to solve the simulation, but I think it was something under 20 minutes.
-
UPDATED. If some image doesn't load, just refresh the page. Dropbox isn't too reliable unfortunately. I chose it as a medium over forum's upload mechanism only because the latter seems to compress images on its own, which I do not want. Two master shots: And three detail shots: What was done in Houdini: Some modelling of base shapes (blades of both fans and all tubular shapes of the CPU cooler - some of which are not visible on this particular shot) and instancing of similar meshes; RBD simulation for realistic placement of all those nuts and bolts; rendering (Mantra); postproduction. Other software used: Nvil - subdivision modelling of all objects. 3D-Coat 4.5 BETA - UVs and texturing of all objects (but the floor). Bitmap2Material 3 - generating PBR textures of the wooden floor. Photoshop - tweaking displacement map of the floor (painting the spacing between the boards); stencils for texturing in 3D-Coat; post. Took over 7 hours (edit: per shot) to render on a 3930K... Mostly because of those blasted semi-transparent motherboard rivets... --- Old, flat image can be accessed here: https://www.dropbox.com/s/vjbje6vcz2o8k4r/nuts_and_bolts_cam1_final.jpg?dl=1
-
Tangent space normal maps from Crazybump.
ajz replied to harima's topic in Lighting & Rendering + Solaris!
There's also this awesome asset on Orbolt that you might want to check out. I use it all the time. It works with tangent-space normal maps generated not only by ZBrush, like its name suggests, but also 3D-Coat, Bitmap2Material and Substance Designer (generally it appears to be compatible with, so called, Maya nad 3DS Max TSNM), so it most likely will also work with maps generated by CrazyBump. Just toggle the Invert Bump parameter if you see strange results. http://www.orbolt.com/asset/_slayerk::ZBrushTangentNormals -
Does the site no longer work on mobile phones?
ajz replied to magneto's topic in Feedback, Suggestions, Bugs
Hey Marc. Any chance of fixing the issue?