ParticleSkull
-
Posts
484 -
Joined
-
Last visited
-
Days Won
15


Recent Profile Visitors
5,097 profile views


ParticleSkull's Achievements
")


-

Remove HDRI Background - Karma Dome Light
ParticleSkull replied to ParticleSkull's topic in Lighting & Rendering + Solaris!
Got it!! It makes sense. I wasnt checking the rendered files to see if it was outputting it black properly Thanks -
Hey guys, I know this should be pretty straightforward, but how can I ger rid of the HDRI background from a dome light? I mean, I'm using a dome light with an HDRI to illuminate my scene. I need the background to be all black, but it keeps showing the hdr image there Thanks Alvaro
-
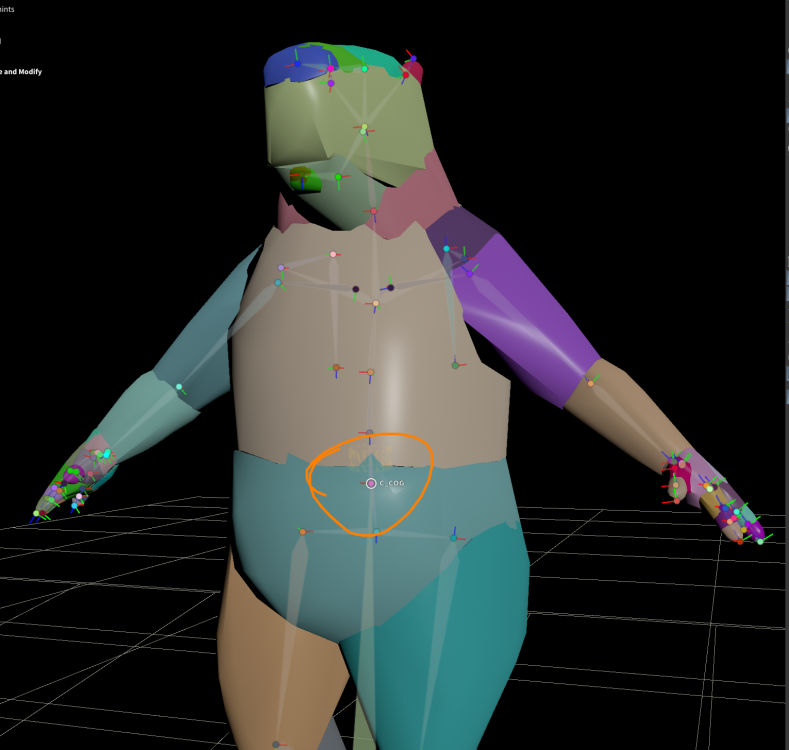
So I fixed it. The issue was quite simple. There was no collision shape for this specific bone. I just had to click on it to create a coll shape, I didnt even resized or moved it. All those shapes doesnt look very optimized though, but it works well for what I need. Ragdoll_0102.hip

-
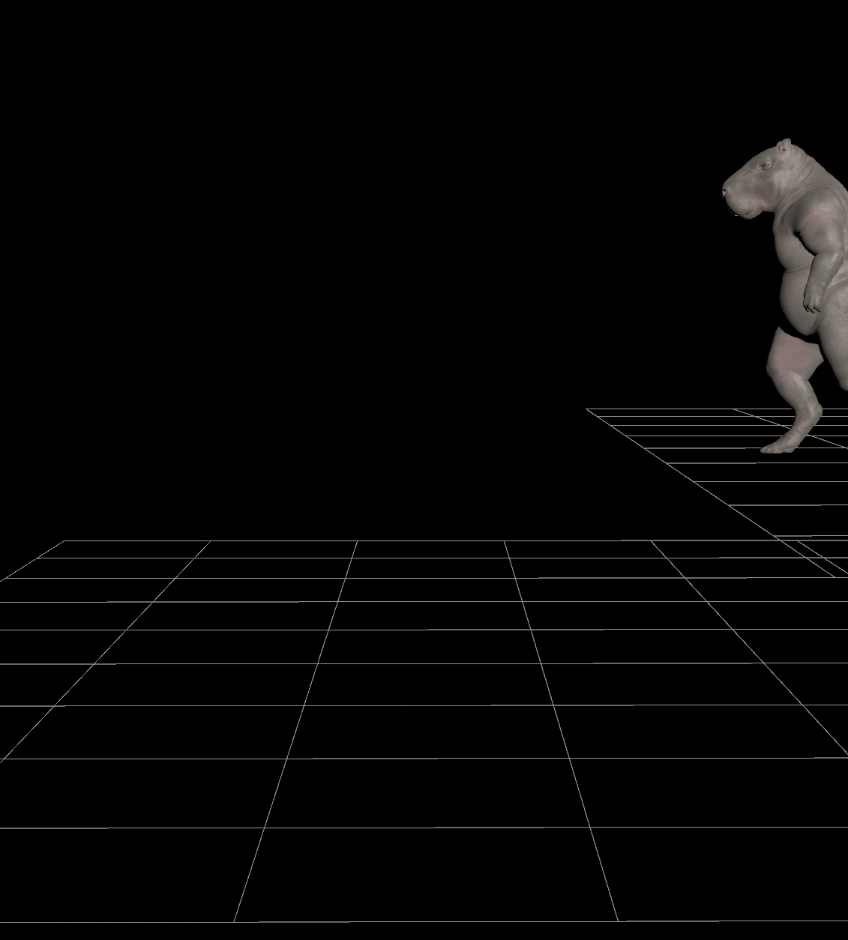
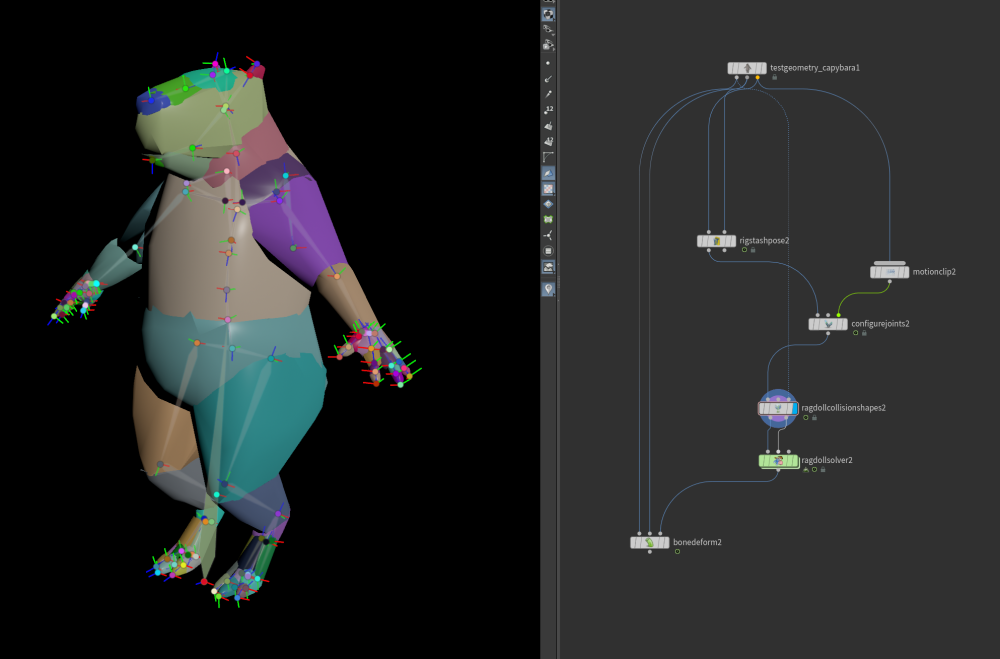
I'm trying it with the Capybara now and it ALMOST works I managed to create the collision shapes just by connecting the capybara's mesh to the third input of the collision shapes node But as you can see, the upper body part is disconnect from the waist and I have no idea why Does anyone know how can I keep it connected? Thanks File is attached: Ragdoll_0101.hip
-
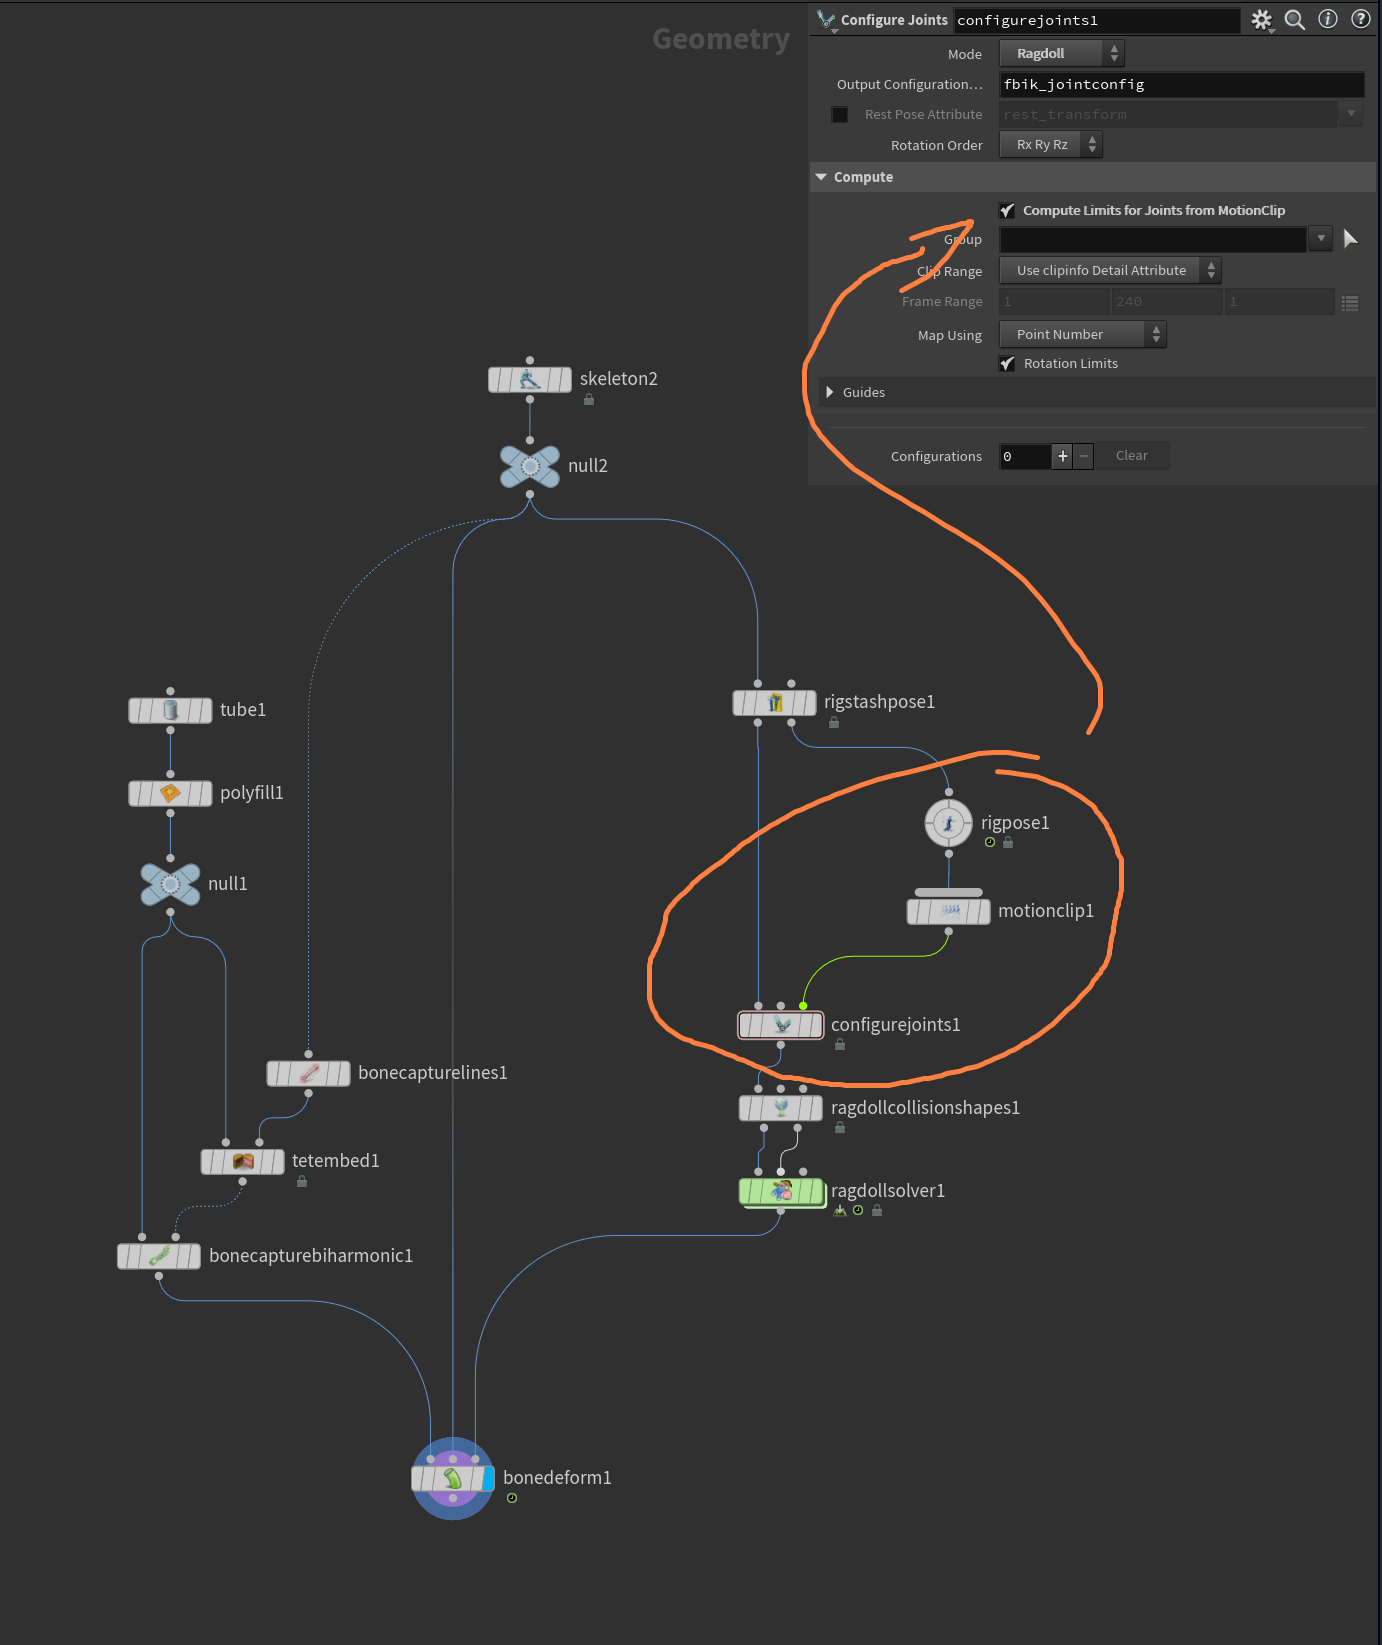
I found a way to configure the joints limits procedurally. Simple_Bones_0202.hip This is how you do it: - You have to animate the skeleton into some key poses using a rig pose, - use a motion clip sop to convert it to a motion clip, - and enable the Compute Limits for Joints from MotionClip on the configure joints sop It looks like the joint limits are working perfectly now + it was super easy to setup


-
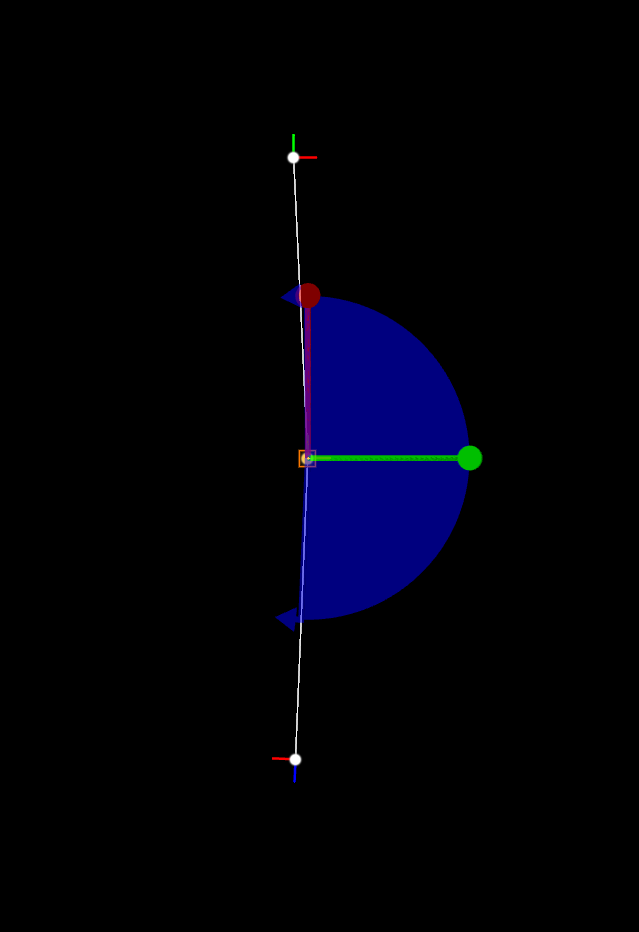
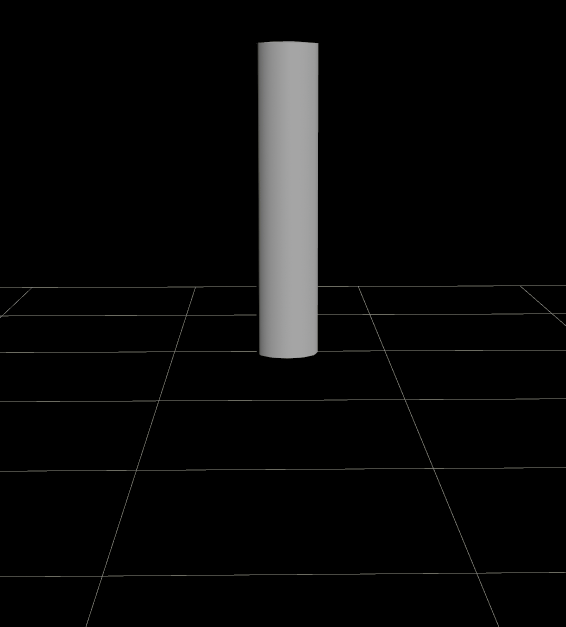
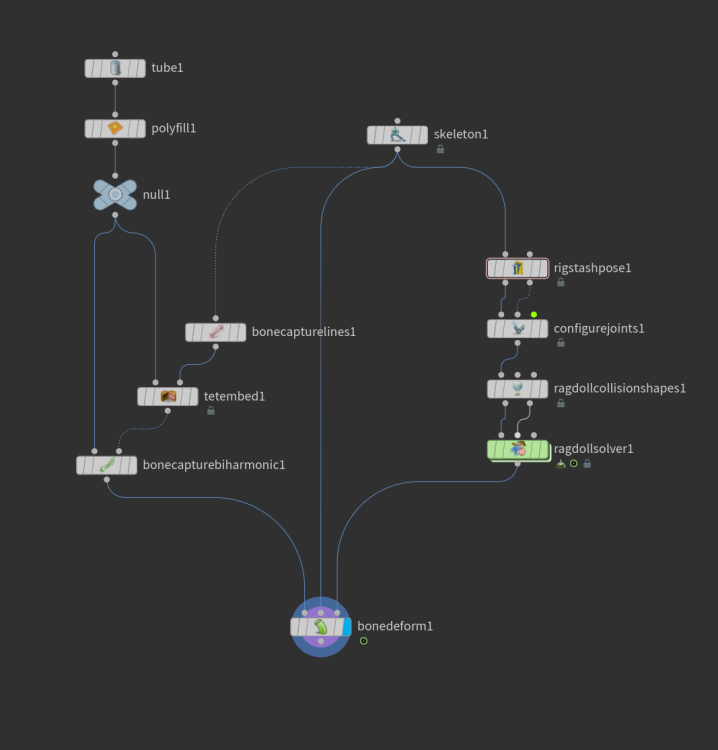
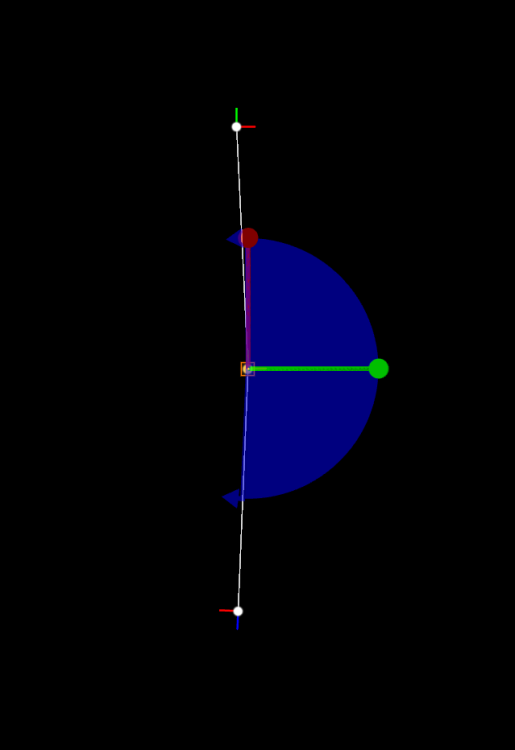
Hey guys! I'm trying to learn the best workflow for Ragdoll simulations. I have a very basic knowledge on KineFX so I believe it's best to start with the simplest scene possible. Here's what I have now: Simple_Bones_0201.hip It works!! But I don't know how to work with it properly. First of all, is this the best workflow for this? Edit: the following topics are all solved - It looks like there's an "automatic" way to configure the joints limits using a motion clip. I tried a couple things but it didn't worked as I expected - There's also an automatic way to create the collision shapes This is the only joint limit I set up, but it doesn't work as I expected. I was expecting the joint to rotate only inside the blue limits, but it does the other way around (as you can see in the animation). Can anyone explain what's going on? This is it for now. Any tips would be amazing, even not related to my doubts Scene file is attached Thank you
-
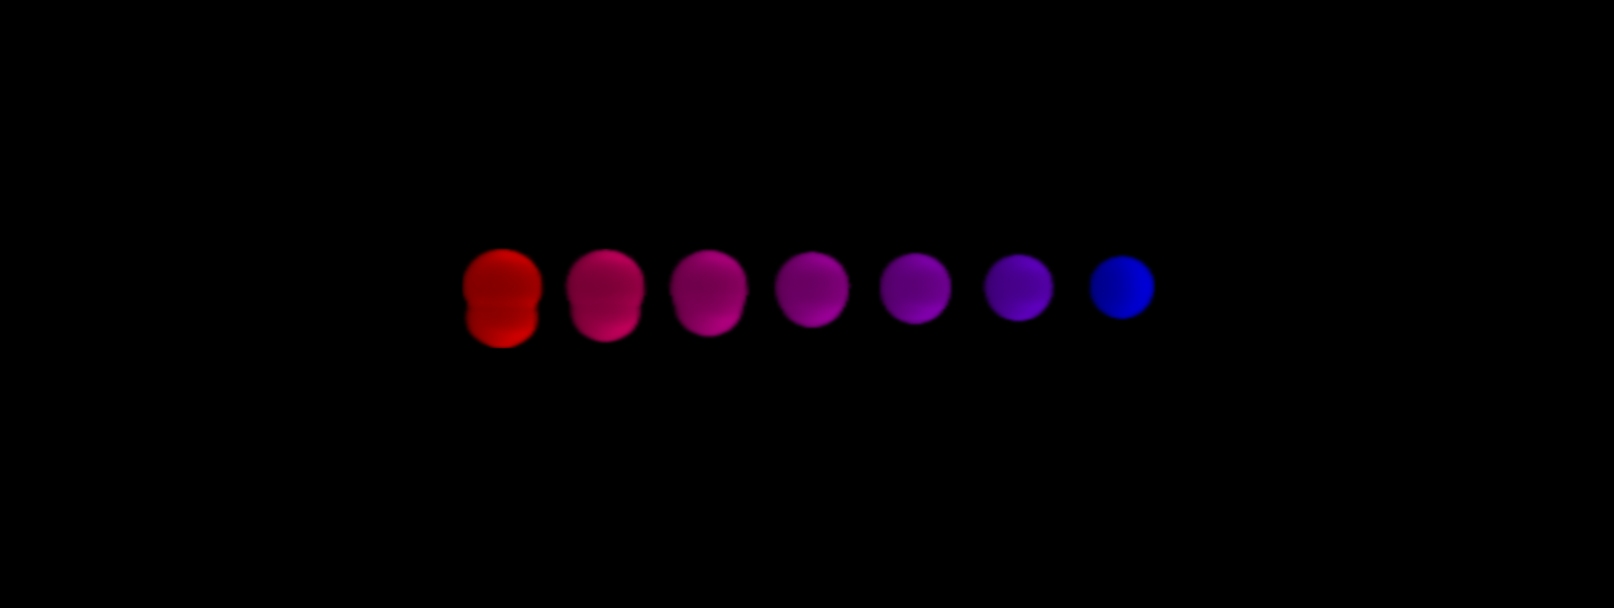
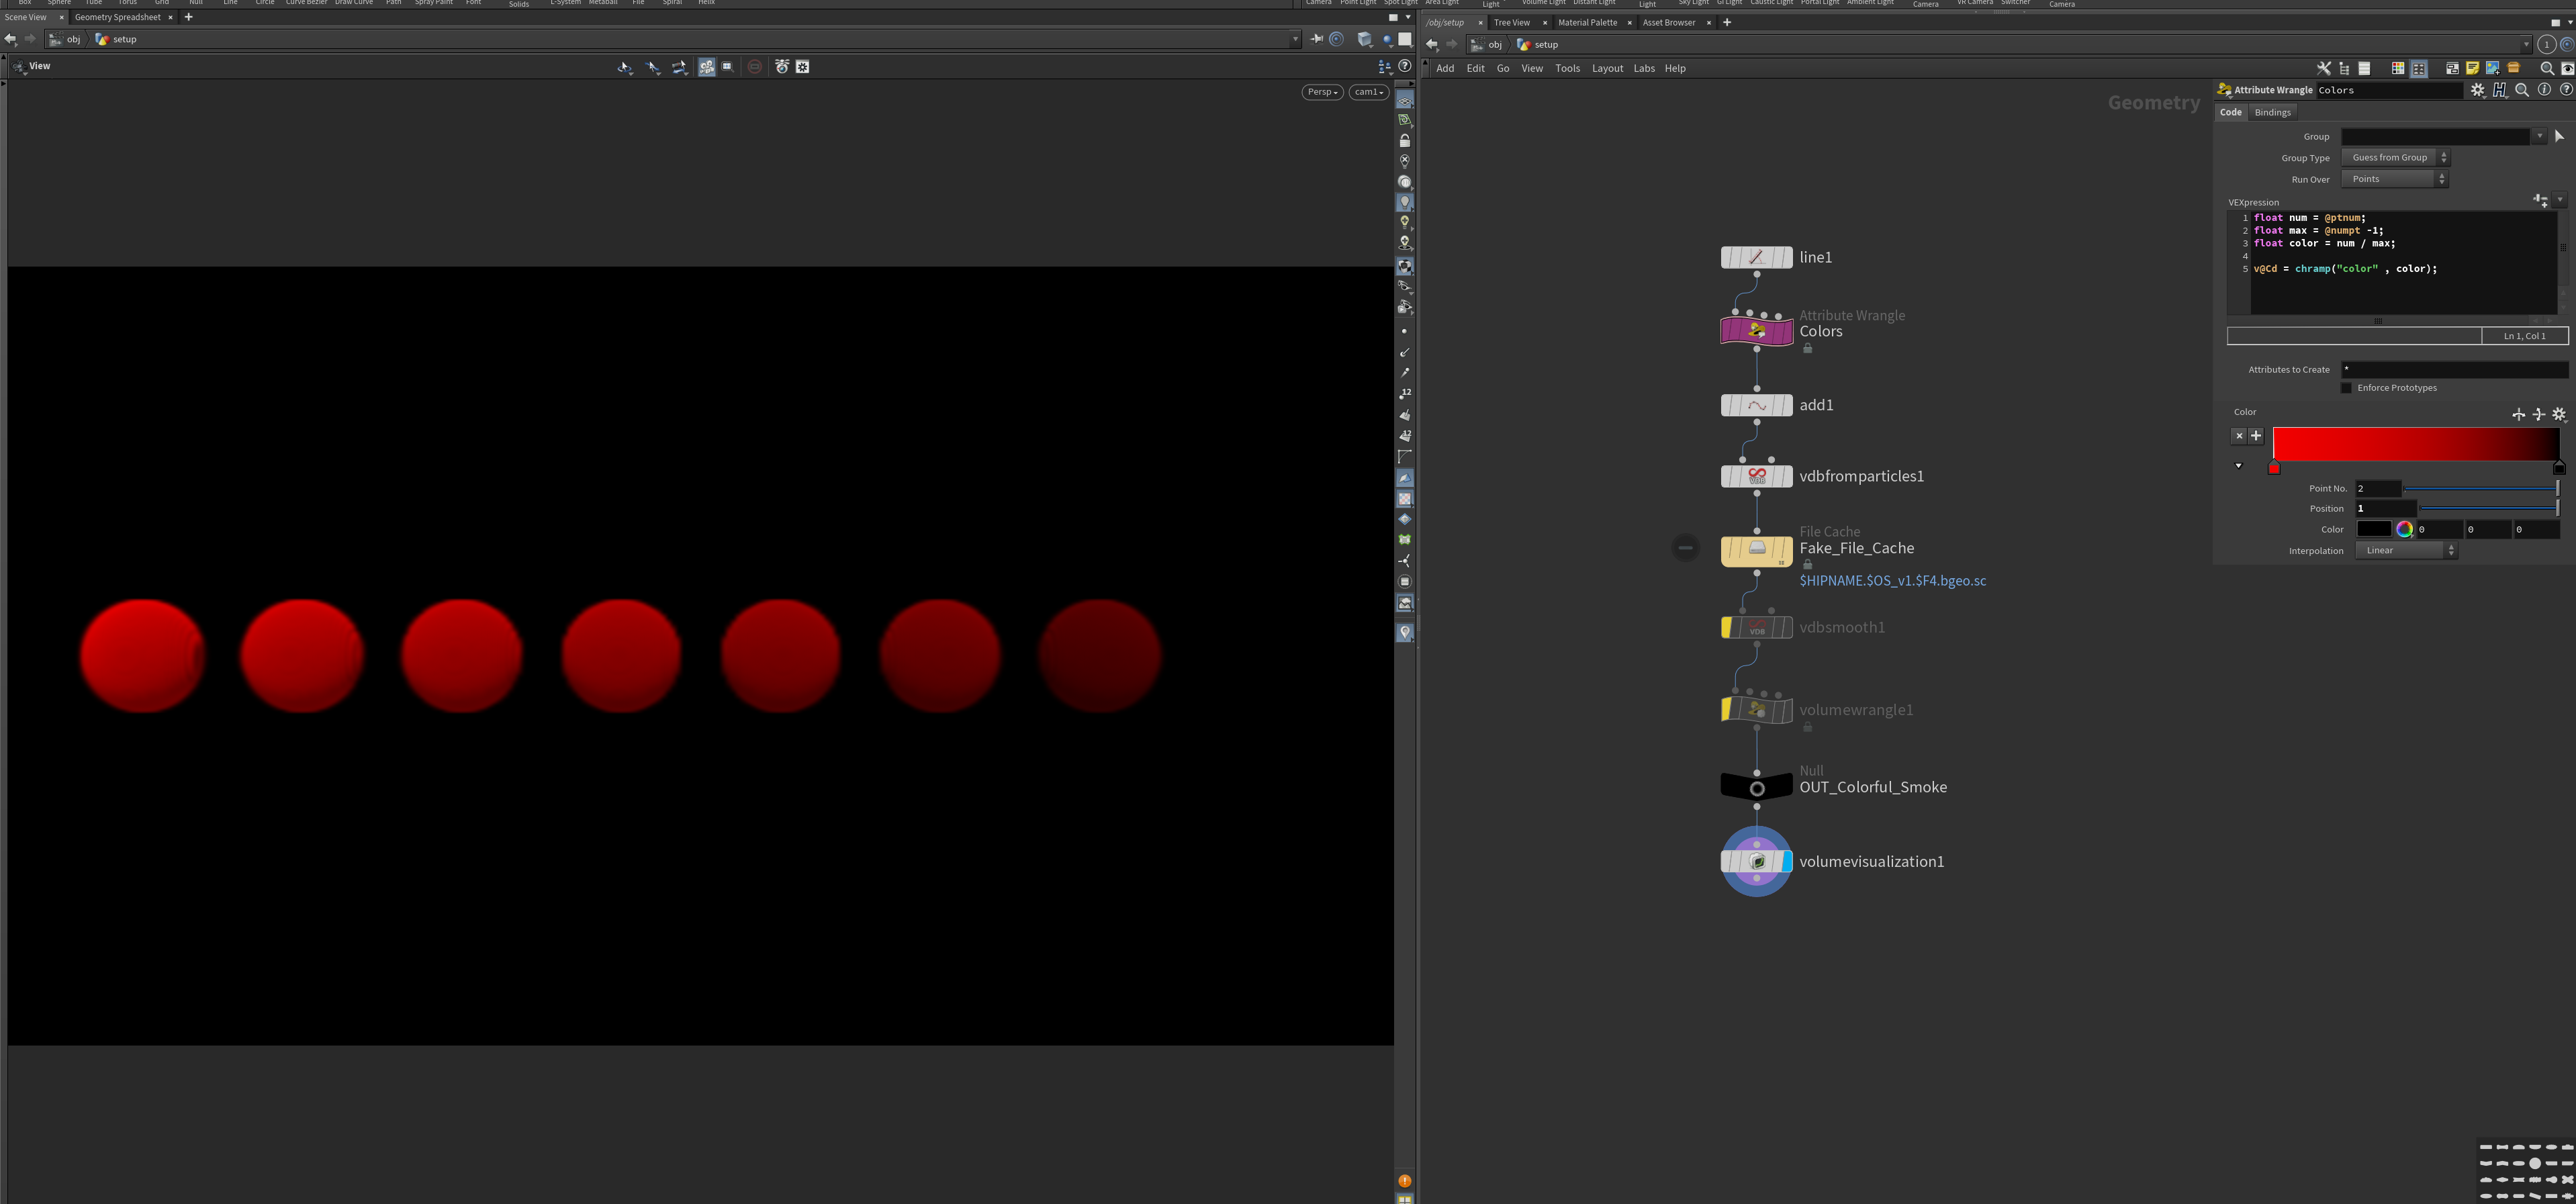
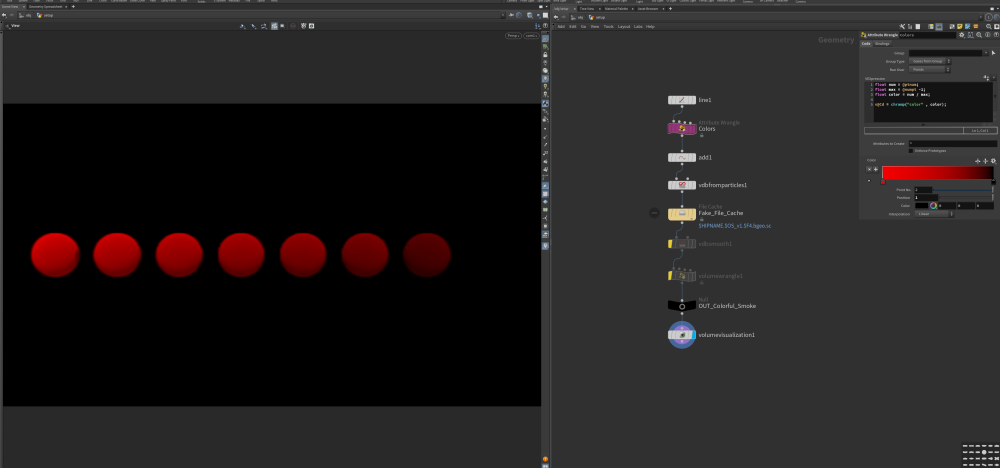
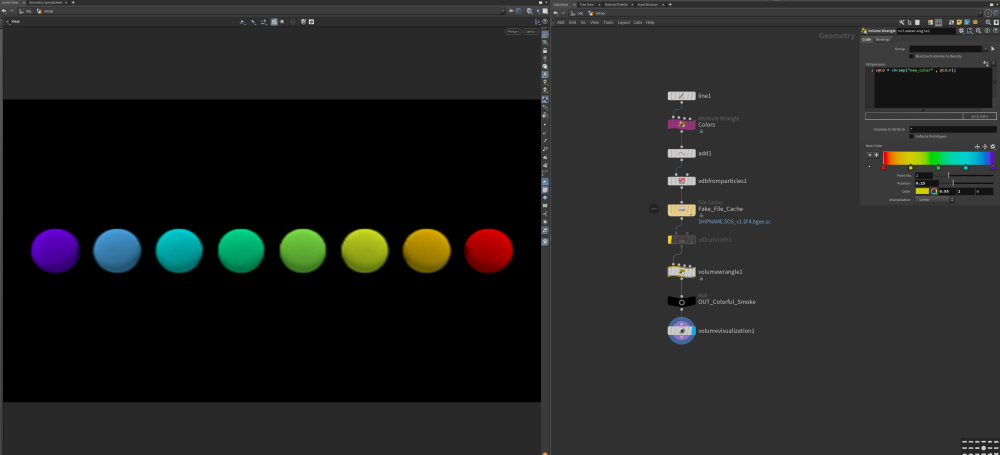
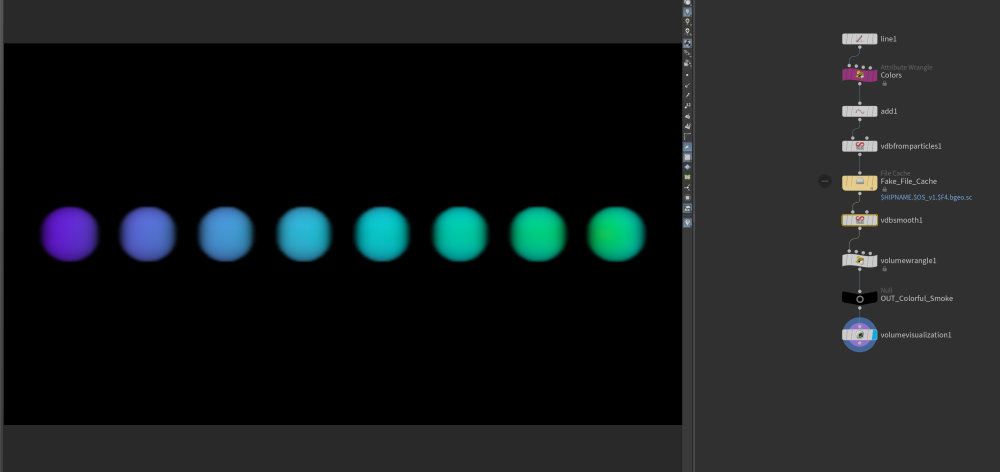
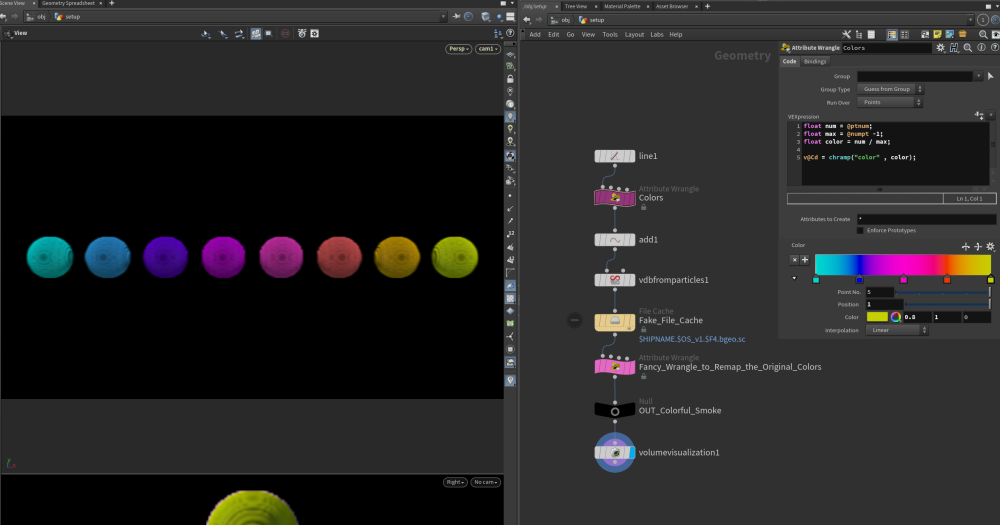
Ok, so here's something much closer to my original scene - it uses axiom solver though I can totally remap the colors while the smoke is not moving, but it gets mixed up as soon as the smoke moves around. And it doesn't mix like this with the original colors, just with the remapped ones The original ones: Axiom_Ink_0106_odforce.hip


-
I just found a way to make it work on my simple example but not on my real scene If my original colors are just a Red gradient, then I can easily remap this red to anything else: BUT it get's messed up if the colors are fading, like it would on a real sim (tried to emulate it with a vdb smooth) So it would have to remap all the colors at the same time, not just the red. - Alvaro
-
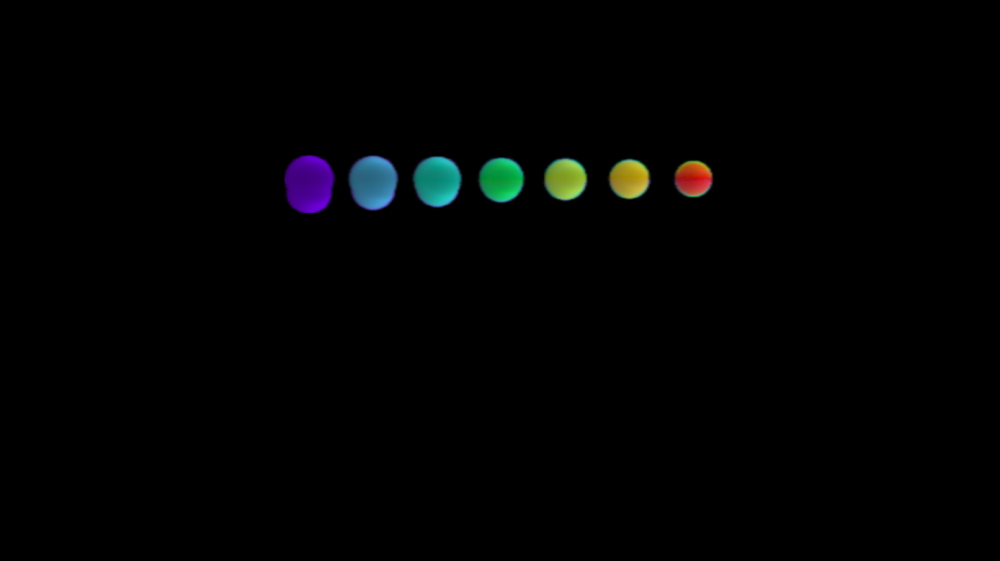
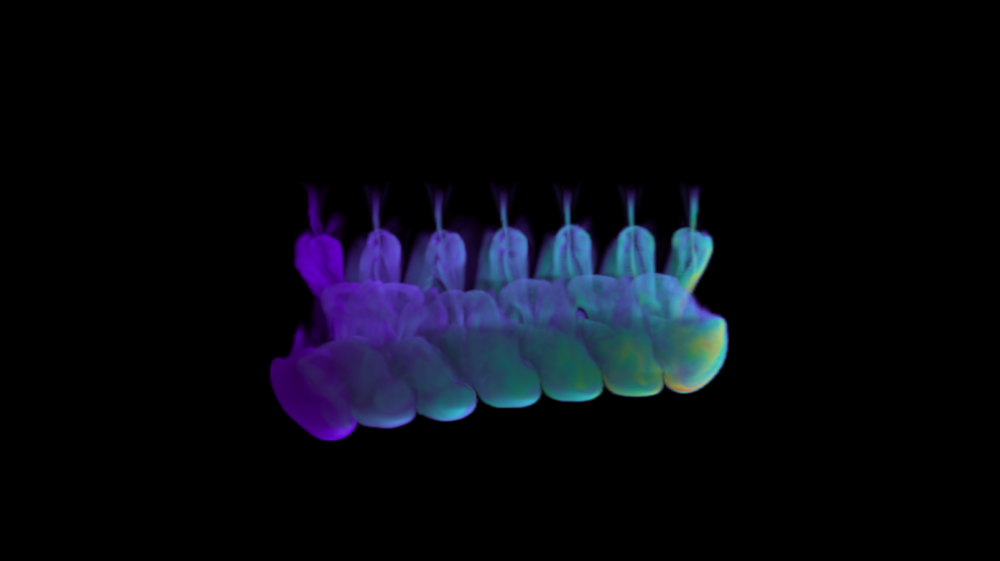
Hey guys, I have a colorful smoke simulation and it would be pretty cool if I could remap this cached Cd later Right now I'm creating the color on each emitter, then I cache the simulation and the colors look pretty bad on render. I'd love to have some artistic control without having to make a new sim, with new colors, every time. I'm attaching a Houdini file with a much simpler version of my scene, here's what's going on: Thanks! Color_Remap_0101.hip
-
This is insane! Any plans to share it eventually?
-
Maybe you can reverse the collision direction with the invert sign?

-
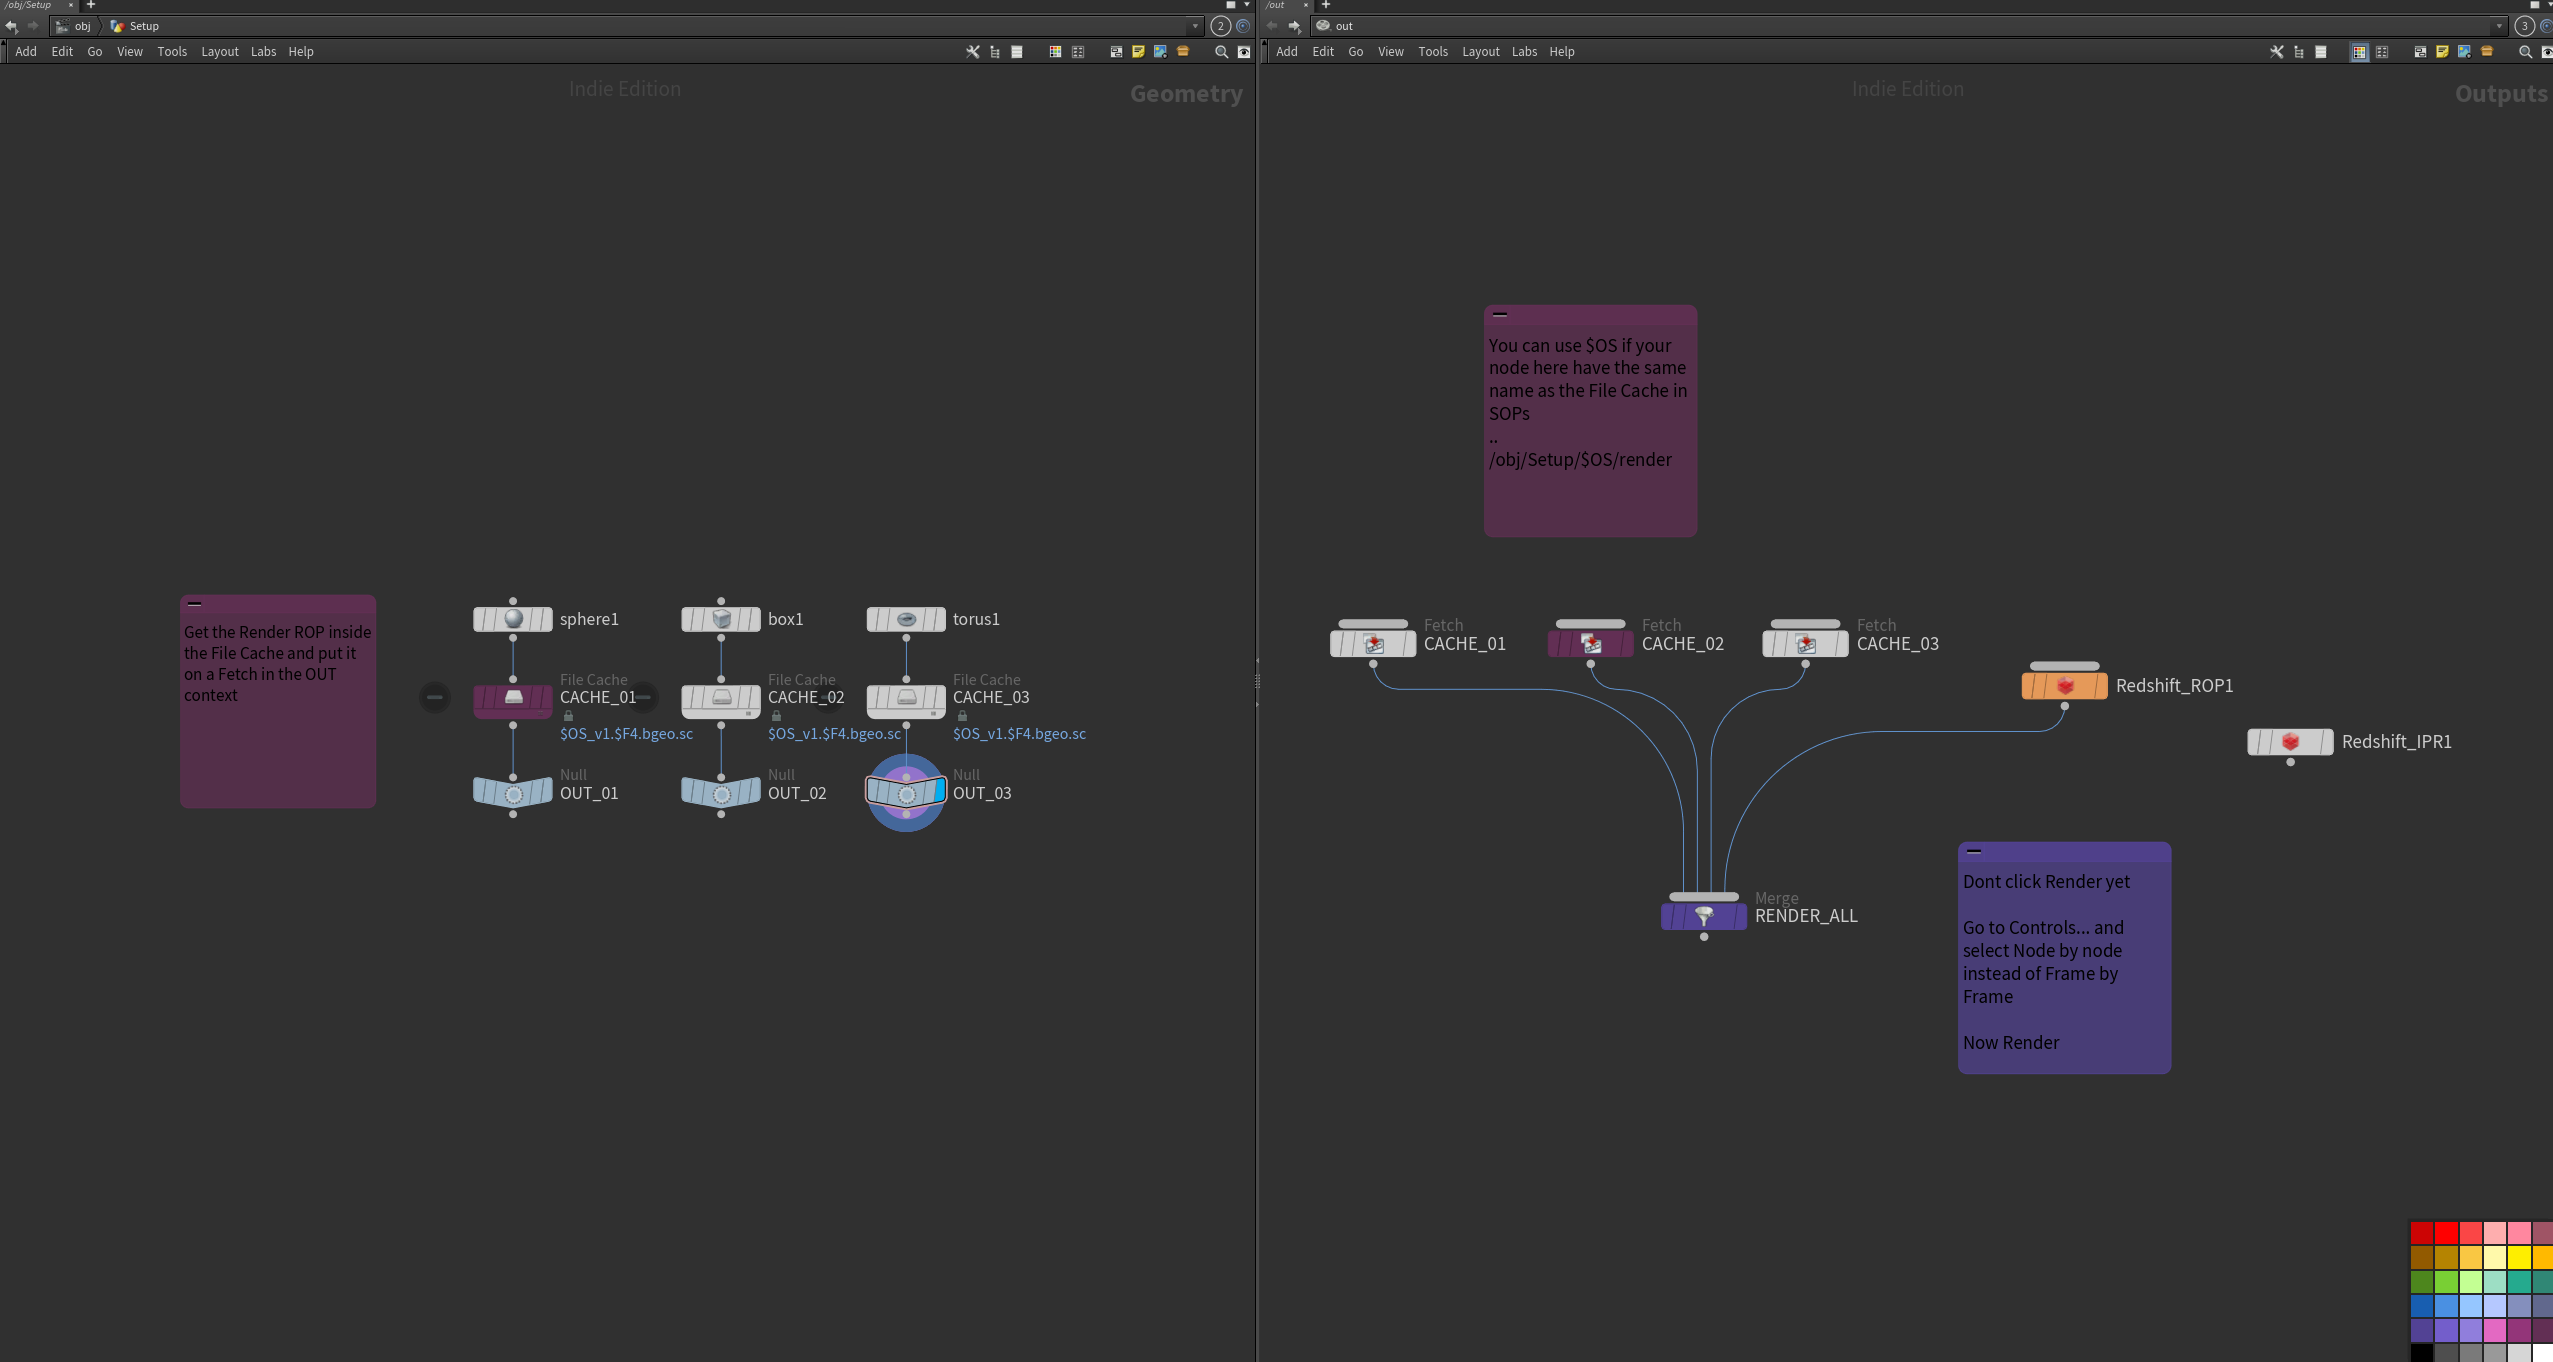
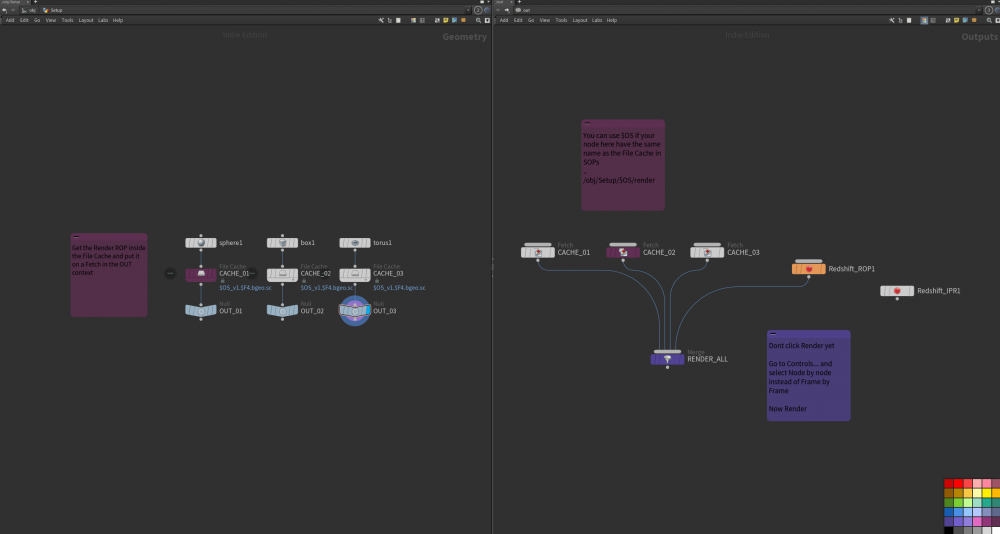
Hey Olly This is what I do. Super easy and fast to setup Multiple_Cache_Render_0100.hiplc
-
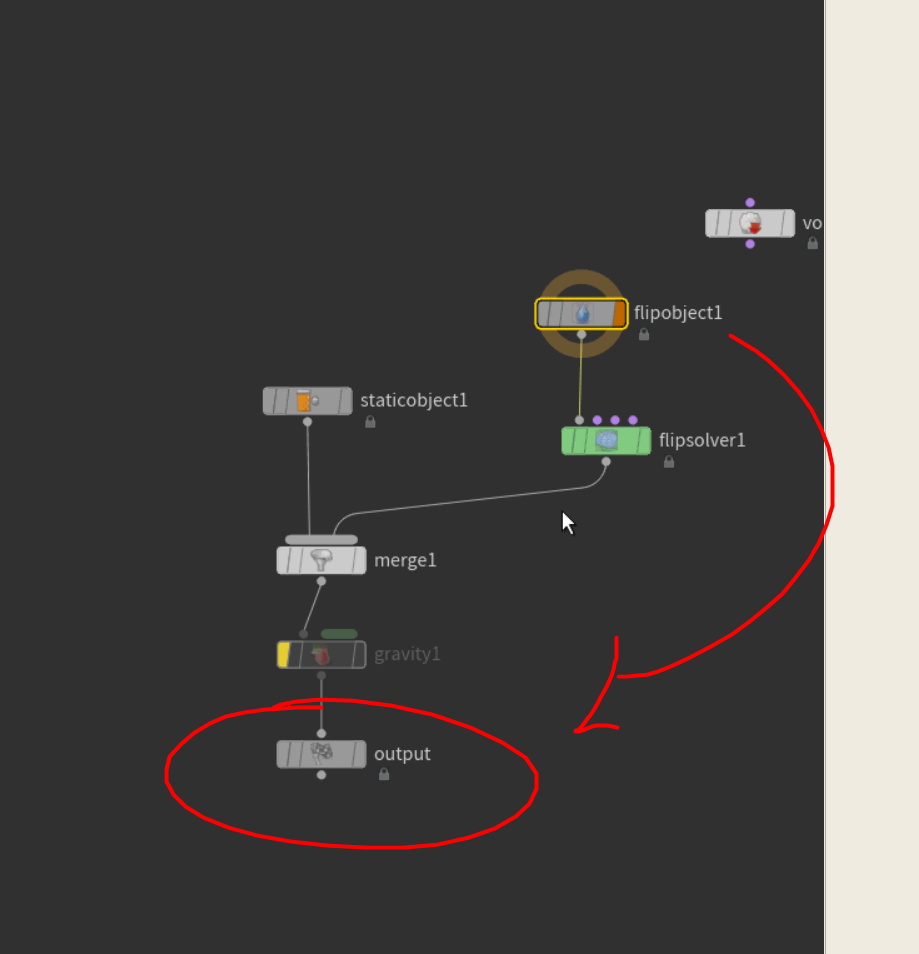
FLIP slip field not working (.hip attached)
ParticleSkull replied to GlennimusPrime's topic in General Houdini Questions
Hey Glenn! Enable the "Enlarge Fields to Contain Sources" option and change the Operation mode to Copy instead of Add Slip_Field_0100.hipnc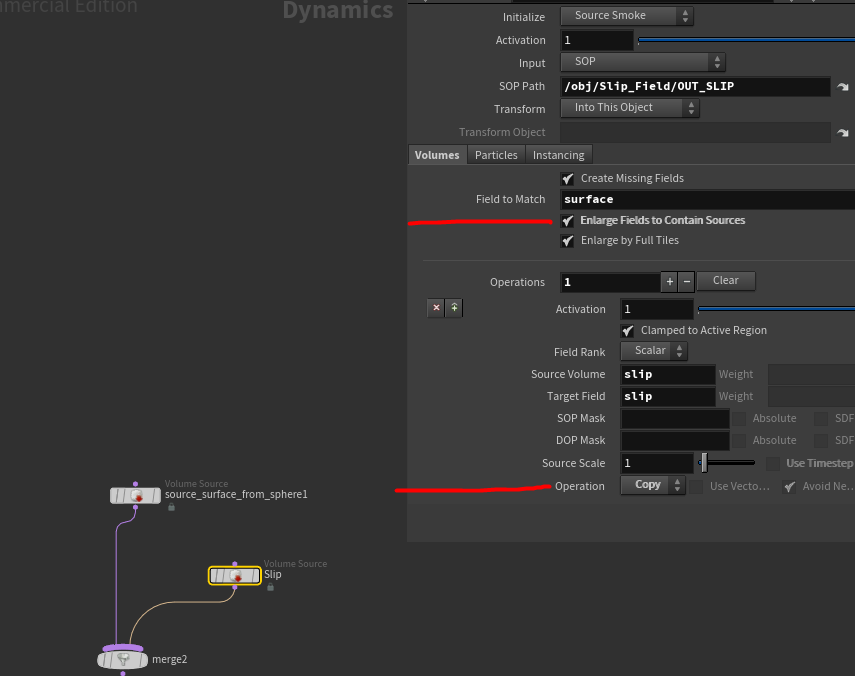
-
but it looks like you dont have the output node enabled inside the dopnet

-
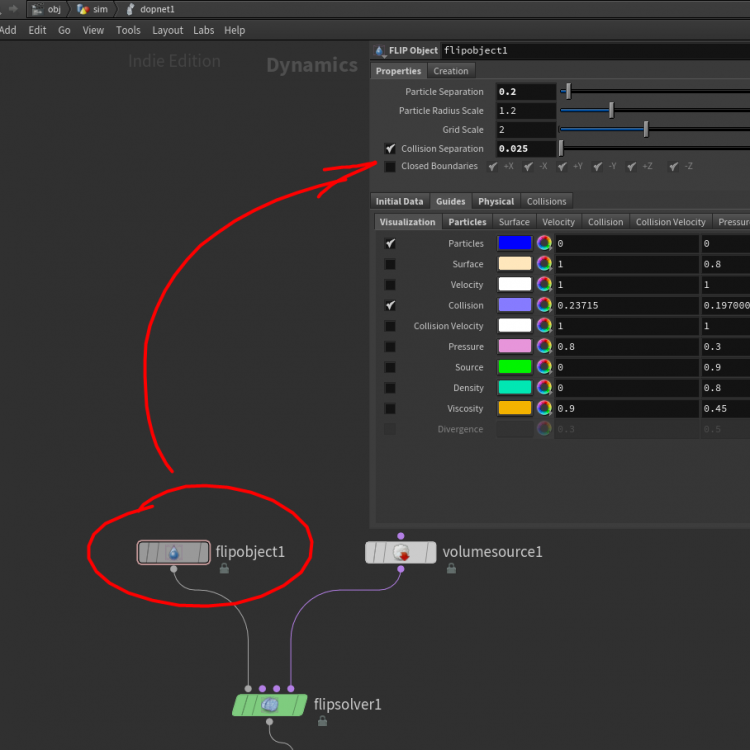
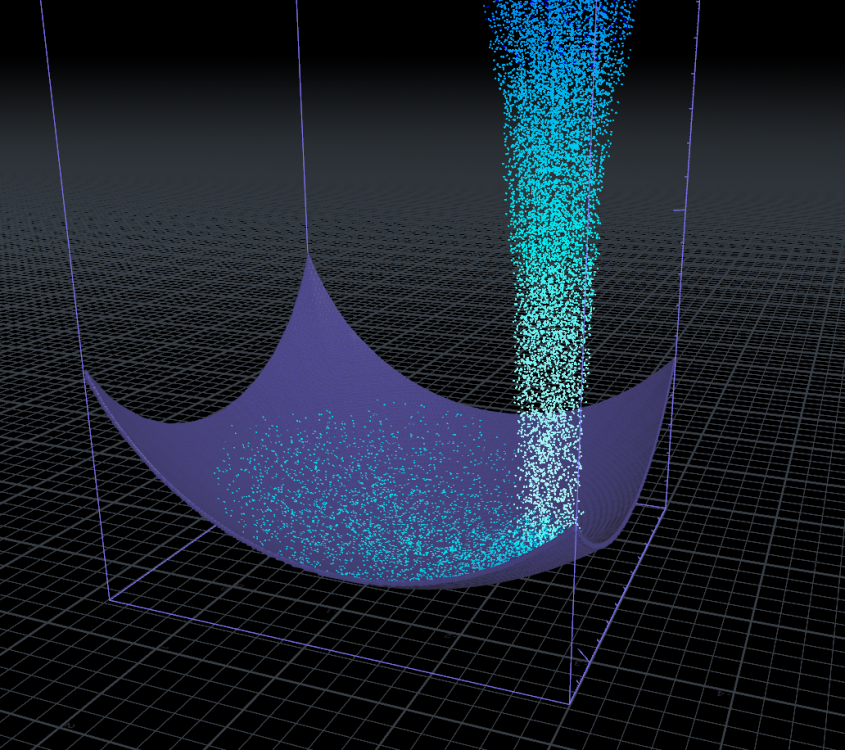
Hey dude, Try decreasing the Collision Separation on the flip object Right now your collision looks like this: and it looks like this with a collision separation of 0.025