Search the Community
Showing results for tags 'Lighting'.
-
Think Tank Training Centre, widely considered to be one of the leading schools worldwide for asset creation in both games and film, is currently working on innovative Houdini content. We are currently searching for amazing senior Houdini artists of all kinds to collaborate in content creation, particularly in the areas of Environments, Modeling, Lighting, Texture/Shading, and LookDev. If you have teaching/content creation experience and are interested in starting potentially right away, please reach out and we'd love to chat about opportunities.
-
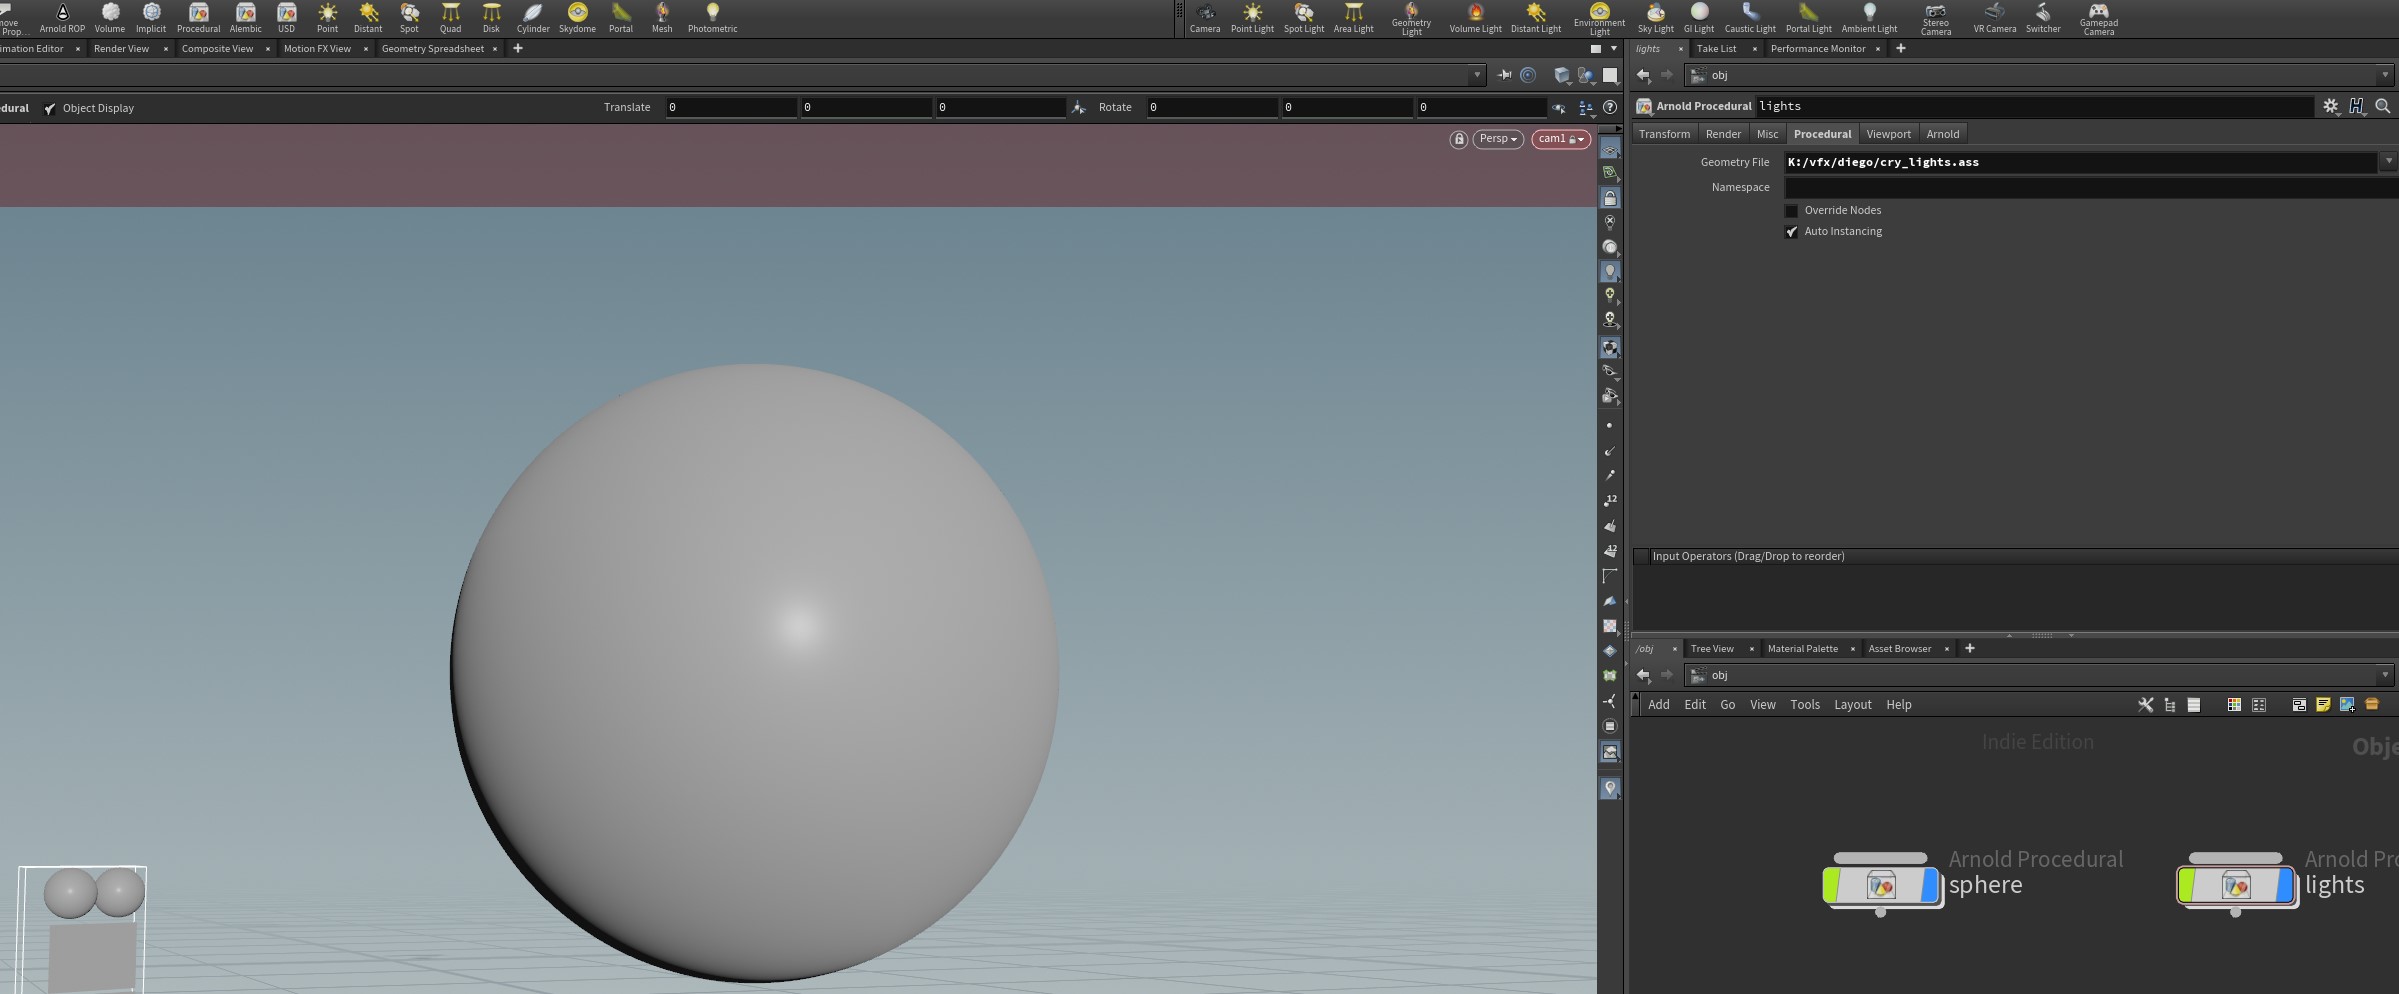
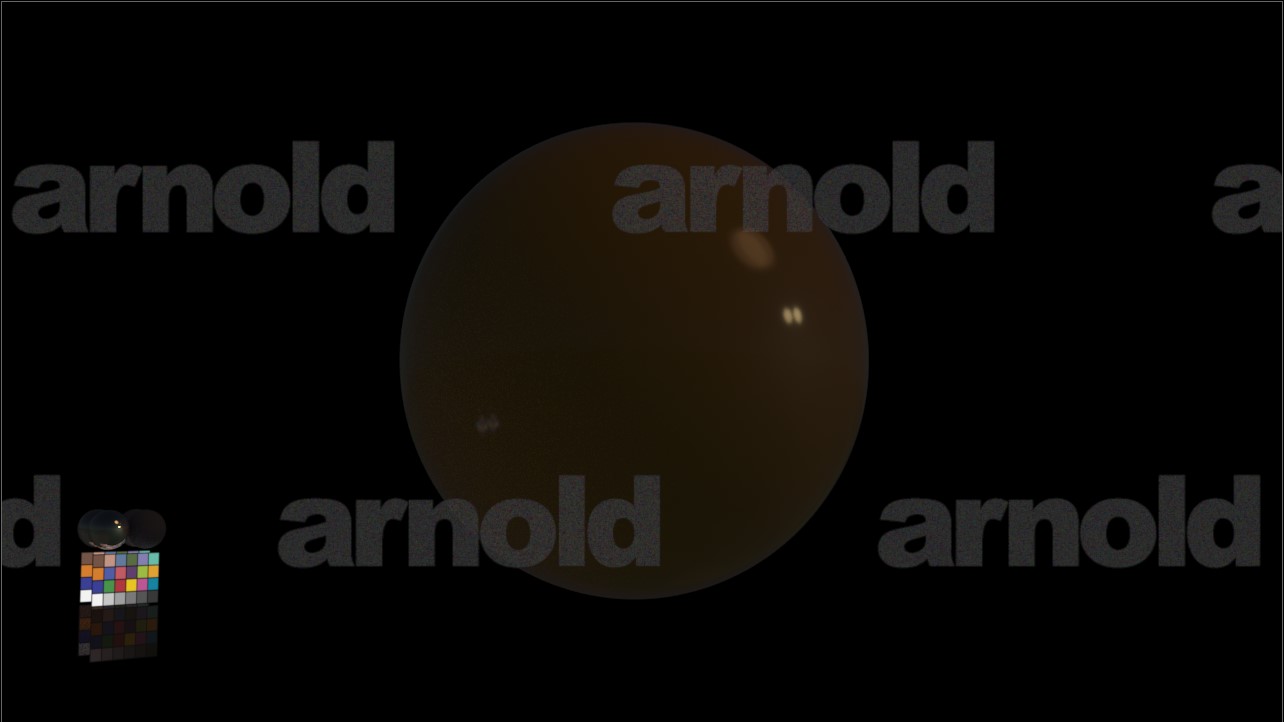
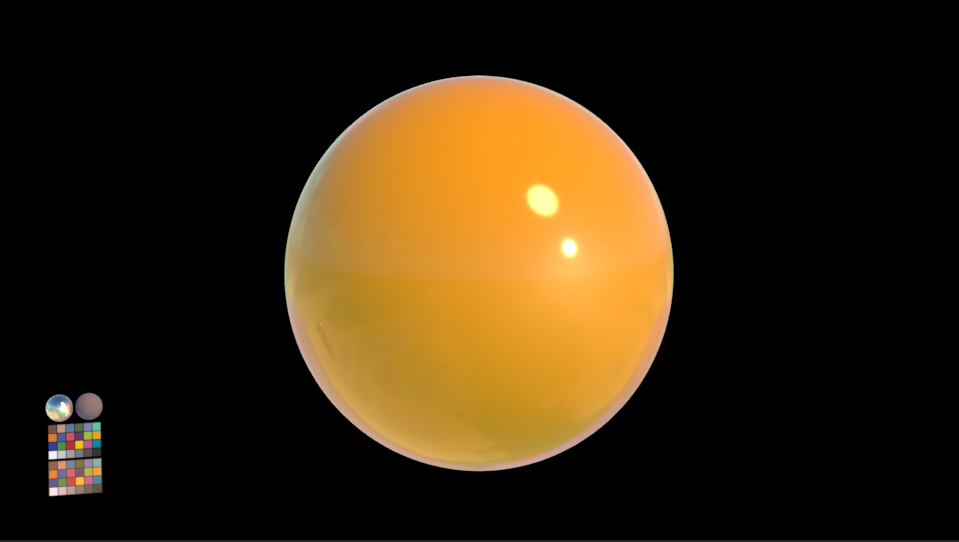
 Hi guys I 've a problem importing .aas file from Maya to Houdini as yo can see from the attached pics I have sphere and lights imported with Arnold Porcedural node. When I render them with Arnold the lights seem to be less intense than the maya ones. this the same but rendered in maya Could anyone know why that happens? Thanks in advantage
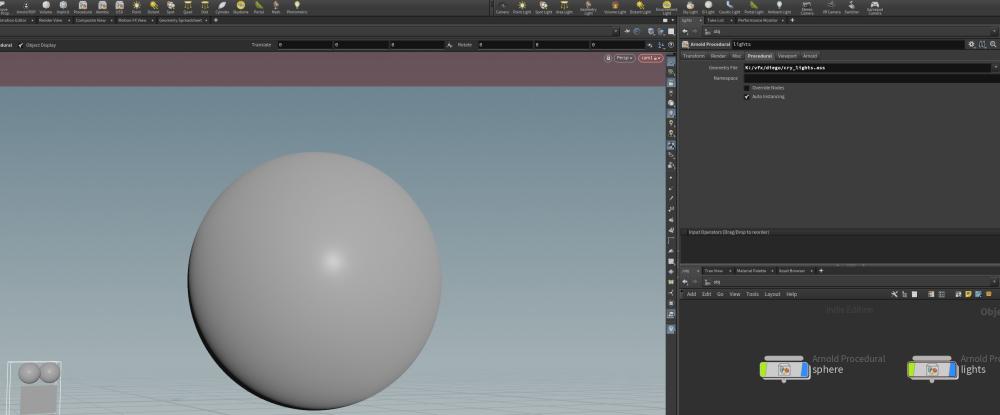

-
Dear ODForcers, I am (being generous maybe?) at an intermediate level in Houdini. I want to make a laser, but have no idea how to either "hack" a light, or create this asset. I could find no tutorial either. How hard is this going to be? Does anyone have some suggestions for me please? [not really sure where to begin] Thanks 5D PS: I need a kind of medium-range (I mean distance to the camera) laser, not a hero one. Ideally, it needs to mostly look like a very thin red, maybe slightly glowing, kinda cylinder. But obviously the dream is to have it act like light, and bounce as the ray trace rays would (reflect refract etc) [i have lots of these materials in a confined space]
-
Hi, I turned off all the lights, however, there is still background light when I render the image. Why is it? Thanks!
-
Good morning everyone, My current studio is deciding to migrate from Maya for lgt. We have been checking Katana, however, Houdini is already part of our pipeline and I was wondering if moving to Houdini could really improve the workflow comparing to Maya to the point we can consider Houdini instead or Katana. My question is, would you recommend Houdini for a full Arnold base lighting workflow and what would be the benefits or cons against Katana? Thank you,
-
 Hello all, I am having troubles with the way colours look between the color editor, the render preview, and the output. There is something I should know that I don't know yet. I heard about linear workflow but if I could have your tips on this, that would be great. First in the colour picker when I choose a color for a material (I am using Redshift, but I saw the same issue in Mantra), the color in the little square doesn't match the color I am sampling from an image. How should I set up this color picker: Linear/Raw/sRGB ?? Then that color taken with the colour picker doesn't look similar in the renderview. How should I set Redshift renderview ( Linear/Raw/sRGB/OCIO) ?? And in the Redshift ROP, is there something I should be aware of, something to tick? Are you using the settings in the render preview of RS, as far as I can tell, you can only render a frame from here, not the sequence. I have been looking online but most tutorials I saw don't talk much about this. I read that having everything linear is best apparently, as it works better for post editing, but when I set my color picker to Linear, my RS preview to linear, when I output my EXR, it looks dull (it looks like the sRGB of the RS renderview) Voila, any tips about your personal workflow for this would be amazing and if you know about a tutorial about this, please share Thank you very much
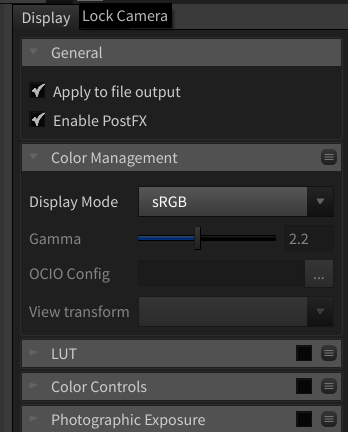
-
I would like to have light 1 from frame 1 to 10 and light 2 starts at frame 11 for example. Cheers
-
I have an image sequence with an alpha and a tracked animated camera. I need to create some shadows on geo from it. My plan is to create some basic geo from the alpha Tracing & extruding to create some rough geo to cast shadows good enough for my purposes is no problem, however how do you project the trace node's results out from the camera? Ideally, I'd have the trace output match the camera frustum and all I'd need to do is animate the z-depth of the trace plane away from the camera to roughly match the plate I'm trying to fake shadows for. How on earth do I go about this? Thanks!
-
 Hi guys, I have a magazine prototype I've put the front cover on using a redshift texture sampler. I can't find out how to make the material respond to light though - it stays the same brightness no matter what. This is probably a very silly, easy to answer question but I can't make it work...still inexperienced in all this. If anyone has the answers please let me know!
 -
How to prevent and object from blocking light
anbt posted a topic in Lighting & Rendering + Solaris!
Hello guys, I have a sphere that I use as a background for my render in Mantra. I am using an environment light with an HDRI texture as a source of lighting. My problem is that my background blocks the light from reaching my geometry. I have tried using Light Mask and the Light Linker but without success. Any ideas? Thanks a lot -
 Hi! I'm working on a project with pretty limited rendering resources and am trying to avoid an expensive environment light on my hero volume. I have dialed back Mantra's step size, shadow step size and opacity step size but I need more. I have also tried reduced the environment light's sampling quality but it seems to need to stay at 2 for my 16spp render. I am using volume shader core, and of course volume indirect is off. I am super-curious to hear any tricks to get a similar look to an environment light without an environment light. When I think about it, for a volume it is really the AO-style overcast day lighting that I really like. I think (but need to test) that multiple area lights on my volume would be just expensive as the environment light... but I am wondering if there are any old-school tricks to replicate the AO look with only point, spot and directional lights. Similarly, if there is any way to hack up an AO volume shader in VOPs rather than computing true lighting. I feel like there must be some old-fashioned ways of lighting volumes that can get me 80% of my look at 10% of my render time... but if not, I will at least learn more about Mantra!
 -
DupeVFX are looking for a Mid-Senior Houdini artists to join our small growing 3d team in East London. We are currently at the stage of switching to an almost full Houdini pipeline, wanting to take advantage of using Solaris and USD to drive the pipeline backbone and PDG for automation. The two roles we are currently interested in are: - Lighting artist with production experience using Arnold for Houdini. Solaris experience a bonus. - Pipeline oriented Houdini artist to help develop our Houdini/USD/PDG pipeline and integrate with our internal pipeline tools. We would also welcome very experienced supervisors that have run multiple shows using Houdini as the core DCC. To apply send an email to joinus@dupevfx.com
-
Hi all! Does Houdini have a feature to place highlights/specular reflections? I.e. you're in camera view, select a light, and press an object where you want the light to create the highlight. The light then changes position to create that highlight relative to the camera. From the documentation it seems something like this might exist in LOPs context, but I'm looking in regular scene view. This is a built-in function on other DCCs, so hoping Houdini have it hidden somewhere. It's very handy to place highlights on beveled edges etc.
-
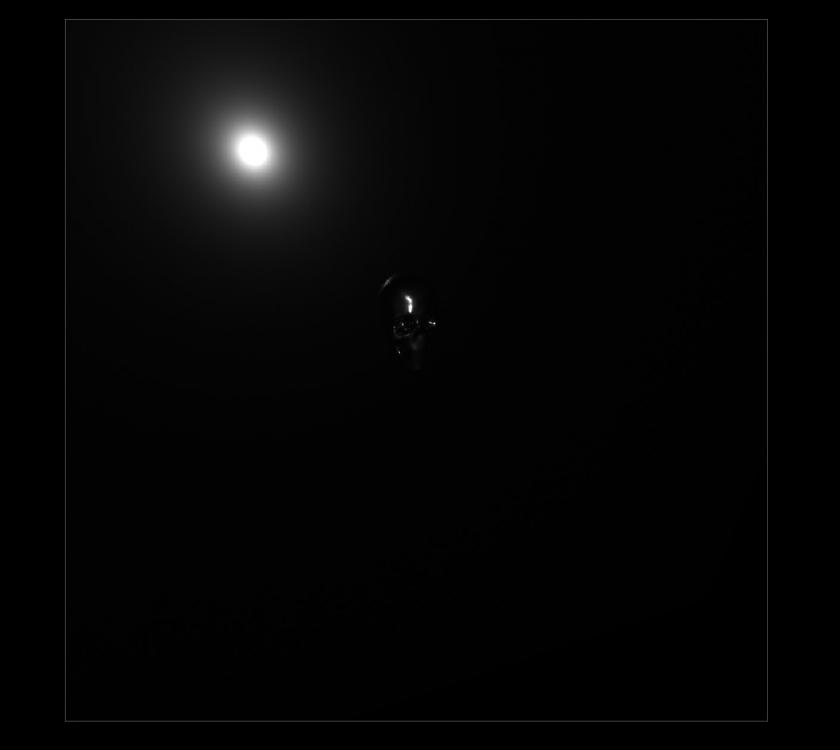
 Am trying to have some light coming out from my particles and i am using a geometry light But i can't even see the reflection on the ground, i just have a little bit on my subject. I've also tried to use a sphere and copy to points with my particles but the result is very unnoticeable. Magician_Particles_V34.hipnc Ganfaul.abc ( Geomerty in the Character Animation Node )
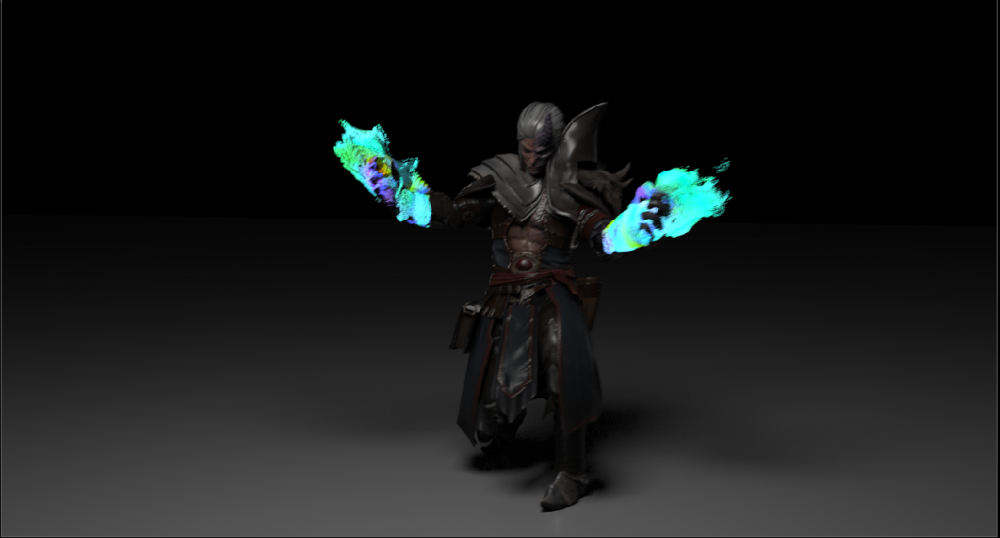
-
 Hi, i'am trying to instance lights on custom points that were created from geometry, but render doesn't start at all or rendering and loading a lot slower than standard primitive geometry and ram usage incredible high. If anyone can help, I will be very grateful Custom points https://prnt.sc/sz0fcl Grid primitive https://prnt.sc/sz0grm inctance_problem.rar Problem is solved, pls delete this topic
 -
 Hi people, Disclaimer: I'm pretty new to houdini and I'm probably using it in a way more basic way that most people. I really like the basic Color SOP node, using that to apply a color to geometry. However, if I want to apply a texture map to geometry, I've been using the UVQuickShade SOP. My question is - if create two cubes and apply a color 1,0,0 using Color SOP to one, and I apply UVQuickShade using an image that is constant color 1,0,0 to the other, why do the two cubes look different in the viewport and in renders? Render Hip
 -
 Hi all, I'm getting some unexpected behavior when I try to light my scene. I've got a particle sim, and I want those particles to illuminate the scene, so I assigned a Geometry Light to them. However, it's not acting as I expected. For one, cranking up the Intensity of the light does nothing. In the viewport, I can see the scene getting brighter, but in the render there is zero difference between an Intensity value of 1 vs 1000. Another odd behavior is that the light in the render seems to be dependent on where my display flag is set in the particle network, rather than the node that I told it to point to. I'll upload my hipfile to illustrate better, but basically I've got two null coming after my particle sim. One has a vop where I'm cranking the Cd way up, and the other is just the vanilla result of the particle sim. Even though I set my Geometry Light to point to the one with the overblown Cd, if I move my display flag to the other null then that is what gets used for the render. This illustrates the third strange behavior to me, which is that cranking up the Cd values makes my light brighter. Like the Cd is acting as the Intensity parameter, rather than the actual intensity. So in order to make my light actually illuminate objects, I have to completely overblow my Cd and ruin the color of my particle sim. Are these supposed to work this way? All three seem odd to me. If I've got something set up incorrectly though, please let me know. Thanks, -Chris particle_lights.hipnc
 -
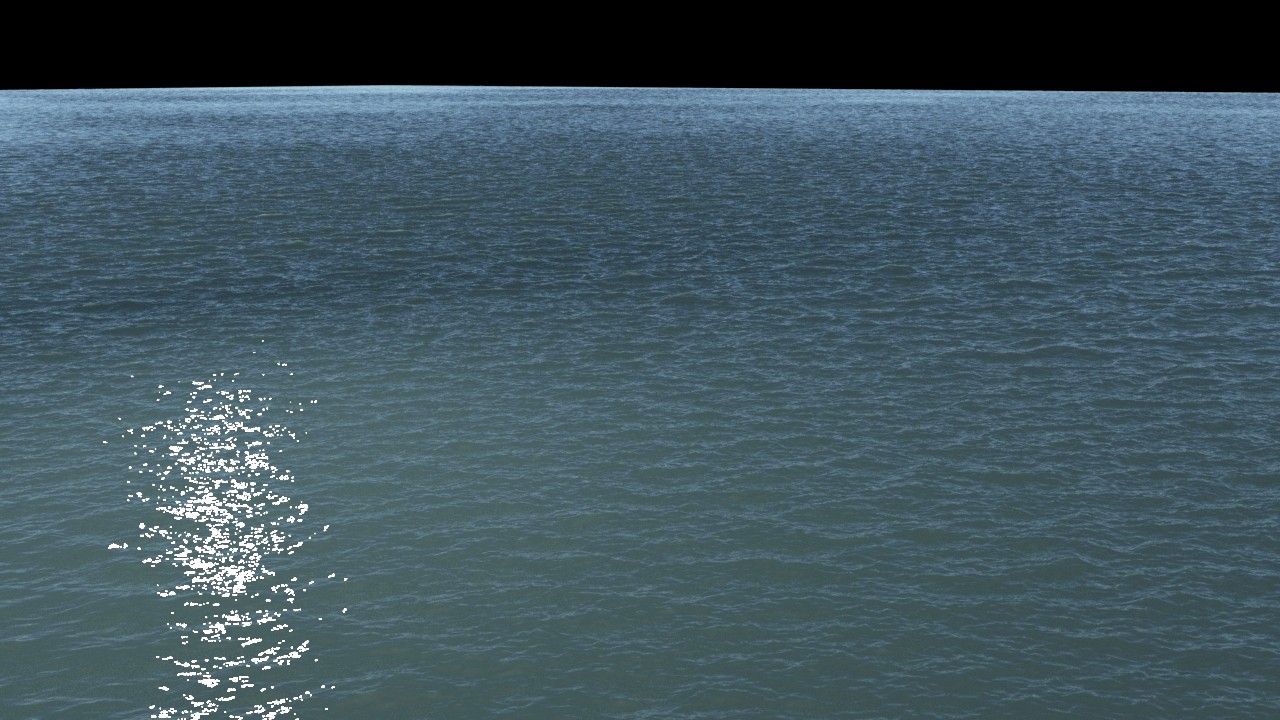
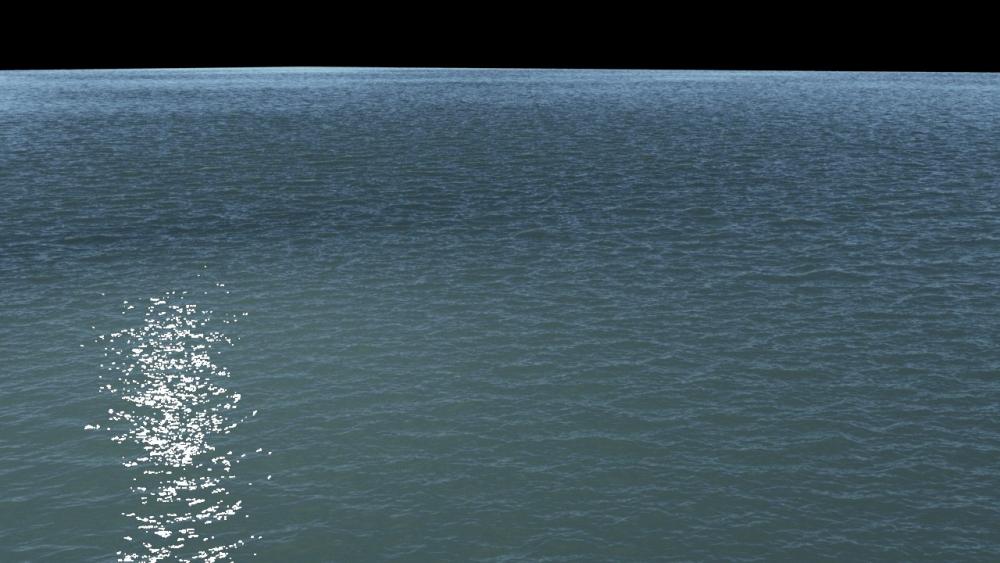
HI My extended ocean have very high specular and I couldn't reduce it or ged rid of it. My lighting rig is Sky Light light, rendering in Mantra using the default ocean surface shader. I tried everything i know the specular is still there, even when when lights are off , I have turn off the "reflect lights" option, the specular is gone but I end up with a flatten not nice look.. Attaching frame example Thank you!
-
hey guys. I'm a little in trouble. Arnold mesh light doesn't work well though I've tried it in the documentation and the topics here. Attach hip data. What is the problem? meshlight_test.hip
-
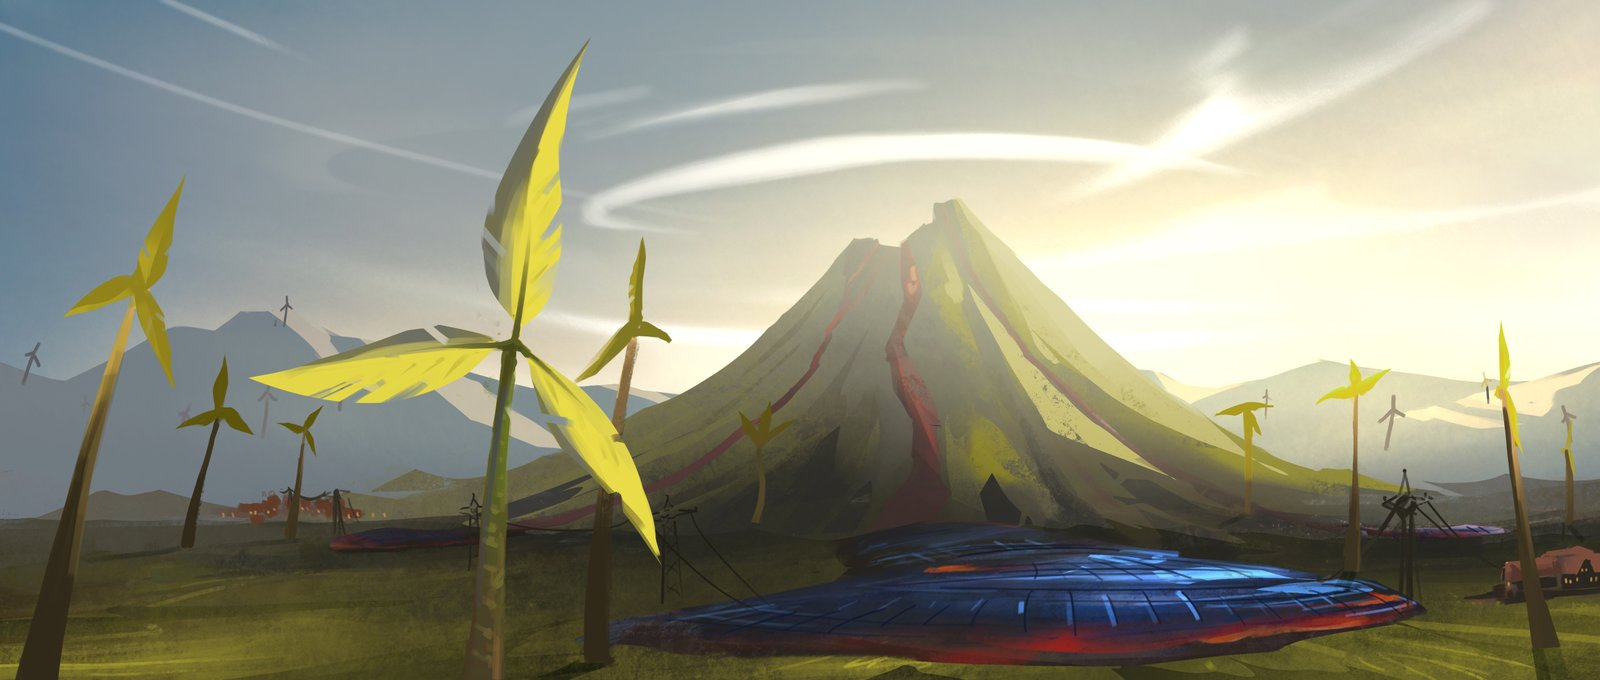
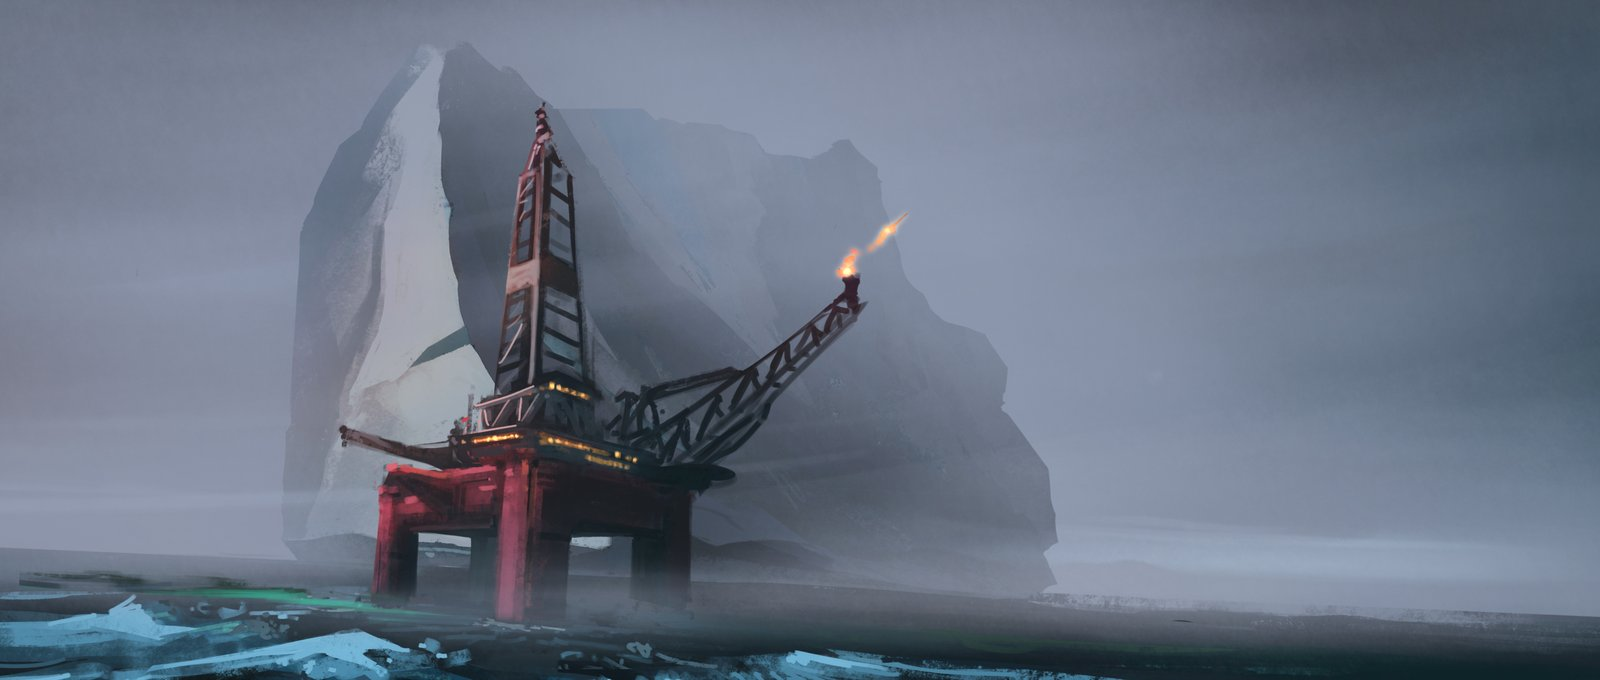
Hello! I'm a student in fourth year in Animation/VFX at Filmakademie Baden-Württemberg, currently starting production on our diploma project including some really awesome VFX shots. The film is a 2 minute social spot promoting renewable energies for private households, the title is "Mother Nature's Power". The story will be told with footage shot in Iceland and in a studio and then some disasters at the film's climax are VFX / Full CG parts. Here are our three key concepts for what we'll create photo-realistically later on: (Oil Rig being crashed by an iceberg) (Coal power plant falling into a sinkhole) (Volcano erupting and the lava turning into solar panels) To get to the point: We already have a big talented roster of film and animation students assigned and scheduled, but we are still looking for help in the department of lighting (Houdini/Redshift/Arnold) and assets (Anything). If you're a passionate artist looking for opportunities to collaborate then we can provide a platform for potentially awesome portfolio work. We'll be working on this for a year from now and we are very flexible with scheduling. Remote work is no issue at all as well. If you are interested, I can send you a project folder with details about our concept and approach as well as our animatic that is almost final and we can talk further. If you wanna know more about the heads of this project, here is the vita from me and the 2nd VFX-Supervisor on this project Lucas Bruchhage: https://www.linkedin.com/in/martin-egger-3d/ (Aixsponza, Mackevision, MPC) https://www.linkedin.com/in/lucas-bruchhage/ (Framestore, MPC) The main director that I share co-direction with is Nicolas Bori, student in Advertising Direction with a lot of production experience also. Check out his website here: https://www.nicolasbori.com/ We're looking forward to hearing from you! Cheers from Stuttgart, Martin Egger Contact: martin.egger@filmakademie.de


-
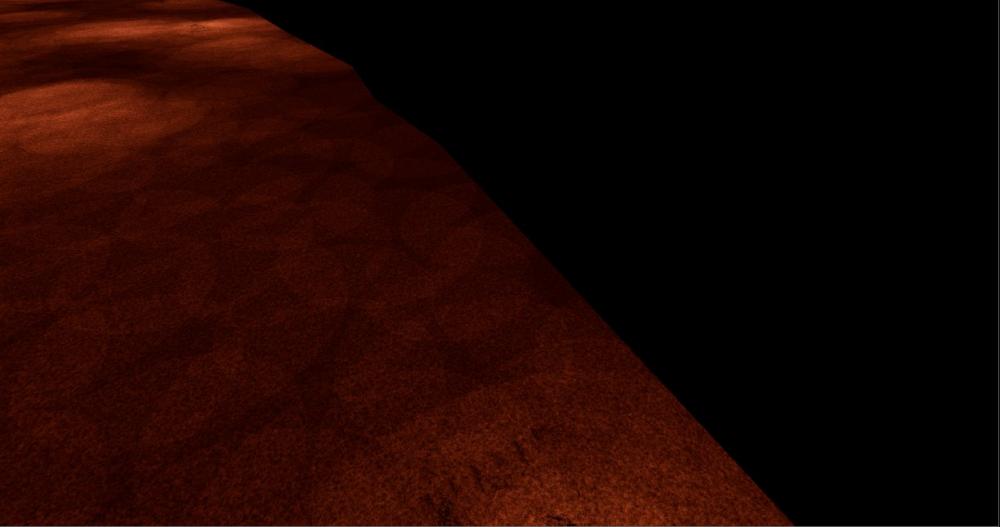
 Hello! I'm working on a custom toon shader. As a basis I want to use the lambert lighting model as described in the tutorial embedded below. To test this I created a very simple scene with a sphere placed at the origin, a point light and a material with the material builder applied to the sphere (see image below). Now, here's the problem: The shading of the sphere is incorrect as soon as the point light has negative coordinates. It seems as if the surface_global's P and N are expressed in a different space compared to the point light's position. This happend with Mantra as well as Redshift (where I used the same setup as in the video below, apart from getting the light's position through a constant and channel references). Am I wrong to assume that P is the world position of the current point being shaded and N is it's normalised normal? Is this the wrong way to get the light position into the shader? I spent some time testing and searching on the internet but I couldn't find anything that clarified these quesitons sufficiently for me. custom_lambert.hipnc
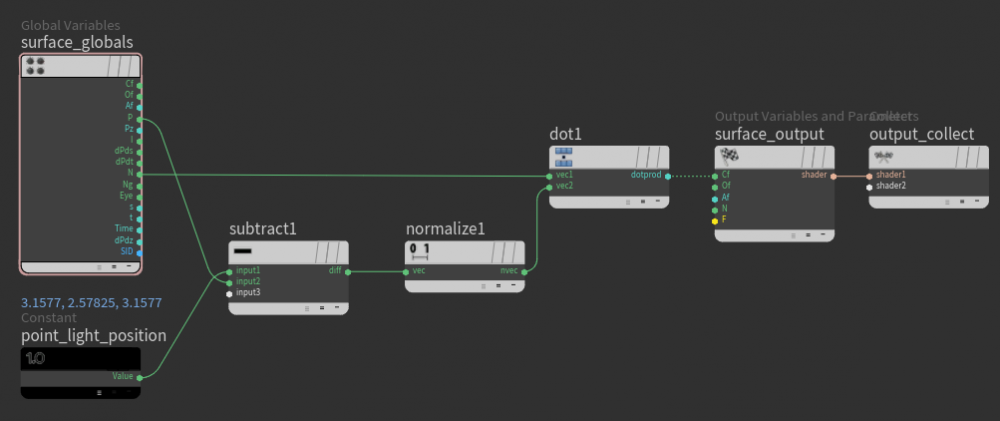
-
Quick question. This is the diffuse AOV from a render using nothing but a distant light. To give you an idea, this scene is rather large. The geometry in this scene is a ocean volume and a plane. I have removed the displacement map from the material to isolate this as much as possible. I can not for the life of me find what sampling quality I'm missing here. Does anyone recognize this kind of circle pattern coming from the light?
-
 How can I render my particles with the isotropic volume lighting model and get self shadows? Its like there is no occlusion and I can see my particle field from one way to the other side, and I can't distinguish wich are in front and wich are in the back... Cheers, Diogo
 -
 I am experimenting with creating an adjustable procedural softbox texture using a COP node. It's working well, but I am not getting interactive updates with RS IPR renders. I have tried using it as a texture on a RS area light, and as an emissive texture on an RS material. It works in both, but neither has live updates in the IPR window - manual refresh works just fine. I am wondering if there is a way to wire this up better to do that, or if this just not something that is possible? Current path in the texture slots: op:/img/img1/Softbox_Gradient_Builder_COP1/subnet1/softbox_out COP node:
 -
 Hi everyone, we meet a problem here. Our group are using Houdini to do the sand interaction effects, but we do the lighting in Maya. How could we do the transfer? For now, we just do the lighting in Houdini to try to match the lighting which we did in Maya. We use the Maya engine to import the sand particles from Houdini, but it occupied a lot of virtual memory. Is there anyone could help us ? We hope to find out how to solve this problem. Thanks a lot!!!!!!!!!!!!!!!!!!!!!!!!!!!!!!!!!!!! Looking forward to any suggestions!!!!!!