Search the Community
Showing results for tags 'layer'.
Found 10 results
-
Hey people- One generell question about how you could approach this effect : Would you layer multiple renders or is it some special motion blur magic with some noise in the velocity ? Cheers!
.thumb.png.539c32091d507477a7290195095e84cd.png)
.thumb.png.b57c0333870da6db2568ba5beae403a3.png)
.thumb.png.1e9c122e33708fd3251df47fb0ff4181.png)
-

shaders Layering Shaders With map ? (Mantra)
quentin posted a topic in Lighting & Rendering + Solaris!
Hi everyone, I'm currently working on a material who mixes 2 shaders and I'm facing a stange issue. How to layering 2 shaders using a map in houdini ? I tried using the layermix and it works but only using a noise as alpha (pluged in alpha) But when i'm trying to use a map there is only the shader 2 who is render the map I want to use is a .pic sequence has alpha and using as mask for wetmap. Does anyone know the right way to use a map as mask for shaders ? maybe I'm not using the layermix correcltly or maybe using a texture node plugged in alpha is not the good way to do it..I don't know. There is not much information about the layermix in Houdini Help... Thans for your help !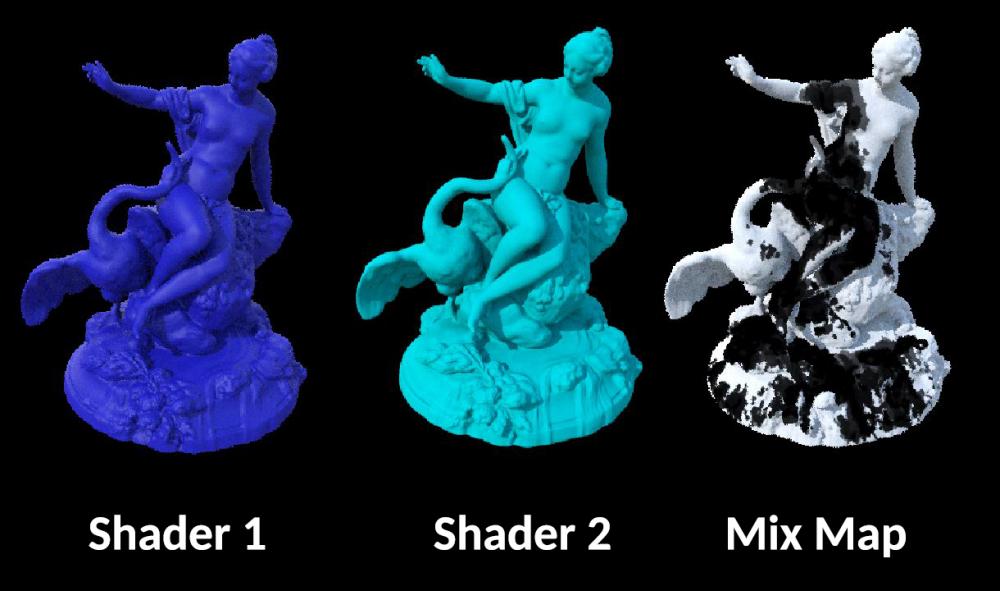
-
Good afternoon, what is the process in crowds to add a two-handed weapon to the agent? At the moment my weapon is well fitted in the upper hand, but it is impossible for me to know that it also rotates around the movement of the left hand. Thank you
-
Hi all! I'm trying to create a layer material and it works fine so far - using it in a mix works as expected. But when I try to use attributes, e.g. the rest position, the binding fails as soon as I use the material as a layer. When I use it directly (assigned it directly to a geo) the binding works fine. And when I use it as a layer (and assign the layer mix to the geo) every other aspect also works fine - just the rest position suddenly is not known anymore (although the geo has not changed and still has the rest pos of course). Attached is a sample scene. The custom shader ("myshader") has a parameter "use_rest". With that you can switch it from using the usual P to using the rest position instead. You can assign the "myshader" material directly to the sphere (everything works fine with both, P and rest) or assign the "layermix" to it (only works with P but not rest). Any ideas? Regards Johannes layered_shader_rest_pos.hiplc
-
Hi all, So I'm still new to Houdini and I have this project I'm working on to melt ice. I want it to look realistic and so I've decided to make it melt layer by layer (outwards in). I've scattered points on the object itself that act as melting points on the object however the result is not realistic and it doesn't melt the entire surface rather it goes through the object. I've attached an image showing a test with a sphere as the object to be melted, the white bits are the seeds that spread and activate the melting process(they spread through the object in a sphere manner rather than just spreading on the surface first then working their way inwards). So my question is, is there any way to group the outer layer of points of an object and make it keep updating so as the object transforms the outer layer will keep regrouping? OR is there any way to make the outside scattered points grow towards the center of the object (e.g. if I were to create a point in the center that attracts all the points surrounding it towards it)? Any feedback would be much appreciated Also apologies if I don't make any sense.
.png.6f2971207b0655775b87cfa97cc35944.png)
-
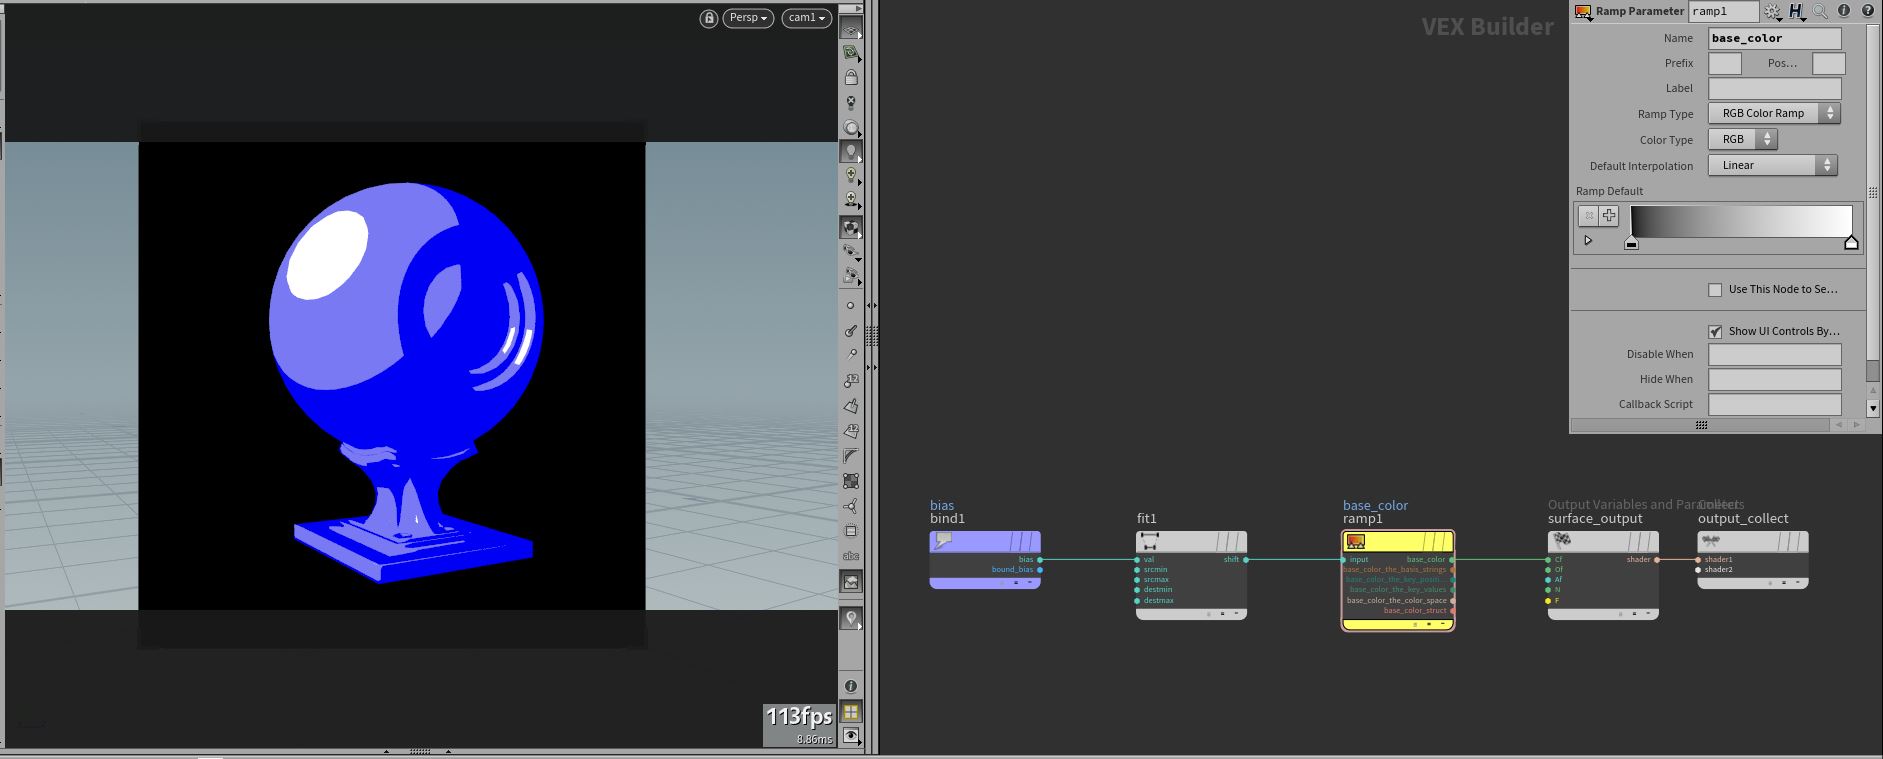
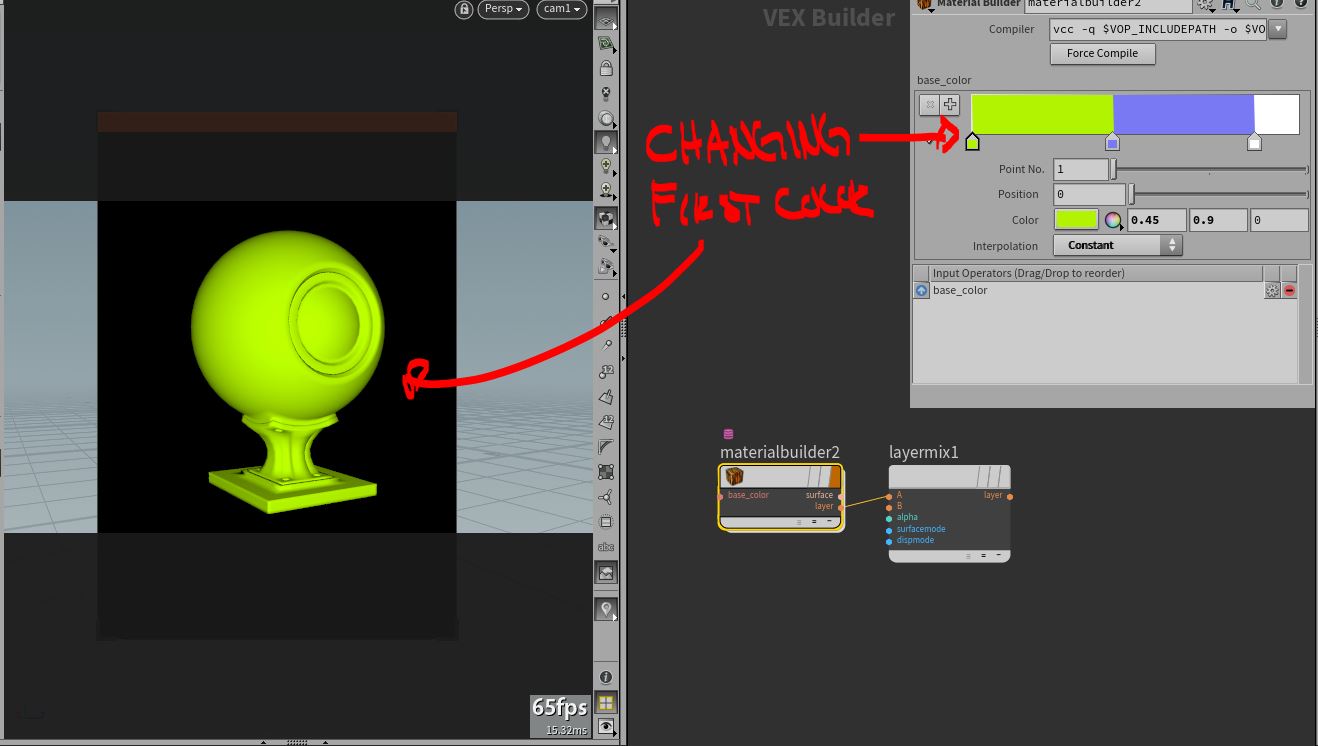
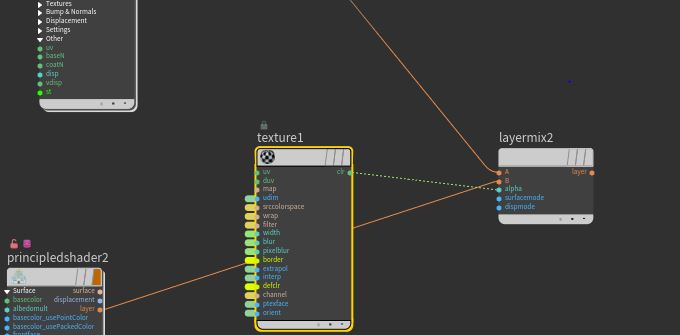
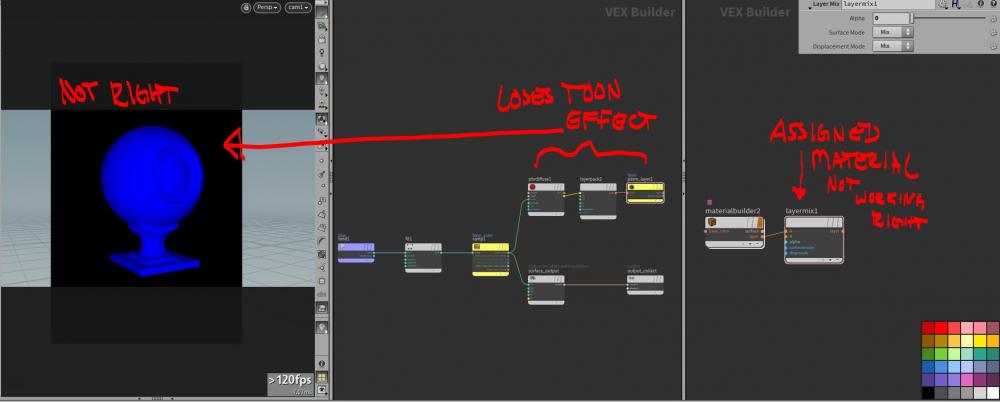
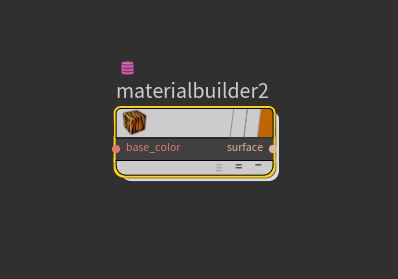
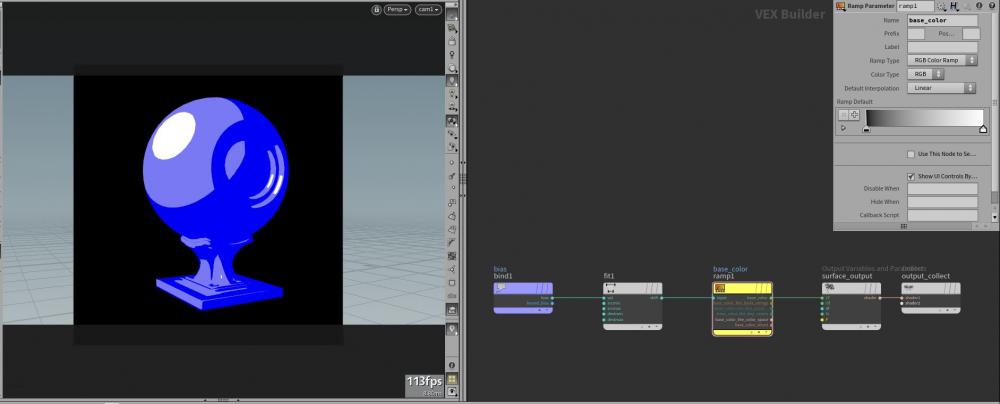
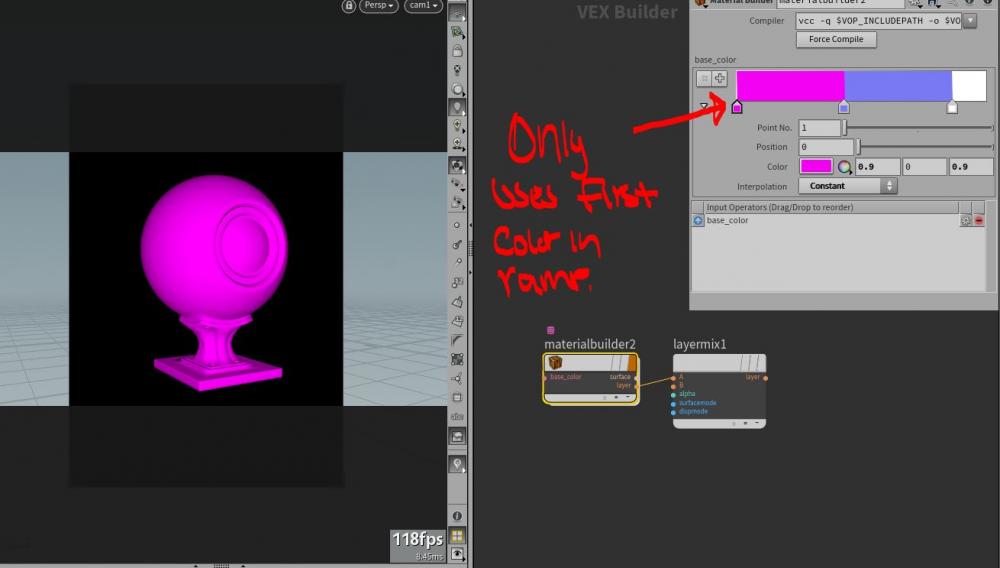
Hey guys, I'm trying to get a custom material to export a layer properly so I can combine other shaders. I've attached the .hip file below. This is the material I built. As a simple example, it works as intended. However, there's no layer yet: So, I dove into the principle_core shader and was able to (unsuccessfully) create a pbrdiffuse node, plug that into the layerpack and then export the layer for mixing: But unfortunately when I assign the layermix to the object, I lose the ramp. It seems to take just the first input of the ramp: It's probably very simple, but this is driving me crazy. Any ideas? material_help.hipnc cw

-
Hey everyone. I was curious if there was a way to break constraints with an agent layer once they convert to ragdoll. For example, a crowd agent holding a sword, once hit becomes an active ragdoll. The sword is bound to the agent via an agent layer node. In DOPs, I'm trying to access the sword layer to tell it if state=ragdoll, sword's active=1, so that he lets go of his sword and it interacts with the rest of the sim as it falls and takes on any velocity from its original movement. Currently I can't find any attribute for the prop layer once the agent is packed and ready for dops. The only way I can access it is by name once it's unpacked, but this gets super slow and won't work properly in DOPs. Anyone know if what I'm trying to do is even possible? Or if there's a better way to do it? Thanks!
-
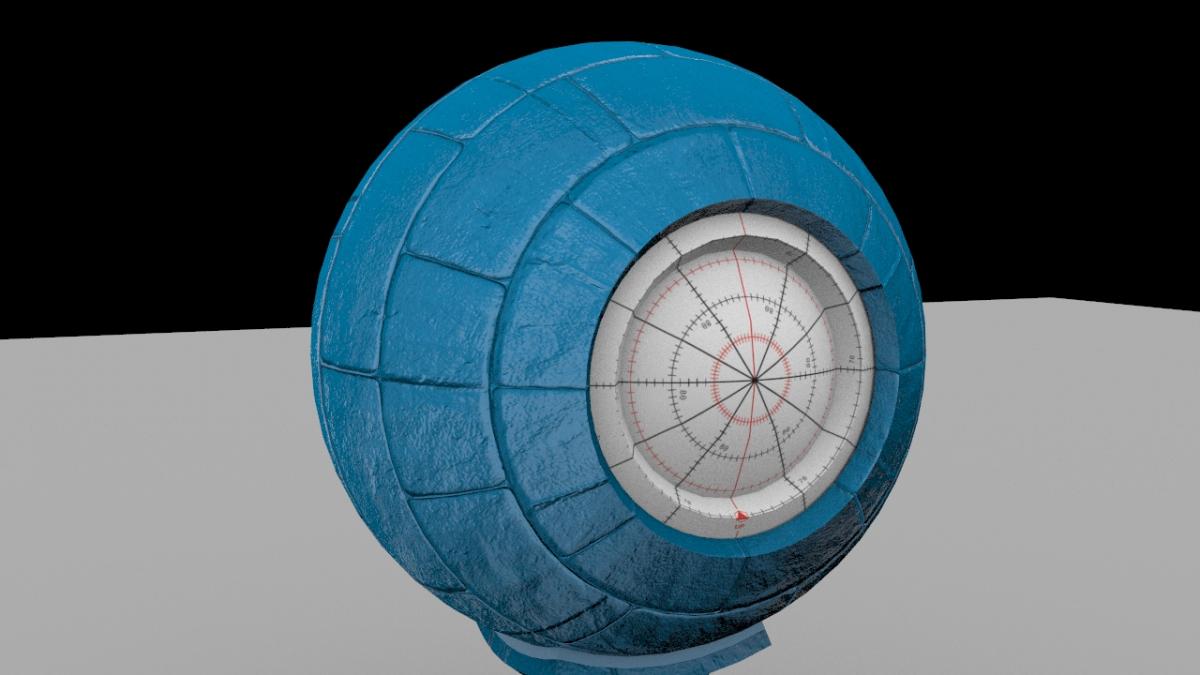
Hi guys, I've been trying to layer 2 normal maps inside one shader and I can't quite figure out what is the right way of blending them. I tried mixing them, adding them, multiplying and subtracting the difference but I can't get them to look correct. As a reference I combined the 2 normal maps in Photoshop by overlaying the red and green channels and multiplying the blue one and I still couldn't get it to match in Mantra. In my file you can see that I have the displacement texture nodes and I'm plugging them into the baseN, and then you can compare it with the displacement texture that is already loading the layered normal from Photoshop. The only way I found of doing this in Houdini is going inside the displacement texture node and doing the same I did with Photoshop combining the RGB channels right before they go into the Displacement node and the normals are calculated. The problem is that it's not a very elegant solution, and I also have the problem that I can't do this with a bump and a normal, so I'm trying to figure out how I can layer the normals themselves, not the textures with the color data. How can I blend 2 normal maps together, or 1 normal map and a bump map? Is there any way of doing this manipulating the normals or will I always have to resort to blending the RGB channels and then getting the value of the normals? Here are the renders showing the difference between the layered normals in Photoshop and the one where I add the normals together: Here is the file with the textures. layerNormalMaps.zip Cheers and happy new year!


-
Render depth layer but force matte object in the depth layer.
-
Hi Guys , I would be curious to know if some of you would be interested to help me work on an Open Source Mantra Shader. There are actually some very cool PBR shaders right now like those one : http://forums.odforce.net/topic/18353-pbr-all-purpose-layered-shader/?hl=danylyon http://forums.odforce.net/topic/20682-bsdf-bonanza-ggx-microfacets-disney-brdf-and-more/ http://forums.odforce.net/topic/21673-physhader/ The problem is that the first 2 are not accessible in VOP , you can't modify them yourself and thus you are not 100% free. The last one is also very cool and will help me a lot to understand VEX more in depth. But i would like to work on a modular shading tool. base on a core BSDF that you would then layer to build complex material. Most shader are more UBER shader like the V-Ray MTL / Arnold Standard / MR MIA / Mantra Shader. But i would like to have something closer from what you have in Maxwell or Octane. Where you combine BSDF. I'm quite bad in complex math, but i guess by combining some brain power here on od force we could achieve something cool. So i would have some questions before starting to work. Q1 - what would be the most powerfull environment to develop a cool mantra shader ? - Material shader builder context inside houdini - CVEX shader builder context - external compile VEX code - external compile CVEX code Q2 - what would be the most elegant organisation to keep thing easy to read / maintain ? - full VOP node organisation - full VEX code organisation - a mix of VOP and VEX with inline code Q3 - what are the requirements if we want to be able to make it work in Reyes/Raytrace/PBR ? - does CVEX shaders work in all mode ? - how to emulate the compute lighting node in CVEX ? For the moment i was thinking to start to work with those : - Material Shader Builder Context - mix of VOP for utilities and Inline Code for core shading functions - VEX I would be glad to have as much advise and pov on the subject ! Cheers E

.png.771c7177648f7ea8571a2360a278ecf5.png)
.png.f03ecc5ff4da2ed77301e71d236974f7.png)
.png.946515c7b859111dd4611fd5e14527c2.png)