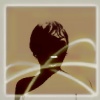
Jason Posted June 30, 2002 Share Posted June 30, 2002 Hi all, I have been creating an animated effect a fun animation I am starting to do. The scene is a hot sun beating down so hard that steam is rising off all the surfaces facing the light. So the spec for this is: Create steam off an object from all it's surfaces facing the sun. All back-faces and shadowed areas should not emit steam. I have done a simple and efficient version of this and here is a screengrab of it (see attached image). If I get a few techniques suggested, I'll describe how I did it, and perhaps even post up the hip file. Things that'll get you points: *) Solve the spec. *) My setup is real-time - as I drag the light around, the steam will emit from the fresh surfaces and the shadowed area will die out, although it's not a requirement for this challenge, it's nice to have direct feedback. *) Build it elegantly, with as few work-arounds as you can. But also try to use as few expressions as you can because other people won't understand them if they're complex, and they're slower than using a SOP solution. *) Try to keep the SOP networks concise and to the point. *) Try to make it simple for other people to follow, so that if you get hit by a London bus someone else will be able to continue using it without a seance. Jason. Quote Link to comment Share on other sites More sharing options...
DaJuice Posted July 1, 2002 Share Posted July 1, 2002 That is way cool, I have no idea how you did that. I hope you'll post up the hip after the challenge is done. Nice idea too, I wonder how many different ways you could do this. Peace! Quote Link to comment Share on other sites More sharing options...
TheUsualAlex Posted July 1, 2002 Share Posted July 1, 2002 Bummer. Just when I thought I am close to figuring it out, I was far from it. Wished I have paid more attention to my high school geometry class back in 9th grade... Anyway, still thinking. Still thinking... Quote Link to comment Share on other sites More sharing options...
Jason Posted July 2, 2002 Author Share Posted July 2, 2002 well, don't burn out:) i'll give you 2 clues - diffuse calculation ( dot product ) and ray SOP... Quote Link to comment Share on other sites More sharing options...
Stremik Posted July 2, 2002 Share Posted July 2, 2002 Does it have anything to do with photons emitted by the lite by any chance? As usual, I have an idea but don't have enough coding skills to implement it! I thought, a custom VEXSop coud be written which would take any number of geometry objects as an input(and get their UV coordinates,maybe?) Then, in this sops parameters woud have to be an option to import a light object. The Sop woud extract from light, parameters like number of photons emitted by the lite,their IDs and trajectories. Than, by putting all this together, the sop woud find a coordinate on surface of the model where each photon hits the surface and calculate the angle at which normal faces the surface at this place. Now the particle could be birthd at this place and depending on the angle at which the normal positioned relatively to the trajectory of incoming photon, the size of a particle could be controlled. Me and my ideas! Does any of it make any sence at all? Quote Link to comment Share on other sites More sharing options...
Jason Posted July 2, 2002 Author Share Posted July 2, 2002 Keep in mind that this can easily be performed completely in SOPs, with a reliace on the point SOP and some expressions. In my example, I made a very simple VEX sop because it's clearer to me than a long hscript expression. You're on the right track, the direction of the light is important. For every point on the surface of the sphere I calculate the light contribution by angle of the point normal to the light source. More specifically, the dot product of the Normal with the light direction gives you the light contribution on the surface. In shader speak, dot(N,L) And then there are the shadows...here I use the Ray SOP. I'll give you guys more time before I give away the *whole* thing:-D Ja hay sunn Quote Link to comment Share on other sites More sharing options...
DaJuice Posted July 2, 2002 Share Posted July 2, 2002 Woa, I just noticed, the box is casting shadows. Yeah, I'm slow. Quote Link to comment Share on other sites More sharing options...
plan9 Posted July 2, 2002 Share Posted July 2, 2002 doh! that is awesome...and i didnt see the post until now ..silly me to the drawing board i go!!!!! Quote Link to comment Share on other sites More sharing options...
Stremik Posted July 2, 2002 Share Posted July 2, 2002 Before you give away the whole sceme, say, is there a PointSOP attached to a MergeSOP in Light object? Jason, I think this Challange idea of yours is GREAT!!! It's a very effective way of larning and it fits Houdini like any other software out there. Moreover,I think there should be a whole forum dedicated to it. We would chalange each other(Not me,not yet anyway) and it would keep things a lot more interesting. Quote Link to comment Share on other sites More sharing options...
Jason Posted July 2, 2002 Author Share Posted July 2, 2002 Thanks - effects is Houdini's strong point and I hope to show people that although the interface lacks some niceties, the core paradigm of Houdini is so incredible. As for the challenge, I don't necessarily want my exact solution to be discovered : there are many ways to skin a cat. I'd like to hear other peoples' solutions to problems like this. My hints are really just a couple of pushes in certain directions.. I make good use of the Point SOP - it's one of the most versatile and powerful effects-oriented SOPs in Houdini. If you like, you can explain (in plain writing) the methodology you'd take, even though you may not know exactly how to execute it in SOPs. We can talk about your method before you try to implement it. If we get a lot of interest in the Challenges, then we'll definately set up a dedicated forum for it:) Thanks for your positive response. Cheers, Jason. Quote Link to comment Share on other sites More sharing options...
stevenong Posted July 4, 2002 Share Posted July 4, 2002 I think I have a solution. Please take a look at the attached images: My solution should be close to Jason's. I'll discuss with him off-forum for now & wait till he posts his solution. Else, I'll post mine. Quote Link to comment Share on other sites More sharing options...
Jason Posted July 5, 2002 Author Share Posted July 5, 2002 Hey Steven, Good going there! Yup that looks like you've got it! Lets wait another day or 2 before we post up our solutions. C'mon plan9, Stremik, DaJuice and everyone else, let's see a quick attempt here Cheers, The Tapir of Hangovers. Quote Link to comment Share on other sites More sharing options...
DaJuice Posted July 5, 2002 Share Posted July 5, 2002 Quick attempt? Sure! I think I came reasonably close. But seriously, I'll give it a shot. Quote Link to comment Share on other sites More sharing options...
plan9 Posted July 6, 2002 Share Posted July 6, 2002 HAHAH DaJuice wins a prize!!! IM GETTIN THERE JASON!! lub, Mike C. Quote Link to comment Share on other sites More sharing options...
stevenong Posted July 6, 2002 Share Posted July 6, 2002 DaJuice should win an award!!! C'mon all! Quote Link to comment Share on other sites More sharing options...
Jason Posted July 8, 2002 Author Share Posted July 8, 2002 Ha ha! That's great! You should get a prize for that amazing painterly effect you've got going too! All right, Steven - why don't you explain your method when you're ready and I'll explain mine:) I believe it'd be fine if we zipped our hip-files and attached them if we want to. I did mine in 5.5 so, I don't know if others could read it. Maybe I should make a 5.0 version.. Quote Link to comment Share on other sites More sharing options...
betty Posted July 9, 2002 Share Posted July 9, 2002 Jason It would be great if you add a 5.0 version. And please more challenges!!! B Quote Link to comment Share on other sites More sharing options...
stevenong Posted July 9, 2002 Share Posted July 9, 2002 All right, Steven - why don't you explain your method when you're ready and I'll explain mine:) I believe it'd be fine if we zipped our hip-files and attached them if we want to. I did mine in 5.5 so, I don't know if others could read it. Maybe I should make a 5.0 version.. This is gonna be a long post. You can download the hip file here: Download me Zip! or Download me Tar.gz! In the zip file, you'll find a hip file & a .vex file. You can put the .vex file in the same directory as the hip file. If all else fails, please put the .vex file in "where_you_installed_houdini"/houdini/vex/Sop. I'll explain the method first then what I did in the hip file. method: Calculate how the position of the light will affect the intensity of each point of the sphere. I had a VEX Sop written before this challenge that does the calculation so that's out of the way. The real challenge is the shadowed area & the hint from Jason about the Ray SOP helped me tremendously. Why? Using the Ray SOP, you can project points of the sphere onto the cube though what you really want is the Ray Hit Group. With this group, you can then use a Point SOP to colour the points black = shadowed area. breakdown of hip file: >> sphere object << I used two Point SOPs(point4 & point5) to orient the Normals towards the light. In point4 SOP, I set Direction Force to be the position of the light. In point5 SOP, I set the Normals to $NX = point("../point4",$PT,"dirf",0) $NY = point("../point4",$PT,"dirf",1) $NZ = point("../point4",$PT,"dirf",2) This will effectively set the Normals to 'look at' the light. The direction of the Normal is the direction the Points will transform using the Ray SOP. Next, I used an Object Merge SOP to read in the cube. To increase the threshold, I used a Transform SOP to scale the cube slightly. This is to ensure the shadowed area is sufficiently covered. In the Ray SOP, I checked off Transform Points as that's not needed though you might want to see the effect. The most important is 'Create Point Group' as that's what I need. I then used another Point SOP(point6) to remove the Normals as they are no longer needed. The next SOP is the VEX Sop I wrote, Geometry Shader, which I'll release on [od]force in the near future. As explained earlier, it'll colour the geometry based on the position of a Reference Object. Finally, I used a Point SOP(another one?!?! ) to colour the Points in the rayHitGroup black to simulate the shadowed area. >> cube object << Just a regular Box SOP. >> steam obect << I copied Primitive Spheres to the Particles for better feedback. >> POP network << The Source POP uses the Sphere Object's point7 SOP to generate the particles. Since I used a Nurbs sphere, I set the Emission Type to be Surfaces (Random). I also used Impluse Activation instead of Constant for cosmetics purposes. Next, in the Birth Probability parameter, I used $CR > 0.15 & $CR > 0.2 to birth particles where the colour is higher than specified. Why only $CR? It's because all three colour variables are the same value, so using $CR, $CG or $CB will work. I also set the Life Expectancy of the particles to be 1 frame for interactivity. end of file I think that's all? Phew! If anyone has questions, please don't hesitate to post them. Looking forward to the next challenge! Quote Link to comment Share on other sites More sharing options...
Jason Posted July 9, 2002 Author Share Posted July 9, 2002 So, before I post up my hipfile (which I've got to convert for 5.0 still) I'll explain my method. ---- Here we go! *) Create the box (the shadow object) *) Create the light *) Create a mesh sphere *) In the Light, put an Add SOP (add1), create 1 point. You'll use this later. *) In the Sphere, *) object-merge the Light>add1, using this object's transform (SUN). So now this object know where the light is relative to it. *) Using a Point SOP, Add Normals, and point the normals toward the light point using the following expression: point("../SUN",0,"P",0)-$TX point("../SUN",0,"P",1)-$TY point("../SUN",0,"P",2)-$TZ *) Object Merge in all the objects going to casting shadows- just the Box in this case. Call this SOP "SHADOWS" *) Using a Ray SOP, ray the sphere using "SHADOWS" as the collision input. Click OFF "Transform Points" and create a Ray Hit Group. Now, all the points inside the group are the points which hit the shadow objects on their way toward the SUN. This is the object shadowing done, really. Now comes the harder bit, self-shadowing. *) The way to calculate light contribution to a surface is using the dot product of the surface normal with the direction of the light. This is known as the Lambertian Shading Model.So now we can restore the normals of the sphere to be correct : use a Facet SOP with "Compute Normals" on. Now append a Point SOP and add Point Colors. In the expression fields you'll use something like this: (this is the part I made a VEX sop for, and you'll see why, coz the expressions get out of hand) In pseudocode: diffuse = dot( N, L ); where N, L are normalized. so, in expression language: Red = dot( normalize( vector( $NX,$NY,$NZ ) ), normalize( vector( point("../SUN",0,"P",0), point("../SUN",0,"P",1), point("../SUN",0,"P",2) ) ) ) Green = Red Blue = Red Make sense? Now we have "baked" the lighting in the Point Colors on the object. *) Now lets make the areas of the Sphere that are shadowed by the Box black too. Add a Point SOP again, important! set the group to the RayHitGroup, set the Point Colors to black. This should set everything in the shadowed area black. All GOOD! Now we have to birth particles based on the intensity of the point colors, Easy peasy! *) Go to Particles, create a new POPnet, then create a Source POP. In the Source POP, emit from the last Sphere SOP and in the Birth Probability put $CR, $CR. Make the lifetime of the particles like 2 or so. *)Create a new object, called Steam. - Put down a Pop SOP, get the particles from your new POPnet. - Create a Sphere SOP and using the Copy SOP to copy your spheres using the Pop Sop as a template. Voila! I added a couple of niceties like the steam fading up and growing and then fading out over it's lifetime using the Color POP and Property POP. But thats not part of the challenge. This system is realtime. Hit play and move around the Light interactive;ly. I hope to post a hip-file soon! Steven, tell us what you did.. The Tapir Quote Link to comment Share on other sites More sharing options...
stevenong Posted July 9, 2002 Share Posted July 9, 2002 Steven, tell us what you did.. I edited my previous post so it seems like I posted first! :P Quote Link to comment Share on other sites More sharing options...
Recommended Posts
Join the conversation
You can post now and register later. If you have an account, sign in now to post with your account.
Note: Your post will require moderator approval before it will be visible.