Leaderboard


Popular Content
Showing content with the highest reputation on 02/26/2012 in all areas
-
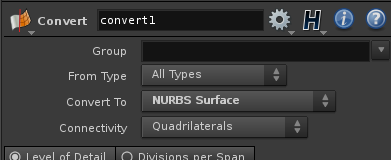
Just convert a curve to a NURBS surface: cut02-01.hipnc

 1 point
 -
Is this what you are looking for? SurfSect.hipnc1 point
-
Hey Jan, there is a convenient rotate node that creates a rotation matrix. Multiply your vector by that, possibly offsetting the multiplication per point with an attribute.1 point
-
If you want exactly a random 20% how about you just use the randomize sort trick and then in the group sop set max range to 0.2*$N with the 0.2 possibly being a chanel reference to a slider below.1 point
-
Drop a Grid SOP and set Rows/Columns to 25 by 25 Drop a Group SOP and connect Grid Set operation to "Group by Expression" Use this expression (rand($PR) * $NPR) < ($NPR * 0.20) Where 0.20 represents a 20% grouping. That's all there is to it. You can add a constant to rand($PR+123) to apply a random seed.1 point
-
Yeap, that would work. Although it would be a bit less flexible, e.g. if you wanted to have 0..1 slider to control how large a portion you wish to select. If rand() is properly random, it should not matter whether you take the first 20% or every fifth. The bad part of being properly random is that there is nothing preventing getting numbers that are close to each other - resulting in clumping in the result. If anyone has good ideas on how to prevent it in a situation like this, I'd like to hear Some thinking out aloud: There is the nrandom() / NonDeterministic Random vex/vop function that can be used to get a mersenne twister or quasistratified random sequence, but I'm not sure how to get that in a useful way to an (especially) primitive selection. Using it in an nrandom() < 0.2 fashion loses its special qualities (I think), one should first run some vex to get a sequence that could then be used as primitive IDs to select. Another idea might be to scatter points onto the geometry and then somehow select the polygons the points end up in. (schnelli's uniform scatterer?) Or, if you want 20% of the faces, you could break up the geometry into 20 chunks with a ForEach SOP and select 1 face from each chunk - a kind of bruteforce startified sampling.1 point
-
I found the directions to be confusing at first also because the way it's explained in the documents makes it seem that you set your variables values to have the variable name in them as well. Here is a step by step install guide I made which is more clear. Step 1. Download a binary distro AKA a compiled version for your specific version of Houdini. In my case 11.0.733 x64. I used this version: HOT 11.0.733 x64 Step 2. Unzip the archive and place the contents into any folder you want. I made a folder in my C:/ drive named "houdini" and inside of that folder I made another folder named "hot" Inside of the "hot" folder I pasted all of the contents of the archive I unziped earlier. So you should have something that looks like so. Step 3. So now all you have to do is add two environment variables. To do this open windows explorer and right click on "Computer" (Windows 7) or "my computer" (Windows XP) and go to properties. Then go to "Advanced system settings" The "System properties" window will pop up at the bottom click on "Environment variables" Step 4. Then you must create your environment variables. Click "New..." Under either section (The system variables will load the variables for any user on the computer, while the user variables will only load for that specific user.) After you click "New..." a window as such will appear. We will do the "HOUDINI_PATH" variable first. The Variable name is: "HOUDINI_PATH" (without the quotes.) The variable value is: C:/houdini/hot;& (The slashes must be in the opposite direction and you must have the semicolon and the ampersand at the end. NO SPACES) Now we will add the Path variable. You most likely already have a "Path" variable Select it and click on "Edit..." do not rename the variable name leave it alone. Move your cursor all the way to the end of the text in the "Variable value:" text field and at the end of the existing text put a semicolon with no space before or after. Then type the path location of the "dlls" folder inside of the "houdini/hot" folders we created earlier. You should have something that looks like this. Note: This path does not need to have the reversed slashes. Nor does it need the semicolon or ampersand at the end. And that should be it! Open Houdini and throw down a grid jump inside the grid and type "ocean" If you see the node it means you were successful. Hope this write up helps clear the confusion with HOT installs on windows. Thanks to Ronald for the compile and Kiel for helping me understand the install myself. James1 point
-
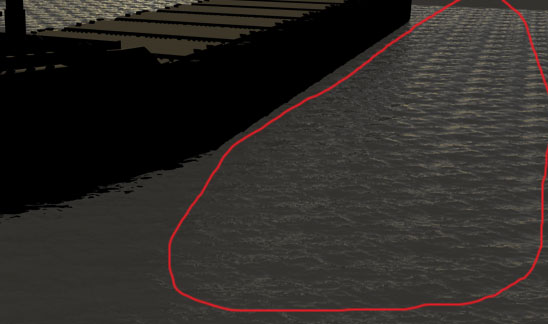
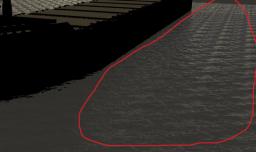
Hello, i have a porblem with wave tiling in maya. Give me advice. ----------------------- best regards Yegor, Russia, Saint-Petersburg
 -1 points