Search the Community
Showing results for tags 'cut'.
-
I have these curves I am using via a Illustrator file, then blasts to separate my individual parts. I would like to carve each part out of a box/plate to have a sort of plasma cutting effect. Where the cut is wide enough to let light shines through when back lighting, enviorment and texturing are aplied. Similar to this except the environment and back lighting would provide the light, the sheet being cut would be thick enough to produce an object that would then fall etc. https://www.youtube.com/watch?v=JCZUWubBqeY The video below is my actual first hack at this. I am just key framing two different parts of the curve with a carve and added a polyextrude for some thickness but I'm not sure where to go from here to allow this process to cut out of, well.. anything. Or maybe and probably there is a better way? Thank you in advance untitled.avi
-
Hello, I am trying to do a boolean operation, I have a curve which uses a carve SOP to shrink or grow, I have used a polywire to give it some geometry and I am using this geometry for input2 in the boolean operation. But when I change the carve, the main object that is connected to boolean input 1, keeps disappearing and reappearing. Does anyone know why this happens? I am using a subtract operation in boolean. Thanks for you help,
-
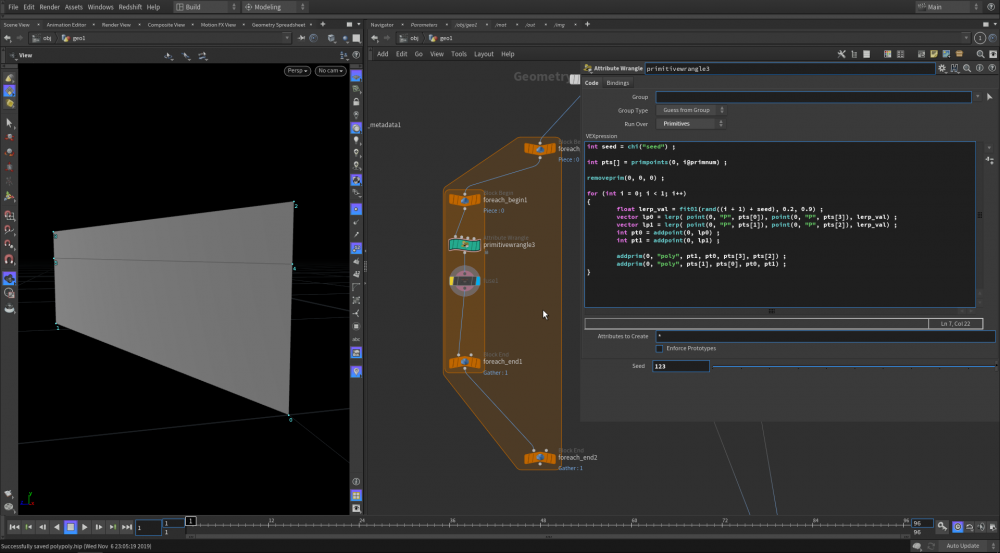
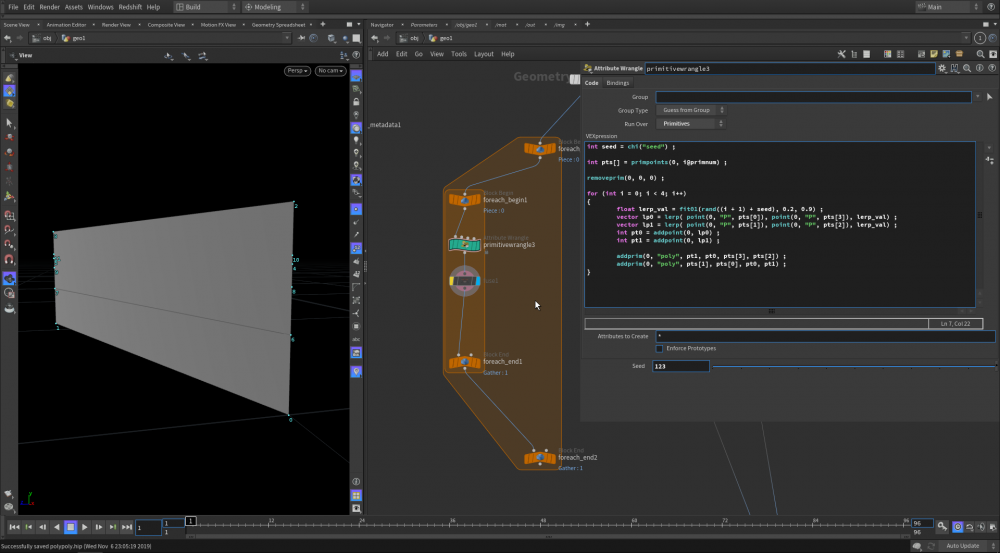
Hello everyone! I'm trying to make kind of greeble tool, but i want cuts to be strict horizontaly. It's looks fine when i do one pass [], but with more then one iteration it gets really weird[]. And i assume why it does that - because it doesn't know where to make correct verticies, so that points can connect, but i don't really know how to solve. Anyone have an idead ? UPD: I figured it out, but i would still love to hear your ideas
-
CrusherSOP is a Houdini HDA designed to speed up process of artistic fracturing geometry. It makes the process quick and efficient. Based on drawing curves in viewport to cut the object. Tested and improved over the course of producing promo video. Available with example HIP Scene where promo video was created. Every step is described and explained. Includes library of HDA tools that speeds up daily RBD tasks. You can use CrusherSOP HDA and HIP Scene to build your RBD demoreel or enchance your existing workflows. www.crushersop.com
-
Hi guys, Doing with my first steps learning this marvelous software :-) I was under the impression that CARVE SOP will slice/cut our meshes (even imported ones) following the information derived from UVs. But now I see that this assumption was wrong… I understood what Carve does when using on Sweeps, Lofts, Birails… stuff created inside Houdini. On a next step, I decided to do some tests using Alembic geometry imported from Modo. My first results were great, because I imported some basic figures, like a thorus or a tube (and at these stage I will continue thinking that slice operation should be derived from imported UVs). But now, using a more complex imported geometry/UVs, I get unexpected results… Now I suspect that Carve Slice operation is derived from internal point order structure and not UV map. My question: is there some SOP or (relatively simple) procedure to apply a slice operation, like the ones produced by Carve, but derived from UVs information? I would like to get something like this mockup, slicing geometry through green and red lines that would be pairs of U and V coords, like the Carve SOP: Unfortunately, this is what I really get: Thanks for your help! :-)
-
Hello all, I'm playing around with FEMs and would like to implement it to my ongoing project. Idea is to create a "Cut the cake" effect. I have tried to use the shelf tools, but FEM build in fracture system is not as flexible as standard Voronoi. Could you please check out .hip and let me know if I can use controlled Voronoi fracturing for FEMs? Or maybe there is a more efficient way to tackle this problem? CutCake002.hip
-
Hi. I'm working on a tool that allows to selection-paint fracture pieces. It works great on simple things, like spheres, planes or tori, but ... when it gets to a more complex, organic shape, like a human face, and the model has holes, things start getting hairy. The weak link is the Break SOP. Right now it seems to me it's almost unusable on anything complex. The only thing I can think of to fix it right now, is to convert the model to a flat set of patches based on UV's, do the cutting and then wrap it back to its original shape, or replace the Break SOP with something else. Any advice? Best Regards Filip
-
cmiVFX Releases Awesome Houdini Facial Hair Grooming Video High Definition Training Videos for the Visual Effects Industry Princeton, NJ (October 28, 2015) Several months in the making, cmiVFX Research releases an epic video on how to groom human facial hair using SideFX Houdini Animation Software. Artist, cmi’s Chris Maynard, researched hair sculpting in conjunction with hair styling students of an international beauty school as well as popular NYC salons to come up with his ground breaking technique of “Render Softening” using digital hair to dither CG renders for a more realistic look. In conjunction with all of these resources, we added the compatibility with Solid Angle’s Arnold Rendering system to leverage the power of inoperability between several major animation packages. Using Alembic support allowed for us to get true congruency across multiple platforms. To add even more excitement to this already amazing video content, we recorded dual monitor high resolution screens to be displayed in our new higher resolution playback formats! No matter what kind of device you are on, or whatever location you are in, we have a solution for you! The cmiVFX website is designed to work 100% of the time using our redundant cloud servers and multiple device support, which is why many global developers are now using our site to test their own networks for problems! At cmiVFX, we are not only the teachers, but life long students. We take our customers feedback seriously, so our website will keep getting better after each new video release. Houdini Facial Hair Grooming is a major video milestone for us, allowing our extremely popular, “outside of the box” methodology to help guide you as the viewer in a way that is both fun and intriguing. For the cost of a family dinner, you can increase your chance for consistent work exponentially. To assist you even further, we will even help you get a job doing what you love. Simply watch a video, then tell us if you want to do this for a living, and we will help you get started on a path to happiness and success. You can rely on cmiVFX.com to help you be the very best you can be! Purchase this video now, and start making all your characters more detailed today. Vimeo Teaser Trailer Short Description Chris Maynard shows one of his legendary VFX tricks of hair blending and “Render Softening” using Houdini. SideFX Houdini Facial Hair Grooming https://cmivfx.com/store/653-Houdini+Facial+Hair+Grooming Chapter Descriptions Introduction Get a quick preview of the content of this video before getting started. Did you know more than 70% of the women in Chris’s family worked in the Beauty Industry? He had attended dissertations on the latest research in hair growth and maintenance as a teenager when his mother was an instructor for Hair Styling and Chemical Treatments in New Jersey. One of his many side jobs was helping maintain a family salon geared towards the Music Industry where he was soon introduced to his initial career in music. Setting Up As an ongoing software UI designer, Chris tends to arrange his workspace for the most efficient level of effort. By reducing the amount of UI clicks, we can spend more time on visualizing changes. It is very important to keep your eyes tuned to the desired object in edit. Base Hair During the years of research in CG, VFX and Design, it often becomes very clear to work from large to small. In this chapter we start off with the largest body of hair which we use a central jumping point to all the secondary and tertiary hair systems. We also cover the seeding of multiple duplicates to create various hair colors for added realism. Most people have hair color variations, as well as fine white hairs which help deflect light in various directions. Hair Blending Often ignored by low level animations, hair can create hard edges that lack reality. Especially, with shorter hair styles, the technique of blending is required to taper between hair types and lengths. This chapter is a key link between the base hair and the rest of the hair systems. Hair Line Sometimes, some variation is required to help pull the eye in a different direction. In our first “Render Softener” we use a bridge of fine hairs to blend the forehead into the head hair. This technique will be used in every digital hair style for the rest of your career and is probably worth the price of the video all on its own. Beard Shadowing How many times have you seen beard shadow added into the texture maps of a character? That might look ok from far away, but on close ups, it just will not do. This chapter we use not one, not two, but THREE different hair systems to make up the 5 O-Clock Shadow of the face. Another ground breaking technique of “Render Softening” is to use it evenly around the object of desire. Eye Brows This is one of the more tricky systems of hair styling. In this part of the video, we will use nearly all the grooming tools on the Houdini Toolbar. The eyebrows fall into our 80%/20% technique, so we allow for the ability to tweak at the end. Eye Lashes Because the eye lashes are going to be moved by animated morph objects, we must make sure they follow the proper direction and help keep them from colliding when the eyes close. The ability to tweak the lashes during this scenario is available, so we are able to design the base look which will be adequate for the animation departments later on. Auxiliary Hairs There are hairs all over the head, face and neck. Find out how to create hairs that cover every single polygon over your entire model and how to shade them appropriately. Ranging from nostril hair, to forehead hair, you will learn more about yourself here than ever before! Final Touches The trick to working in CG is to nail down 80% quality of all your objects until they are all together, then finish the last 20% with all your parts in one place so you know they will work as one. Working in any other way will take much longer and could yield a lesser result in the long run. Wrapping Up Find out how to set up Arnold Hair Shaders and Lights so that you can go back and forth between Mantra if needed. This video was meant to work with other cmiVFX Hair system videos so that no matter what application you are in, the end result renders the same. About The Instructor Chris Maynard is an international software GUI designer and the owner, Chief Public Partner, as well as Head Researcher of the profit-sharing organization known as cmiVFX.com. Project Contents All cmiVFX videos come with all the training materials you need right from our website. No matter what time of day, your location, or how your feeling, cmiVFX will be there waiting for you! This video is available today at the cmiVFX Store: www.cmivfx.com About cmiVFX cmiVFX is the leader in High Definition Video Training for the Visual Effects Community. Register for free and receive hours of free content at the cmiVFX Video-on-Demand Player. Copyright 2015 cmiVFX | cmiStudios. All rights reserved.


