All Activity
- Past hour
-
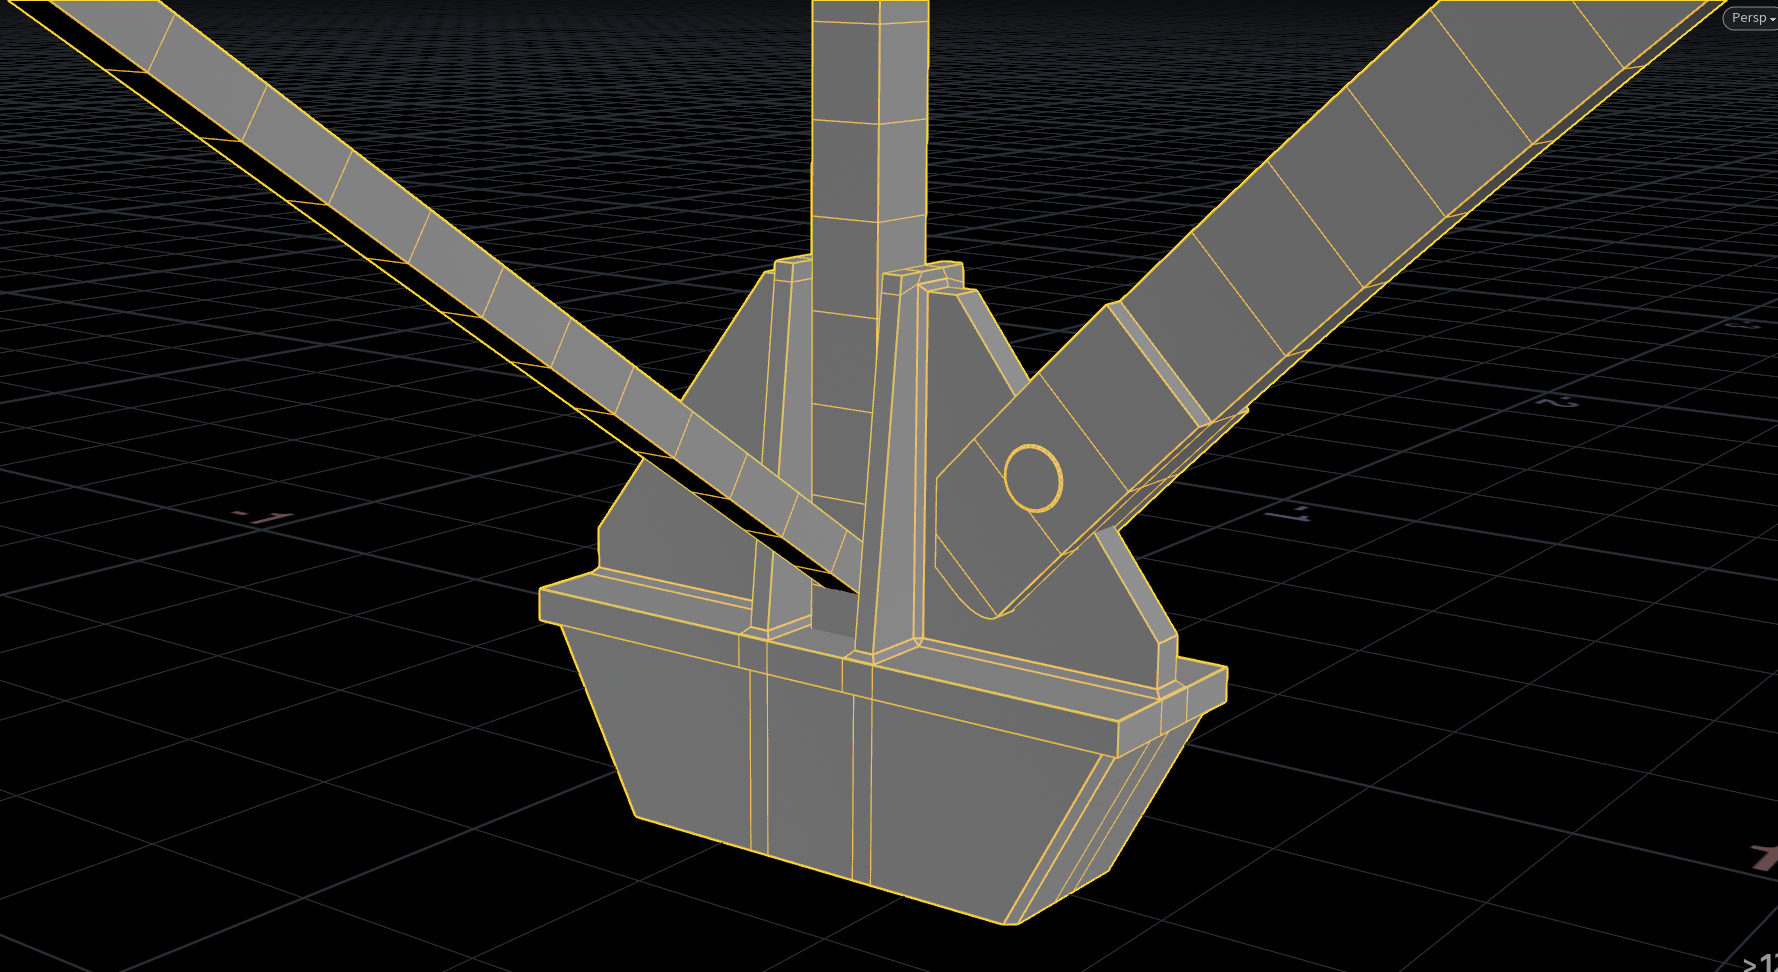
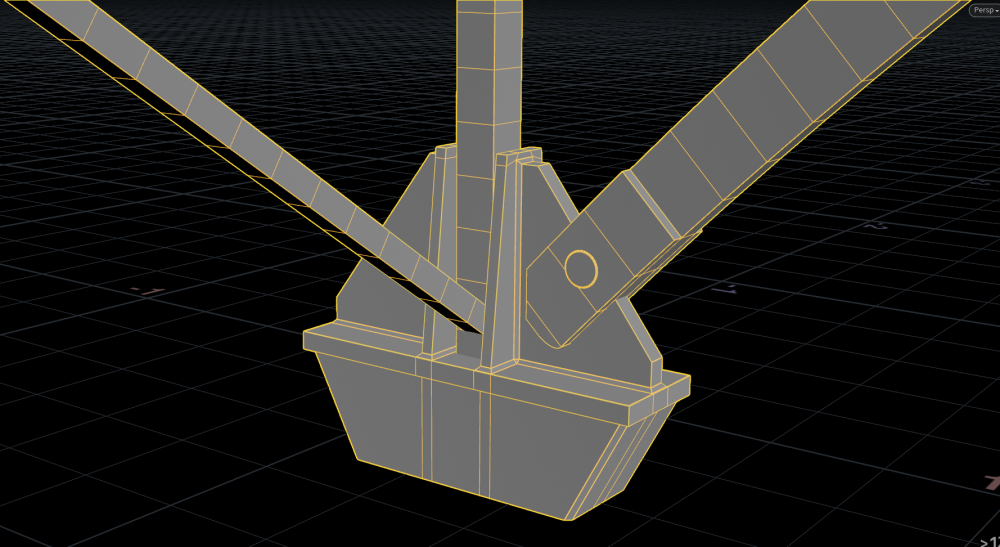
 Many objects are procedural like these (lines & curves here): But others parts are more complex like that: This is why I'm trying to manage better UVs than LabsAutoUV node...
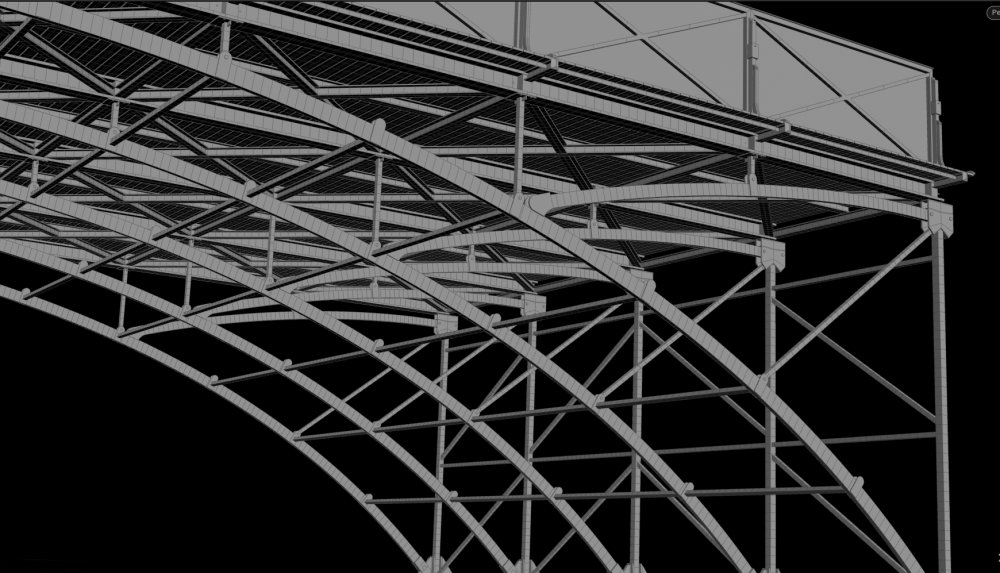
-
 Data_Man joined the community
 - Today
-
 It's usually best to create UVs on the fly and not just at the end. For this, you can use the sweep node for pretty much any building part and enable its UV outputs. Additionally other output attributes such as primrow and ptcol can be useful for selecting patterns next, ie. i@primcol%3==1
 - Yesterday
-
 muhammadibrahim9412 joined the community
 -
 I was testing an agent for ragdoll and noticed when I reload the agent definition cache (load from disk and attributes on) it locks up houdini trying to recalculate something in the crowdsolver. Is this a known thing?
 -
megm changed their profile photo
-
 This!! And in the end it depends on how you model it and what you mean when you say high level details, which details??? share an example file, maybe you can create a file of 4 examples with different details, in which you have these problems. And believe me, you will be answered!!
 -
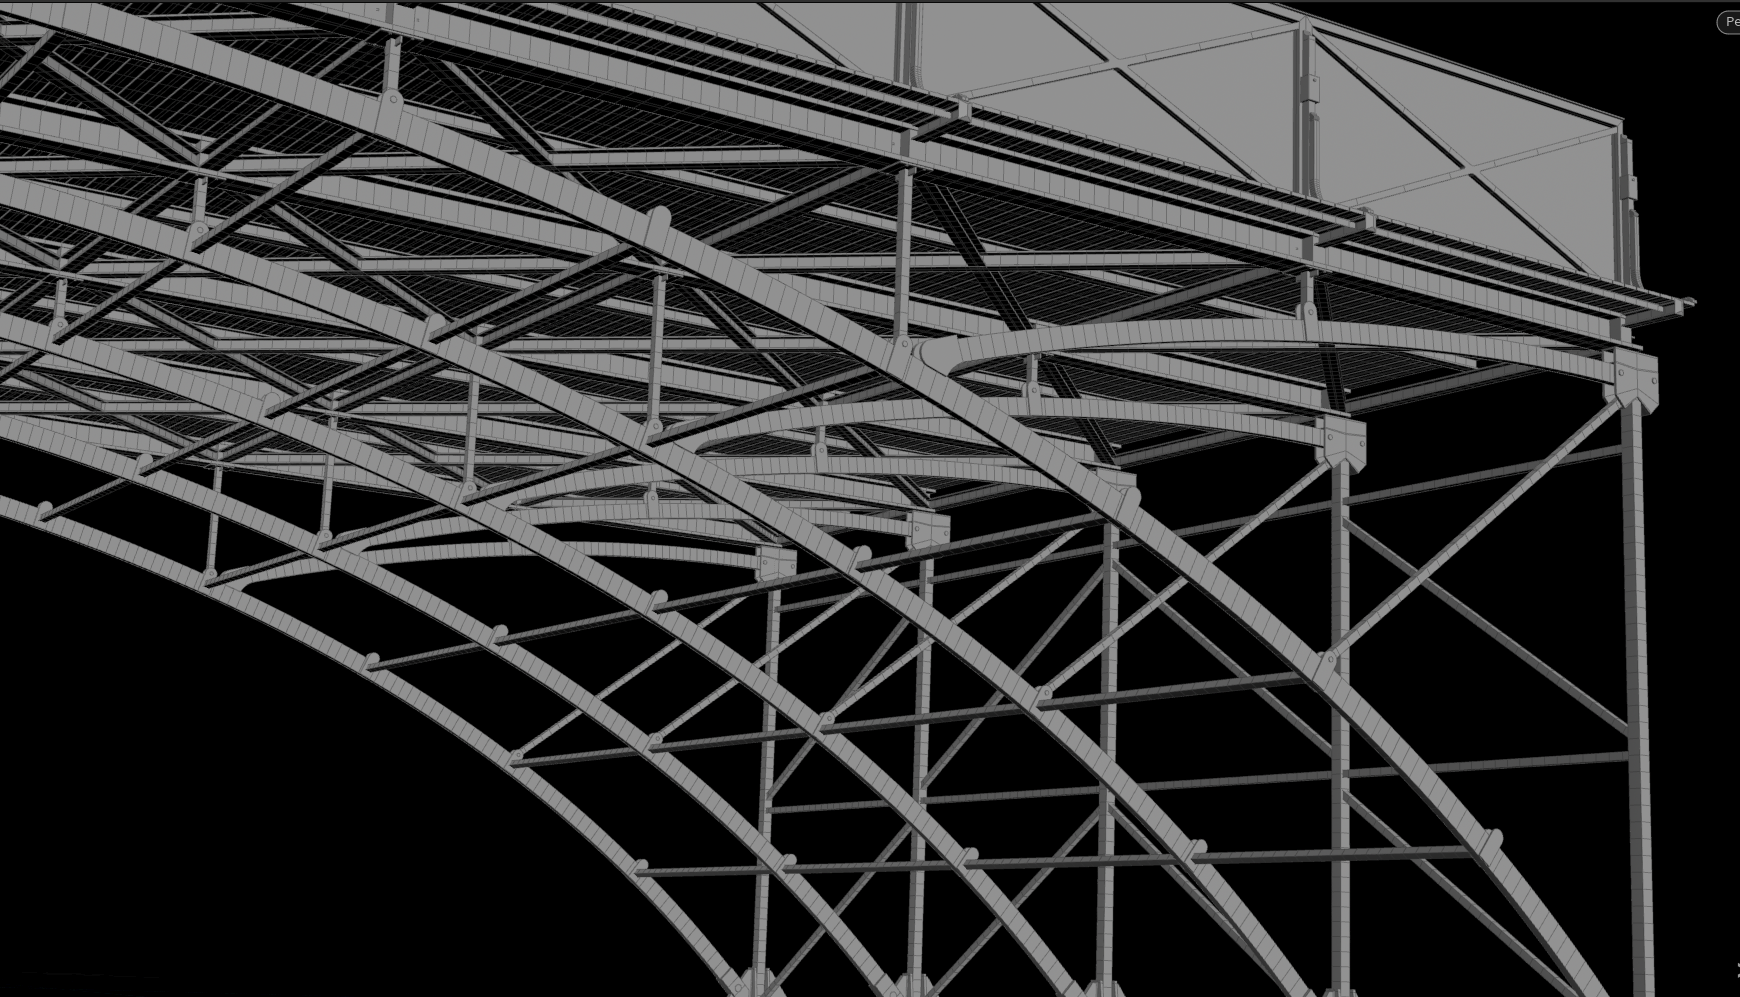
Hello, I'm currently modeling some large architecture stuff (like bridge and buidlings with high level details) with Houdini. And of course, I'm using procedural modeling to the maximum I can. But now come the UV part and it's not my main skill at all... So, what's the best way to do that?? Using nodes like "uvtexture", "labsautouv", "uvunwrap" and manage the result inside another software like Adobe Painter, RizomUV or anything else? Or manage everything "at hand" with custom seams, uvlayout and Copernicus module ?? If you can give me some good advices about this subject, it will be very (very!) cool! Thanks a lot in advance!
-
Why?
-
.thumb.jpg.7736d1130d41f5a8d26c52af98e650ed.jpg) arevcuk joined the community
arevcuk joined the community -
 Nurbek joined the community
 -
 pip joined the community
 -
megm joined the community
-

python Toggle buttons visibility
shrifazmy replied to shrifazmy's topic in General Houdini Questions
Thank you That exactly what am was looking for - Last week
-
 moid joined the community
 -
 Hello, I'm very new to Houdini and still trying to get familiar with the UI and workflow. I've finally managed to get to the rendering stage, but the result looks much rougher and lower quality than what I see in the viewport preview… I'm not sure what I'm doing wrong. I've attached the scene file for reference. Thank you. houdini question.zip
-

Need help for Toggle "Remove BackFace" Parameter
Fenolis replied to Lampay's topic in Tools (HDA's etc.)
Check the docs, they're factually correct, unlike ChatGPT: https://www.sidefx.com/docs/houdini/hom/hou/GeometryViewportDisplaySet.html def TintBackface(): node = hou.pwd() bTintBackface = node.parm("tintbackface").evalAsInt() # Get a reference to the geometry viewer pane = hou.ui.curDesktop().paneTabOfType(hou.paneTabType.SceneViewer) # Get the display settings settings = pane.curViewport().settings() # Get the GeometryViewportDisplaySet for objects dispset = settings.displaySet(hou.displaySetType.DisplayModel) dispset.showPrimBackfaces(bTintBackface) -
Chatbot??
-
Hi everyone, I am running a very quick (takes about 2 minutes to complete) pipeline related survey with some amazing rewards from our sponsors. The survey ends on 11th August, don't miss the chance to steer the future of open-source pipeline tools and win one of the awesome rewards! Details and survey link here: https://tik-manager.com/pipeline-survey/
-
Hi, to see how it works in attached file create a new button visibility node from tab -> Digital Assets toggle_button_visibility.hipnc
-
Hey I have two buttons in hda's UI one to 'Start paint' and the other 'Done paint' I want each one to toggle the other visibility so they are not shown together, I been digging around with no success can someone point me for a good tip please thank you
-
 I also don't like to export directly from SOPs. I tend to do all of my work in SOPCreate nodes so that I can see how my geo is being translated into USD before I cache. You should be able to specify the primitive path on the Geo Clip Sequence node. I don't have a hip file on hand but I have made a tutorial that covers a caching + referencing workflow that might be helpful. Scenes can get slow for loads of reasons, even when everything is cached. The main thing you can do to keep things as light as possible is make sure you have no time dependency badges and ideally have proxy geo for everything. If it's a big scene with lots of assets then unloading payloads can help too. Regarding the bgeo cache, you can use that directly in the Geometry Clip Sequence (as long as you're rendering in Houdini/husk). I do that for heavy fluid Sims as you're right it tends to be a smaller file size. I also cover this in the tutorial above. Alternatively for other things I'll treat the bgeo cache as a temporary cache to avoid having to recook things and then save my USD cache from there. You can of course save directly to USD instead of bgeo. Just use a USD Export in sops or USD ROP or File Cache in LOPs. Note that you should only need the Geometry Clip Sequence if you're caching really heavy geo to per frame USD or bgeo files. For most things you can save to a single USD file which is much easier to work with.
 -
 Thank you very much, Matt, for your detailed response and explanation. I greatly appreciate your time and insight. I was hoping to understand more about how you structure your scene while keeping the pipeline in mind. I'm planning to use the Component Builder for asset creation, and I’d prefer not to export USD directly from SOPs. From what I’ve read in some forum discussions, exporting USD from SOPs can sometimes result in missing attributes. For that reason, I'm currently using the Geo Clip Sequence node. My goal is to bring all geometry into Solaris and cache it there. However, I’ve encountered an issue with the Geo Clip node: when I save the output, it alters the hierarchy names. I'm not sure how to prevent this so that it matches the hierarchy created by the Component Builder. Any guidance on how to resolve this would be very helpful. If possible, it would be incredibly helpful if you could provide an example file showing the correct workflow. I’ve looked through SideFX documentation and tutorials but haven’t found one that addresses this specific issue within Solaris. Without caching, I've also noticed the scene becomes quite slow during lighting — especially when working with fur or feathers. Additionally, I have a question about caching: after creating a .bgeo cache, is it necessary to generate a separate geometry cache? It seems to create redundant files, and in cases involving fur or feathers, the geometry cache tends to be significantly larger than the .bgeo. The only benefit I’ve seen is that the Geo Clip Sequence loads faster. As mentioned, is there a way to directly generate the final geometry cache without first creating a .bgeo cache? I’d like to avoid repeated caching steps if possible. Thanks again for your help and any advice you can offer!
 -

Need Help Post Sim Ripple Tutorial
Shieh3 replied to adamknauer1's topic in General Houdini Questions
FMX HIVE 2022 presentation by Simon Fiedler & Bastian Schiffer -
Here's a couple older links on the topic.
-
Hey everyone, I have been experimenting with some new ideas & wanted to ask—has anyone tried incorporating AI-generated content into their FX workflows in Houdini? I am talking about things such as using AI-generated textures, noise patterns or even animation cues as part of simulations or procedural setups. Also I checked out a Gen ai course that briefly discussed how AI tools can be used in creative production & it sparked a few ideas. I want to know if anyone here has used AI outputs to drive things such as pyro, particles or other FX elements. Not just for quick concepts but as a core part of the workflow. I want to hear if any of you have tested this kind of mix. Did it actually help or just complicate things? Maybe someone’s even built tools around this idea? Thank you....:)
-
Hey magicians, I was following Pizola's guided sim tutorial, and I don't know why my pieces are not falling down. The ghosted box is used as a guide velocity. I have uploaded the file here... Another problem is that small pieces are sticking to the surface area. Playblast1.mp4 GuidedRBD_Upload.hip
-
2025-03-1422-12-16.mp4.e555422f6dfe2821d968424cac091851.mp4 I have been looking for this tutorial, does anyone know who makes it? John Kunz? It explains how they added ripples post sim. If you know the tutorial please send me! Thanks
-
opinput path expressions in Solaris?
PixelNinja replied to GlennimusPrime's topic in Lighting & Rendering + Solaris!
lopinputprims('.', 0) -
I remember there was a tutorial on this. Do you have the link to the artist that originally posted this? Thanks
-
 I remember there was a tutorial on this. Do you have the link to the artist that originally posted this? Thanks
 -
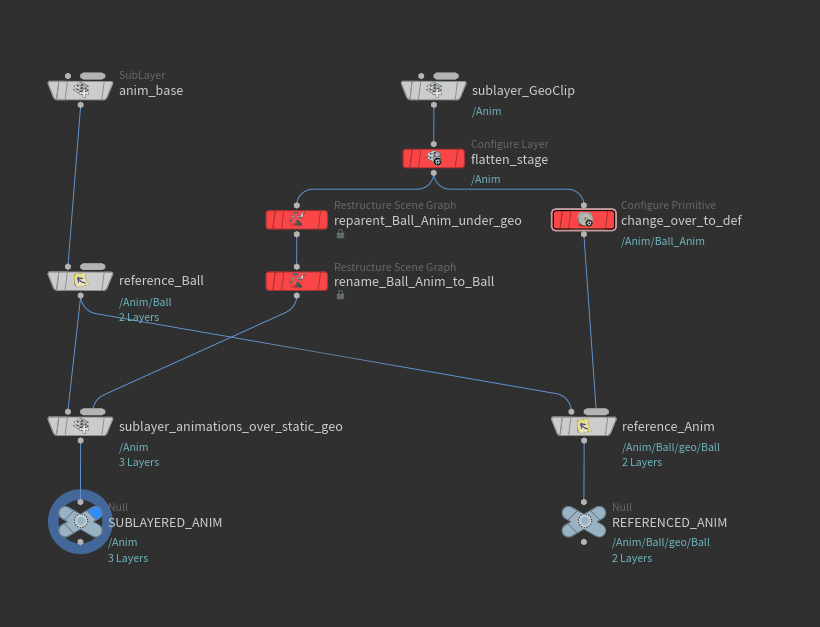
I don't know your pipeline so I can only comment on why your scenefile doesn't currently work. If you're intent is to sublayer deforming meshes over static meshes then your deforming meshes layer must be authored such that the mesh prims are in the correct place. Your scene attempts to sublayer /Anim/Ball_Anim over /Anim/Ball/geo/Ball, so it won't work. You could reference the deformation onto /Anim/Ball/geo/Ball but your deformation layer has /Anim/Ball_Anim specified as an "over" not a "define" so that won't work either. Essentially you need to reauthor your GeoClip layer. The red nodes in the image here are what I needed to do to make it work. My recommendation would be to either author your deforming mesh with a heirarchy that matches your asset (/Ball/geo/Ball) or your shot (/Anim/Ball/geo/Ball). In the former case you can sublayer the animation over the asset and then reference the animating asset into the shot. In the latter case you can simply sublayer the animation over the shot. Hope that helps. As a side note, I try to avoid sublayering after referencing as it leads to more layers on disk than necessary. If you look at the layers panel, every time you end up with an implicit layer sandwiched between explicit or "don't save" layers you'll end up with an extra layer needing to be saved. So try to order things to keep implicit layers together at the top of the stack so they nicely collaspe into a single work layer when you export.
-
For anyone else stumbling on this years later I had the same issue today. If you have your Karma render settings "Velocity Blur" parameter set to "Velocity Blur" or "Accelleration Blur" it won't render any Deformation Blur unless you set your deforming mesh prim to "No Velocity Blur" with a Render Geometry Settings LOP.
- 1 reply
-
- 1
-