Search the Community
Showing results for tags 'houdini 16'.
Found 19 results
-
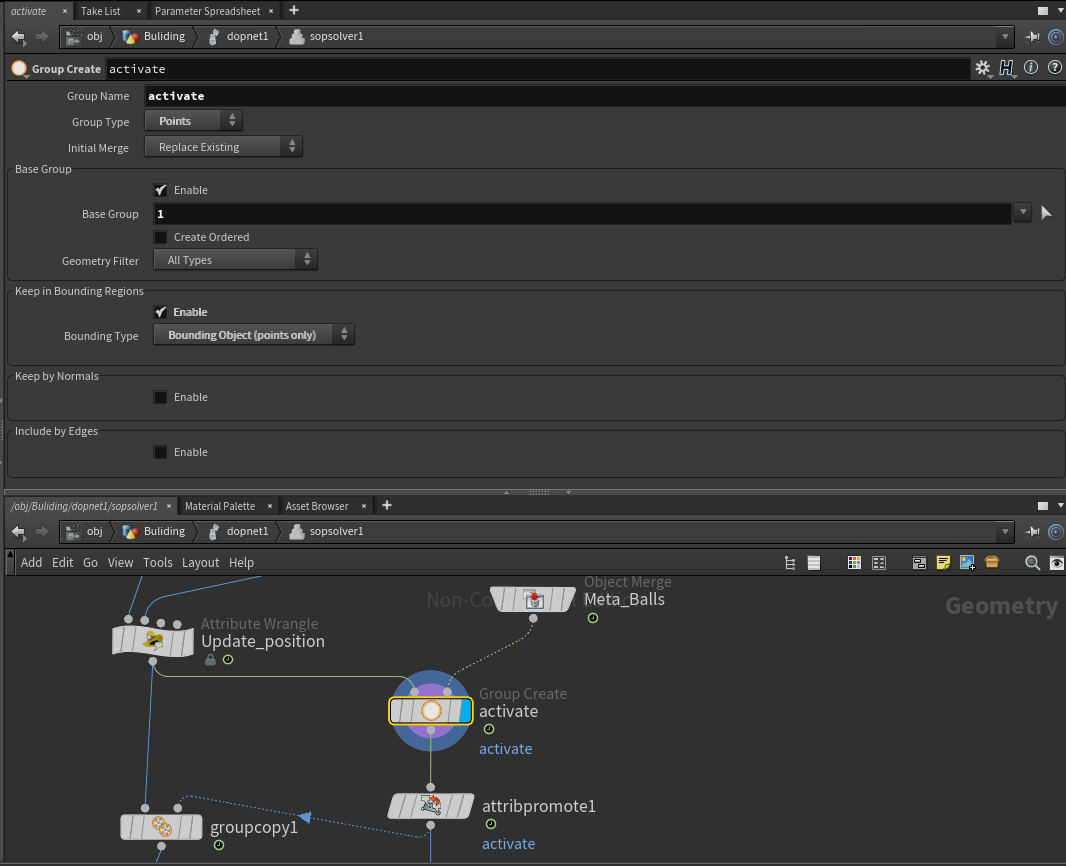
Hi, i am following Steven Knipping Houdini rigid 2. I install the Houdini 16 apprentice version and I am stuck with the group node. In the video, Steven creates point group and the convert those point into primitive by group node. but when i use the group node its not creating any group. and when i try with a sphere it working out. There is no tab to convert point to primitive. I try with attribute promote but still getting error. it will be very helpful if someone can explain me the new group node in Houdini 16.
-
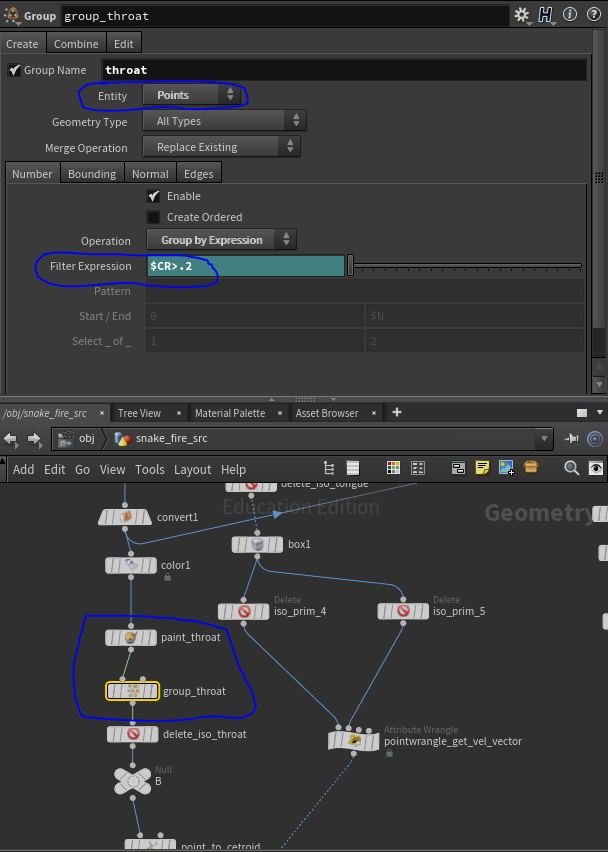
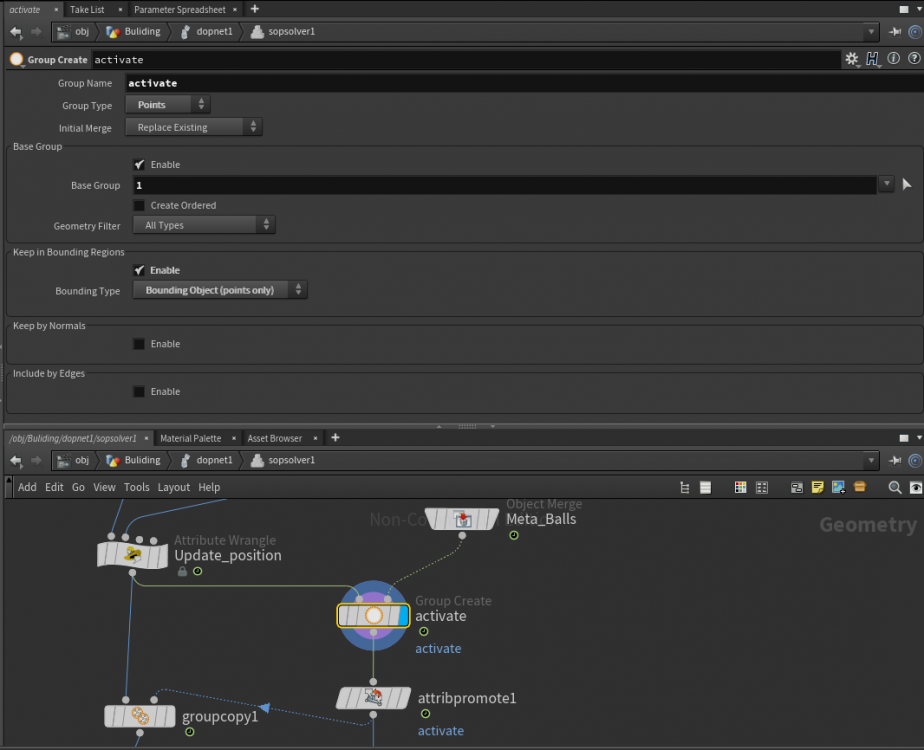
 Hi everyone, I'm following a Houdini 15 tutorial and i'm using Houdini 16. Seeings as the group node has been changed in H16 i'm having trouble getting the same results. The tutorial uses a paint node to highlight a section of geometry and then uses H15's group node to select the painted geo. It then makes that selection into points and enters the expression “$CR>.2” into the filter expression box. Does anyone know how to replicate this in H16 with the new group nodes? I've included a screen shot of the tutorial for reference. Any help is really appreciated. Chris
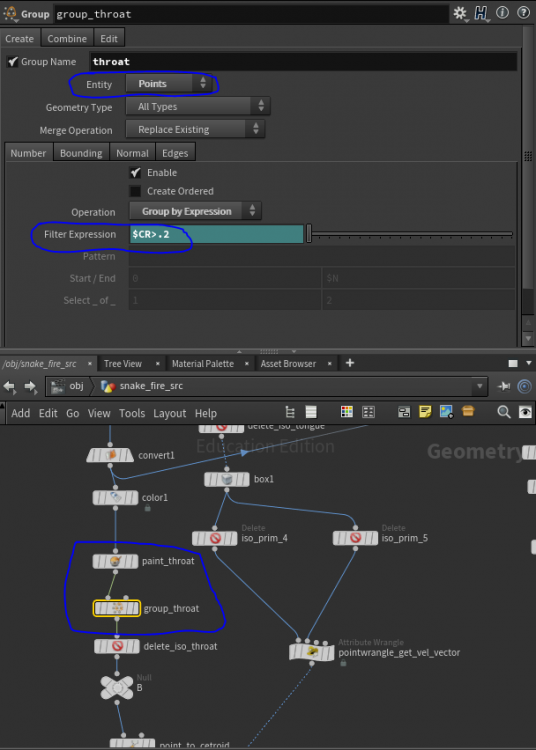
-
 Hi Guys, Spent nearly 3 hours looking for the simplest of things. I just want to to find a way to parent a cameras target point to a null so I can rotate the null (lets say placed in the center of the dancer) and have the camera rotate around her with a locked point of view. I tried the look at in the constraints to parent but it won't work with rotation at all - only position. Any help is appreciated! Thanks! Matt
-
 Hi everyone, I'm trying to do a school of fish with a particle system that would follow a curve. Basically I'm emitting some particles and they move along a curve with a popcurveforce. By default the particles orientation seem to go along with the curve but since I'm trying to do a school of fish, I would like my particles Z orientation to always be 0 so the fishes don't swim on the back. So far I've tried with this expression in a popwrangle : p@orient.z = 0; The thing is it seems to zero out the orientation of x and y as well.. And I still want the x and y to go along with the curve. I'v tried with a popattract instead of a popcurveforce and I'm still not able to constraint the Z orient.. Maybe it has to do with something else than the @orient attribute since I don't see it in my geometry spreadsheet..? There's something I don't get! (Needless to say that I'm new in Houdini :P) Thanks a lot! test_fish_school.hiplc
 -

wood fracture Wood like voronoi fracture. Need help
XanaduArt posted a topic in General Houdini Questions
I'm learning Voronoi fracture these days. And I'm doing a wood-like fracture test tonight. But I can't do pinning the RBD fracture object to the ground and glued them together at the same time. My RBD fracture object starts jittering and fall down when I use the Glue adjacent shelf tool to glue them together. Very appreciated that you guys can share some ideas on how to do that. Thank you very much. Have a nice day. wood fracture.hipnc -
 Hello, Houdini wizards! In Houdini 16, I'm trying to merge my FLIP sim with the ocean surface, but i'm stuck with the workflow. It seems like in the newer version of houdini 16+, save_spectra has "replaced" "ocean render". With houdini 15, all you had to do was connect the core fluid to ocean preview AND ocean render, and then use the fetch node and point to the ocean render displacement location. However, in Houdini 16, due to the different nodes for the "small wave", i am experiencing lots of problems creating the displacement maps. My viewport which shows the FLIP sim and the ocean waves is completely different to my render window! 1) What i did was that i saved the output file in "Save spectra" node. 2) The fetch export node is already sourcing from save_spectra. 3) Mantra node connected to fetch export spectra. 4) Created and locked the camera to perspective view. Now when i render, its only rendering the small ocean waves, and completely ignores my FLIP sim. What am i doing wrong?? Can someone save me? Thanks!
 -
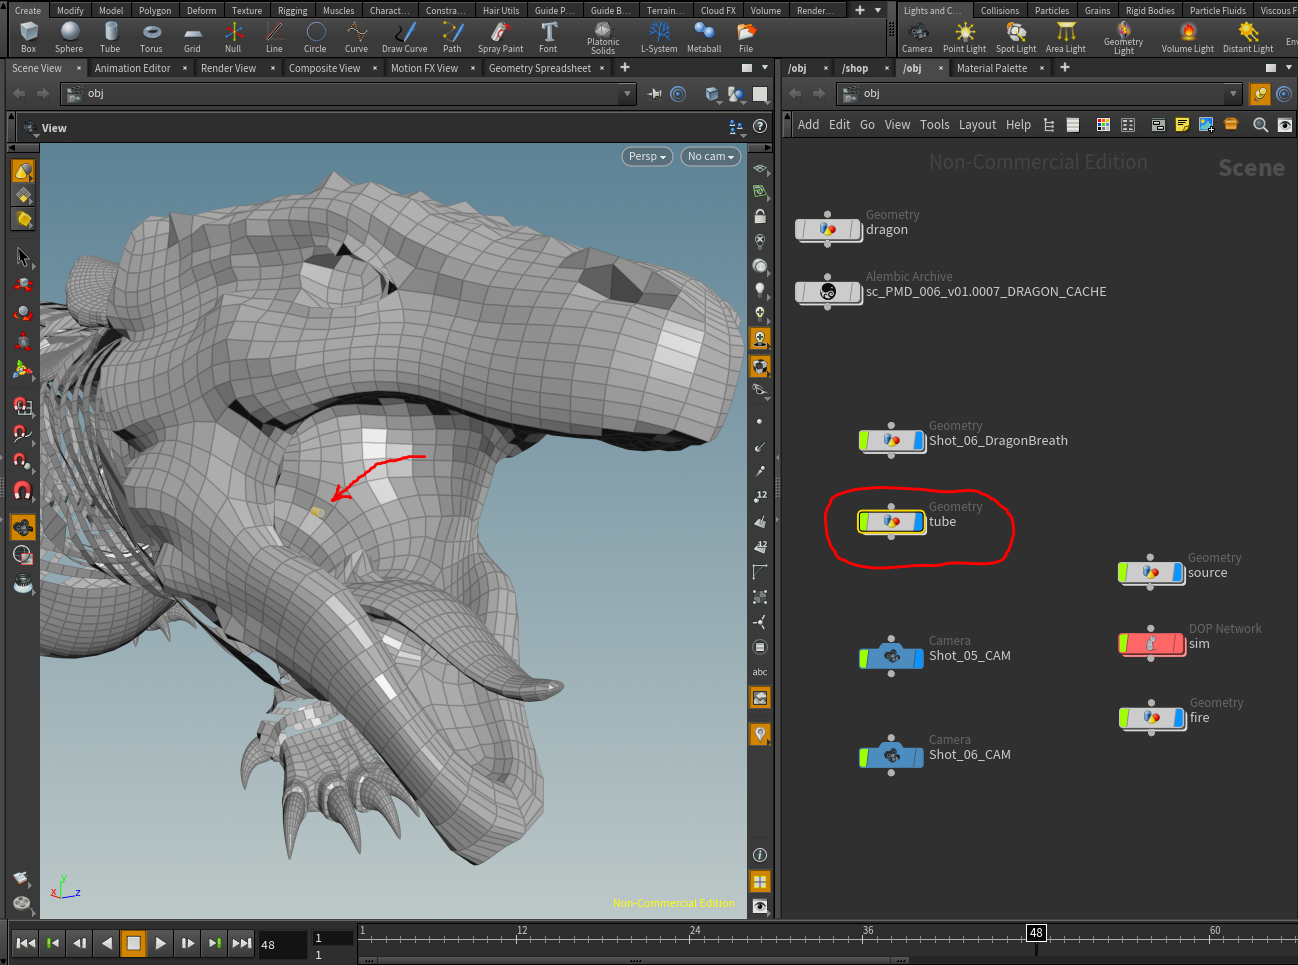
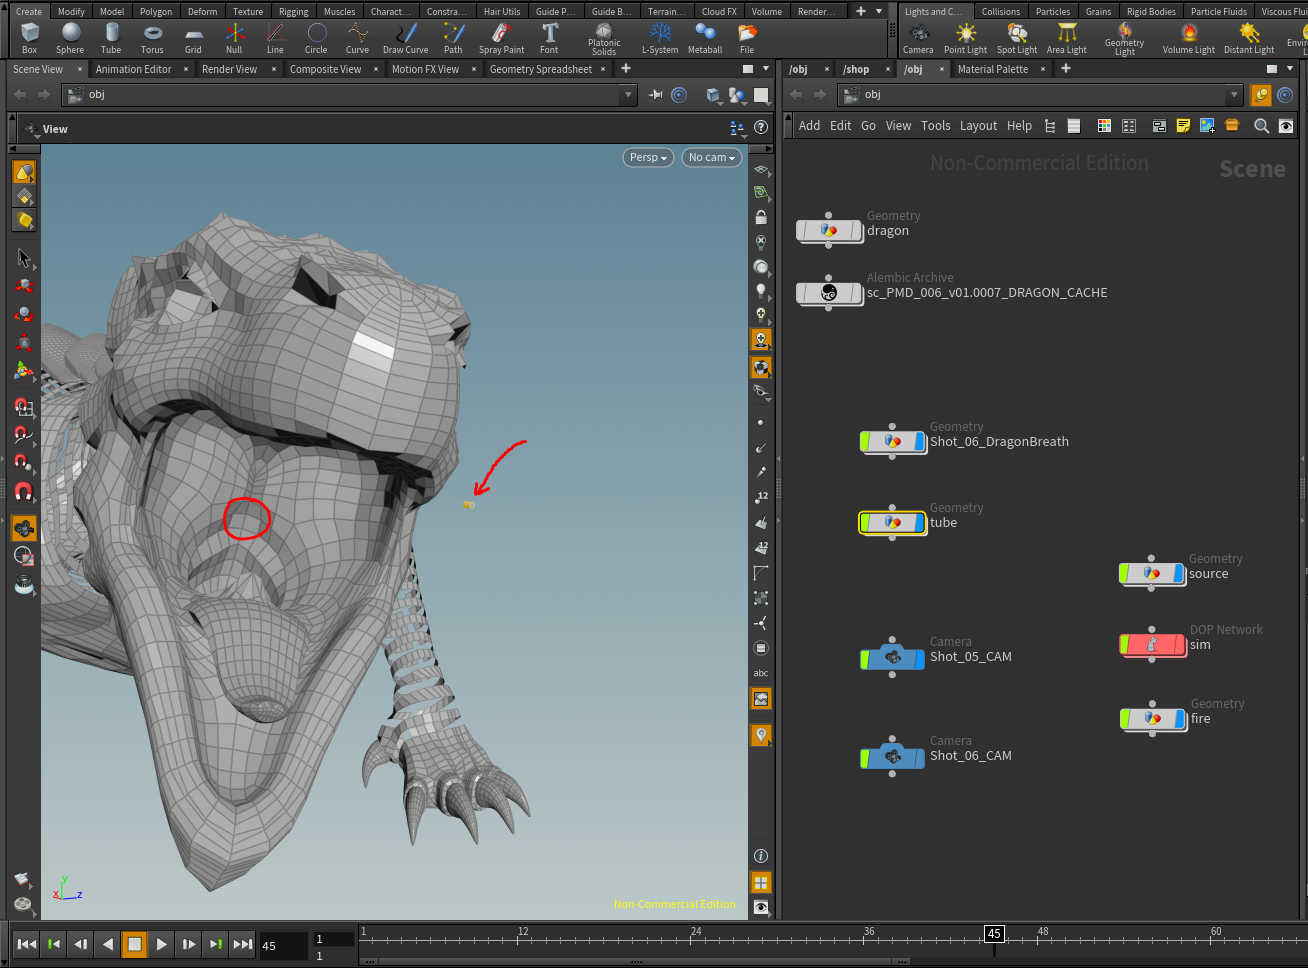
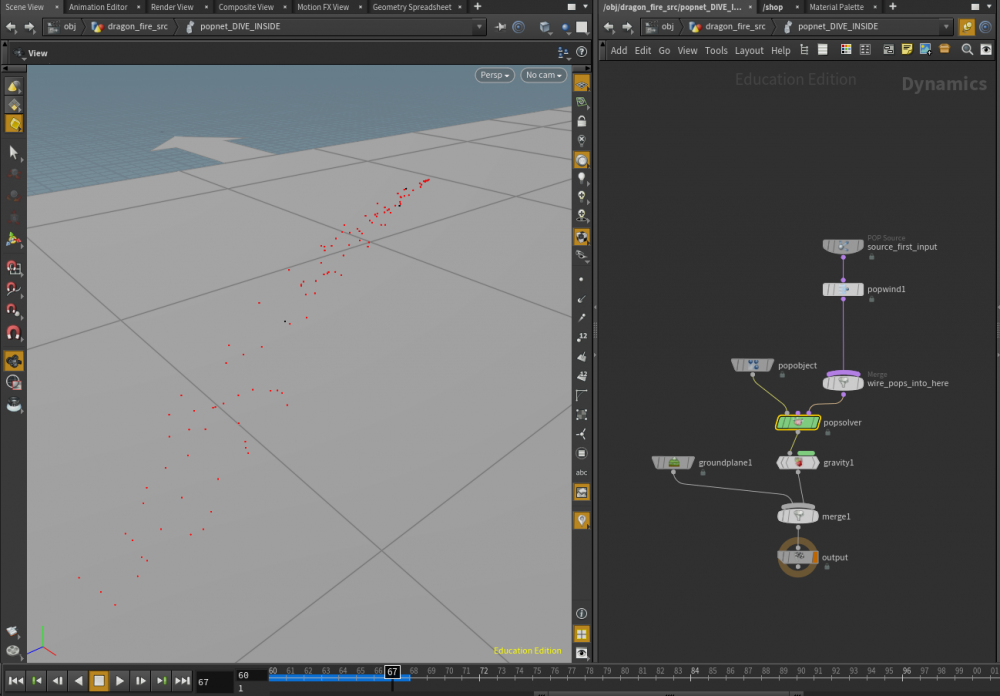
Hi everyone, I'm using Houdini 16 and I'm trying to parent a tube to the inside of the mouth of a dragon character that is animated. My goal is for the dragon to breath fire and I want to use the tube as an emission source object. I've parented the dragon and tube together but I need the tube locked onto the dragon's mouth. At the moment when the dragon moves it head, the tube isn't animated with it. I need the tube to inherit the animation of the dragon's mouth. Does anyone have any suggestions for how to achieve this? I'm guessing I need to constrain the tube to a section of the mouth? Thanks in advance, Chris (AUS)

-
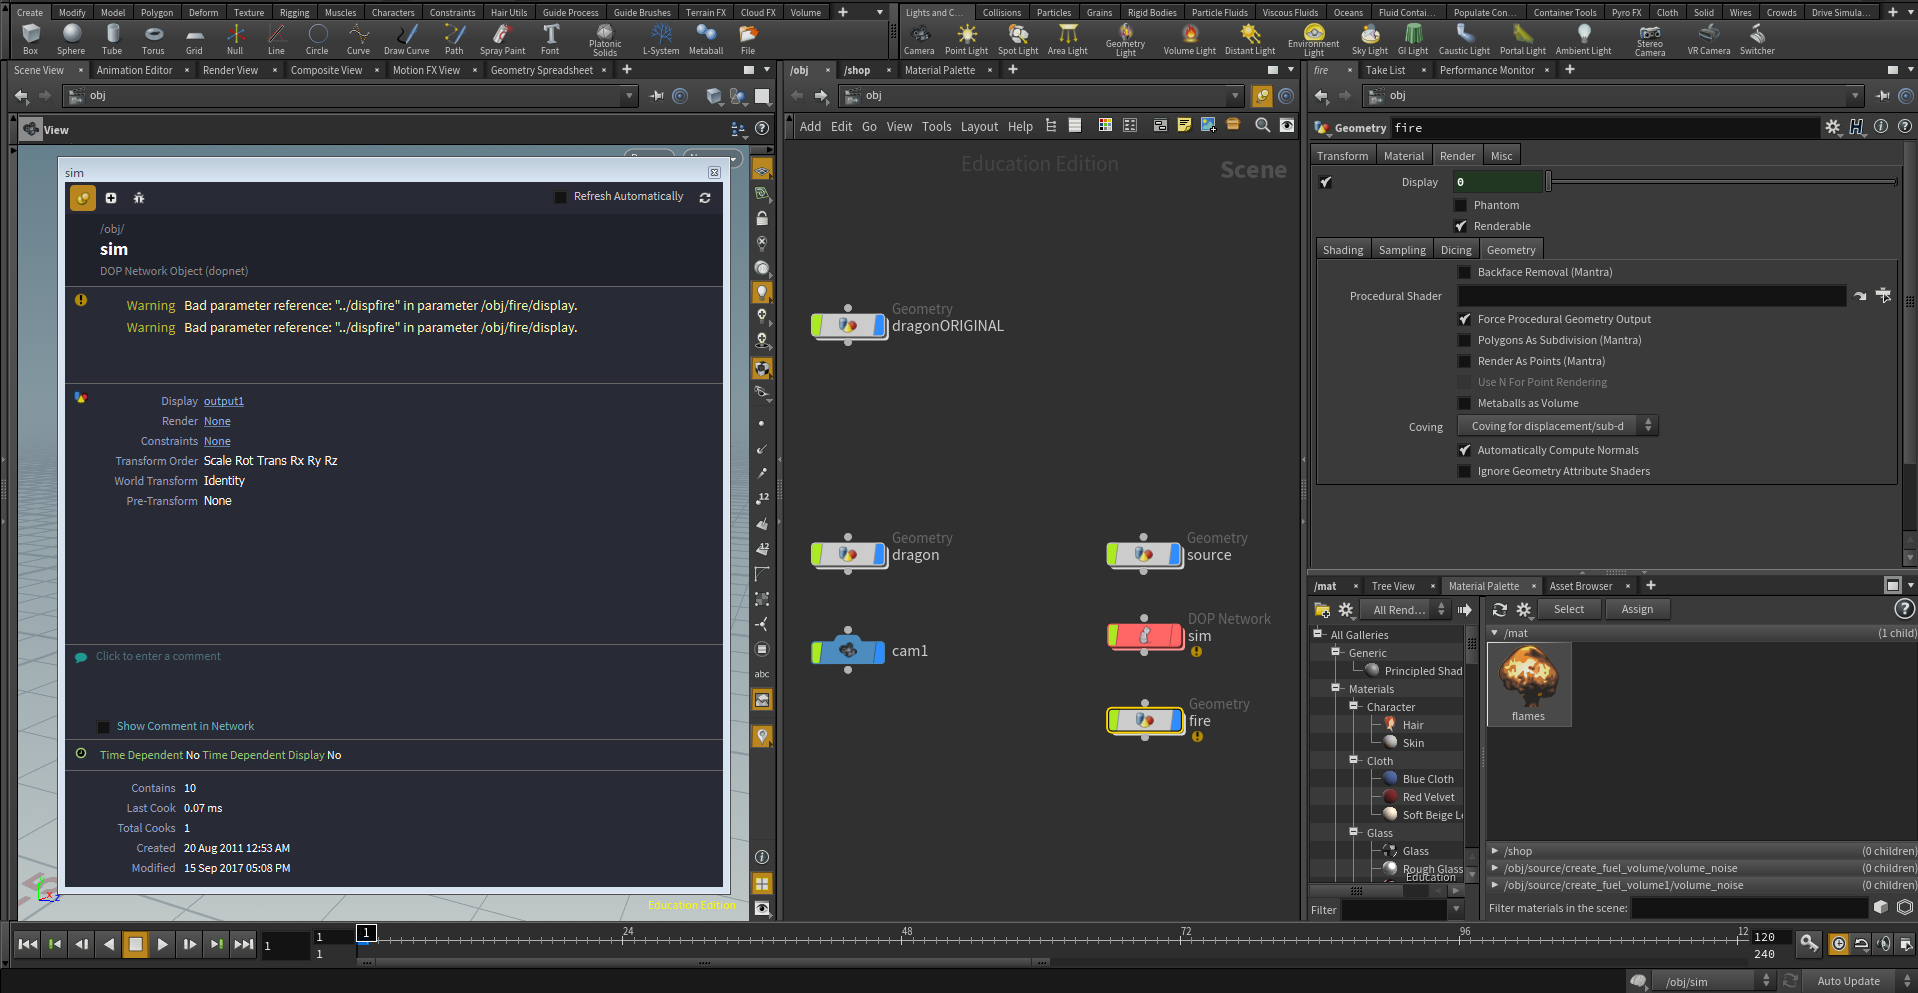
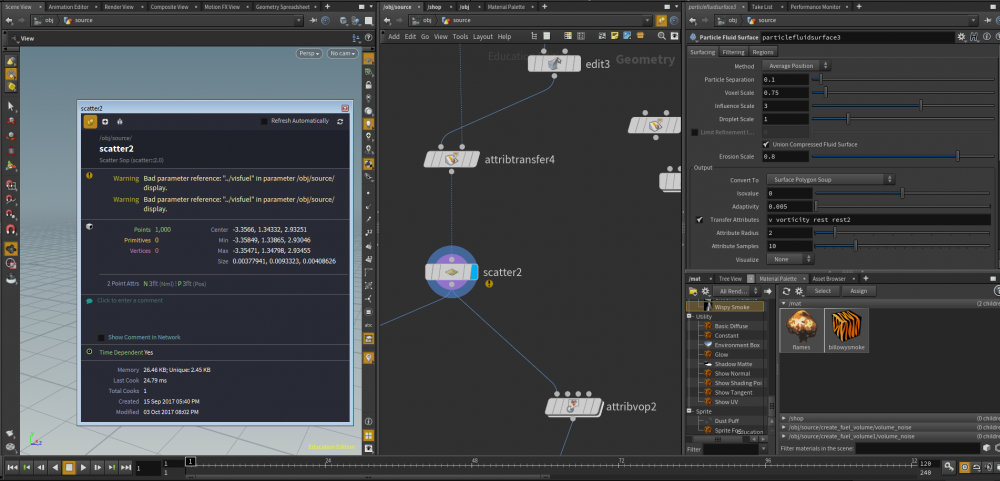
Hey everyone, I'm working on a Houdini 14 scene that I've opened in Houdini 16. I'm slowly converting the node network over to the latest versions and I'm getting "bad parameter reference" errors on a lot of the nodes. It's popping up on both the old and the new nodes. Does anyone have experience with this type of error and how to resolve it? I've tried googling and looking around for similar issues online and I havn't had a lot of luck. Thanks! Chris (AUS)

-
Hey all, Im trying to get a peeling effect on an arm for a shot I was asked to work on at school. I looked all around and found some different techniques to use but when set up completely nothing works, if anyone has any idea if some attributes changed in H16 or can look through the Hip and tell me what I'm doing wrong that would be fantastic. shot_48_02.hipnc
-
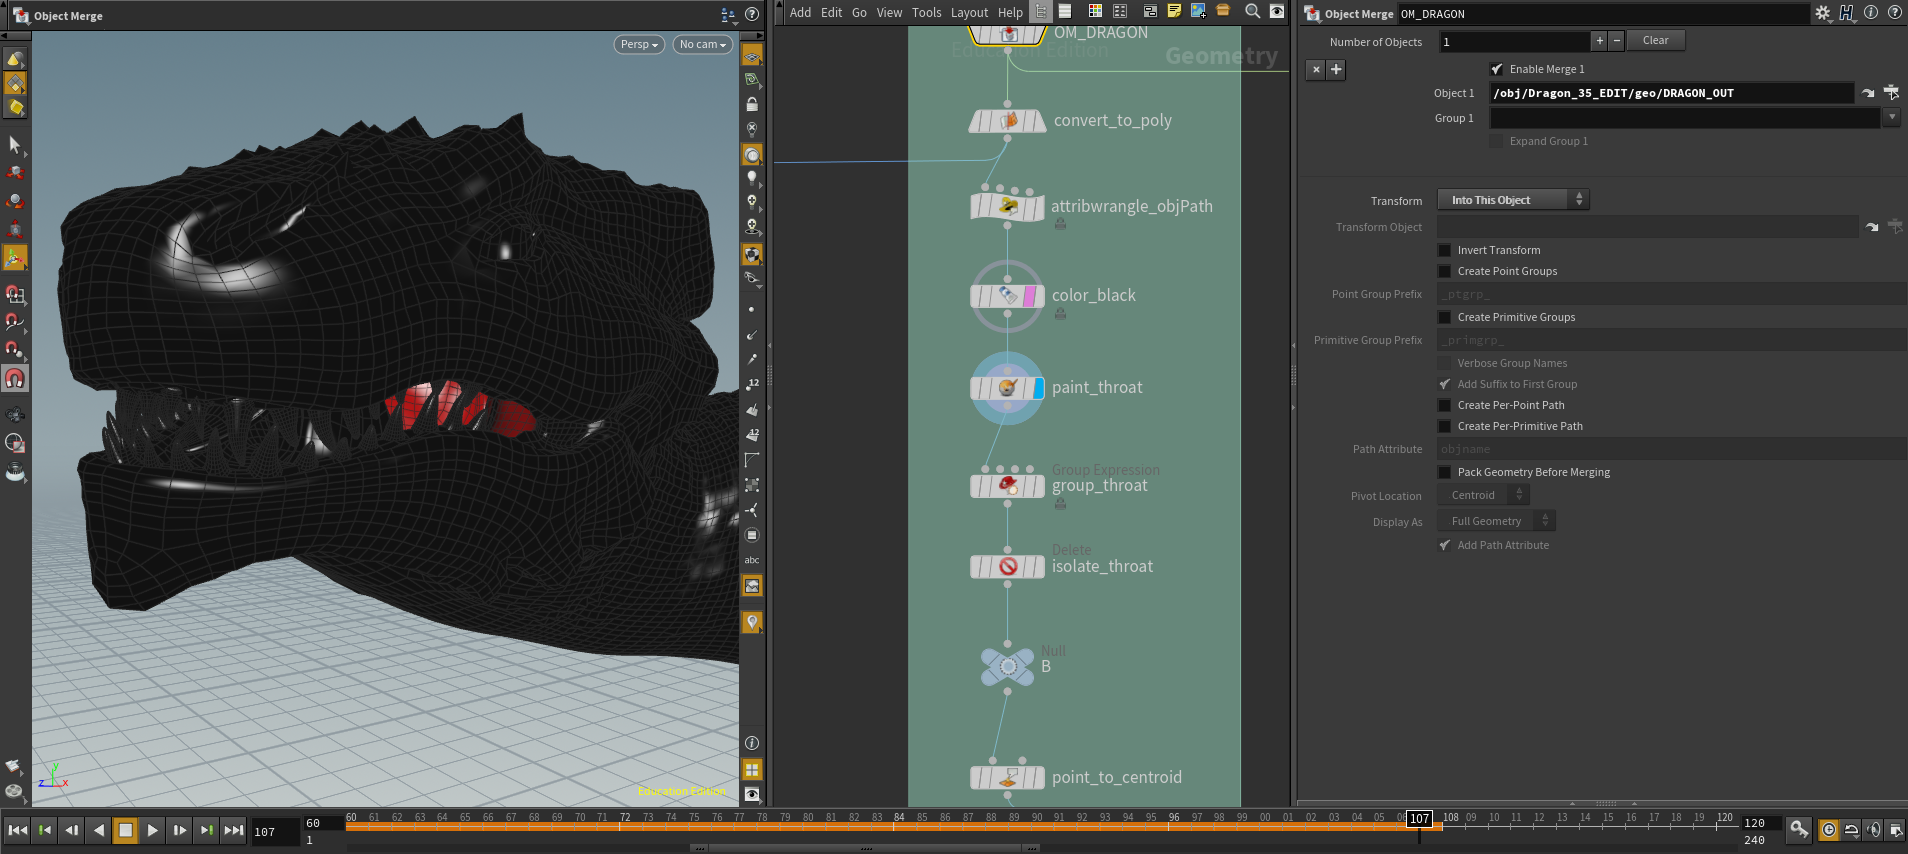
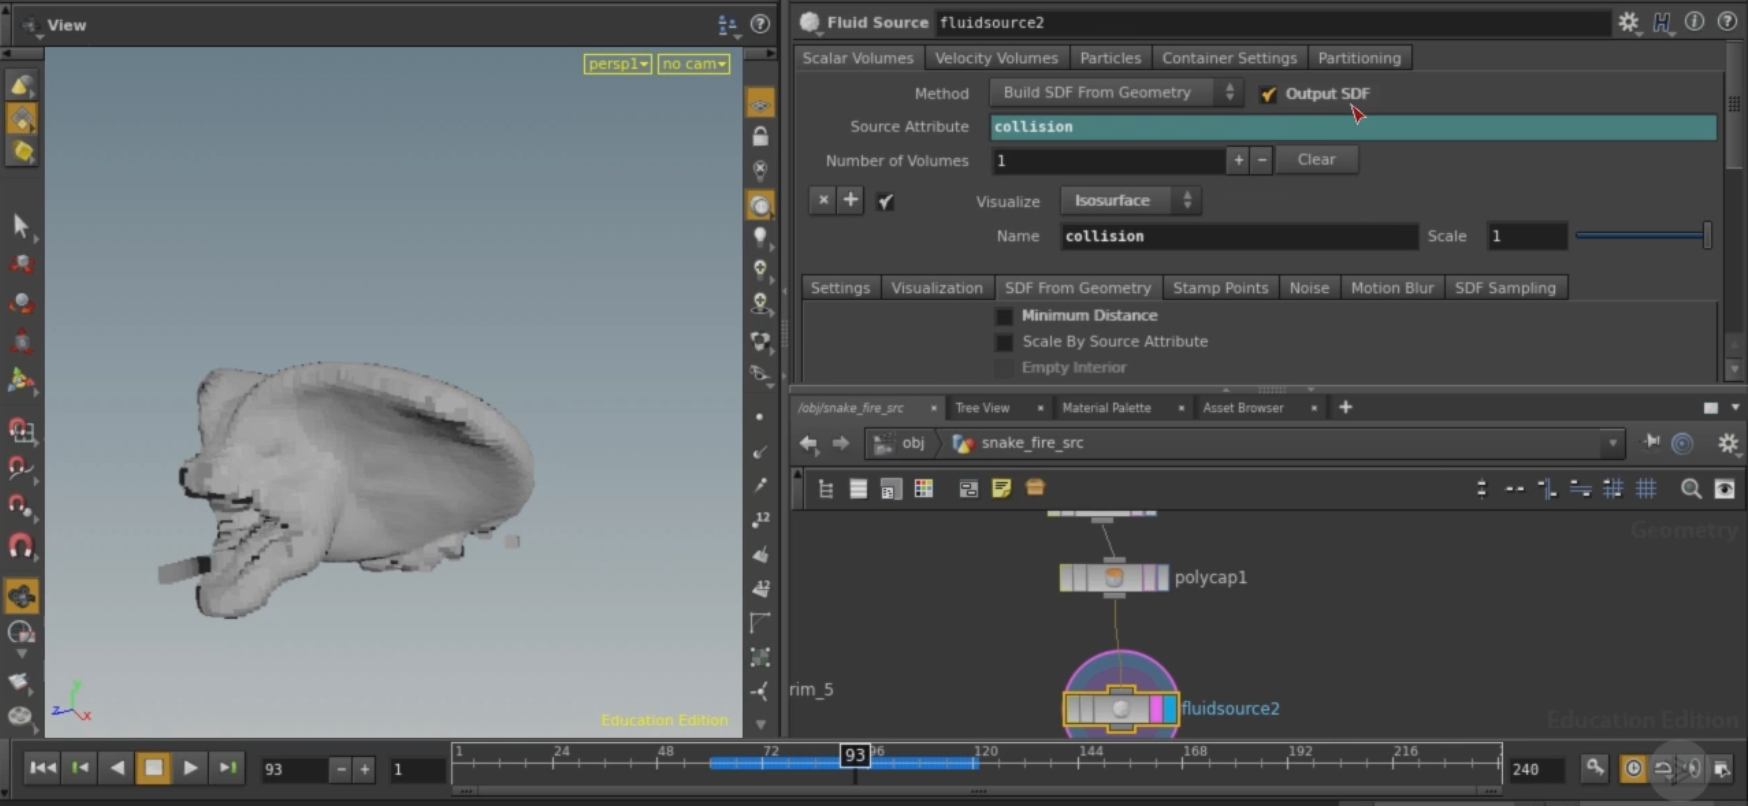
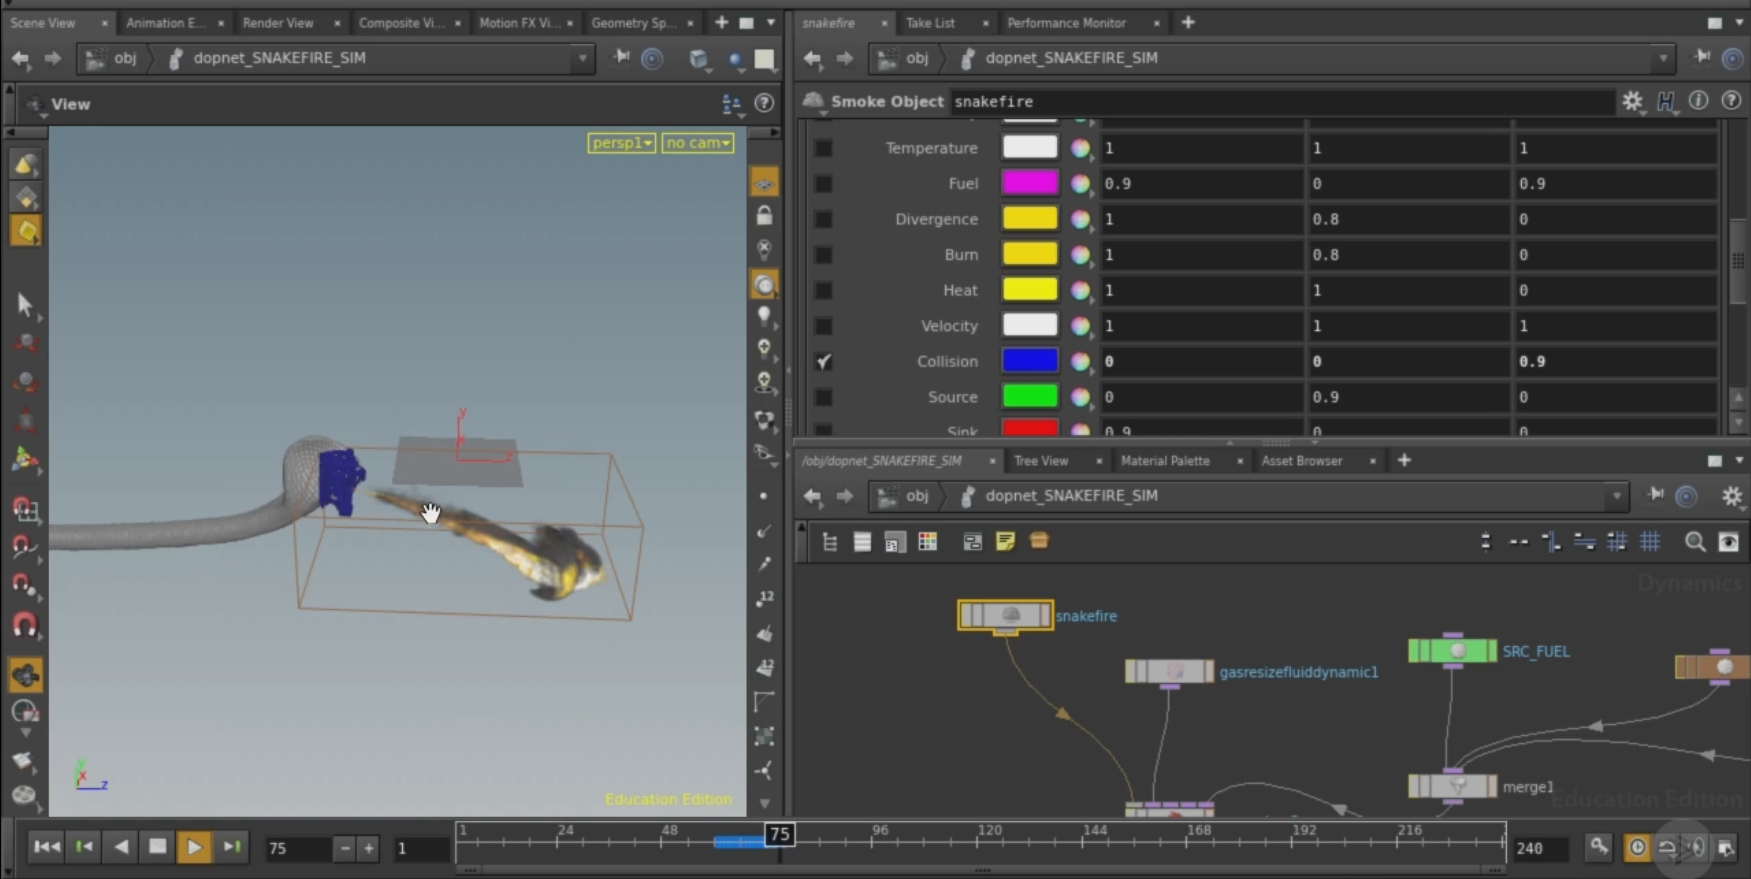
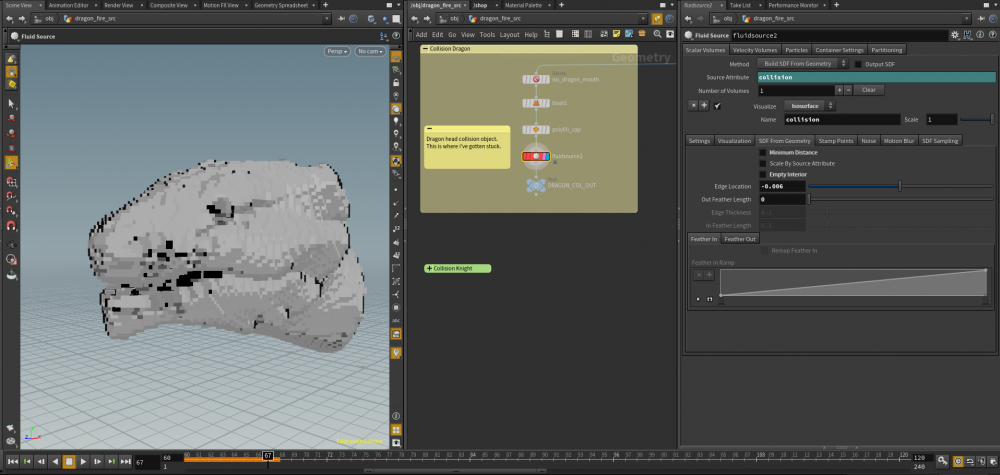
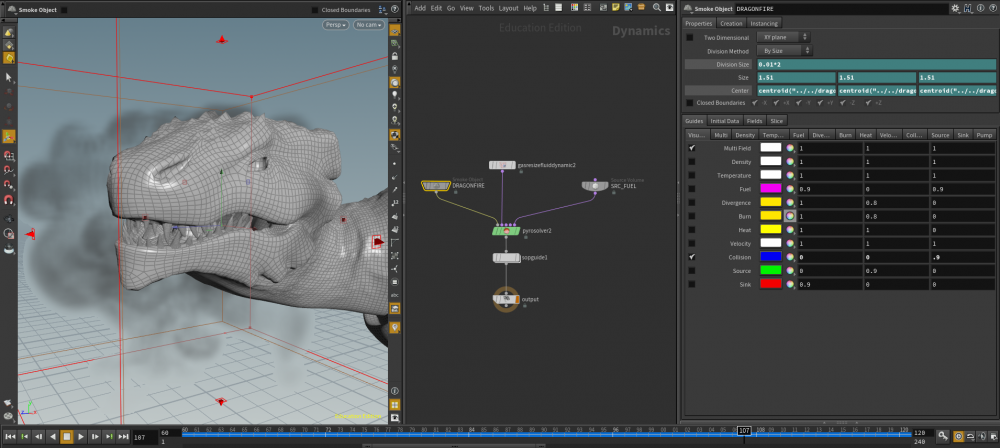
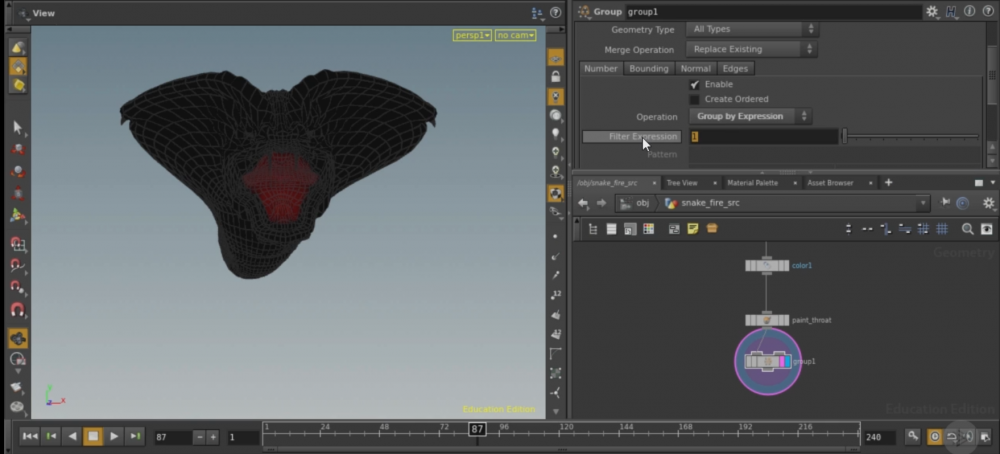
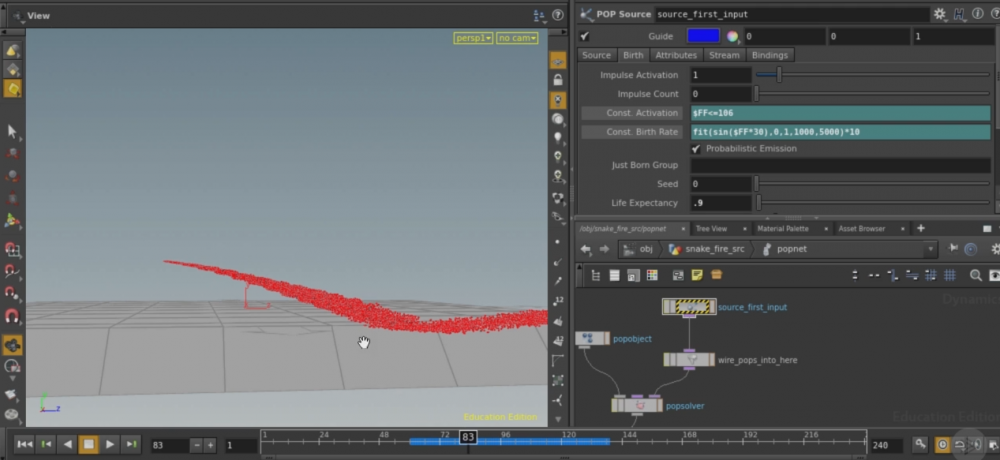
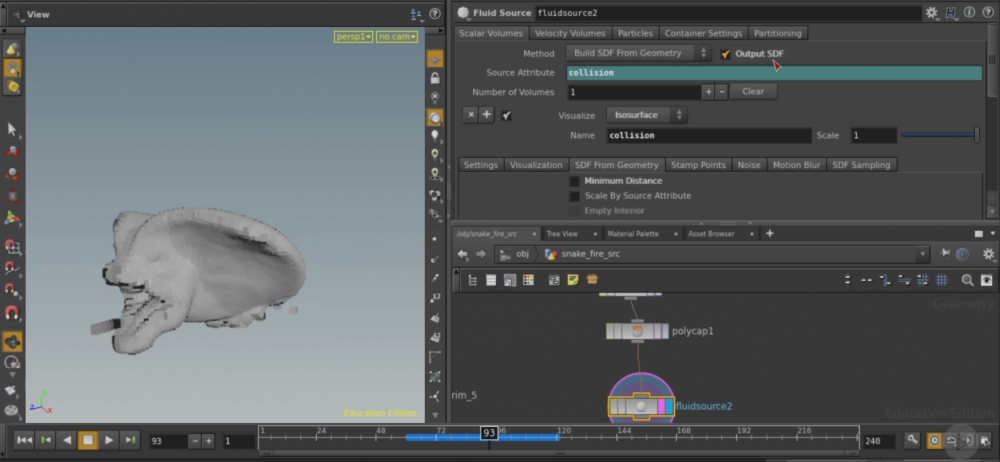
Hi again everyone, I'm working through a Pluralsight tutorial (Introduction to Houdini Pyro) for developing a firebreath sim. It was made in Houdini 15 and I only have access to Houdini 16. I've been running into some issues related to the different versions. One of my main problems at the moment is my pyro sim isn't colliding with the dragon geometry that I need to be using in my current project; there are some minor differences in settings as I need a much smaller flame with a different look, but otherwise I'm following the tutorial's steps closely. The POP network that the fluidsource is plugged into doesn't register that the dragon's head is a collision object. The tutorial doesn't do anything specific to make the two interact and their example works fine but mine doesn't collide at all. Has anyone done this tutorial series before and had success with this previously? Or are there any Houdini wizards out there who could take a look at my .hip file and suggest where I'm going astray? I've included some screen shots from the tutorial (Snake) and then from my file (Dragon), to give you an idea of what I'm working with. There's also the tutorial's .hip file, my current .hip file, and a link to the dragon geo alembic file included below. Any help or suggestions is greatly appreciated! https://drive.google.com/open?id=0B4nUEqhUvCtpeVFBS0xTYVhRY0U (Dragon Alembic) Thanks again ODFORCE, Chris (AUS) Mother_Dragon001.hipnc Snake_Tutorial.hipnc


-
Hello! When I make a smoke trail, it makes several containers for the same smoke. This is something I love when I make the simulation. But when I export it to VDB and try to render it, it only renders a black cube. I discovered that it was because the simulation had several containers because when I filter it with a Blast and choose only one containers, I avoid this problem. Would there be a way to merge all containers into one? Thank you!
-
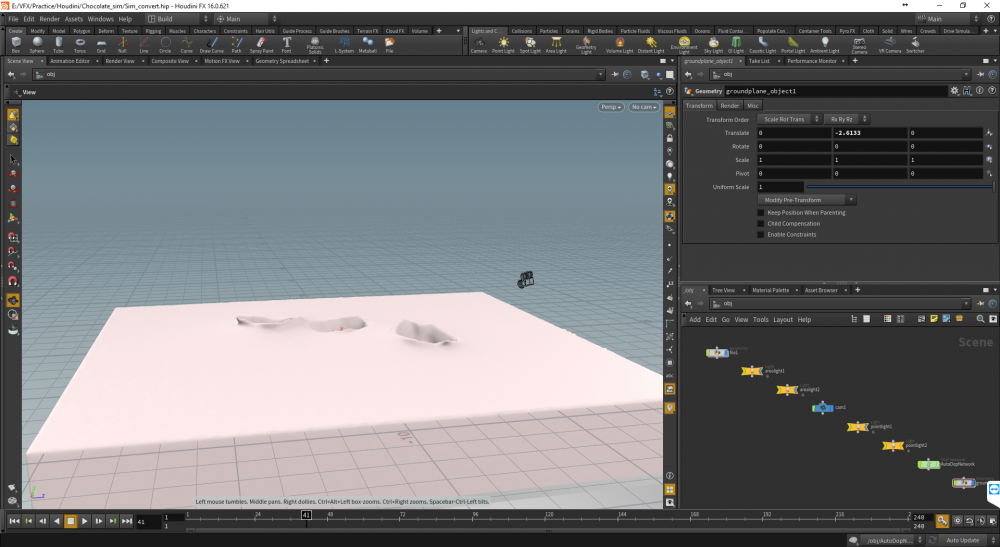
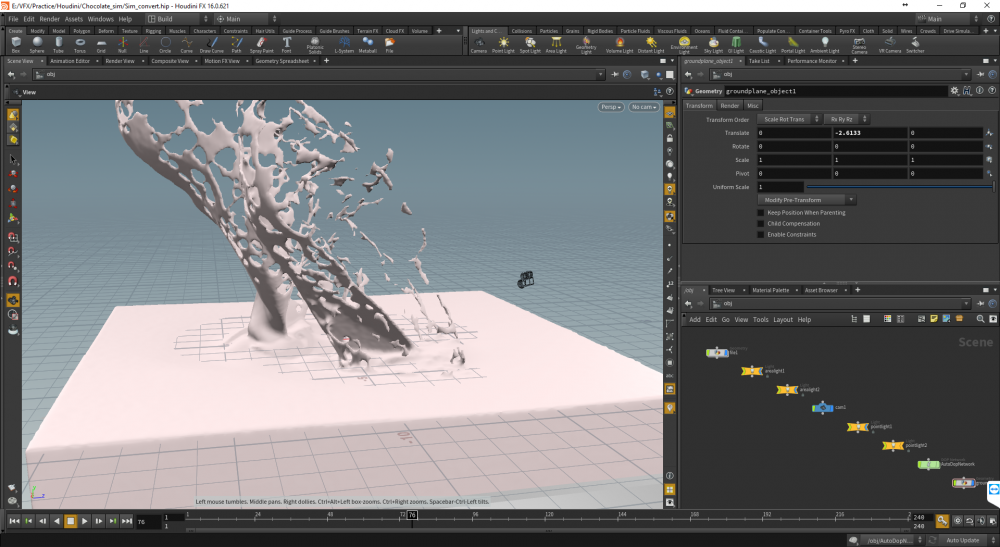
i have a problem with the splash that comes from collision object into the flip fluid ,i created a flat tank and i imported a strawberry obj and make it to Hero RBD with volume collision , bu tas you see the splash is too weak and the feedback of the fluid jumping after the collision is too high, and i got tired trying to solve it to look realistic particle separation : 0.045 = almost 10 mil density of the fluid : 1100 collision feedback scale : 0 collision force scale : 1 viscosity of fluid: 35 surface extrapolation: 0.001 velocity transfer: swirly kernal surface tension: 10 vorticity : on preservation rate: 0.1 use friction and bounce in solver is off Dop SUbsteps : 2 falling strawberries density : 100 solver type = RBD Houdini version : 16.0.621 hip file included + obj strawberry will be thankful if anyone helped me reference splashes: in this video the reference for the jumping fluid after the collision in the youtube video ate the 0:17 just a simple splash close to crown splash Chocolate_sim.rar
-
 I have been playing around with Houdini for a few months now and have now got stuck into 16. As the title says, the new drip particle fluid node doesn't enable it to collide with the ground plane (see attached hip file) How can I make it collide? blood.hipnc
 -
Hi everyone ! I need help for a project that I need to finish before next week, I have created a crack propagation (with VDB) on a simple geometry in Houdini, but unfortunately when I play the animation of the alembic exported file in Maya it makes crash the application… A workflow is described by Wayne Hollingsworth from gnomon here https://www.youtube.com/watch?v=RHLDS3SrZfs&t=3025s between 1:02:50 and 1:05:00 but once in Maya he uses Vray proxy import instead standard import to keep UVs. I share with you my houdini file (hiplc, h16), the alembic file size generated in houdini is under 100Mo As I am pretty new to houdini there are maybe some mistakes, if you see something wrong or if you have an idea to solve the problem, tell me thank you very much ! Alexandre calcification_v2.hiplc

-
Hey all, can maybe someone give me an example of how the position pop node works? thanx!
-
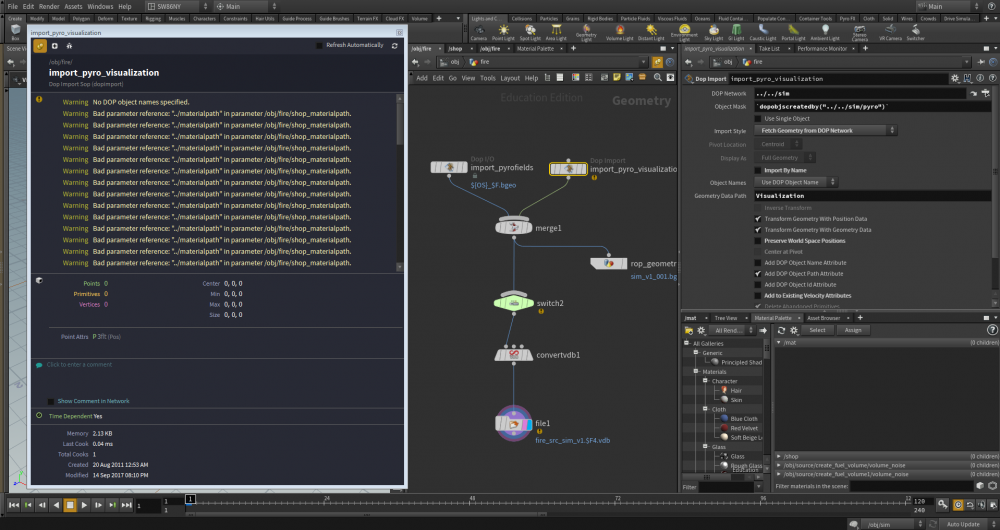
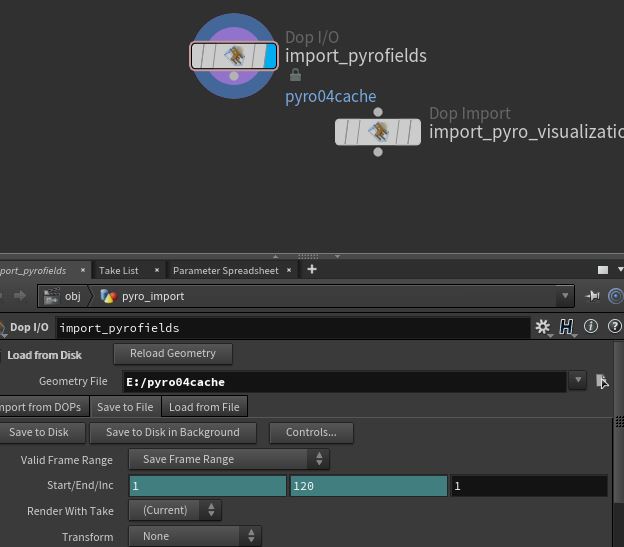
I run a pyro simulation (flames), using Houdini 16 non commercial, cached the sim (120 frames) using the import_pyrofields node (save to file->save to disk). I can see the cache in the hard disk 115MB file. But when I try to play in the sim after clicking load from disk, I hear a weird noise (this happened on two different days, the noise has to do playing the simulation), and the sim is completely frozen on the last frame I had played. Even if I go back to frame 1 you would see exactly what in the picture. Any idea what I may be doing wrong? After closing and reopening the file, I no longer hear the noise but the simulation is still frozen on the picture you see no matter what frame I move to.

-
 In Houdini 16, after watching new ocean tutorial from official website, I can not find option 'Bake All Displacements to One Layer' in Ocean Evaluate node, anyone knows?
 -
Hey everyone!I've been messing around with the new guided ocean layer approach in Houdini 16, but came to realize my simulation goes haywire when I lower the particle separation. Everything seems to be respected at a particle count of 740,000, but when I simulate 3,000,000 points the velocities go crazy and I get patches where particles disappear.I attached both flip-books to show what I'm talking about.Both files have the same parameters just a different particle separation. hi_res_sim.mp4 lo_res_sim.mp4
-
Hi, I'm fairly new to Houdini and was working on a fur simulation in Houdini 15.5. Changing to H16, a lot has changed in the hair and fur department and now I don't seem to get my simulations working anymore when using an alembic archive file. Tests with a sphere (which I animated with just a few keys to give it some movement) work perfect, giving it some short fur sticking on the spheres surface (without extra simulation), and some long hairs on which I used the "simulate" button. This test works fine and the long hairs move nicely with the movement of the sphere. (I'm rendering the hairs as points to give it a more experimental look) Using an alembic file (alembic archive) of an animated lion, the short hairs still stick to the surface and it moves along with the lion nicely (No extra simulation) , but when I create some long hairs and press the "simulate" button, it doesn't work. The hairs stay in the same place and I keep getting errors from my Hair_gen node : invalid bounding box. Since the setup for fur in H16 is totally different then in H15.5, (you don't need to set up your mesh as a rigid body and setup the collisions anymore since H16 does that apparently automatic with the "simulate" button ?), I don't know what to do. Any suggestions or tutorials on how to use the hair & fur on an animated file in Houdini 16 ?? Could the alembic archive node be also the cause of the problem? I use a geo node with an "object merge" to bring in the simulation from the alembic archive file.