Search the Community
Showing results for tags 'houdini 17'.
-
Hi there! After more time of working, testing, and, more long process, writing the documentation (help offline) I publish my new OTL for Houdini (17.5 and up) to create a dust/smoke FX generated from the contact between one or more geometry. The tool is inspired by another tool I did and used in production on some TV-Show for kids (check on my LinkedIn profile). In the last 4 months, I re-created, re-design, and fixed some problems from the old OTL for made a very stable and cool tool you can use for your FX and in more cases is "ready-out-the-box". It's a payment tool and if you buy the version for Houdini 17.5 I give you a free update for the next release with the sparse solver. buy now here https://gum.co/NVcJM If you follow me on Patreon you can take it for free. I'm working on the version with sparse solver, if you get it now you have the update for free. Thanks Matteo video
- 1 reply
-
- houdini 17
- pyrofx
-
(and 3 more)
Tagged with:
-
Hi Does anyone know good tutorials for learning Explosions? Thx in Regards Balaji J
-
Hi all So I have a question about the new versions of the For-Each node, particularly the Numbers one, I have been following a tutorial from Anastasia Opera, and during the tutorial she uses a For-Each subnetwork node now I understand what this node is doing collecting the data from the box_id, Anastasia also gave the node a stamp name which will be used a bit later on for a blast node to specifically target some points following the local path hence why the stamp name was given to the For-Each Subnetwork node in order to lead a path towards a node that contains specific points with a number that is less than 3 which I understand is the point number and can also see it infant of me.... but now here is where I get confused in the new version of Houdini 17 the Subnetwork node has been disabled and be re-enabled but instead I would like to understand what on earth is up with the new For-Each Numbers node, it has some weird dodgy layout that just throughs me right off!! I would not mind trying to re-create the tutorial using this new node but its proving to be a challenge as I have no idea where to place the nodes that help in set things up for procedural modelling which I have tried to place things in myself but ended up with nothing but more errors. if someone could please help that would really awesome and I would really appreciate it. Kindly Ahmet .B
-
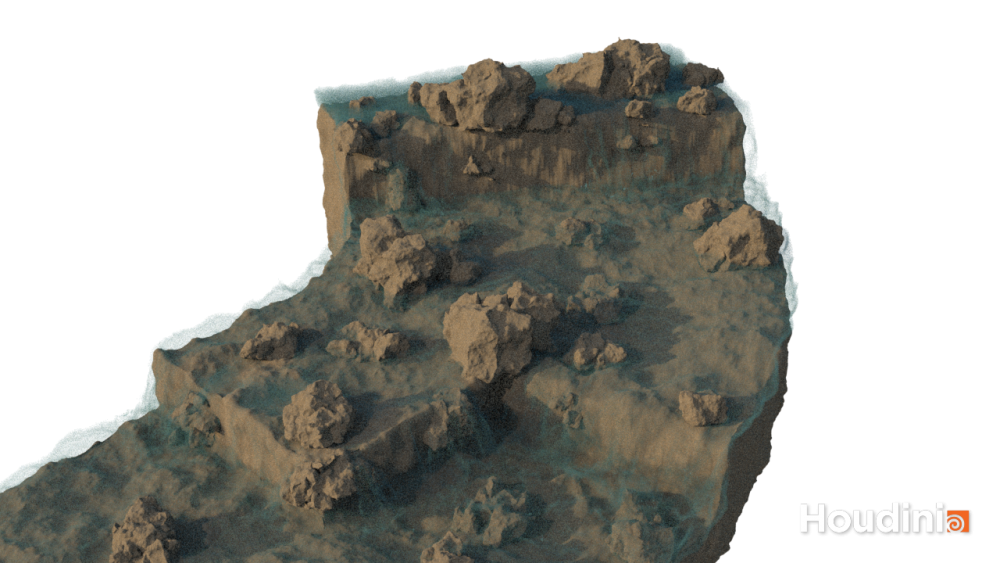
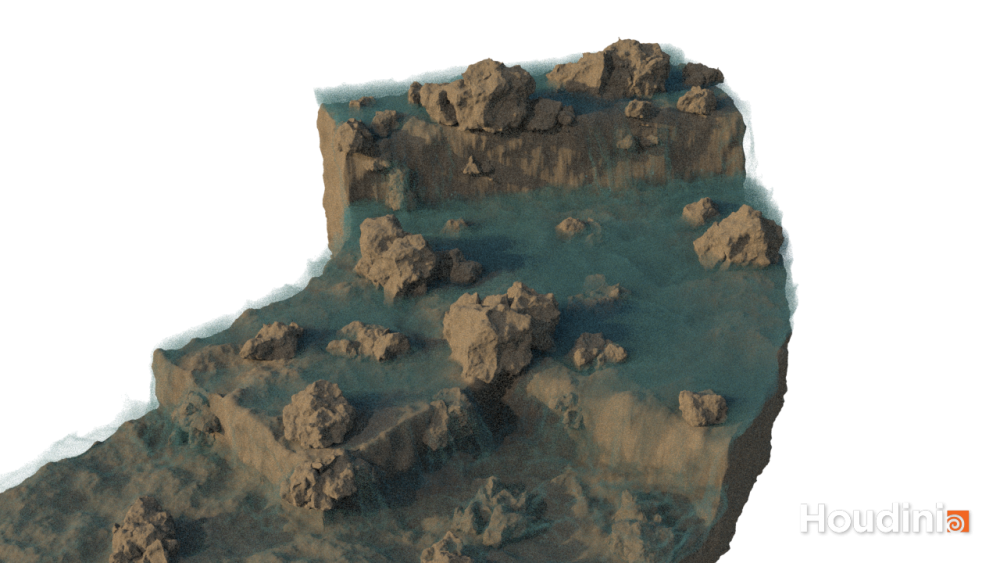
Hi there everyone. I am having a really strange issue with my river scene when I render it out. The reflective of the water seems to turn on and off randomly. I then did some further testing and found it to be the interior Volume giving me issues but this only happens in the center section of my River, the Top and bottom are not affected by this problem. Below I have two Images to show the result of the Volume issue which is consistante on these two Frames even if I re-cache the Sim Frame 350, the Volume in the center is really Thin. Frame 357, the volume is much Thicker in the center. Please check out the Link HERE for a low quality render with a few frames on Vimeo. Password : JodysFX I feel like there is a setting I am not turning on or a value thats two low. It might be in the Surfacing node but I am not sure, I will continue to test. Any help is greatly appreciated.
- 7 replies
-
- houdini 17
- mantra
-
(and 7 more)
Tagged with:
-
Hi all, I am having some issues with following along with a tutorial in which the person teaching is using Houdini 14, so the Foreach loop and Voronoi are different, I managed to work out Voronoi in Houdini 17 as I have used it before except the Foreach loop nodes in which this case is nod usable due to Houdini 17 new node layout for the Foreach node. Instead I managed to do this in a hackey way and it worked. However I am trying to do this other trick where after applying a voronoi lets say to a cube, I want to be able to delete the outer rocks and keep the center rocks visible, also I managed to delete the outside of the voronoi'd box I am using, managing to delete the flat outer surface of the box and not necessarily the pieces them selves whilst retaining the center pieces. Any help would be well appreciated, I cant figure out how to go past this bit. I can share my save file if anyone would like to see it, and can include pictures, name of the tutorial etc.. Kind Regards Rusty.
- 1 reply
-
- rbd
- houdini 14
-
(and 1 more)
Tagged with:
-
Hi guys, I'm not quite sure if I'm doing something wrong here, but starting with houdini 17, whenever I'm using the surfaceexport-node to connect i.e. a classiccore I'm getting this warning: ‘Warning: /opt/hfs17.0/houdini/vex/include/physicalsss.h: Using uninitialized variable: nmax (247,26:29)’ - using computelighting doesn't yield that message… (tested under windows and Linux) Anyone else experiencing this? cheers, flo
-
I'm currently doing my FMP for University and will be working in a group of 4 to create an environment with a character asset and Waterfall/Lake FX asset within it. I will be solely responsible for creating the waterfall/lake but I'm currently unsure with which way i should approach the project. The Waterfall is going to be in the background cascading down some rocks into a lake in a cave however we will be creating the cave to real world scale which has caused problems when trying to set up emitters at such a large scale. I've attached some reference photos of what the waterfall is going to be based on as well as the initial proxy geometry created for my particles to flow over. I was just wondering if anyone here has any experience with a sim of this type/scale and could lend any advice on how they created it. Thanks RocksPrim.obj
-
Hello everyone! I am relatively new to Houdini, and I am having some difficulty figuring out how to use Houdini 17's crowd system. It's a bit different than 16.5, strange things are happening, and I am not sure why. I am using my own character models and rigs, and I am having difficulty getting my animation clips to play at the appropriate time I set in the "crowd_sim" transitions. My process is as follows: ⦁ Import each clip as a seperate FBX or Merge ⦁ Bake Agents ⦁ Go into agent node, ctrl click "Collision Layer" in "Crowds" dock ⦁ Add collision capsules for main bones ⦁ Put agent to "rest" pose when finished ⦁ With "Build Collision Layer" node selected, ctrl click "Configure Joints" in "Crowds" dock ⦁ Select Agent, click Populate ⦁ Select crowdsource, click simulate ⦁ Under crowd_sim, go to "crowdsource" (POP Source node) ⦁ Go to Attributes, set Inherited Velocity to 0 ⦁ Go into crowd simulation node, add transitions Any help or suggestions are needed and would be appreciated, thank you!
- 1 reply
-
- crowds
- crowd simulation
-
(and 1 more)
Tagged with:
-
Hello, I encounter major problems when exporting an alembic sequence from houdini 17 to maya 2018. I traced the problem down to the “build hierarchy from attribute” option combined with rendering frame ranges into an alembic-file. Attached is a test file, to rebuild/illustrate the problem: export an alembic file with build hierarchy from attribute “name” ON —> import in Maya causes crash or empty transform nodes, but the hierarchy would be there export an alembic file with build hierarchy from attribute “name” OFF —> import in Maya with animation works fine - except that I don’t get the correct hierarchy I’m aiming for. Is someone encountering the same behaviour and has a solution for that? Or is it only at my system/setup? I’m working with Houdini 17.0.352 and Maya 2018.5 (but it didn’t work in any maya version between 2017 and 2018.5) Any help would be appreciated. Thanks! Joko alembic_export_maya.hiplc
-
- maya 2018
- houdini 17
- (and 5 more)
-
Greetings! I'm working on a shot where I'm using a sphere to push a cloth through a hole in another object. Up to a point, the sphere acting as a collision object works great. However, the cloth slips off the sphere halfway through the sim. I was hoping I could animate an "Attach to Geometry" Vellum constraint to ensure the cloth sticks to the sphere after a certain period of time. I can't seem to figure out how to animate any constraint properties though. I'm doing it at the sop level using Houdini Apprentice 17.0.352, if that makes a difference. I tried making a simple scene with a grid and sphere through vellum constraints. The idea was to let the grid fall to the ground and animate the stiffness value on an "Attach to Geometry" to pick it back off the ground, but it doesn't work. I also tried the "Attach Frame" setting on the "Attach to Geometry" constraint, but that doesn't seem to do the trick either. Are Vellum properties set at the beginning of the sim and unable to be changed? Or is there some secret sauce I need to add? Do I need to do this in a DOP network or change values upstream in a wrangle? I can't seem to find anything but beginner Vellum materials online at the moment. Thanks! haveahapyday_vellum_animatedPropertiesTest.hipnc haveahapyday_vellum_clothHole.hipnc EDIT: Solved! Check Noobini's responses in this thread.
- 11 replies
-
- animated constraints
- vellum
-
(and 2 more)
Tagged with:
-
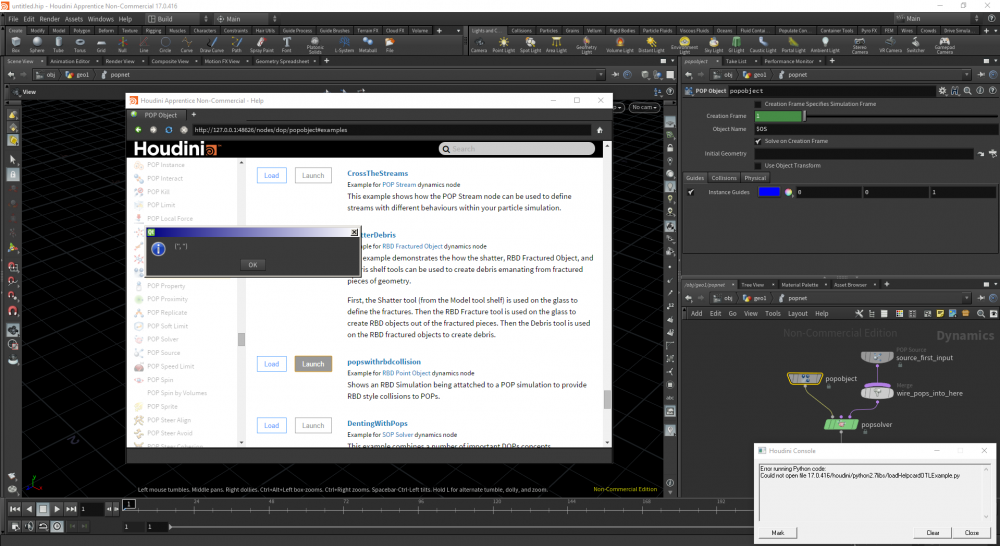
Hello, I'm trying to open a Houdini example file called "popswithrbdcollisions" and it shows me an error about python. Should I install python to run the example files? btw I have Houdini 17.0.416 Here's a screenshot with the problem: If anyone has a clue of why this happens, please comment! Thanks!
-
Hey OdForce! Lately I've been doing weekly quick-tips that I'd like to share with you all. Be sure to follow me on youtube & vimeo for new videos. Also, keep an eye out for my new course - Houdini For the Artist - Modeling I which I'll be finishing up shortly. Cheers,
- 2 replies
-
- 4
-

-

-
- simulation
- houdini 17
-
(and 1 more)
Tagged with:
-
Please, how is the best way to achieve the same result as in the file with a RBD SIM without particles? oddf.hipnc
-
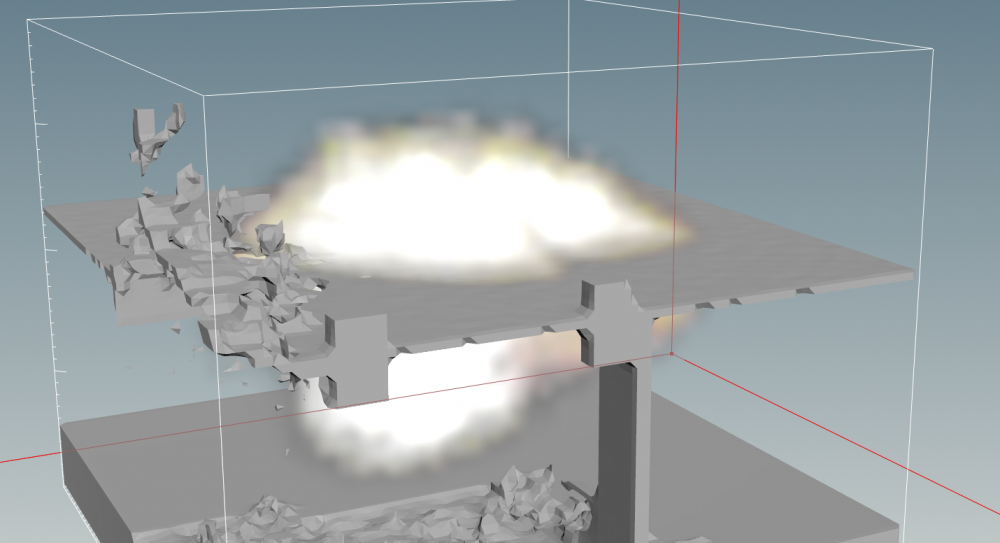
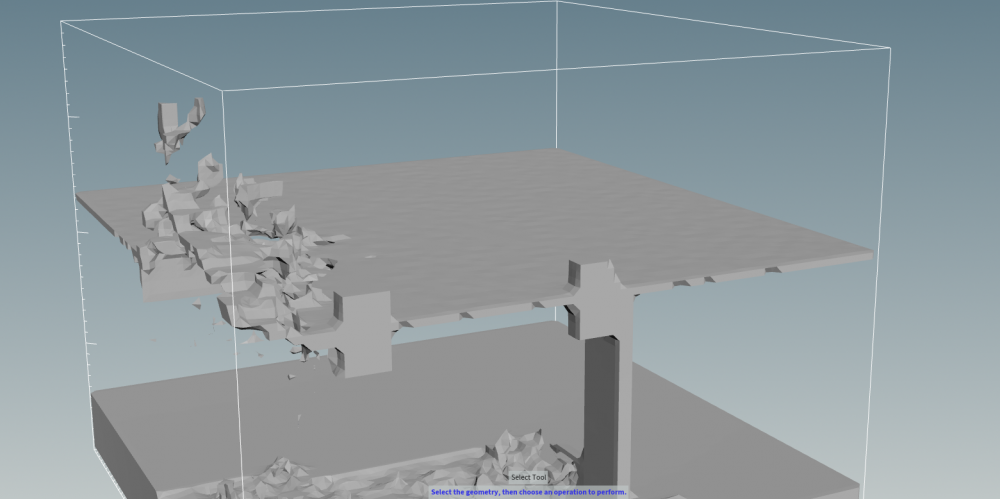
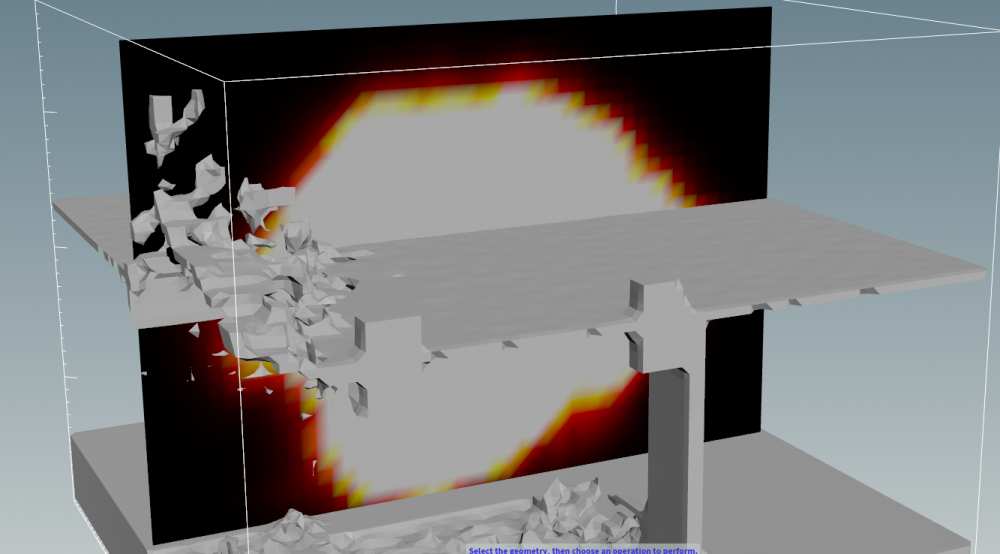
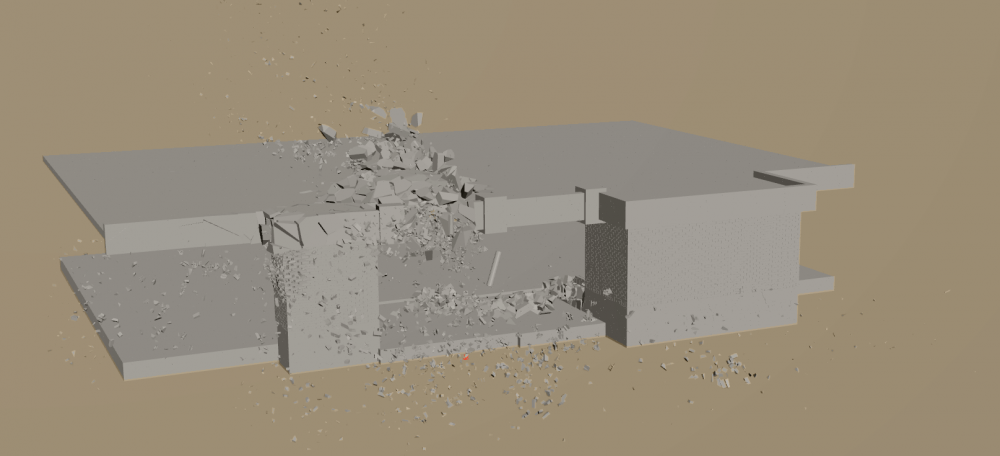
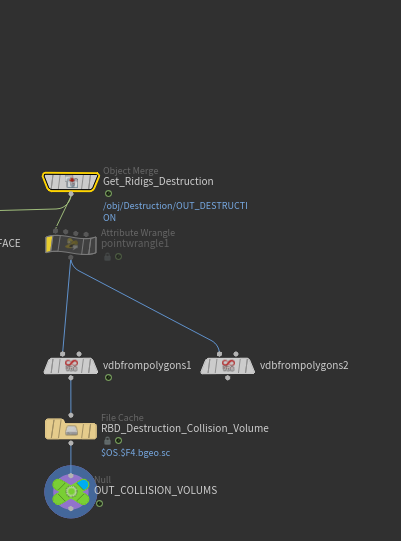
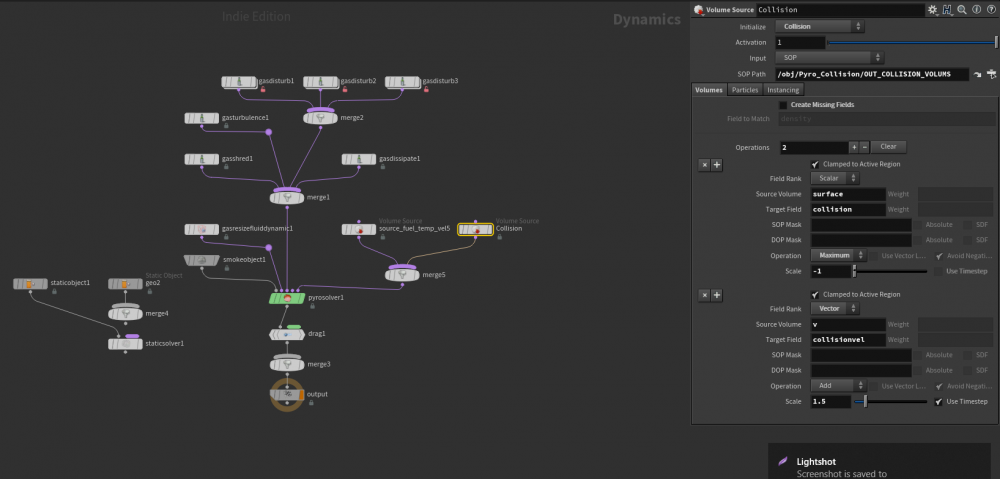
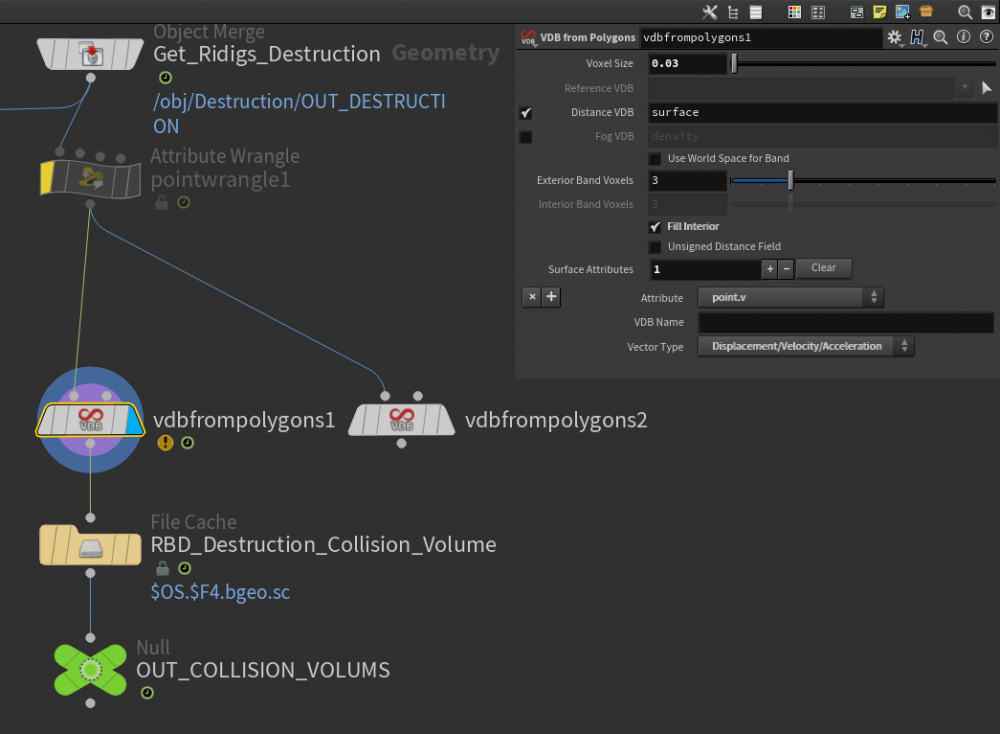
Hi there everyone. This must be a common question but I just cannot seem to get the Pyro Collisions to work correctly there is defiantly something I am missing and I would greatly appreciate some assistance. So this is the issue I am having. Below you can see the Multi Field going through the Collision Field where there are no holes. This is the Multi Field. Here is the Collision Field on its own so you can see its a solid Piece. This is the Temperature Field. This is another angle of the actual Geo at the same frame as the images Above. So I just wanted to mention what I have observed and what I have tried. first my observations, the Multi filed is only partly interacting with the collision field, in that some of the smoke travels along the ceiling of the roof before finding an exit and pushing outwards. Secondly have I have tried, Is using the Houdini shelf Deforming collision object but it only dose 2 frames then hits my 32gb memory cap and my system crashes and restarts. This is if the mode in the Static Object is set to Volume Sample. If I try Ray Intersection it dose not work, there are holes in the collision Field. so the method I am Trying to get right (Based on the Images above) is the secondary Volume Source set to collision. Here are my VDBs and I am merging in the Cached RBD Data. And this is my Volume Source for that VDB Surface If you need anything Please Let me know ! Have a Great day, Jody.
- 14 replies
-
- houdini 17
- houdini
-
(and 2 more)
Tagged with:
-
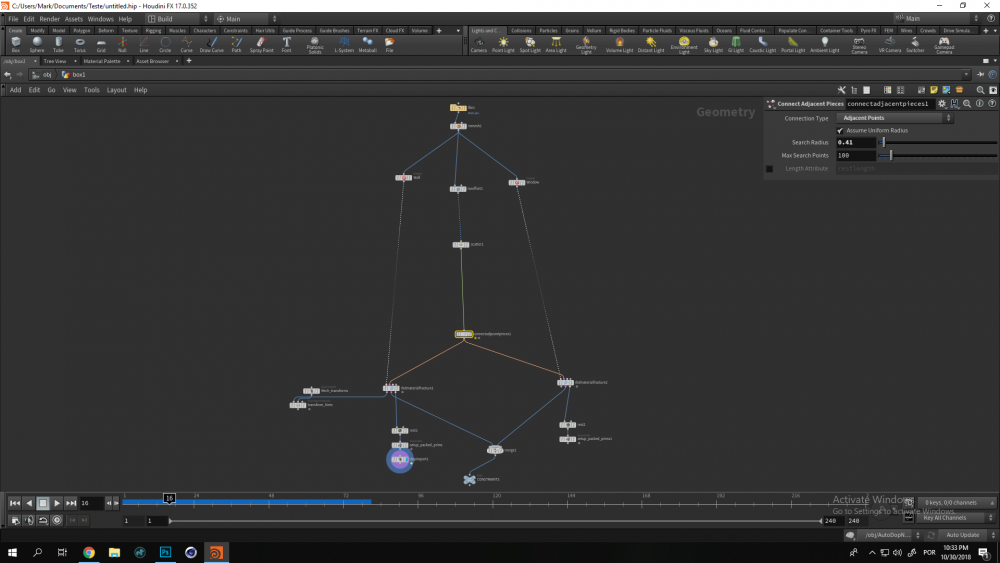
Hello I looked at F1 and still could not figure out how to make this connection between objects. RBD Material Fracture has its own constraint system and in this way is not done, but to connect different fractures, such as the image example, you need to use Connect Adjacent Pieces, but I could not get Constraint Network to identify this constraint between the objects. I used the old method to paste as pieces and can not make the two examples dialog


