Leaderboard


Popular Content
Showing content with the highest reputation since 07/20/2009 in all areas
-
There are so many nice example files on this website that I am often searching for. I wanted to use this page as a link page to other posts that I find useful, hopefully you will too. This list was started years ago, so some of the solutions may be dated. Displaced UV Mapped Tubes Particles Break Fracture Glue Bonds Render Colorized Smoke With OpenGL Rop Moon DEM Data Creates Model Python Script Make A Belly Bounce Helicopter Dust Effect Conform Design To Surface Benjamin Button Intro Sequence UV Style Mapping UV Box and Multiple Projection Styles Ping Pong Frame Expression Instance vs. Copy (Instance Is Faster) Particle Bug Swarm Over Vertical and Horizontal Geometry Rolling Cube Rounded Plexus Style Effect Pyro Smoke UpRes Smoke Trails From Debris Align Object Along Path Fading Trail From Moving Point Swiss Cheese VDB To Polygons Get Rid Of Mushroom Shape In Pyro Sim A Tornado Ball Of Yarn Particles Erode Surface Unroll Paper Burrow Under Brick Road Non Overlapping Copies Build Wall Brick-By-Brick FLIP Fluid Thin Sheets Smoke Colored Like Image Volumetric Spotlight Moving Geometry Using VEX Matt's Galaxy Diego's Vortex Cloud Loopable Flag In Wind Eetu's Lab <--Must See! Wolverine's Claws (Fracture By Impact) Houdini To Clarisse OBJ Exporter Skrinkwrap One Mesh Over Another Differential Growth Over Surface Blazing Fast OpenCL Smoke Solver [PYTHON]Post Process OBJ Re-Write Upon Export Rolling Clouds Ramen Noodles Basic Fracture Extrude Match Primitive Number To Point Number Grains Activate In Chunks Fracture Wooden Planks Merge Two Geometry Via Modulus Fill Font With Fluid DNA Over Model Surface VDB Morph From One Shape To Another Bend Font Along Curve Ripple Obstacle Across 3D Surface Arnold Style Light Blocker Sphere Dripping Water (cool) Exploded View Via Name Attribute VEX Get Obj Matrix Parts eetu's inflate cloth Ice Grows Over Fire Flying Bird As Particles DEM Image To Modeled Terrain Pyro Temperature Ignition Extrude Like Blender's Bevel Profile Particles Flock To And Around Obstacles BVH Carnegie Mellon Mocap Tweaker (python script) Rolling FLIP Cube Crowd Agents Follow Paths Keep Particles On Deforming Surface Particle Beam Effect Bendy Mograph Text Font Flay Technique Curly Abstract Geometry Melt Based Upon Temperature Large Ship FLIP Wake (geo driven velocity pumps) Create Holes In Geo At Point Locations Cloth Blown Apart By Wind Cloth Based Paper Confetti Denim Stitching For Fonts Model A Raspberry Crumple Piece Of Paper Instanced Forest Floor Scene FLIP pushes FEM Object Animated Crack Colorize Maya nParticles inside an Alembic Path Grows Inside Shape Steam Train Smoke From Chimney Using Buoyancy Field On RBDs In FLIP Fluid Fracture Along A Path COP Based Comet Trail eetu's Raidal FLIP Pump Drip Down Sides A Simple Tornado Point Cloud Dual Colored Smoke Grenades Particles Generate Pyro Fuel Stick RBDs To Transforming Object Convert Noise To Lines Cloth Weighs Down Wire (with snap back) Create Up Vector For Twisting Curve (i.e. loop-d-loop) VDB Gowth Effect Space Colonization Zombie L-System Vine Growth Over Trunk FLIP Fluid Erosion Of GEO Surface Vein Growth And Space Colonization Force Only Affects Particle Inside Masked Area Water Ball External Velocity Field Changes POP particle direction Bullet-Help Small Pieces Come To A Stop Lightning Around Object Effect Lightning Lies Upon Surface Of Object Fracture Reveals Object Inside Nike Triangle Shoe Effect Smoke Upres Example Julien's 2011 Volcano Rolling Pyroclastic FLIP Fluid Shape Morph (with overshoot) Object Moves Through Snow Or Mud Scene As Python Code Ramp Scale Over Time Tiggered By Effector Lattice Deforms Volume Continuous Geometric Trail Gas Enforce Boundary Mantra 2D And 3D Velocity Pass Monte Carlo Scatter Fill A Shape Crowd Seek Goal Then Stop A Bunch Of Worms Potential Field Lines Around Postive and Negative Charges Earthquake Wall Fracture Instance Animated Geometry (multiple techniques) Flip Fluid Attracted To Geometry Shape Wrap Geo Like Wrap3 Polywire or Curve Taper Number Of Points From Second Input (VEX) Bullet Custom Deformable Metal Constraint Torn Paper Edge Deflate Cube Rotate, Orient and Alignment Examples 3D Lines From 2D Image (designy) Make Curves In VEX Avalanche Smoke Effect Instant Meshes (Auto-Retopo) Duplicate Objects With VEX Polywire Lightning VEX Rotate Instances Along Curved Geometry Dual Wind RBD Leaf Blowing Automatic UV Cubic Projection (works on most shapes) RBD Scatter Over Deforming Person Mesh FLIP Through Outer Barrier To Inner Collider (collision weights) [REDSHIFT] Ground Cover Instancing Setup [REDSHIFT] Volumetric Image Based Spotlight [REDSHIFT] VEX/VOP Noise Attribute Planet [REDSHIFT] Blood Cell Blood Vessel Blood Stream [REDSHIFT] Light Volume By Material Emission Only [REDSHIFT] Python Script Images As Planes (works for Mantra Too!) [REDSHIFT] MTL To Redshift Material [REDSHIFT] Access CHOPs In Volume Material [REDSHIFT] Mesh Light Inherits Color [REDSHIFT] Color Smoke [REDSHIFT] FBX Import Helper [REDSHIFT] Terrain Instancer Height Field By Feature Dragon Smashes Complex Fractured House (wood, bricks, plaster) Controlling Animated Instances Road Through Height Field Based Terrain Tire Tread Creator For Wheels Make A Cloth Card/Sheet Follow A NULL Eye Veins Material Matt Explains Orientation Along A Curve Mesh Based Maelstrom Vortex Spiral Emit Multiple FEM Objects Over Time Pushing FEM With Pyro Spiral Motion For Wrangle Emit Dynamic Strands Pop Grains Slope, Peak and Flat Groups For Terrains Install Carnegie Mellon University BVH Mocap Into MocapBiped1 Ramp Based Taper Line Fast Velocity Smoke Emitter Flip Fill Cup Ice Cubes Float [PYTHON]Export Houdini Particles To Blender .bphys Cache Format [PYTHON] OP UNHIDE ALL (opunhide) Collision Deform Without Solver or Simulation Mograph Lines Around Geometry Waffle Cornetto Ice Cream Cone Ice Cream Cone Top Unroll Road Or Carpet Burning Fuse Ignites Fuel or Painted Fuel Ignition Painted Fuel Combustion Small Dent Impact Deformation Particle Impact Erosion or Denting Of A Surface Helicopter Landing Smoke And Particles Radial Fracture Pieces Explode Outwards Along Normal Tangent Based Rocket Launch Rolling Smoke Field Tear/Rip FLIP (H12 still works in H16) Rain Flows Over Surface Rains Water Drip Surface Splash Smoke Solver Tips & Tricks Folding Smoke Sim VEX Generated Curve For Curling Hair Copy and Align One Shape Or Object To The Primitives Of Another Object (cool setup) A Better Pop Follow Curve Setup FEM Sea Cucumber Moves Through Barrier Fracture Cloth Smoke Confinement Setup Merge multiple .OBJ directly Into A Python Node Blood In Water Smoke Dissipates When Near Collision Object Whirlpool Mesh Surface Whirlpool Velocity Motion For FLIP Simple Bacteria Single Point Falling Dust Stream Flames Flow Outside Windows Gas Blend Density Example Localized Pyro Drag (smoke comes to a stop) Granular Sheet Ripping Post Process An Export (Post Write ROP Event) Corridor Ice Spread or Growth Set Velocity On Pieces When Glue Bonds Break Water Drops Along Surface Condensation Bottle Grains Snow or Wet Sand Starter Scene A Nice Little Dissolver Turn An Image Into Smoke Fading Ripples Grid Example Stranger Things Wall Effect Face Through Rubber Wall [PYTHON]Create Nurbs Hull Shelf Tool [PYTHON] Ramp Parameter [PYTHON] On Copy OF HDA or Node Select Outside Points Of Mesh, Honor Interior Holes Sparks Along Fuse With Smoke Umbrella Rig Melt FLIP UVs Tire Burn Out Smoke Sim Flip or Pyro Voxel Estimate Expression Motorcycle or Dirt Bike Kicks Up Sand Particles Push Points Out Of A Volume [PYTHON]Cellular Automata Cave Generator Punch Dent Impact Ripple Wrinkle VEX Rotate Packed Primitive Via Intrinsic Kohuei Nakama's Effect FLIP Fluid Inside Moving Container Particles Avoid Metaball Forces FLIP Divergence Setup FLIP Transfer Color Through Simulation To Surface Morph Between Two Static Shapes As Pyro Emits Constraint Based Car Suspension Pyro Smoke Gas Disturbs Velocity Wire Solver Random Size Self Colliding Cables Fast Cheap Simple Collision Deform CHOP Based Wobble For Animated Character Slow Motion FLIP Whaitewater Avoid Stepping In Fast Pyro Emission Fast Car Tires Smoke FLIP Fluid Fills Object Epic Share Of Softbody/Grain Setups (Must see!) Balloon, Pizza, Sail, Upres Shirt, Paint Brush Create Pop Grain Geometry On-The-Fly In A DOPs Solver Varying Length Trails VEX Based Geometry Transform Determine Volume Minimum and Maximum Values Grain Upres Example Animated pintoanimation For Cloth Sims Batch Render Folder Of OBJ files Vellum Weaving Cloth Fibers Knitting Kaleidoscopic Geometry UV Image Map To Points Or Hair Color Particles Like Trapcode Particular Flat Tank Boat Track With Whitewater Orthographic Angle Font Shadow Select Every Other Primitive or Face? Printer Spits Out Roll Of Paper Unroll Paper, Map, Plans, Scroll Simple Vellum L-System Plant Basic Cancer Cell 2D Vellum Solution Vellum Animated Zero Out Stiffness To Emulate Collapse Whitewater On Pre Deformed Wave [PYTHON] Menu Callback Change Node Color Extruded Voronoi With Scale Effector Multi Material RBD Building Fracture House Collapse Spin Vellum Cloth Whirlpool Vortex Trippy Organic Line Bend Design Logo Based Domino Layout Delete Outer Fracture Pieces, Keeping Inside Pieces UV Mapped Displaced Along Length Curly Curves Slow Particle Image Advection Nebula Saw Through VDB Like Butter Fuel Based Rocket Launch With Smoke Fuel Based Rocket Launch With Smoke [upres] Deform Pyro Along Path Bend Pyro Gas Repeat Solver With RBD Collision Raining Fuel Fire Bomb City Video Tutorial Pyro Cluster Setup (Animated Moving Fuel Source) [PYTHON] Mantra .MTL File Reader (creates new materials) Pyro Dampen By Distance FLIP Fluid Sweeps Away Crowd Ragdoll Gas Repeat Solver X-Men Mystique Feather Effect Camera Frustum Geometry Culling Vellum Extrude Shape Into Cloth Wire Web Constraint Setup Pyro Smoke Font Dissolve "Up In Smoke" Helicopter Landing With Vellum Grass and Dust or Smoke Another Thin Sheet Fluid Setup Color Rain Drops Over Surface Dual Smoke Object Wand Battle Custom GasDisturb node (easy to use) Hair Driven Grass Example File Pyro Smoke With Masked Turbulence Align High Resolution Mesh With Low Resolution RBD Simulation Streaky Portal Effect Height From Luma Cracking Glass Dome, Fracture VEX Noise Types FLIP Waterwheel Fracture Brick Wall Using UVs Vellum Stacked Torn Membranes Terrain Topographical Line Curves Prepare RBD Fracture For Unreal Alembic Export Growing Ivy Solver Fix For Intermittent FLIP Surfacing Issue Extensive RBD Fracturing Thread With HIP Files Peter Quint's Pop Streams Particle Example Fracture Geometry To Release Flip Fluid Inside Procedurally Reverse Normals Vellum Culling Voronoi Shape To Shape Transition Animated Scattering Accessing Parametric UVs On A Surface Organic Hallways/Corridors Through A Mesh Smoke Particle Dissolve Along One Axis Expanding Vellum Rings That Collide With One Another Read, Fetch, or Get SOP Attribute Inside Of DOPS Broad Splash When Object Enters Water Blendshape Crowd Example [PYTHON] Replace Packed Intrinsic Geometry From Another Source Rip/Tear Part Of Paper To Reveal And Roll Up After Effects Text Styles Cabling Mesh Surface Hanging Wires Or Cables Use Python Inside a Font Sop Brand Accurate Textures Using Karma XPU hScript asCode Microscopic Hair USD Attribute Equivalents For Preview Shader (i.e. Cd mangle) Vellum Peel Effect SOP Pyro Control Field Gas Disturbance Repair Geometry Self Intersection FLIP Follows Curve Long Winded Guide To Houdini Instancing Disable Simulations On Startup Tutorial HIP Library Use Google To Discover Attached HIP Files Useful Websites: Tokeru Houdini Houdini Vex Houdini Python Houdini Blueprints FX Thinking Rich Lord HIP Files iHoudini Qiita Ryoji Toadstorm Blog Eetu's HIP Of The Day Video Tutorials: Peter Quint Rohan Dalvi Ben Watts Design Yancy Lindquist Contained Liquids Moving Fem Thing Dent By Rigid Bodies Animating Font Profiles Swirly Trails Over Surface http://forums.odforce.net/topic/24861-atoms-video-tutorials/ http://forums.odforce.net/topic/17105-short-and-sweet-op-centric-lessons/page-5#entry127846 Entagma Johhny Farmfield Vimeo SideFX Go Procedural130 points
-
Few tips and tricks to manipulate gas simulation. 1. Independent resolution grid. E.g. Overriding vel grid size independent to a density grid. 2. Creating additional utilities. E.g. gradient, speed, vorticity and etc which can be used to manipulate forces. 3. Forces via VEX and some example snippets. smokesolver_v1.hipnc P.S. Some of this technique are not Open CL friendly though.
 76 points
 -
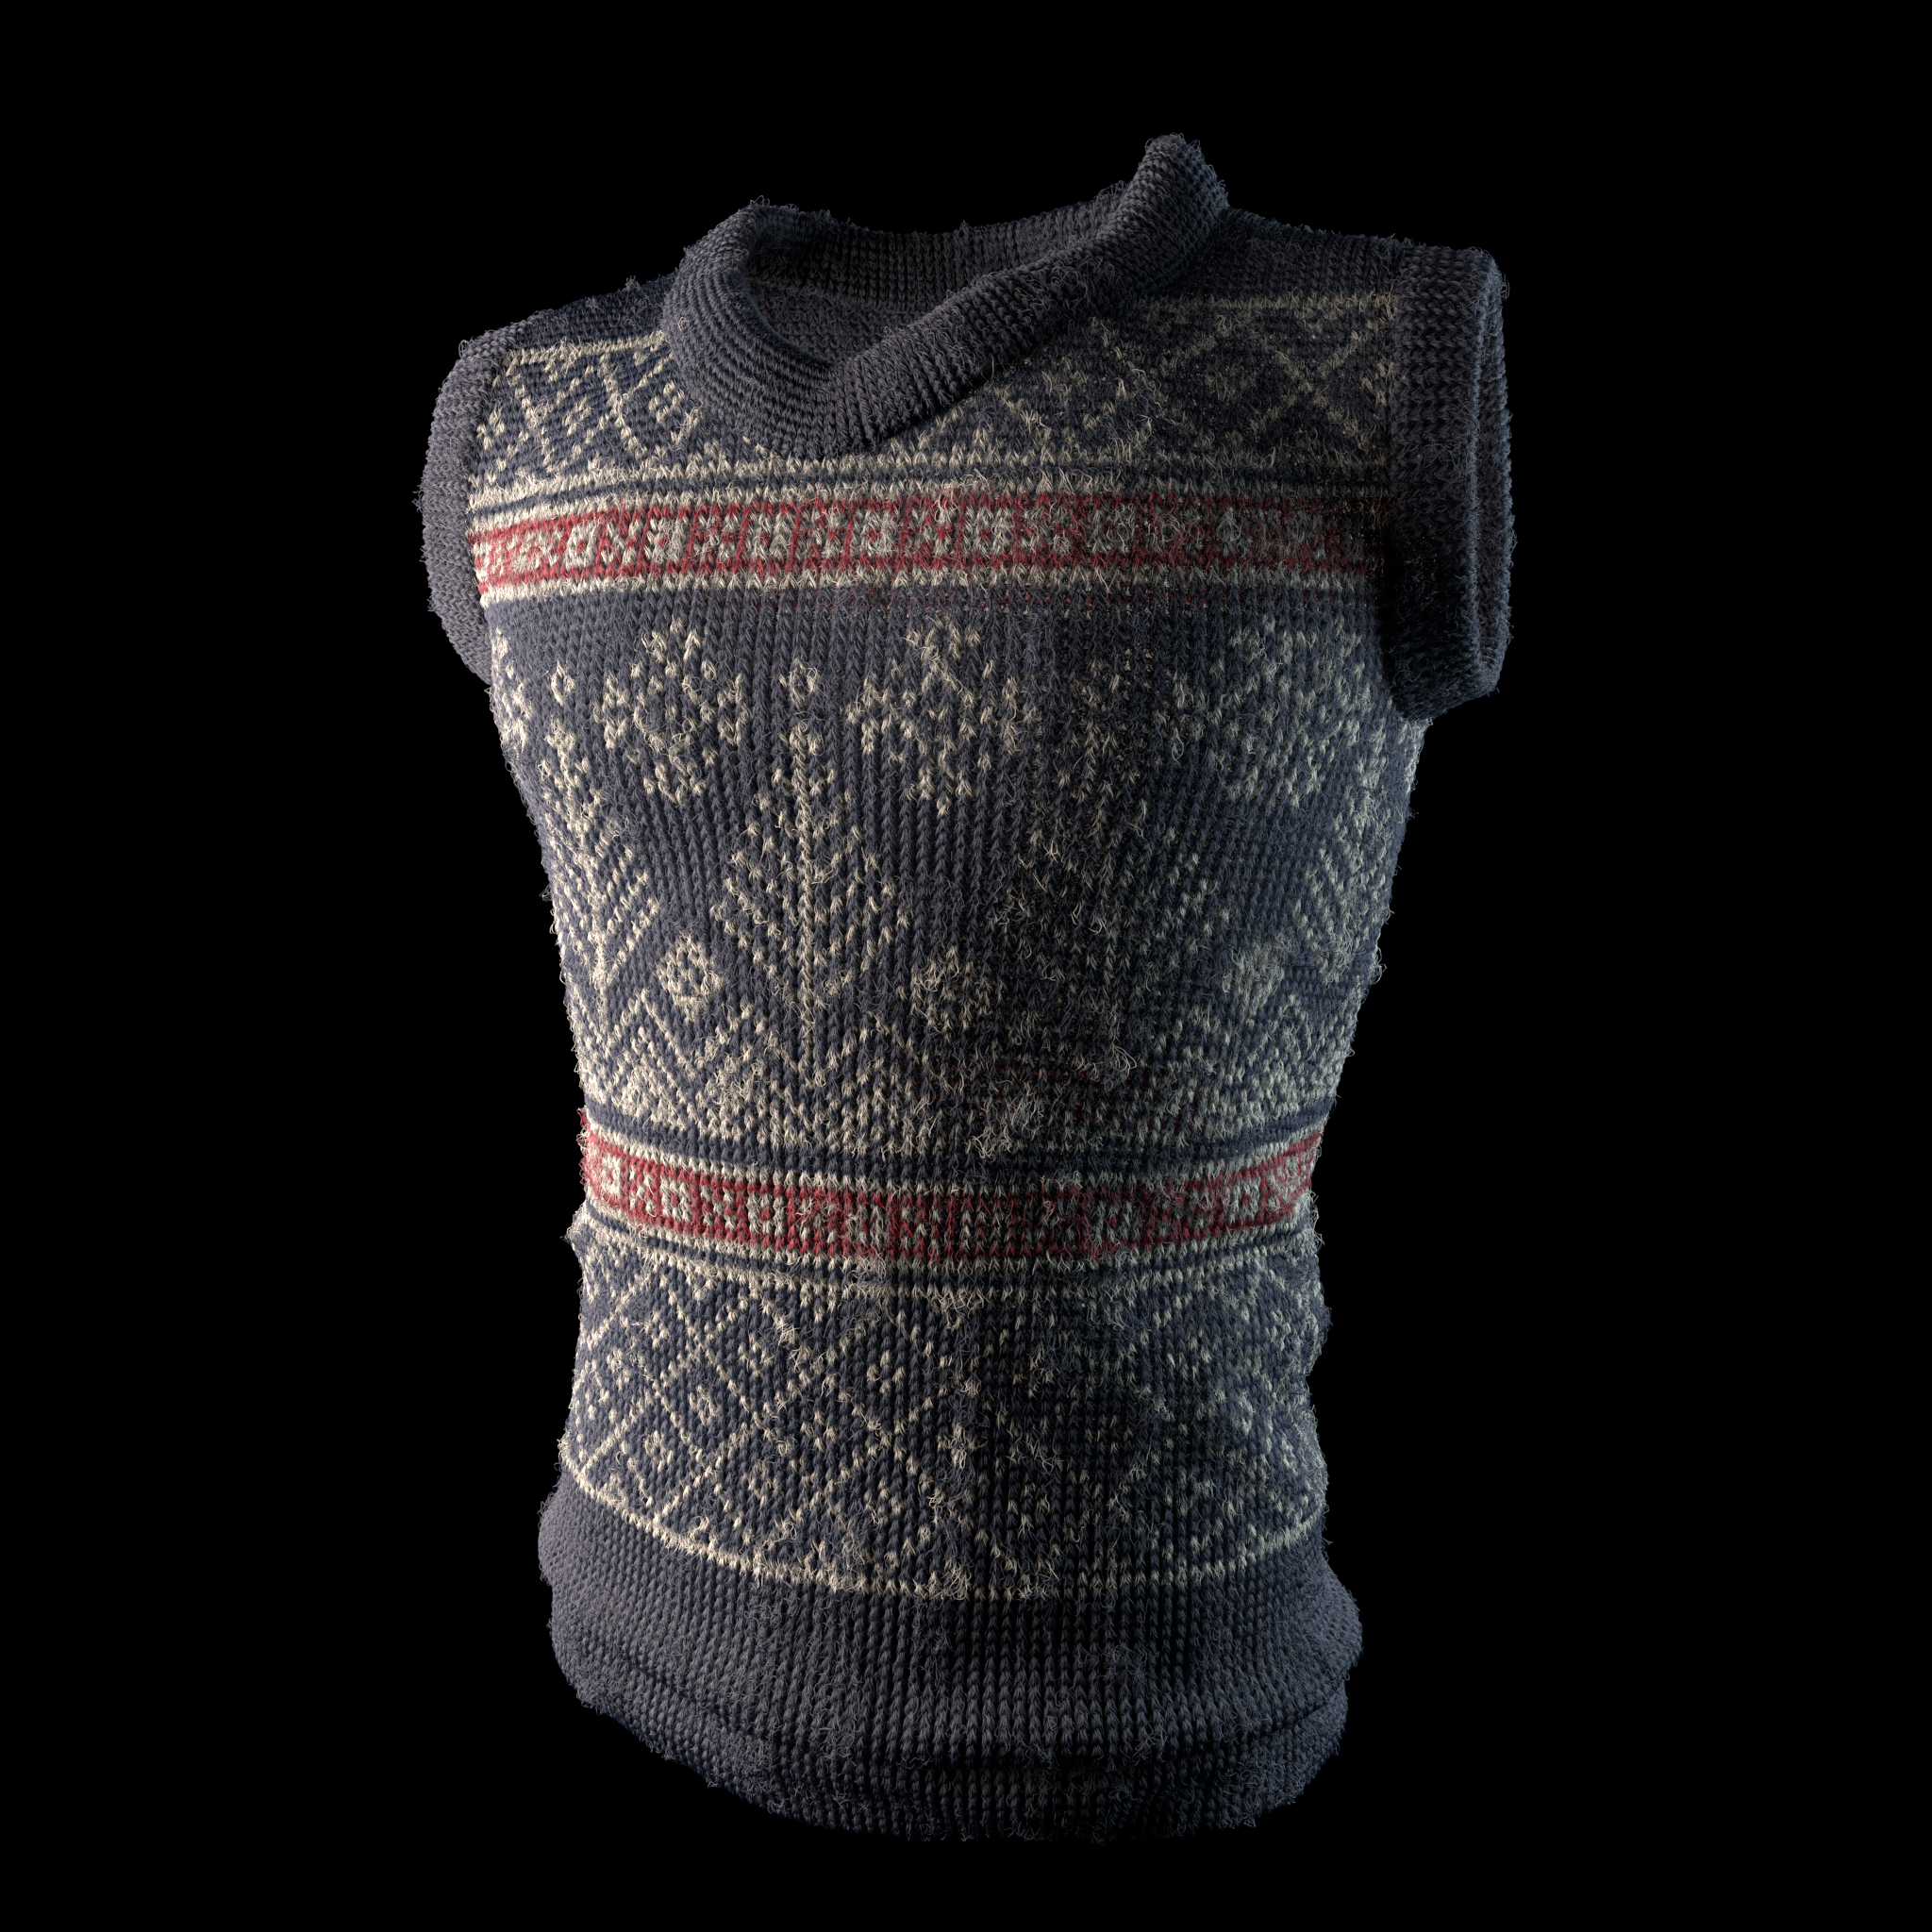
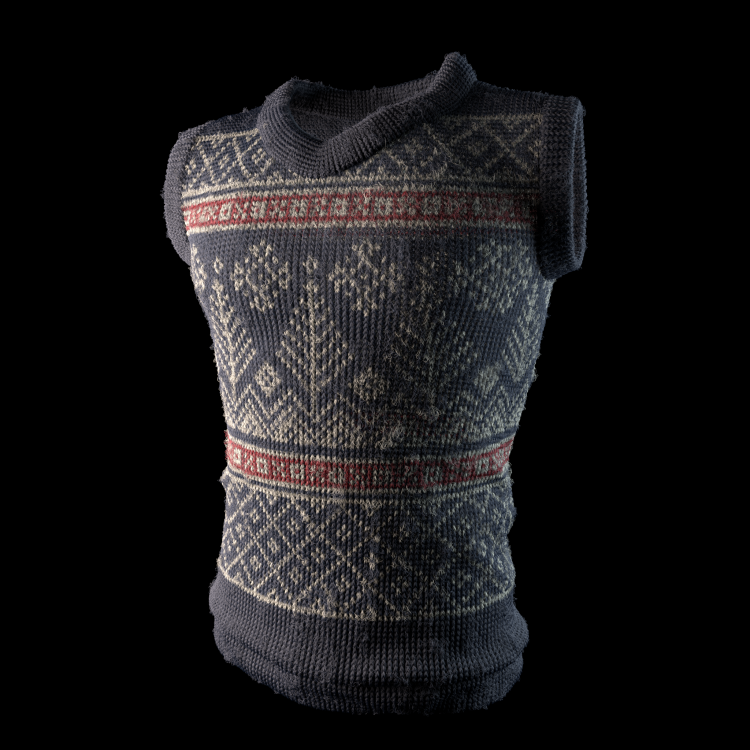
Hi all, I had been doing a rnd project on how to generate knitted garments in Houdini lately. And one my inspiration was from a project which was done by Psyop using Fabric engine and the other one is done by my friend Burak Demirci. Here are the links of them. http://fabricengine.com/case-studies/psyop-part-2/ https://www.artstation.com/artist/burakdemirci Some people asked to share my hip file and I was going to do it sooner but things were little busy for me. Here it is, I also put some sticky notes to explain the process better, hope it helps. Also this hip file is the identical file of the one that I created this video except the rendering nodes https://vimeo.com/163676773 .I think there are still some things that can be improved and maybe done in a better way. I would love to see people developing this system further. Cheers! Alican Görgeç knitRnD.zip
 72 points
 -
There is no mystery as to how Houdini works. Anything that gets done in Houdini can be expressed by a node. Whether that node is a coded c++ operator, an operator written in VEX (or using VOP nodes representing vex functions), Python operators or Houdini Digital Assets (HDA's), each node does it's own bit and then caches it's result. There is no lower level than nodes. The nodes in Houdini are the lowest level atomic routine/function/programme. A SOP node for example takes incoming geometry and processes it all in of itself, then caches it's result which is seen in the viewport, MMB on the node as it's stats and in the Details View to see the specific attribute values. If this is a modifier SOP, it will have a dependency on it's input node. If there is an upstream change, the current node will be forced to evaluate. If there is a parameter reference to another node and the other node is marked "dirty" and affects this node, this node will have been forced to evaluate. To generalize the cooking structure of a SOP network, for every cook (frame change, parm change, etc), the network starts at the Display/Render node and then walks up the chain looking for nodes with changes and evaluates dependencies for each node also querying those nodes for changes until it hits the top nodes. The nodes marked dirty causing the network to evaluate the dirty nodes top down evaluating the dependencies that were found. You can set a few options in the Performance Monitor to work in the older H11 way and see this evaluation tree order if you wish. Change that. It is "mandatory" that you do this if you want a deeper understanding of Houdini. You definitely need to use the Performance Monitor if you want to see how the networks have evaluated as it is based on creation order along with the set-up dependencies. Yes deleting and undeleting an object can and will change this evaluation order and can sometimes get you out of a spot with crashing. If you haven't used the Performance Monitor pane, then there you go. Use it. Just remember to turn it off as it does have an overhead performance wise. Another key is to use the MiddleMouseButton (MMB) on any and all nodes to see what they have cached from the last cook evaluation. Memory usage, attributes currently stored, etc. the MMB wheel on my mouse is as worn in as the LMB as I use it so much. You can see if the node is marked as time dependent or not which will affect how it evaluates and how it will affect it's dependent nodes. You can RMB on the node and open up the Dependency view for that operator which will list all references and dependencies. You can hit the "d" key in the network and in the parameter display options, in the Dependency tab, enable the various dependency aids (links and halos) in the network to see the dependencies in the network. Houdini is a file system, in memory, and on disk in the .hip "cpio" archive file. If you want, you can use a shell, and given any .hip file, run the hexpand shell command on the file. This will expand the Houdini file in to a directory structure that you can read and edit if you so wish. Then wrap it back up with hcollapse. If you really want to see how Houdini works low level, then this how it all ends up, and how it all starts. It's just hscript Houdini commands that construct the nodes including the folder nodes themselves. Each node is captured as three distinct files: the file that that adds the node and wires it up to other nodes, the parameter file that sets the nodes parameters, and another file that captures additional info on the node. If you locked a SOP, then that binary information will be captured as a fourth file for that node. It is for this reason that .hip files are very small, that is unless you start locking SOPs and that is not wise. Better to cache to disk than lock but nothing stopping you. When you open up a .hip file, all the nodes are added, wired, parameters modified and nodes cooked/evaluated. There are different types of node networks and nodes of a specific type can only be worked on in specific directory node types. This forces you to bop all over the place, especially if you still willingly choose to use the Build desktop which I do not prefer. You have to have a tree view up somewhere in the interface to see how the network lays out as you work. It's also very handy for navigating your scene quickly. The Technical Desktop is a good place to start when working on anyone's file as there is a tree view and a few other panes such as the Details View, Render Scheduler and more. If you want to use the technical desktop and follow a vid done with the Build desktop, simply switch up the Network with the Parameter pane and now the right hand side is the same as Build, but now you can follow the tree view and see where and when other nodes are dropped down. A new Houdini file is an unread book, full of interesting ideas. Using a desktop that exposes a tree view pane, you can quickly see what the user has been up to in a couple seconds. Again use the Technical Desktop as a start if you are still using Build (if you know me you will know I will force you to have a tree view up). You can quickly traverse the scene and inspect the networks. If that isn't enough, you can pop open the Performance Monitor and see what nodes are doing the most work. You really don't need any videos, ultimately just the .hip file. Helps if the scene is commented and nodes named based on intent. Let's stick to SOPs. In Houdini, attributes are an intrinsic part of the geometry that is cached by each SOP. Not some separate entity that needs to be managed. That is what makes SOPs so elegant. That wire between two SOPs is the geometry being piped from one SOP to the next, attributes and all. Not a link per attribute (which in other software can be a geometry attribute, parameter attribute, etc). This makes throwing huge amounts of geometry with lots of attributes a breeze in Houdini. All SOPs will try their best to deal with the attributes accordingly (some better than others and for those others, please submit RFE's or Bugs to Side Effects to see if there is something that can be done). You can create additional geometry attributes by using specific SOPs: - Point SOP creates "standard" point attributes - Vertex SOP creates "standard" vertex attributes - Primitive SOP creates "standard" Primitive attributes - Use the Attribute Create SOP to create ad-hoc attributes with varying classes (float, vector, etc) of type point, vertex, primitive or Detail. - Use VEX/VOPs to create standard and ad-hoc point attributes. - Use Python SOPs to create any standard or ad-hoc geometry attributes. One clarification that must be made is the distinction between a "point" and a "vertex" attribute in Houdini. There are other softwares that use the term vertex to mean either point attributes or prim/vertex attributes. Games have latched on to this making the confusion even deeper but alas, it isn't. In Houdini, you need to make the distinction between a point and a vertex attribute very early on. A point attribute is the lowest level attribute any data type can have. For example, vector4 P position (plus weight for NURBs) is a point attribute that locates a point in space. If you want, that is all you need: points. No primitives what so ever. Then instance stuff to them at render time. You can assign any attribute you want to that point. To construct a Primitive, you need to have a point for the primitive's vertices to reference as a location and weight. In the case of a polygon, the polygon's vertices is indexing points. You can see this in the Details View when inspecting vertex attributes as the vertex number is indicated as <primitive_number>:<vertex_number> and the first column is the Point Num which shows you which point each vertex is referencing as it's P position and weight. Obviously you can have multiple vertices referencing a single point and this is what gives you smooth shading by default with no vertex normals (as the point normals will be used and automatically averaged across the vertices sharing this point). In the case of say a Primitive sphere, there is a single point in space, then a primitive of type sphere with a single vertex that references that point position to locate the sphere. Then there is intrinsic data on the sphere (soon to be made available in the next major release) where you can see the various properties of that sphere such as it's bounds (where you can extrapolate the diameter), area, volume, etc. Other primitive types that have a single point and vertex are volume primitives, metaball primitives, vdb grid primitives, Alembic Archive primitives, etc. How does a Transform SOP for example know how to transform a primitive sphere from a polygonal sphere? Answer is that it has been programmed to deal with primitive spheres in a way that is consistent with any polygon geometry. Same goes for Volumes. It has been programmed to deal with Volumes to give the end user the desired result. This means that all SOPs properly coded will handle any and all primitive types in a consistent fashion. Some SOPs are meant only for Parametric surfaces (Basis SOP, Refine SOP, Carve SOP, etc.) and others for Polygons (PolySplit, etc.) but for the most part, the majority of SOPs can work with all primitive types. What about attributes? The Carve SOP for example can cut any incoming polygon geometry at any given plane. It will properly bi-lineraly interpolate all attributes present on the incoming geometry and cache the result. It is this automatic behaviour for any and all point, vertex, primitive and detail Attributes that makes working with SOPs a breeze. How does Houdini know what to do with vertex attributes when position P, velocity v and surface normal N need to be handled differently? When performing say a rotate with a Transform SOP and the incoming geometry has surface normals N, velocity vector v, and a position cache "rest", each attribute will be treated correctly (well N because it is a known default attribute but for user-defined attributes, you can specify a "hint" to the vector that will tell it to be either vector, 3 float position, or of type surface normal). It is this auto-behaviour with attributes and the fact you don't need to manage attributes makes using SOPs so easy and very powerful without having to resort to code. Remember that each SOP is a small programme unto it's self. It will have it's own behaviours, it's own local variables if it supports varying attributes in it's code logic, it's own parameters, it's own way of dealing with different primitive types (polygons, NURBs, Beziers, Volumes, VDB grids, Metaballs, etc). If you treat each SOP as it's own plug-in programme, you will be on the right path. Each SOP has it's own help card which if it is authored correctly will explain what this plug-in does, what the parameters do, what local variables are available if at all, some other nodes related to this node, and finally example files that you can load in to the current scene or another scene. Many hard-core Houdini users picked things up by just trolling the help example files and this is a valid way to learn Houdini as each node is a node and a node is what does the work and if we were to lock geometry in the help cards the Houdini download would be in the Gigabytes so nodes are all that is in the help cards and nodes is what you need to learn. I'm not going to touch DOPs right now as that is a different type of environment purpose built for simulation work. Invariably a DOP network ends up being referenced by a SOP to fetch the geometry so in the end, it is just geometry which means SOPs. Shelf tools are where it's at but I hear you. Yes there is nothing like being able to wire up a bunch of nodes in various networks and reference them all up. Do that for a scratch FLIP simulation once or twice, fine. Do that umpteen times a week, well that is where the Shelf Tools and HDA's make life quite simple. But don't be dismayed by Shelf Tools. All of those tools are simply executing scripts that place and wire operators together and set up parameter values for you. No different than when you save out a Houdini .hip scene file. If you are uber-hard-core, then you don't even save .hip files and you wire everything from scratch, every time, each time a bit different, evolving, learning. So with the shelf tool logic you find so objectionable, if you open up an existing .hip scene file, you are also cheating. Reminds me of the woodworker argument as to what is hand built and what isn't. I say if you use anything other than your teeth and fingernails to work the wood, you are in essence cheating, but we don't do that. Woodworkers put metal or glass against wood because fingernails take too long to grow back and teeth are damaged for ever when chipped. And I digress... Counter that to power users in other apps that clutch to their code with bare white knuckles always in fear of the next release rendering parts of their routines obsolete. With nodes, you have a type name and parameter names. If they don't change from build to build, they will load just fine. I can load files from before there were .hip files and they were called .mot (from Sage for those that care to remember) from 1995. Still load, well with a few meaningless errors but they still load. A Point SOP is a Point SOP and a Copy SOP is a Copy SOP. No fear of things becoming obsolete. Just type in the "ophide" command in the Houdini textport and you will still find the Limb and Arm SOPs (wtf?). LOL! First thing I do every morning? Download latest build(s). Read the build journal changes. If there is something interesting in that build, work up something from scratch. Then read forums time permitting and answer questions from scratch if I can. All in the name of practice. Remember from above that a .hip file is simply a collection of script files in a folder system saved on disk. A Houdini HDA is the same thing. A shelf tool again is the same thing: a script that adds and wires nodes and changes parameters. Not pounding a bunch of geometry and saving the results in a shape node never to have known the recipe that got you there. To help users sort out what created which node, you can use the "N" hotkey in any network and that will toggle the node names from the default label, the tool that added that node and finally nothing. Hitting "N" several times while inspecting a network will toggle the names about. That and turning on the dependency options in the network will help you see just what each shelf tool did to your scene. Knowing all this, you can now troll through the scene and see what the various shelf tools did to the scene. If you like to dig even deeper, you can use the Houdini textport pane and use the opcf (aliased to cd), opls (aliased to ls), and oppwf (aliased to oppwd and pwd) to navigate the houdini scene via the textport as you would in a unix shell. One command I like to show those more interested in understanding how Houdini works is to cd to say /obj then do an opls -al command to see all the nodes with a long listing. You will see stats very similar to those found in a shell listing files or if you RMB on any disk file and inspect it's info or state. Remember Houdini "IS" a file system with additional elaborate dependencies all sorted out for you. There are user/group/other permissions. Yes you can use opchmod (not aliased to chmod but easily done with the hscript alias command) to change the permission on nodes: like opchmod 000 * will remove read/write/execute permissions on all the nodes in the current directory and guess what? The parameters are no longer available for tweaking. Just remember to either tell your victim or to fix it for them or you may be out of a job yourself. opchmod 777 * gives back the permissions. An opls -al will verify this. Now you know what our licensing does to node states as you can set the state of a node to be read and execute only but remove the write to any DOP or POP node and you have a Houdini license while a Houdini FX license will enable the write to all nodes in all networks. Also knowing this, the .hip file truly is a book with a lot of history along with various ways of inspecting who created what node and when, what tool was used to create this node, what dependencies are on this node, is it time dependent, and more, all with a quick inspection. After all this, learning Houdini simply becomes learning each node in turn and practice, practice, practice. Oh and if you haven't figured out by now, many nodes have a very rich history (some older than 30 years now) and can do multiple things, so suck it up, read the node help cards, study the example files and move forward. The more nodes you master, the more you can see potential pathways of nodes and possibilities in your mind, the faster you work, the better you are. The more you do this, the more efficient your choices will become. The learning curve is endless and boundless. All visual. All wysiwyg.66 points
-
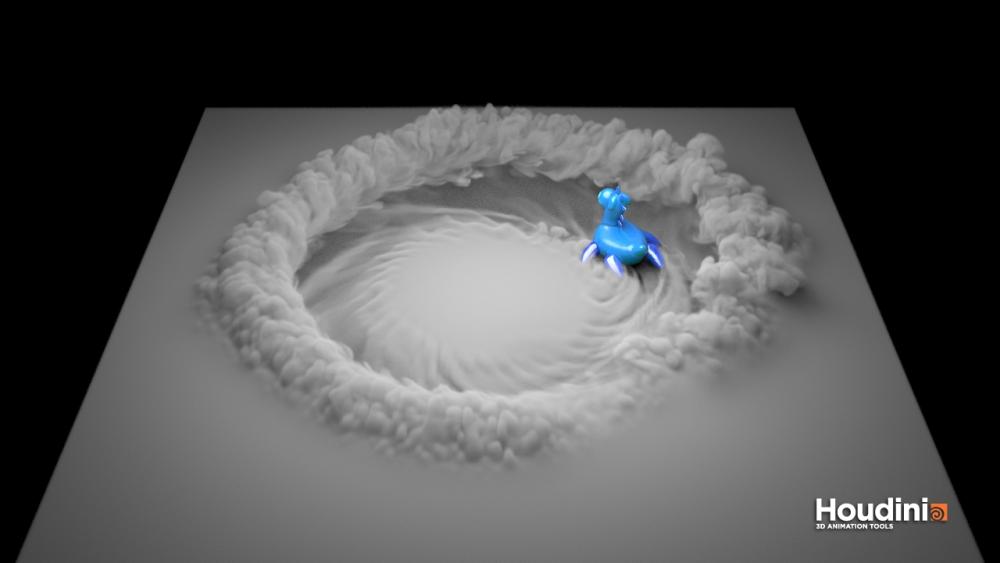
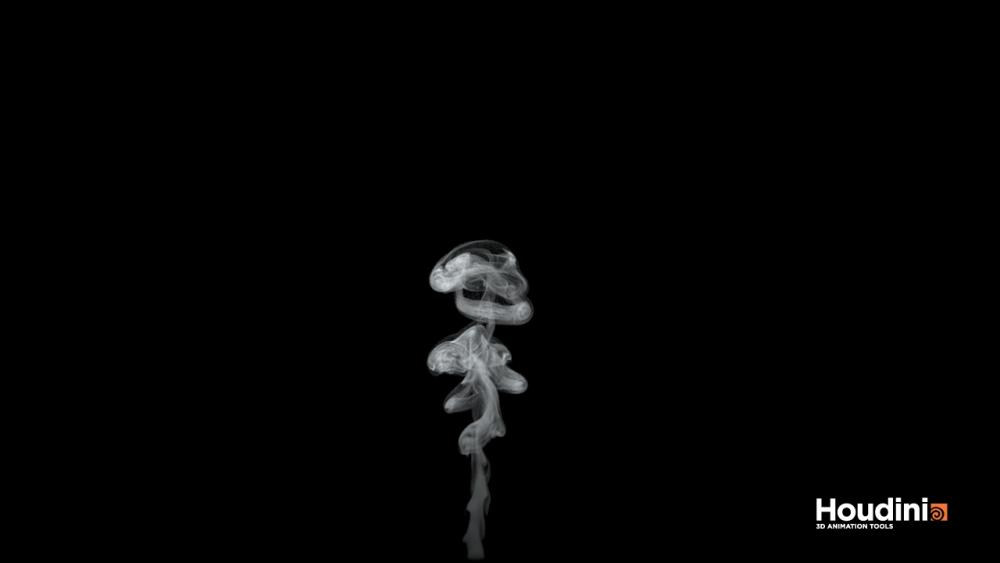
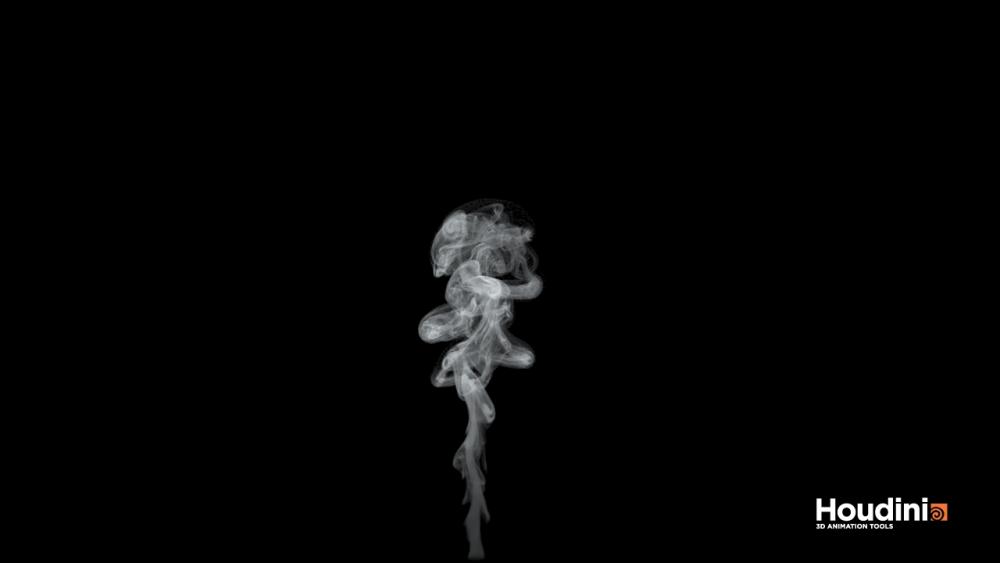
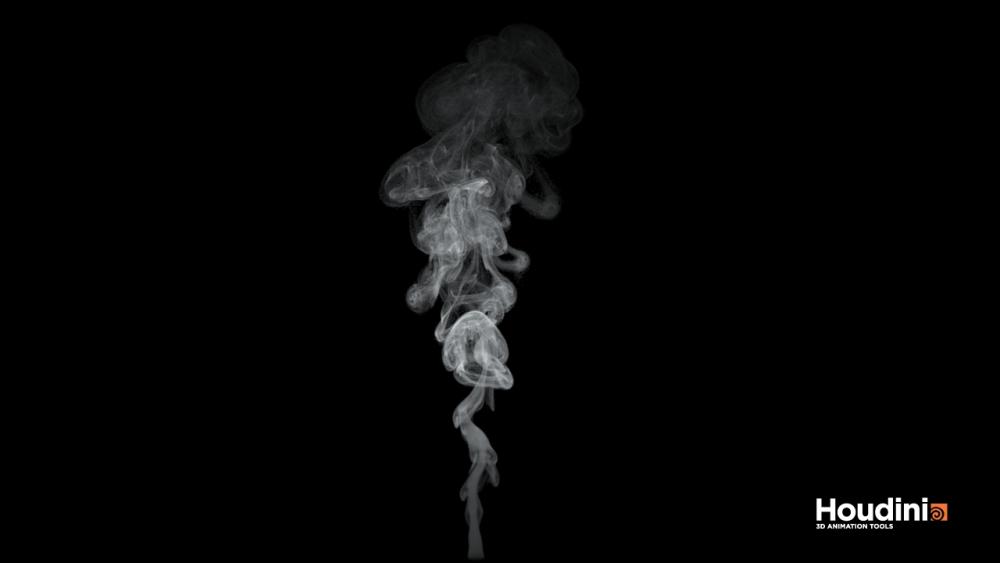
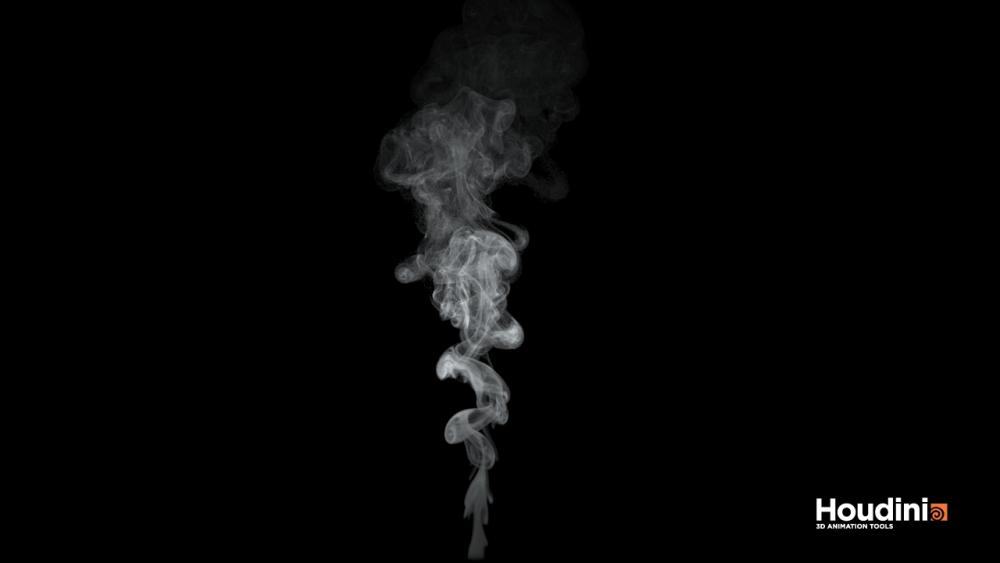
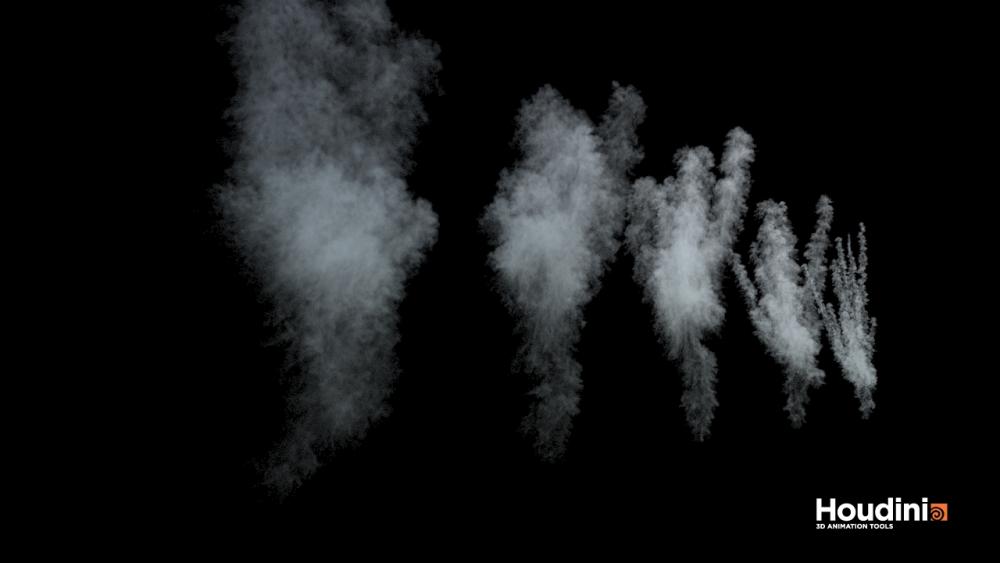
I've wanted to tackle mushroom caps in pyro sims for a while. Might as well start here... Three things that contribute greatly to the mushroom caps: coarse sub-steps, temperature field and divergence field. All of these together will comb your velocity field pretty much straight out and up. Turning on the velocity visualization trails will show this very clearly. If you see vel combed straight out, you are guaranteed to get mushrooms in that area. If you are visualizing the velocity, best to adjust the visualization range by going forward a couple frames and adjusting the max value until you barely see red. That's your approximate max velocity value. Off the shelf pyro explosion on a hollow fuel source sphere at frame 6 will be about 16 Houdini units per second and the max velocity coincides with the leading edge of the divergence filed (if you turn it on for display, you'll see that). So Divergence is driving the expansion, which in turn pushes the velocity field and forms a pressure front ahead of the explosion because of the Project Non-Divergent step that assumes the gas is incompressible across the timestep, that is where where divergence is 0. I'm going to get the resize field thingy out of the way first as that is minor to the issue but necessary to understand. Resizing Fields Yes, if you have a huge explosion with massive velocities driven by a rapidly expanding divergence field, you could have velocities of 40 Houdini units per second or higher! Turning off the Gas Resize will force the entire container to evaluate which is slow but may be necessary in some rare cases, but I don't buy that. What you can do is, while watching your vel and divergence fields in the viewport, adjust the Padding parameter in the Bounds field high enough to keep ahead of the velocity front as that is where you hope for some nice disturbance, turbulence and confinement to stir around the leading edge of the explosion. or... Use several fields to help drive the resizing of the containers. Repeat: Use multiple fields to control the resizing of your sim containers. Yep, even though it says "Reference Field" and the docs say "Fluid field..", you can list as many fields in this parameter field that you want to help in the resizing. In case you didn't know. Diving in to the Resize Container DOP, there is a SOP Solver that contains the resizing logic that constructs a temporary field called "ResizeField", importing the fields (by expanded string name from the simulation object which is why vector fields work) with a ForEach SOP, each field in turn, then does a volume bound with the Volume Bounds SOP on all the fields together using the Field Cutoff parameter. Yes there is a bit of an overhead in evaluating these fields for resizing, but it is minor compared to having no resizing at all, at least for the first few frames where all the action and sub-stepping needs to happen. Default is density and why not, it's good for slower moving sims. Try using density and vel: "density vel". You need both as density will ensure that the container will at least bound your sources when they are added. Then vel will very quickly take over the resizing logic as it expands far more rapidly than any other field in the sim. Then use the Field Cutoff parameter to control the extent of the container. The default here is 0.005. This works for density as this field is really a glorified mask: either 0 or 1 and not often above 1. Once you bring the velocity field in to the mix, you need to adjust the Field Cutoff. Now that you have vel defined along side density, this Field Cutoff reads as 0.005 Houdini units per second wrt the vel field. Adjust Field Cutoff to suit. Start out at 0.01 and then go up or down. Larger values give you smaller, tighter containers. Lower values give you larger padding around the action. All depends on your sim, scale and velocities present. Just beware that if you start juicing the ambient shredding velocity with no Control Field (defaults to temperature with it's own threshold parameter so leave there) to values above the Field Cutoff threshold, your container will zip to full size and if you have Max Bounds off, you will promptly fill up your memory and after a few minutes of swapping death, Houdini will run out of memory and terminate. Just one of the things to keep in mind if you use vel as a resizing field. Not that I've personally done that... The Resolution Scale is useful to save on memory for very large simulations, which means you will be adjusting this for large simulations. The Gas Resize Field DOP creates a temporary field called ResizeBounds and the resolution scale sets this containers resolution compared to the reference fields. Remember from above that this parameter is driving the Volume Bound SOP's Bounding Value. Coarser values leads to blurred edges but that is usually a good thing here. Hope that clears things up with the container resizing thing. Try other fields for sims if they make sense but remember there is an overhead to process. For Pyro explosions, density and vel work ok. For combustion sims like fire, try density and temperature where buoyancy contributes a lot to the motion.62 points
-
Project Non-Divergent Step and Mushrooms The Project Non-Divergent DOP is responsible for 99.9% of the simulation's behaviour. Yes hundreds of DOPs inside the Pyro Solver all playing a part but all funnelling through that single Non-Divergent step. This means that if you don't like the look of your sim and the mushrooms, it's ultimately because of the Non-Divergent step creating a vel field that doesn't do it for you. If you want to see for yourself, unlock the Pyro Solver, dive in, find the Smoke Solver, unlock that, dive in and find the projectmultigrid DOP and bypass it, then play. Nothing. For most all Pyro sims, this is the Project Non-Divergent Multigrid as it is the fastest of the Non-Divergent micro-solvers. This specific implementation only takes the vel and divergence field and assuming across the timestep that the gas is non-compressible when divergence is 0, will create a counter field called Pressure and then apply that pressure field to the incoming vel to remove any compression or expansion and that gives you your velocity, nice turbulent and swirly, or combed straight out. Just tab-add a Project Non-Divergent Multigrid DOP in any dop network and look at the fields: Velocity Field, Goal Divergence Field and Pressure Field (generated every timestep, used, then removed later on). All the other fields in Pyro are there to affect vel and divergence. Period. Nothing else. At this point I don't care about rendering and the additional fields you can use there. It's about vel and divergence used to advect those fields in to interesting shapes, or mushrooms. If you want to create your own Pyro Solver taking in say previous and new vel, density, temperature, and then in a single Gas Field VOP network, create an interesting vel and divergence field, then pass that straight on to the Project Non-Divergent Multigrid microsolver, then advect density, temperature and divergence afterward, go for it. Knowing that only vel and divergence drive the simulation is very important. All the other fields are there to alter the vel and divergence field. So if you have vel vectors that are combed straight, divergence (combustion model in Pyro) or buoyancy (Gas Buoyancy DOP on temperature driving vel) have a lot to do with it. Or a fast moving object affecting vel...48 points
-
Methods to Stir Up the Leading Velocity Pressure Front We need to disturb that leading velocity pressure front to start the swirls and eddies prior to the fireball. That and have a noisy interesting emitter. Interesting Emitters and Environments I don't think that a perfect sphere exploding in to a perfect vacuum with no wind or other disturbance exists, except in software. Some things to try are to pump in some wind like swirls in to the container to add some large forces to shape the sim later on as it rises. The source by default already has noise on it by design. This does help break down the effect but the Explosion and fireball presets have so much divergence that very quickly it turns in to a glowing smooth ball. But it doesn't hurt. It certainly does control the direction of the explosion. Directly Affecting the Pressure Front - Add Colliders with Particles One clever way is to surround the exploding object with colliders. Points set large enough to force the leading velocity field to wind through and cause the nice swirls. There are several clever ways to proceduralize this. The easiest way is with the Fluid Source SOP and manipulate the Edge Location and Out Feather Length and then scatter points in there then run the Collide With tool on the points. Using colliders to cut up the velocity over the first few frames can work quite well. This will try to kick the leading pressure velocity wave about and hopefully cause nice swirling and eddies as the explosion blows through the colliders. I've seen presentations where smoke dust walls flowing along the ground through invisible tube colliders just to encourage the swirling of the smoke. You can also advect points through the leading velocity field and use these as vorticles to swirl the velocity about. The one nice thing about using geometry to shape and control the look, as you increase the resolution of the sim, it has a tendency to keep it's look in tact, at least the bulk motion. As an aside, you could add the collision field to the resize container list (density and vel) to make sure the colliders are always there if it makes sense to do so. Colliders work well when you have vortex confinement enabled. You can use this but confinement has a tendency to shred the sim as it progresses. You can keyframe confinement and boost it over the first few frames to try and get some swirls and eddies to form. Pile On The Turbulence Another attempt to add a lot of character to that initial velocity front is to add heaping loads of turbulence to counter the effect of the disturbance field. You can add as many Gas Turbulence DOPs to the velocity shaping input of the Pyro Solver to do the job. Usually the built-in turbulence is set up to give you nice behaviour as the fireball progresses. Add another net new one and set it up to only affect the velocity for those first few frames. Manufacturing the turbulence in this case. In essence no different than using collision geometry except that it doesn't have the regulating effect that geometry has in controlling the look of the explosion, fireball or flames, or smoke. As with the shredding, turbulence has it's own visualization field so you can see where it is being applied. Again the problem is that you need a control field or the resize container will go to full size but if it works, great. Or use both colliders and turbulence pumped in for the first few frames and resize on the colliders. Up to you. But you could provide some initial geometry in /obj and resize on that object if you need to. Hope this helps...47 points
-
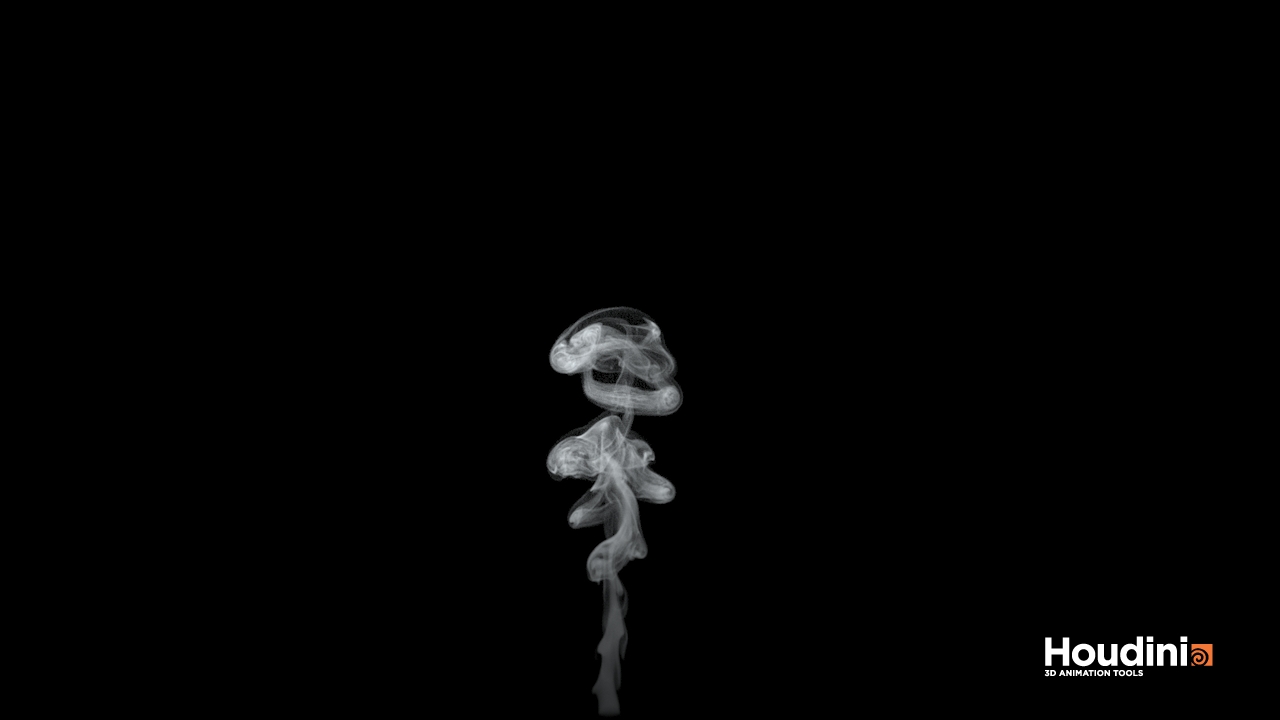
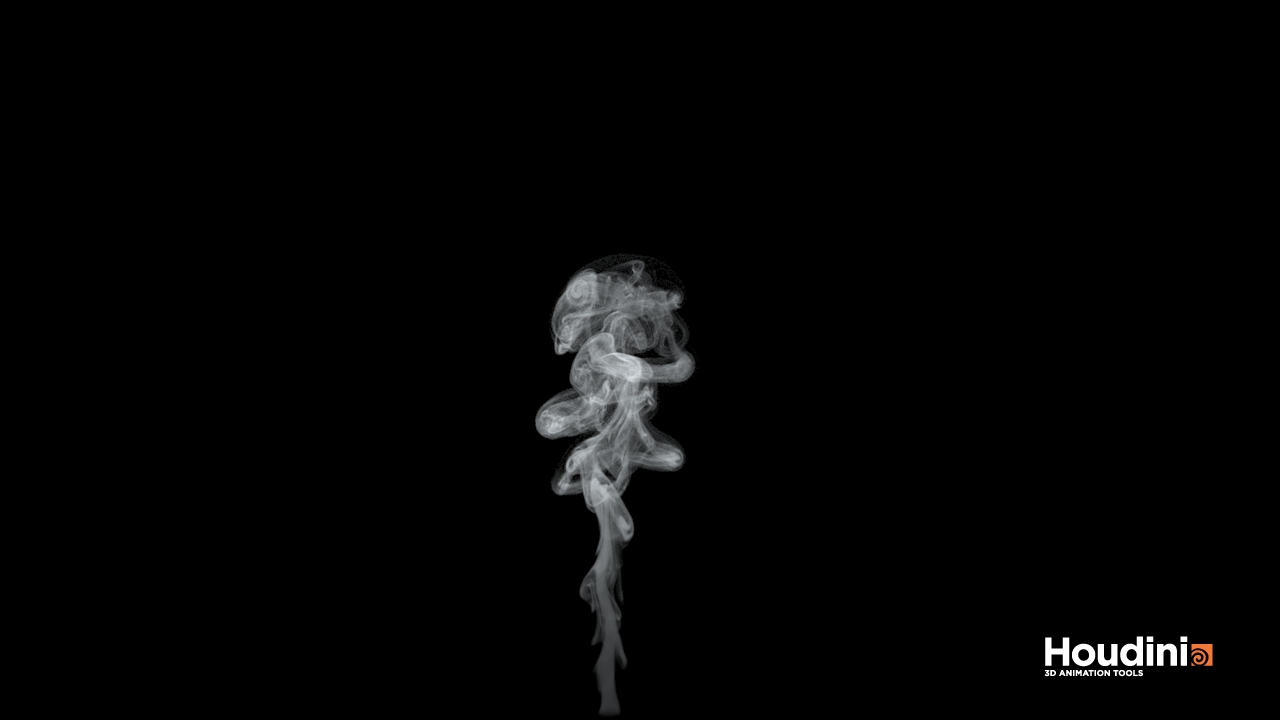
Filament like structure, combination of Smoke Solver, VDB Advect Points + Volume Rasterize Particles. smokesolver_v3.hipnc
 43 points
 -
Ok! First - the most important part of the method. Check this diagram and attached file - they are the core algorithm I came up with. 1. Let's say we have a simple 2d point cloud. What we want is to add some points between them. 2. We can just scatter some random points (yellow). The tricky part here is to isolate only the ones that lay between the original point cloud and remove the rest. 3. Now we will focus just on one of the points and will check if it is valid to stay.Let's open point cloud with certain radius (green border) and isolate only tiny part of the original points. 4. What we want now is to find the center of the isolated point cloud (blue dot) and create vector from our point to the center (purple vector). 5. Next step is to go through all points of the point cloud and to create vector from yellow point to them (dark red). Then check the dot product between the [normalized] center vector (purple) and each one of them. Then keep only the smallest dot product. Why smallest - well that's the trick here. To determine if our point is inside or outside the point cloud we need only the minimum result. If all the points are outside , then the resulted minimum dot will always be above zero- the vectors will tends to be closer to the center vector. If we are outside the point cloud the result will always be above zero. On the border it will be closer to 0 and inside - below. So we are isolating the dot product corresponding to the brightest red vector. 6. In this case the minimum dot product is above 0 so we should delete our point. Then we should go to another one and just do the same check. Thats basically all what you need. I know - probably not the most accurate solution but still a good approximation. Check the attachment for simpler example. In the original example this is done using pointCloudDot function. First to speedup things I'm deleting most of the original points and I'm trying to isolate only the boundary ones (as I assume that they are closer to gaps) and try not to use the ones that are very close together (as we don't need more points in dense areas). Then I scatter some random points around them using simple spherical distribution. Then I'm trying to flatten them and to keep them closer to the original sheets - this step is not essential, but this may produce more valid points instead of just relying on the original distribution. I'm using 2 different methods - the first one ( projectToPcPlane ) just searches for closest 3 points and create plane from them. Then our scattered points are projected to these closest planes and in some cases it may produce very thin sheets (when colliding with ground for example). There is a parameter that controls the projection. Then second one is just approximation to closest points from original point cloud. Unfortunately this may produce more overlapping points, so I'm creating Fuse SOP after this step if I'm using this. The balance between these 2 projections may produce very different distributions, but I like the first one more, so when I did the tests the second one was almost always 0. Then there is THE MAIN CHECK! The same thing that I did with the original points I'm doing here again. In 2 steps with smaller and bigger radius - to ensure that there won't be any points left outside or some of them scattered lonely deep inside some hole. I'm also checking for other criteria - what I fond that may give better control. There may be left some checks that I'm not using - I think I forgot some point count check, but instead of removing it I just added +1 to ensure that it won't do anything - I just tried to see what works and what not. Oh and there are also some unused vex functions - I just made them for fun, but eventually didn't used. So there it is. If you need to know anything else just ask. Cheers EDIT: just edited some mistakes... EDIT2:file attached pointCloudDotCheck.hiplc43 points
-
Coarse Sub-Steps If you have an expanding gas field front that from frame 1 to 2 or frame 2 to 3 travels one or two Houdini units and substeps are set to 1, you will get combed straight velocity vectors which means mushroom caps. No matter how much turbulence or confinement you set on your Pyro Solver DOP, there simply isn't enough time to evolve these fields and have an effect on the result. More substeps means smaller velocities to deal with between substeps making things more manageable too. In an attempt to keep substeps at 1, you can manufacture noise and pump that in to vel but in the end two things will happen: The Non-Divergent step will take your noise and negate most of it, or you end up pumping in so much noise because it isn't working with smaller values you tried earlier, that it swamps the entire effect and it looks like a fractal hash and not that nice evolving fireball. Oh and if you really pump in tons of noise in to vel, it too can create many smaller velocity fronts pushing ahead and you end up with smaller mushroom caps! Doh... This is in essence what the Gas Disturbance DOP does. The Pyro Solver has a Gas Disturbance DOP in it's logic and those parameters are promoted up to the top asset interface but we're concerned about substeps right now and allowing enough time for turbulence and confinement to create the nice swirls on the leading edge of the explosion. So it's coming down to sub steps to try and allow for a lot more character around the leading pressure front for fast evolving explosion type simulations. Two ways to go about this: Brute force increase the global substeps for the entire DOP network, or use the Pyro Solver Substeps in the Advanced tab. Brute Force Global Substeps For explosions, the huge almost instantaneous velocities happen at the first 5-10 frames. It would be nice to keyframe animate the Sub Steps parameter, but you can't (DOPs is that way). If you set the global sub-steps to get enough detail in the first few frames you have to carry those sub-steps through the rest of the sim when things are moving a lot slower and those substeps are no longer required. Not that great. No wonder everyone tries to inject their own pumps to affect vel to avoid global substepping. Pyro Solver Substeps The Pyro Solver exposes minimum and maximum substepping logic to control when and how the Pyro Solver will substep. This sounds interesting and could be just what we need. But what is CFL Condition? No it isn't the Canadian Football League even though we know that 3 downs rule and 4 downs are for those that can't deal 3. It's named after a couple guys who in the '20's, that's 1920's, who were trying to figure out the frequency of data samples they required in order to map and predict fluid simulations and pressures/resistance to flow with fast moving collision objects (that be ships). The help note on the actual Gas SubStep DOP explains it quite well: timestep will be reduced if the velocity field will move only 1 voxel in a timestep. A CFL of 2 will allow it to move 2 voxels in a timestep. Or something like that. You can find it on wikipedia. You can set your minimum substeps to 1 and your maximum substeps to a high enough value such that if the CFL Condition is exceeded, more substeps will occur when the simulation has large velocities and less when the velocity is smaller. Hopefully this gives enough time to let the turbulence and other methods to stir up the vel field kick in. Keyframe Timescale There is a third option to controlling sub steps but that is to keyframe animate the Timescale. Yes more than valid to do this to slow down the sim at the start and then speed up when the huge velocities subside. As a matter of fact, the shelf tools set Timescale to 0.65 as an attempt to get a good looking explosion or fireball without having to resort to substeps. But this is not an automatic method. This requires intervention if you want to animate the timescale. This means you have to run the sim and evaluate. Then you keyframe the timescale and you end up with an entirely different simulation. Then you move your keys, run again. Then you increase the resolution of the simulation and everything changes again. In many ways, it's worth to at least give the min and max substeps a go and see if you can dial in the CFL Condition to get a happy balance. As you increase the resolution of the simulation, the CFL condition measured in voxels will allow substeps to run up a bit faster to the max without too much of a change in the final result.43 points
-
Temperature Field and Divergence Field and what to do about it Combed straight velocities lead to mushroom puffs. Large directional forces lead to combed straight velocities. The pressure wave leading the divergence field leads to combed straight velocities. So what to do? Looking at Temperature first, it is directly used with Gas Buoyancy to drive the intensity whereby the upward direction is multiplied by temperature and then added to vel. Temperature is also used to burn fuel at an ever increasing rate with higher temperatures which then ultimately affects the divergence field. Temperature is also used by some of the shaping tools to inject noise or trigger confinement within the simulation, amongst other fields. Temperature and Gas Buoyancy DOP High temperature values fed in to the Gas Buoyancy DOP will affect the velocity field quite effectively, in a singular direction no less, the buoyancy direction. This inherently leads to nicely combed velocity with higher temperature values and large amounts of buoyancy as the simulation evolves which leads to nice mushrooms leading the way. Just like in real explosions and initial bursts of hot smoke/steam. But the director always wants more "character". That's fine and manageable in most cases as the velocities aren't that large, especially in smoke simulations where the temperature is driven by the sources. In the case of explosions, the burning of fuel can create very high temperatures and cause large upward velocities. Working Temperature with Disturbance By default the Disturbance field affects temperature. It is also cited as one way to break up or diminish the mushrooms. But how and why? And does it work? Using disturbance is designed to add noise to the temperature field around the simulation. This is one way to try to kick or disturb the rising velocity field, in an indirect way though. For Pyro, temperature is used to ultimately affect vel in two ways: Buoyancy and Combustion (which inevitably drives the divergence field). What is Divergence? Well it's randomly generated noise. It's not time coherent turbulence. Yep. If you dive down in to the Gas Disturbance DOP, in to the disturb_field Gas Field VOP you will find a lowly random VOP that is fed a vector 4 (vector P and an animated offset) and generates random incoherent noise per substep. If this sounds desperate, well it kinda is. But it works very well in some cases to etch the leading edge of the velocity to cause eddies that then form ripples and swirls. Think volcano smoke. Disturbance can be applied to temperature and it will eventually have an effect, or you can have it work directly on the velocity for a brute force immediate effect to try to etch away at that leading velocity front generated by the rapidly expanding divergence field. if it is strong enough and if it is localized to just around the evolving sim so that our container doesn't resize to maximum and take too much memory and take too long to simulate, it can work very well. Perhaps this is why the shelf tools only allows for a small value relative to the velocities that are present in an explosion or fireball: it doesn't really work for these types of sims at it's defaults. We have all of the necessary tools to implement this well enough. The Gas Disturbance DOP built in to the Pyro Solver and exposed as the Disturbance parameters can do this. It has support for a control field and even a ramp with min and max threshold values to really dial this in, if you have a field to use that is... For Smoke and combustion fire type simulations (no explosions), you can gleefully use the density field as both your Threshold Field to control the cut-off threshold for the disturbance and as the field to control the amount of disturbance you want. Or use temperature as the Control Field as with rising smoke, the temperature tends to lead the density. For fast rising smoke, you can set the Control Field to temperature and then use the Control Range to say 0 and 0.1 to try to etch the velocity field prior to it being run over by the advancing wave. For Explosions, there is feint hope. Unless you envelop the entire container with shredded velocity, there is no other field at your disposal to use to control where the disturbance should be applied. Yes you can create an additional field containing an expanded divergence field to try this, but there's better ways to coax swirls in the initial part of the explosion. In the end, as with all the other shaping tools, it comes down to magnitude. If the magnitude of the previous frame's velocity is much larger than the velocity shaping amplitude, knowing that velocities are for the most part added or subtracted in most simulation engines, you aren't going to see much effect, especially after the Non-Divergent step gets rid of most of this random pressure hash anyway. When you are dialling in a sim, you have to have the vel on for display and adjust the Visualization Range (working the leading red envelope) to get an idea as to where the velocity is fastest and what those values are (in Houdini units per second). If you have a velocity of 10 in the leading velocity pressure front and you set disturbance amplitude to 0.5, you know it won't have much of an effect. One thing that will have an effect is to apply Disturbance directly to vel for explosions and apply it within the divergence, burn, temperature or any other field that's playing a role in the fireball itself. But not to the surrounding area unless again you bypass the resizing of the container. Heck you don't even need to bypass the resize container DOP. If you are resizing on density and vel, the container will max out after the second or third frame anyway. And you can live with completely incoherent noise that for the most part is wiped out by the Non-Divergent counter pressure field. Divergence and Burning Fuel The divergence field in explosions and fireballs is the main contributor to mushroom caps over the first second or so. It will comb the velocity vectors perfectly straight in the leading pressure wave advancing in front of the density, temperature, fuel, whatever. We know why. It's the Non-Divergent step trying to remove any pressure across the timestep outside of the divergence field. It makes perfect sense then that when carefully inspecting the velocity around the leading edge of the divergence, you will find the greatest velocities. Divergence pushing outward creating a large pressure front causing the Non-Divergent step to add a very large counter pressure field that gives you that front of straight combed velocity. Large amounts of burning fuel (fuel + temperature = burn, divergence (gas expansion) then uses burn and fuel to drive the expansion of the sim) leads to a strong divergence field. Gas Buoyancy affects vel very effectively and divergence allows for rapid expansion. How do the explosion and fireball shelf tools try to avoid mushrooms? Well we see that the timescale is reduced for both options in an attempt to add enough time to evolve interesting swirls in the simulation as it evolves. But for many cases doesn't give you that nice character over the first few frames of the simulation. We also see Disturbance added but at a meagre 0.75 Shredding is set to 1. Shredding is a very nice tool for adding character to fire. As it's name implies, within the threshold tolerance of the effect, the velocity field is either stretched along a gradient direction or compressed. It is the transition between the two that gives you the real nice licks of fire. Shredding defaults to 1 and it has visualization option to see where this shredding occurs and how strong it is by it's color in relation to the velocity. If you look at the shredding, by default it is being applied along the surface of the temperature field where the Threshold Width is being set. Again this won't work for the first second of the explosion. Same for Turbulence and Confinement. They too work within the fireball and not the leading edge of the explosion. so what to do?39 points
-
Another, focused on instancing smoke objects. Manipulating points with basic instancing attributes, i@cluster, v@scale and f@sourceframe. How to activate smoke object and holding a volume source. This method ideal for triggering independent gas simulation on impact data. Additional examples, e.g. grid clustering method for trail and non-trail which I'm merging from a separate thread. smokesolver_v2.hipnc
 38 points
 -
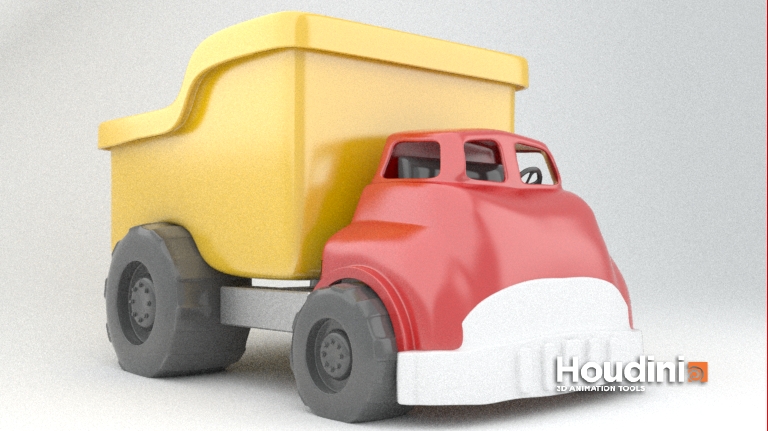
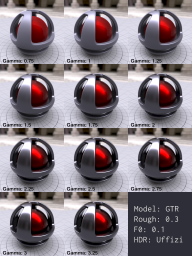
Hi Ronan, What a perfect file to warp and twist a render's performance. Super simple geometry with no surface complexity what so ever. Simplistic lighting scenario. Perfect set-up to turn Mantra's PBR defaults sideways but if you know a bit about how to approach such a scene, you can dial it in and get super reasonable render times out of Mantra. Just looking at your file, yeah you had the primary samples jacked which is what I find most everyone does when they first try to get clean PBR renders. I really want to have a reorganized interface in a Mantra ROP tailored to just do PBR. My approach with PBR and Mantra these days is to set the primary Pixel Samples as low as you can to resolve the geometry detail itself and if there are fine displacements or high frequency textures, then and only then will I start cranking up the primary Pixel Samples if I can't resolve that "primary" detail. I call these "primary" as they are the bare minimum that Mantra will fire at the given bit of surface under the current pixel being shaded. These are the first set of rays that find geometry (including fine curves and displacements), resolve geometric detail and run shaders to draw texture maps and procedurals. After that, secondary rays are fired at the same bundle amount set by Pixel Samples when the noise threshold hasn't been met. The Min Pixel Samples I rarely set above 1. The Max Pixel Samples defaulting to 9 I don't change unless I start lowering the noise threshold below 0.02 or 2 percent variation in the returned pixel samples. The max Pixel Samples is a maximum threshold for number of Pixel Sample passes to perform in order to reduce the noise to your given noise tolerance. Either you run out of secondary ray multipliers on the Pixel Samples or you reach your noise threshold. When rendering with PBR, you must set the gamma to 2.2 or use a proper sRGB lut to compensate for your monitor OS settings. It assumes that your images will be color corrected with a gamma 2.2 set. If not, you will adjust your lights for things to look good and that will cause your darks to be artificially too dark with the result being much more noise. I wonder if this given render engine is Fisher Price'ing the linear lighting process by doing this all behind the scenes for you. I won't tell you the amount of heat we'll take in Support if we ever tinker toy'ed the interface... Pretty simple. Chase the rays in the darks where there is more noise and fire as few rays for the areas swimming in lots of light. Now for some tests to see this in action. In the images below, look at the shadow under the dump as well as the yellow of the dump on the rear as trouble areas where the noise seems to be most obvious. My test mule is a MacBookPro core-i7 2.3GHz 4 cores with 8GB of memory. I always set the Color Space on the Mantra ROP to Gamma2.2 to help get PBR chase more light rays in to the dark occluded regions. I also left the Diffuse bounces to 3 as you have set them and no indirect Photons used. Time: 3m01.374s Pixel Samples: 3x3 Min Ray Samples: 1 Max Ray Samples: 9 Noise Level: 0.01 (one percent) Notes: By rendering out the "level" export plane, I can see that with noise level set to 0.01, in the dark regions the trace level hit around 9 so the number of rays were 9*3*3=243 in the dark shadow areas. On the more direct illumiated surfaces, it was at 1 or 2. The Ray Variance Aliasing allows you to use the noise percentage threshold to have PBR chase rays where you want them to go. Time: 3m29.139s Pixel Samples: 3x3 Min Ray Samples: 1 Max Ray Samples: 10 Noise Level: 0.01 (one percent) Notes: This next render has the Max Ray Samples bumped up only one stop and the render time is a bit longer. This tells me that the previous image hit the Max Ray Samples before the noise threshold was satisfied in more areas than this render. In this image, with the extra bundle of 3x3 primary samples, the noise threshold caused another multiple of rays to be cast in the dark shadow regions and most likely the noise threshold was met in more areas of the image. Time: 9m46.193s Pixel Samples: 3x3 Min Ray Samples: 1 Max Ray Samples: 32 Noise Level: 0.01 (one percent) Notes: One third longer render from the previous even though the Max Ray Samples is set to 32. I am now pretty much guaranteed to have reached my specified noise threshold limit of one percent (0.01). At 9m a render, this should be the absolute longest render time for this kind of an image. If you are getting anything longer than this with the given hardware, then you jacked the pixel samples too high. The only thing reducing the noise now is to reduce the noise threshold even further or investigate the use of indirect photons to help with calculating irradiated light and reduce secondary bounces. Time: 4m36.849s Pixel Samples: 2x2 Min Ray Samples: 1 Max Ray Samples: 32 Noise Level: 0.01 (one percent) Notes: So now lets put the knowledge to a test. Given that this is a real simple model with little if any geometric detail and the edges are all fairly smooth, we should be able to reduce the primary Pixel Samples and still get a nice clean render. Reducing the primary pixel samples to 2x2 in this specific image with very little surface detail really doesn't have much effect on the final image quality and with Max Ray Samples at 32 and noise at 1 percent, still gives you very nice results with indirect lighting. Now if this model had displacements or fine highly detailed textures, I'd probably have to bump up the primary Pixel Samples to 4x4 or 5x5. You just gotta play with it. Time: 4m58.302s Pixel Samples: 2x2 Min Ray Samples: 1 Max Ray Samples: 32 Noise Level: 0.005 (0.5 percent or half of the above images) Notes: Pushing things to the logical limit, let's reduce the noise threshold in half and see if we can chase more pixel sample rays in to the shadows to clean things up there. As you watch the render progress, the nicely lit areas render quickly but when the bucket lies in an area of shadow, things slow down as they should. Now if you naively jacked the primary samples, you'd get this even overbearing overhead. Remember, chase the noise! So the render time didn't increase that much indicating that we are bumping up against that 32 Max Ray Sample threshold so now you can carefully increase the Max Ray Samples until the noise in the darks are gone with minimal increase in render times on top of this. Time: 3m21.05s Pixel Samples: 2x2 Min Ray Samples: 1 Max Ray Samples: 32 Noise Level: 0.005 (0.5 percent or half of the above images) Added Indirect gilight to the scene to help cache indirect light at default settings Notes: Same settings as the previous render but significantly faster, smoother and with more indirect light. Sweet. Adding the indirect light does have an additional overhead in calculating the photons but not that bad. It does become invalidated in the IPR viewer if you change a light or a surface parameter, but within reason when tweaking subtle light values and colors, you can plow ahead knowing that the indirect photons are not quite perfect but close for tweaking. Mistakenly many think that using indirect Photon Maps is primarily for speed with less noise. Well yes and no. I use them primarily to get at the final total limit indirect diffuse contribution in the scene. Note the yellow in the shadow under the dumper and red under the cab in this render. You'd have to crank the indirect ray bounces much higher to get this otherwise. So this is one way to dial things in with PBR. First get the primary samples to resolve the primary direct lit surface detail to where you want. Then add indirect lighting by managing the max ray samples and the noise level on top of the base Pixel Samples. Simple and effective.


 35 points
 -
Hi all! New version of the setup for H14. The scene is much better organised and optimised. There also some new features which makes this setup actually very useful. Have Fun! DOP_DynamicFracture_H14_v09.hiplc33 points
-
During the last 3 weeks, a did some Rnd and published my results on vimeo . Some people asked me to share my files here, so here we are i hope it will help!32 points
-
Basic: // Primitive wrangle. int pts[] = primpoints(0, @primnum); vector rest = point(0, "P", pts[0]); vector prev_pos = rest; matrix3 frame = ident(); for (int i = 0; i < len(pts); i++) { vector pos = point(0, "P", pts[i]); rotate(frame, 0.1, {0, 0, 1}); vector new_pos = (pos - rest) * frame + prev_pos; rest = pos; prev_pos = new_pos; setpointattrib(0, "P", pts[i], new_pos); } Advanced: // Primitive wrangle. #define TWO_PI 6.2831852 addpointattrib(0, "N", {0, 0, 0}); int pts[] = primpoints(0, @primnum); int npt = len(pts); // Loop variables. vector rest = point(0, "P", pts[0]); vector prev_pos = rest; matrix3 frame = ident(); for (int i = 0; i < npt; i++) { vector pos = point(0, "P", pts[i]); vector delta = pos - rest; rest = pos; // Make normal. Point normals could be used instead. vector normal = normalize(cross(cross({0, 1, 0}, delta), delta)); if (length(normal) == 0) { normal = {0, 0, 1}; } // Drive a shape with ramps and multipliers. vector axis; float ramp, angle; // Twist the bend axis. axis = normalize(delta); ramp = chramp("twist_profile", (float) i / npt); angle = fit01(ramp, -TWO_PI, TWO_PI) * ch("twist") / (npt - 1); rotate(frame, angle, axis); // Bend the curve. axis = normalize(cross(normal, delta)); ramp = chramp("bend_profile", (float) i / npt); angle = fit01(ramp, -TWO_PI, TWO_PI) * ch("bend") / (npt - 1); rotate(frame, angle, axis); // Compute new position and normal. vector new_pos = delta * frame + prev_pos; prev_pos = new_pos; setpointattrib(0, "P", pts[i], new_pos); setpointattrib(0, "N", pts[i], normal * frame); } curl.hipnc


 31 points
 -
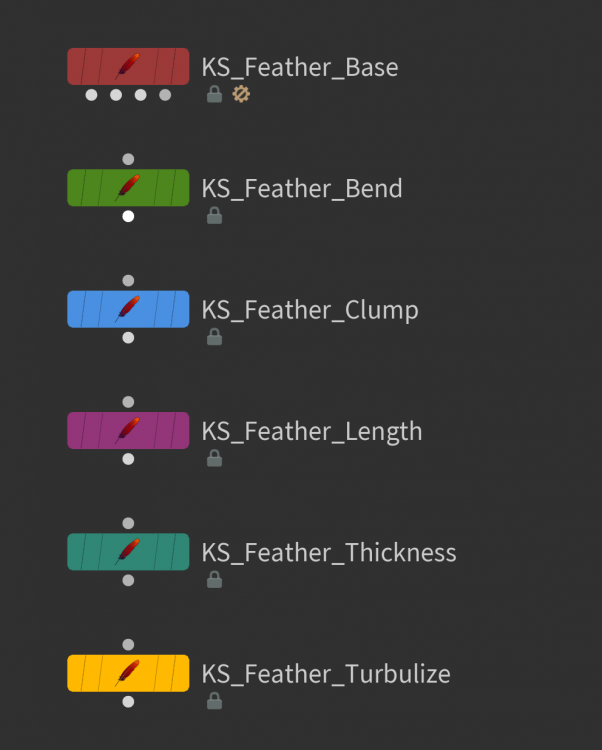
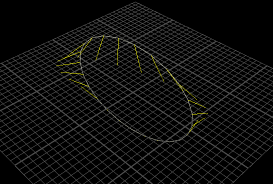
I want to share a little tool I made for grooming feathers. Its a set of 6 nodes, one base node and 5 modifiers. Super easy to use. Just connect them and.. there you go - you got yourself a pretty little feather. You can layer modifiers as many as you want. Any feedback is super appreciated. https://www.dropbox.com/sh/8v05sgdlo5erh0b/AADSfadqkxgPOBVeaGr2O49Oa?dl=0


 29 points
 -
A lot of people asked me to share this fake fire method.If you interested it, you can will check this simple hip. After rander i used ACES for a better look. fake_fire_rnd.hip29 points
-
Try this... Put down a measure SOP and set it to measure the perimeter of your curves. After that a primitive wrangle and write. #include <groom.h> adjustPrimLength(0, @primnum, @perimeter, @perimeter*@dist); groom.h is a included file containing some functions used in the grooming tools and one of the functions is... void adjustPrimLength(const int geo, prim; const float currentlength, targetlength)29 points
-
Hello. Since Houdini 12.5 and the addition of the cvex_bsdf() function the user base is no longer restricted to the confines of Phong and Blinn. While these models are tried and true over the past few years newer reflectance models have stepped into the spotlight (pun!), notably the ever so popular GGX. So for the lulz I implemented a variety of the newer ones and would like to share. Ultimately this is an incredibly huge topic and would take a significant amount of writing to explain all the fun bits so instead I'm going to link spam because I got TF2 to play. Background & Learning Physically Based Rendering for Artists (youtubez) Physically Based Specular for Artists Basic Theory of Physically-Based Rendering Cook-Torrance Model in Mantra Shader Microfacet BRDF (This is quite "mathy" but gives a nice overview of what is going on inside the Microfacet VOP) Disney BRDF (Disney's BRDF from Siggraph 2012, minimal parameters with a fair bit of flexibility. Required reading for the Disney VOP and also the GTR VOP) Siggraph 2010 Course Notes Siggraph 2012 Course Notes Siggraph 2013 Course Notes So with that all that background info out of the way on to the toys. In the attach OTL there are a few different VOPs, I've included a brief description here, but I actually (gasp) wrote documentation for each of the VOPs so I suggest you read them. Physically Based GGX (cvex) Microfacet BSDF with a GGX distribution, Schlick Fresnel, and Smith Masking. If you set the model to be "Distribution Only" it disables Fresnel and Masking and is purely just a distribution similar to how Phong, Blinn work. This model also supports anisotropic distributions. Physically Based GTR (cvex) A more generalized version of GGX. (GTR stands for Generalized Trowbridge & Reitz). In fact GGX == GTR when GTR's gamma parameter is 2. This is isotropic, Mathematica and I are still having a disagreement over possible anisotropic solutions. Physically Based Microfacet (cvex) This is everything and the kitchen sink. Its slower and not really meant for production cause it has all the options. But its good for exploring the various models and what they look like. Once a nice combination is found you'd would make a more dedicated and optimized version similar to the GGX/GTR ones above. You might get some fireflies with this for certain combinations as some of the formulas will converge on infinity faster than others. Generally the easiest way to fix it is to increase your Roughness G. The Roughness G parameter allows you to control the roughness Geometry Masking term independently of the distribution. Think of it as a multiplier for how much "micro-occlusion" you want. Disney (cvex) Direct port of the Disney BRDF. The parameters for this are suppose to be generally kept between 0 and 1 however I find the sheen to be way under powered when at a value of 1, so you might need to crank it to 11 to see it. Please read the help card for this VOP, there is some special sauce overriding functionality I added. Disney Mixer VOP for mixing collections of Disney BRDR parameters. (Or BSDFs) How My Versioning Works major.minor.hotfix.build Majors: are full rewrites and I'd be amazed if the look stays the same. Minors: are important changes that might affect the look but I'll try to avoid it as much as possible. Basically I'll only change the look if I'm fixing a flaw. Hotfix optional: is for cases where some bug that needed fixing but doesn't change the look. Build: Builds are the number of commits since the previous release object. These will go up during development and once a release is frozen the build will stop. These don't affect namespacing and only show up in the otversion. Reporting Issues If you have a issue/bug/question please ask, I (we) are using variants of these in production so there will be continued support. When asking tho I ask/plead that you post what version of the shaders you are using. That way I know exactly where to took. You can get this info by middle mousing on one of the VOP nodes or running 'opinfo' on it. For example- / -> opinfo /shop/vopsurface1/pbrdisney1pbrdisney1: Full Name: /shop/vopsurface1/pbrdisney1 Operator type: pbrdisney Version: 1.1.55 Branch: release-1.1 Date: 2014-08-06 Commit: 6fc9e7f All that version, branch, and commit info is music to my ears. (If nothing else, please provide the commit.) Obligatory Renders of Smooth Objects Both these wedges are of the GTR model. One with varying roughness, the other with varying gamma. (Gamma on the GTR model controls how fast the specular tail falls off.) OTLs There are two OTLs, both with the same shaders but one OTL has namespaces and versions on the type names the other one doesn't. If you are going to use these in production or what-not I recommend the namespaced version that way if there is an update later one they can live side by side. If you don't care and are playing just go for the non-namespaced one. All of this stuff currently sits in a private git repo on bitbucket, once everyone bangs on it a bit and I get everything rock solid I'll switch it to a public repo so others can contribute. v-1.2 (devel) bsdf-v1.2.otl bsdf_namespaced-v1.2.otl v-1.1.1 (stable) bsdf-v1.1.1.otl bsdf_namespaced-v1.1.1.otl v-1.1 (stable) bsdf.otl namespaced_bsdf.otl Release Notes: 1.2: Removed roughness masking remapping on the Disney BSDF. (Edges will reflect more light now.) 1.1.1: Workaround for Houdini LLVM bug #63368 Added an Ashikhmin Diffuse VOP which handles microfacet masking 1.1: Initial Public Offering Known Issues: Calculation of albedo needs some thought. Currently the albedo returned is the normalization factor for the distribution function. While this matches how phong() and blinn() are setup, it should instead return the full reflectivity over the hemisphere taking into account frensnel (and masking?).

 27 points
 -
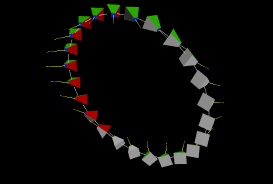
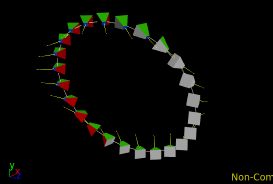
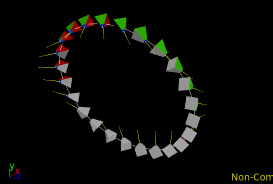
Gifstorm! First I've used a visualizer sop to show @v coming out of the trail sop: That makes sense so far. To make the next step easier to understand, I've shrunk the face that sits along +Z, and coloured the +Y face green, +X red, +Z blue. So, that done, here's that cube copied onto the points, with the v arrows overlaid too: The copied shapes are following the velocity arrows, but they're a bit poppy and unstable. So why are they following, and why are they unstable? The copy sop looks for various attributes to control the copied shapes, @v is one of them. If found, it will align the +Z of the shape down the @v vector. Unfortunately what it does if it has only @v is a little undefined; the shapes can spin on the @v axis when they get near certain critical angles, which is what causes the popping and spinning. To help the copy sop know where it should aim the +Y axis, you can add another attribute, @up. I've added a point wrangle before the trail, with the code @up = {0,1,0}; ie, along the worldspace Y axis: you can see all the green faces now try and stay facing up as much as they can (note the view axis in the lower left corner), but there's still some popping when the velocity scales to 0, then heads in the other direction. Not much you can do about that really, apart from try some other values for @up, see if they hide the problem a little better. What if we set @up to always point away from the origin? Because the circle is modelled at the origin, we can be lazy and set @up from @P (ie, draw a line from {0,0,0} to @P for each point, that's a vector that points away from the origin): Yep, all the green faces point away from the center, but there's still popping when @v scales down to 0 when the points change direction. Oh well. Maybe we can venture into silly territory? How about we measure the speed of v, and use it to blend to the @up direction when @v gets close to 0? Better! Still a bit poppy, but an improvement. Here's the scene with that last setup: vel_align_example.hipnc To answer the other key words in your topic title, I mentioned earlier that the copy sop looks for attributes, obviously @v and @up as we've used here, but if it finds others, they'll take priority. Eg, @N overrides @v. @N is still just a single vector like @v, so it too doesn't totally describe how to orient the shapes. You could bypass the trail and the wrangle so that there's no @v or @up, set @N to {0,1,0}, and all the shapes will point their blue face towards the top. Without any other guidance, it will point the red side of the shapes down +X. If you give it @N and @up, then it knows where point the green side, and you get a well defined orientation. While using 2 attributes to define rotation is perfectly valid, there are other options. The one that trumps all others is @orient. It's a single attribute, which is nice, and its party trick is that it defines orientation without ambiguity, using a 4 value vector. The downside is quaternions aren't easy to understand, but you don't really need to understand the maths behind it per-se, just understand what it represents. The simplest way is to think of it as @N and @up, but glommed into a single attribute. Another way is to think of it as a 3x3 matrix (which can be used to store rotation and scale), but isolated to just the rotation bits, so it only needs 4 values rather than 9 values. In houdini, you rarely, if ever, pluck quaternion values out of thin air. You normally generate what you need via other means, then at the last minute convert to quaternion. Lots of different ways to do this, coming up with ever funkier smug ways to generate them in 1 or 2 lines of vex is something I'm still learning from funkier smug-ier co-workers. Eg, we could take our fiddled @v, and convert it to a quaternion: @orient = dihedral({0,0,1} ,@v); What that's doing is taking the +Z axis of our shape-to-be-copied, and working out the quaternion to make it align to @v. You could then insert an attrib delete before the copy, remove @N, @v, @up, and now just with the single @orient, all the shapes rotate as you'd expect. vel_align_example_orient.hipnc
 26 points
 -
I promised, that i will publish some source files and here they are. Inside you can find some network from demovideo, from pre work to render. All assets are unlocked(i used its for git), don't pay attention to that. Happy x-mas. Tree_generator_demoscene_unlocked.hipnc26 points
-
attached is a file with all sorts of curvature computation for vdbs ... hth. petz vdb_curvature.hipnc25 points
-
Hey all. I tend to read these sorts of forums a lot but never actually contribute anything, so I figured I should change that. Here's a somewhat lengthy write up of an approach to peeling paint off of a wall: http://www.pixelninja.design/paint-flakes-in-houdini/ I haven't been using Houdini long (only a couple of months) so there's probably much better ways of doing this. If so, let me know! Hopefully it's easy enough to follow along with. Blog/tutorial writing isn't something I generally do, so if you've got any feedback I'd love to hear it. Edit: added a hip file as per a request paintFlakes.hipnc24 points
-
There was an error in pop_too_close wrangle. It deleted both intersecting bubbles, not just the smaller one, drastically reducing bubblecount. Normally it should remove only degenerate bubbles almost enclosed by neighbours. It also seems that whole loop can be replaced with a point wrangle. So, it cooks instantly now, retains topology and scales better. Scattering and pscale setup really matters. You need to generate a good foam first, before doing intersections. The current setup should be improved somehow. bubbles2.hipnc
 24 points
 -
I'll just leave this one here. Very easy and controllable way to add details to the simulation, that I wanted to try for such a long time. Cheers! DOP_particleVorticles_v08.hiplc24 points
-
Hello fellow magicians I've released my latest project Skull Beach and raised some interest regarding the method I used for the foam. I want to share a hip file with the basic principle behind this fx. Have fun with it, improve on it, and don't hesitate to share your creations! vellum_foam.hip23 points
-
Pixelkram / Moritz S. (of Entagma) and I are proud to announce MOPs: an open-source toolkit for creating motion graphics in Houdini! MOPs is both a suite of ready-to-use tools for solving typical motion graphics problems, and a framework for building your own custom operators easily. More information is available from our website: http://www.motionoperators.com Enjoy!
 23 points
 -
Use VDB point advection to output geometry. You need to compute a velocity vector, it's up to you. For example, just a curl noise (first image) is a good starting point, as well as cross product of @N and position delta using point cloud (second image, some noise applied also). It may be anything you could imagine, from fluid trails to volume thickness. curlypig.hipnc
 23 points
 -
ok, here is the example file with 4 ways (cache the instance geometry first, both blue nodes ) 1. (Purple) rendering points with instancefile attrib directly through fast instancing 2. (Green) overriding unexpandedfilename intrinsic for any packeddisk primitive copied onto points without stamping 3. (Red) just for comparison Instance SOP, which is using copy stamping inside, so it will be slower than previous methods 4. (Yellow) copying static alembic without stamping and overriding abcframe in this case to vary time for each instance independently (if you need various alembics you can vary abcfilename as well) ts_instance_and_packed_examples_without_stamping.hip23 points
-
Not long ago I was tasked with a simulation of bags of hard candy falling and splitting open on the floor, with the candy of various shapes and sizes spilling out. This turned out to be way harder then I thought. There is really no built in way for vellum and bullet dynamics to interact with each other in Houdini. After searching the internet, I did find one tutorial on kind of faking the interaction, but it seemed overly complicated to me. So after a bit of R&D I came up with this setup. Its very simple and fast, and solves both the vellum and bullet sims in one network at the same time: It basically works by importing the RBD geo into the vellum collision solver, and the vellum geo into the bullet solver. The mass of the RBD has to be faked in somewhat, so it interacts with the cloth in a more realistic way, but that's it! See hip for example: vellum_x_bullet.hip
 22 points
 -
Lighting/Shading test22 points
-
SideFX Houdini - History Houdini 16.0 2017-FEB-21 New Network Editor Brand new architecture for better performance, user experience and control Completely redesigned look and feel ‘Dot’ connections to help route wires Customizable node shapes Resizeable colour palette ‘Flyout ring’ to quickly access node flags and node info at any zoom level Persistent node info dialog with live links and cut-and-paste capabilities Visual ‘badges’ to indicate certain properties of the node Multi-selectable and multi-assignable wires Ability to knife-cut wire connections Snapping guides for fast and easy node alignment Automatic shifting of nodes to accommodate new entrants Intuitive, gesture-driven network layout tools Quickmark hotkeys to jump between networks or within one network Dimming of long wires to prevent obstruction of nodes Visual indication of non-local dependencies, with handy jump-to controls Background image support for network boxes or the entire canvas Font size, colour and background controls for sticky notes Optional display of the node type Powerful search engine Modeling Fast Boolean with exact predicates and arithmetic 3D and UV smoothing with advanced surface analysis kernels PolyFill with quads, fans, and more Enhanced PolySplit and PolyBevel Redesigned Copy/Instance and Group Intersection analysis and stitching Robust 2D triangulation Selection enhancements Fast tool access via customizable, gestural radial menus Infinite reference plane with rulers Medial axis snapping Vertex normal support in the viewport for cusping Pseudo-bevelling with Normal SOP Aggressive geometry compression Extensive OpenCL support ‘Compiled SOP’ architecture: parallel cooking and memory savings 3D Mouse support Terrain Brand new architecture for procedural terrain generation Based on height-field volumes in SOPs Full and immediate access to Houdini’s modelling arsenal 30+ dedicated surface operators Powerful erosion models Straightforward workflow, similar to image compositing but in 3D Seamless optional leveraging of Houdini’s compositing network (COPs) Ability to mask areas of interest with freeform curves and texture maps Ability to paint and override any attribute Support for geotiff and several Lidar formats Native output to game engines Fully tileable Game-friendly terrain material and specialized shader for VFX use High-quality visualization in the viewport Dedicated Mantra procedural for rendering Very fast: hardware accelerated via OpenCL Native collision support for Houdini’s physical sim environment (DOPs) Look Development Architecture for single-tiered shader creation in VOPs (no SHOPs required) - /MATs Much streamlined workflow to aid both new and existing users Full support for nested, unlimited shader layering Redesigned VOP node tiles Ray-traced SSS BSDF with image-plane outputs Support for unified nested dielectrics Dispersion and absorption BSDFs Redesigned Principled ubershader with extensive features and controls Updated shader gallery with new entries such as skin, wax and mountain Easy OpenGL tagging of shader attributes for viewport visualization Viewport support for metallics, coat, occlusion, reflection and more Texture baking enhancements OpenColor IO support Per-pixel inspection of material stylesheet overrides in IPR Significant performance enhancements to Mantra Fine-grained, intuitive controls for the quality/performance tradeoff Direct rendering of HIP files containing curves and points with no Engine license Character Many enhancements to the Animation Editor Flexible constraint architecture based on VOPs and CHOPs Biped and quadruped auto-rigs Biharmonic skin capturing to diminish the need for weight painting Fast bone placement with medial axis support ‘Invisible rig’ support in Pose tool Spring-based and FEM-based skin & muscle system Significantly improved FEM soft-body solver Optimized for performance Hair & Fur Complete overhaul of hair and fur creation, grooming and rendering Unrestricted layering of grooming operations in SOPs Rich set of dedicated tools such as clump, frizz, curl, trim, extend and part Flexible masking tools to isolate areas of interest Ability to override any attribute via texture maps or 3D paint Total freedom to mix attribute painting with 3D brushing Equal editing access to grooming guides and generated hair Full preservation of procedural graph Built-in simulation controls Easy and accurate retargeting High-quality hair visualization in the viewport Dedicated shelf tools and desktop Very fast: uses OpenCL and the new ‘Compiled SOPs’ architecture SOP-based Mantra procedural that does not consume Engine license Crowd Simulations Viewport visualization of material stylesheet overrides Animation clip layering Enhanced hip adjustment and foot locking Non-bipedal terrain adaptation Intelligent adaptation to real-time deforming terrain Advanced controls for looping, trimming and self-blending of clips Easy attachment of props such as weapons and clothing Support for custom collision shapes Robust and significantly faster computation of automatic joint limits Improved clip selection and randomization controls Clip renaming and unit conversion during FBX import Native support for collision with height-field terrain Ocean Tools Complete overhaul of the ocean FX architecture Unlimited layering of arbitrary wave spectra in SOPs Infinite oceans: tile-free approach that eliminates concern for artefacts Waves can be applied artefact-free even to deformed/warped base grids Art-directable, animated hero waves can be mixed in seamlessly Masking tools to isolate areas of interest 3D particle foam system for a richer and more realistic look Guided sims: seamless blending of FLIP fluid sim with ocean surface Improved boundary layer that preserves boundary velocities Very fast: OpenCL accelerated Layerable ocean shader that lets you plug in foam particles Render-time evaluation of ocean surface via dedicated Mantra procedural FLIP Fluids Physically correct simulation of surface tension Suction force: art-directable fluids driven by animated geometry Waterline feature: wave dynamics that extends correctly beyond boundaries Enhanced viscosity solver with slip controls Fully OpenCL-accelerated pyro pipeline Native support for collision with height-field terrains Houdini Engine & Games HAPI 3.0: no longer Houdini Digital Asset (HDA) centric; packed primitive support Remote debugger: live view and manipulation of game engine scene within Houdini Many UE4 and Unity plug-in enhancements Dedicated shelf tools for games Rigid-body and breakable simulation export to FBX Blendshape export to FBX Simulation export to textures for use in real-time engines Much improved texture baking More robust PolyExpand2D Houdini 16.0 Price (USD) as of 2017-OCT-18 Package Type Floating Floating Annual Rent Floating Annual Upgrade Plan Node Locked Node Locked Annual Upgrade Plan 30-Days Rent 7-Days Rent FX C $6,995 $4,495 $3,995 $4,495 * $2,495 $625 Core C $2,995 $1,995 $1,495 $1,995 * $995 $255 Engine C $795 $499 * $100 * $35 * Indie LC $199 ** Engine Indie LC FREE ** Education NC $75 Engine Education NC FREE Apprentice NC FREE * * Monthly Renewal * Limit of 5 Licenses per studio. ** Limit of 3 Licenses per studio. * Maximum Quantity of 5 * Maximum Quantity of 10 Houdini 15.5 2016-MAY-19 Modeling New PolyBevel 2.0 SOP New PolySplit 2.0 SOP New Dissolve 2.0 SOP TopoBuild tool (phase II) Variable width offsets in PolyExpand2D Double-click for edge loop selection Double-click for point and primitive island selection Crowds Advanced locomotion controls Direct FBX Imports for agents Vertex normal support for deforming crowd agents New Agent CHOP New Terrain Adaptation SOP Improved crowd steering behaviour Accurate foot planting Mocap Biped 3 with library of motion clips UVs Triplanar UV projection VOP Curvature support for UV Bake Tighter UV island packing in layout Lighting and Rendering Third Party Rendering Support in Houdini Indie - Today: RenderMan, Arnold, and Octane - Coming: Redshift, V-Ray and Maxwell New VR Camera built using new VR lens shader DOF and Motion Blur in OpenGL ROP Overscan rendering support and crop window fixes OpenGL displacement mapping in viewport "Render to Disk in Background" button on SOHO ROPs Photon tracing control in Mantra User Experience Better Euler tumbling in viewport 3D handle enhancements File chooser enhancements Improved geometry snapping Multi row/column pasting in Parameter Spreadsheet Help system enhancements Character "Delta Mush" deformation support Multi overlapping selection in Dopesheet Hair and fur grooming enhancements Performance Faster VEX function loading and more efficient memory use Faster saving of large geometry HQueue performance optimizations Volumes OpenVDB 3.1 Interoperability Many Alembic enhancements Houdini 15.5 Price (USD) as of 2016-FEB-06 Package Type Node-Locked Floating Subscription Houdini FX Commercial $4,495 $6,995 Perpetual Houdini Commercial $1,995 $2,995 Perpetual Houdini Engine Commercial $499 $795 Annual Houdini Indie Limited Commercial $199 --- Annual Houdini Engine Indie Limited Commercial FREE --- Annual Houdini Education Non-Commercial $75 --- Annual Houdini Apprentice Non-Commercial FREE --- Monthly Houdini 15.0 2015-OCT-15 UI GGX and PBR in viewports XML Menus Geometry PolyBridge Block Begin/End Looping Paste at cursor Animation Onion Skinning Character Picker Pane Pose Library Pane Dynamics FLIP handling 2B+ particles Crowds Rag Doll States Rendering Principled Shader (Disney) Shader Layering in VOPs Viewport Normals Material Stylesheets Update IPR Render times info Read PSDs in COPs Bake Textures Houdini 14.0 2015-JAN-15 UI Qt for GUI Visualizer New Color Picker (TMI) Animation Editor (Channel Editor) Workflow Improvements Dynamics Point Based Dynamics (PBD) Crowd Simulation Gas Curve Force Hair Grooming Material Stylesheets Bunch of New Nodes Attributes can now hold Arrays Mantra license now per-machine (previously per-CPU) Houdini Engine for UE4 2015-DEC-03 Houdini Engine for 3dsmax 2015-NOV-06 Houdini Engine 2.0 2015-OCT-15 Houdini Indie 2014-AUG-07 Houdini Engine for Cinema 4D 2014-APR-23 Houdini Engine for Unity 2013-NOV-20 Houdini Engine for Maya 2013-NOV-20 Houdini 13.0 2013-OCT-31 Particles Particles as DOPs VEX-based (Faster) Stream Concept Dynamics Finite Element Solver New Fluid Surfacer Debris Shelf Tool Packed Primitives OpenEXR 2 (ILM) OpenSubdiv (Pixar) OpenVDB (Dreamworks) Update VEX/VOP Can now create geometry Linear Workflow Data Tree Houdini Engine Introduction 2013-JUL-11 Maya Cinema 4D Houdini 12.5 2013-MAR-14 FX CloudFX OceanFX OpenVDB Sparse Volumes Primitive (Dreamworks) OpenCL DOP FLIP Animated Densities, Viscosities & Timescales Bullet Concave Geos New Bullet RBD Constraints Lighting Volume Lights Independent Env Light Workflow Alembic Updates Alembic Procedural Shader File SOP/DOP Create Dirs Geometry PolySoup Primitive Remesh SOP Wrangle Nodes UI Group visualization Coincident Points Bind VOP Houdini Master Price Drop - $4,495 2012-AUG-07 Houdini 12.1 2012-AUG-07 Edge Grouping OpenVDB Initial Integration Alembic update "Houdini FX" Naming Orbolt Smart Asset Store Tetra Primitives Houdini 12.0 2012-MAR-01 Simulations Faster (Pyro, Cloth, FLIP, Hair/Fur) FLIP Viscosity PyroFX 2.0 Re-written core OpenCL/GPU simulation Clustering Pyro Shader SOP Solver Bullet (now default) RBD Rendering PBR for Volumes IES Lights OpenGL ROP Point Instance Procedural Shader Viewport Rewrite - OpenGL 3.2 Performance Monitor New geometry core (GA library replaces GB library) Houdini Master Price Drop - $6,695 2010-JUN-10 Houdini 11.0 2010-JUL-27 Simulations FLIP Solver - See History Dynamic Fracturing (Voronoi) SPH Speed Up Improvements on Fur/Cloth Volume Nodes Shader Building Material Shader Builder Delayed Load Procedural VOP Ptex Uniform Volume Property (PBR/RT) VOPs Shader Effects Collapse/Peg Debug/Bypass Viewport OpenGL Effects (Volumes, Lights, Normals) 11.1 Alembic Support Extended Support for OpenEXR & Field3d Houdini 10.0 2009-APR-16 Simulations Distributed Sims Smoke Up-res Rendering Progressing Interactive Photo-realistic Rendering (IPR) PBR Multi-threading Engine now implemented in VEX Deep Camera Maps Dynamics RBD - ODE Cloth Crumpling/Tearing Misc Stereo Support Sticky Notes Shaking Disconnect Shift/Ctrl movement shortcuts MotionFX Houdini Apprentice HD - $99 2008-JUN-12 Houdini 9.0 2007-SEP-20 Fluid Dynamics Solver Liquids Smoke & Fire (PyroFX) New User Interface Tool Shelf Parameter Interface Mantra PBR & Volume Rendering Volume Primitives Python Support 9.5 Mac Support (2008-JUN-12) FBX Export Houdini Master Price Drop 2007-MAR-01 Floating: $9,995 Node Locked: $7,995 Houdini 8.0 2005-OCT-06 New Dynamics Architecture DOPs Light Linking and Interactive Photorealistic Rendering (IPR) Character Workflow Improvements Irix Support Discontinued Disney's The Wild, C.O.R.E. (3 Years - 2006-APR-20) 8.1 Auto Rig Muscle Houdini Master - $17,000 2005-OCT-06 Package Floating Node-Locked Houdini Select $1,299 $1,599 Houdini Halo --- $2,999 Houdini Escape $1,999 $2,999 Houdini 7.0 2004-SEP-20 Takes Manager RSL VOPs Channel List / Dope Sheet Documentation File Loading Free HDK Houdini Escape (Model, Anim, Texture, Light, Render) - $1,999 RenderMan Support Character Tools Improvements Houdini 6.0 2003-MAY-08 Digital Assets (OTLs) 6.1 UV Pelt (2003-JUL-23) Syflex Plugin (2004-FEB-09) - $2,200 Character Workflow Improvements Houdini Master 2002-JUN-28 Houdini Halo (Comp) 2002-JUN-22 Houdini Escape (Character) 2002-JUN-22 Houdini Apprentice 2002-JUL-09 Houdini - $15,999 2002 Houdini Select - $1,299 2002 Houdini 5.5 2002-MAY-14 64-Bit Support [*] New COPs (COP2) Deep Raster VOPs Major new Character Tools Houdini Community Section on website X-Men 2 BAMF - Vijoy Gaddipati, Lead FX TD, Cinesite. (Released 2003-MAY-6) Houdini 5.0 2002-MAR-12 Mental Ray (2001-JUL-11) Viewport Modeling Solaris Support (Later dropped) Houdini Select - $1,999 2001-AUG-13 Houdini 4.0 - $17,000 2000-JUL-24 [*][*][*] Resizable Panes VEX (Mark Elendt) [*] Mantra Updates Linux Port [*] 4.1 TouchDesigner was derived from this version. [*] Houdini 3.0 1999-OCT-02 [*] Motion Capture (Mouse, Keyboard peripherals) Subdivision Surfaces Higher Order Rational Curve Networks WREN Houdini 2.5 1998-MAR-28 [*] POPs CHOPS Windows NT Port Houdini 2.0 1997-AUG-05 [*] UI Enhancements Four View Modeller Advanced OpeGL Display (Transparency & Projected Spotlights) Mantra 4 Fast Motion Blur Lens Flare Built-in Network Rendering Modeling Surface Pasting Animated Trim Curves Nested Intersection Trim Loops Clay Tool Sleletal Capturing and Deformation Tools Operator Subnetworks Houdini 1.0 - $9,500 1996-OCT-02 [*] First Non-linear 3D Environment (Procedural) 3D and 2D tools Integration Nurbs RenderMan Front-end Scripting and Expression Language PRISMS Short History [*] Execellent Review of Prisms, includes lots of screenshots! [*] DATE VERSION UPDATES 1998 PRISMS 7.0 Final Ship 1997 PRISMS 6.4 SGI O2 Compatibility 1997 PRISMS 6.3 RenderMan Interface 1996 PRISMS 6.1 Optimizations (Houdini 1.0 at SIGGRAPH) 1995-JUN PRISMS 6.0 Introduction of Sage, the node-based package for modeling. This was the prototype of Houdini. 1995-JAN PRISMS 5.5 L-Systems 1994-JUN PRISMS 5.4 MOCA, TIMA 1993-DEC PRISMS 5.3 MOJO, ICE, Metaballs 1992 PRISMS 5.2 FPaint Added (new C++ UI libs) 1991 PRISMS 5.1 Full-width Graph 1991 PRISMS 5.0 Crystal2 Renderer Eliminated 1991 PRISMS 4.5 Particles 1990 PRISMS 3.0 Mantra Raytrace Renderer Added 1989 PRISMS 2.0 Patch Support, Deformation SOPs 1988 PRISMS 1.5 Initial SOPs, Light Editor 1987 PRISMS 1.0 New motion editor and modeler combined to form action. Installer File Sizes * I set some parts to BOLD to emphasize particular version highlights. * References: Google, OdForce Wiki, SideFX Press, Houdini Help Docs, CG Channel, CG Press, Nekochan. * For those interested, I also posted a Houdini FLIP History blog post here.


 22 points
 -
I wrote a custom render engine in COPs today. While 'engine' is probably a bit far fetched, it's a little ray tracer experimentally supporting: Meshes with UV coordinates Shading on diffuse textures Multiple point lights (including color, intensity, size) Area shadows and light attenuation Ambient occlusion Specular highlights Reflections with varying roughness The snippet basically transforms the pixel canvas to the camera position and shoots rays around using VEX functions like intersect() and primuv(). The rendering process only takes a few seconds. I still have to figure the licensing fees, though COP_render.hipnc
 21 points
 -
Hi gang ! Here is my latest vellum file, I played around with noises and constraints. My goal was to emulate a membrane tearing, much like a burning film: You can download the hipfile and play around with it tearing_share.hip21 points
-
With this work I tried to do a metalic monster with a inverse pipeline..the model exist from the rig, on this case a single line... that is completly procedural.21 points
-
Great stuff, Nicolas. This is starting to look Giger-like already! You don't necessarily need to create UVs in SOPs, though. To project textures on those VDB meshes it's arguably more efficient to do in a shader: 1) Transform position to world space. 2) Curve IDs shown as random colors. 3) U value from curves in HSV colors. 4) Direction to nearest curve position. 5) Tangents from curves set to absolute. 6) Direction to curve oriented along tangents. 7) V coordinate enclosing each wire. 8) UV coordinates in red and green. 9) UV mapping an image texture. 10) Texture based displacement along curves or at least what happens when mandrills do the job ; ) The material snippet: string geo = 'op:/obj/curves/OUT'; P = ptransform('space:current', 'space:world', P); int prim = -1; vector uvw = vector(0.0); float dist = xyzdist(geo, P, prim, uvw); vector pos = primuv(geo, 'P', prim, uvw); float u = primuv(geo, 'u', prim, uvw); vector tangent = primuv(geo, 'tangentu', prim, uvw); matrix3 rot = dihedral(tangent, {0,1,0}); vector dir = normalize(P - pos); vector dir_mod = dir * rot; float v = fit( atan2(dir_mod.z, dir_mod.x), -M_PI, M_PI, 0.0, 1.0 ); P = set(u, v, 0.0); curly_curves_shader.hipnc
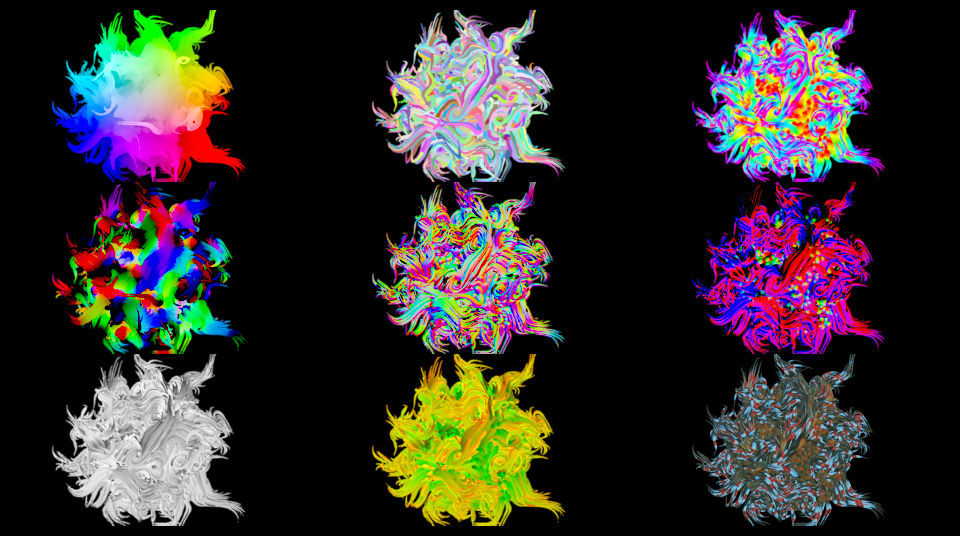
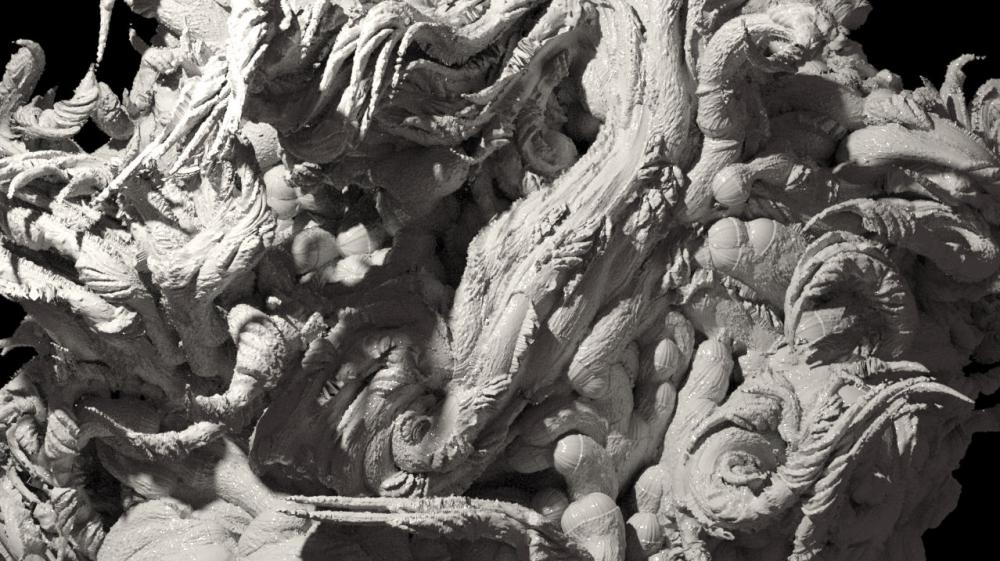 21 points
 -
Ok, ill bite here. Ive been wanting to understand these effects for awhile, so maybe this will spark some experimentation. Heres my initial idea for making it work. I'll spend a bit more time documenting the process tommorow, but heres the basic steps. Its all done in a solver node: 1 - resample a line, adding a point each frame (alterable with an attribute) 2 - avoid_force - use a point cloud to sample all the nearby points and create a vector that pushes them away from each other 3 - edge_force - measure each line segment and create a force which attempts to extend the line to a maximum distance. (this was difficult as if you have a totally straight line you never get any interesting motion. My crap solution was to turn the direction vectors into quaternions and slerp between them) 4 - add up the edge force and the avoid force and move the points a little bit along that vector. 5 - use a ray sop to make the points stick to a surface. As long as the movement is not too great, this isn't too bad. I've ran out of time to tweak this tonight, hopefully i'll get back to it soon. This version barely works! Id love to see other peoples ideas for how to create this. sopsolver_growth.hip
 21 points
 -
A basic way to span a graph that efficiently connects all points using Prim's algorithm. https://en.wikipedia.org/wiki/Prim's_algorithm minimal_graph.hipnc
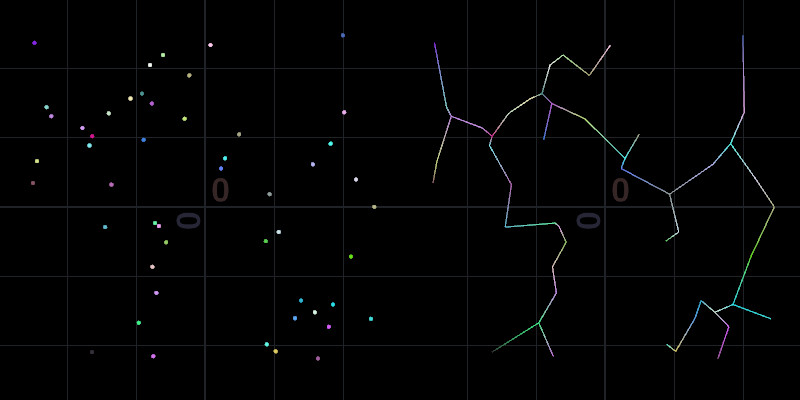
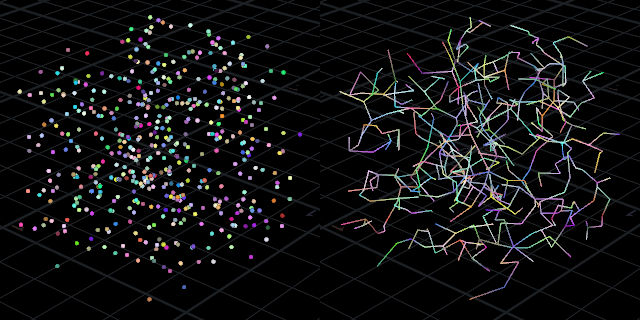 20 points
 -
Since there's been a lot of talk around the web about graphics APIs this past week with Apple's decision to deprecate OpenGL in MacOS Mojave, I thought I'd take this opportunity to discuss the various graphics APIs and address some misconceptions. I'm doing this as someone who's used all versions of OpenGL from 1.0 to 4.4, and not with my SideFX hat on. So I won't be discussing future plans for Houdini, but instead will be focusing on the APIs themselves. OpenGL OpenGL has a very long history dating back to the 90s. There have been many versions of it, but the most notable ones are 1.0, 2.1, 3.2, and 4.x. Because of this, it gets a reputation for being old and inefficient, which is somewhat true but not the entire story. Certainly GL1.0 - 2.1 is old and inefficient, and doesn't map well to modern GPUs. But then in the development of 3.0, a major shift occurred that nearly broken the GL ARB (architecture review board) apart. There was a major move to deprecate much of the "legacy" GL features, and replace it with modern GL features - and out of that kerfuffle the OpenGL core and compatibility profiles emerged. The compatibility profile added these new features alongside the one ones, while the core profile completely removed them. The API in the core profile is what people are referring to when they talk about "Modern GL". Houdini adopted modern GL in v12.0 in the 3D Viewport, and more strict core-profile only support in v14.0 (the remaining UI and other viewers). Modern GL implies a lot of different things, but the key ones are: geometry data and shader data must be backed by VRAM buffers, Shaders are required, and all fixed function lighting, transformation, and shading is gone. This is good in a lot of ways. Geometry isn't being streamed to the GPU in tiny bits anymore and instead kept on the GPU, the GL "big black box" state machine is greatly reduced, and there's a lot more flexibility in the display of geometry from shaders. You can light, transform, and shade the model however you'd like. For example, all the various shading modes in Houdini, primitive picking, visualizers, and markers are all drawn using the same underlying geometry - only the shader changes. OpenGL on Windows was actually deprecated decades ago. Microsoft's implementation still ships with Windows, but it's an ancient OpenGL 1.1 version that no one should use. Instead, Nvidia, AMD and Intel all install their own OpenGL implementations with their drivers (and this extends to CL as well). Bottlenecks As GPUs began getting faster, what game developers in particular started running into was a CPU bottleneck, particularly as the number of draw calls increased. OpenGL draw calls are fast (more so that DirectX), but eventually you get to a point where the driver code prepping the draw started to become significant. More detailed worlds meant not only bigger models and textures, but more of them. So the GPU started to become idle waiting on draws from the CPUs, and that draw load began taking away from useful CPU work, like AI. The first big attempt to address this was in the form of direct state access and bindless textures. All resources in OpenGL are given an ID - an integer which you can use to identify a resource for modifying it and binding it to the pipeline. To use a texture, you bind this ID to slot, and the shader refers to this slot through a sampler. As more textures we used and switched within a frame, mapping the ID to its data structure became a more significant load on the driver. Bindless does away with the ID and replaces it with a raw pointer. The second was to move more work to the GPU entirely, and GLSL Compute shaders (GL4.4) were added, along with Indirect draw calls. This allows the GPU to do culling (frustum, distance based, LOD, etc) with an OpenCL-like compute shader and populate some buffers with draw data. The indirect draw calls reference this data, and no data is exchanged between GPU and CPU. Finally, developers started batching as much up as possible to reduce the number of draw calls to make up for these limitations. Driver developers kept adding more optimizations to their API implementations, sometimes on a per-application basis. But it became more obvious that for realtime display of heavy scenes, and with VR emerging where a much higher frame rate and resolution is required, current APIs (GL and DX11) were reaching their limit. Mantle, Vulkan, and DX12 AMD recognized some of these bottlenecks and the bottleneck that the driver itself was posing to GPU rendering, and produced a new graphics API called Mantle. It did away with the notion of a "fat driver" that optimized things for the developer. Instead, it was thin and light - and passed off all the optimization work to the game developer. The theory behind this is that the developer knows exactly what they're trying to do, whereas the driver can only guess. Mantle was eventually passed to Khronos, who develops the OpenGL and CL standards, and from that starting point Vulkan emerged. (DirectX 12 is very similar in theory, so for brevity’s sake I'll lump them together here - but note that there are differences). Vulkan requires that the developer be a lot more up-front and hands on with everything. From allocating large chunks of VRAM and divvying it up among buffers and textures, saying exactly how a resource will be used at creation time, and describing the rendering pipeline in detail, Vulkan places a lot of responsibility on the developer. Error checking and validation can be entirely removed in shipping products. Even draw calls are completely reworked - no more global state and swapping textures and shaders willy-nilly. Shaders must be wrapped in an object which also contains all its resources for a given draw per framebuffer configuration (blending, AA, framebuffer depths, etc), and command buffers built ahead of time in order to dispatch state changes and draws. Setup becomes a lot more complicated, but also is more efficient to thread (though the dev is also completely responsible for synchronization of everything from object creation and deletion to worker and render threads). Vulkan also requires all shaders be precompiled to a binary format, which is better for detecting shader errors before the app gets out the door, but also makes generating them on the fly more challenging. In short, it's a handful and can be rather overwhelming. Finally, it's worth noting that Vulkan is not intended as a replacement for OpenGL; Khronos has stated that from its release. Vulkan is designed to handle applications where OpenGL falls short. A very large portion of graphics applications out there don't actually need this level of optimization. My intent here isn't to discourage people from using Vulkan, just to say that it's not always needed, and it is not a magic bullet that solves all your performance problems. Apple and OpenGL When OSX was released, Apple adopted OpenGL as its graphics API. OpenGL was behind most of its core foundation libraries, and as such they maintained more control over OpenGL than Windows or Linux. Because of this, graphics developers did not install their own OpenGL implementations as they did for Windows or Linux. Apple created the OpenGL frontend, and driver developers created the back end. This was around the time of the release of Windows Vista and its huge number of driver-related graphics crashes, so in retrospect the decision makes a lot of sense, though that situation has been largely fixed in the years since. Initially Apple had support for OpenGL 2.1. This had some of the features of Modern GL, such as shaders and buffers, but it also lacked other features like uniform buffers and geometry shaders. While Windows and Linux users enjoyed OpenGL 3.x and eventually 4.0, Mac developers were stuck with a not-quite-there-yet version of OpenGL. Around 2012 they addressed this situation and released their OpenGL 3.2 implementation ...but with a bit of a twist. Nvidia and AMD's OpenGL implementations on Windows and Linux supported the Compatibility profile. When Apple released their GL3.2 implementation it was Core profile only, and that put some developers in a tricky situation - completely purge all deprecated features and adopt GL3.2, or remain with GL2.1. The problem being that some deprecated features were actually still useful in the CAD/DCC universe, such as polygons, wide lines, and stippled lines/faces. So instead of the gradual upgrading devs could do on the other platforms, it became an all-or-nothing affair, and this likely slowed adoption of the GL3.2 profile (pure conjecture on my part). This may have also contributed to the general stability issues with GL3.2 (again, pure conjecture). Performance was another issue. Perhaps because of the division of responsibility between the driver developer of the GPU maker and the OpenGL devs at Apple, or perhaps because the driver developers added specific optimizations for their products, OpenGL performance on MacOS was never quite as good as other platforms. Whatever the reason, it became a bit of a sore point over the years, with a few games developers abandoning the platform altogether. These problems likely prompted them to look at at alternate solution - Metal. Eventually Apple added more GL features up to the core GL4.1 level, and that is where it has sat until their announcement of GL deprecation this week. This is unfortunate for a variety of reasons - versions of OpenGL about 4.1 have quite a few features which address performance for modern GPUs and portability, and it's currently the only cross platform API since Apple has not adopted Vulkan (though a third party MoltenVK library exists that layers Vulkan on Metal, it is currently a subset of Vulkan). Enter Metal Metal emerged around the time of Mantle, and before Khronos had begun work on Vulkan. It falls somewhere in between OpenGL and Vulkan - more suitable for current GPUs, but without the extremely low-level API. It has compute capability and most of the features that GL does, with some of the philosophy of Vulkan. Its major issues for developers are similar to those of DirectX - it's platform specific, and it has its own shading language. If you're working entirely within the Apple ecosystem, you're probably good to go - convert your GL-ES or GL app, and then continue on. If you're cross platform, you've got a bit of a dilemma. You can continue on business as usual with OpenGL, fully expecting that it will remain as-is and might be removed at some point in the future, possibly waiting until a GL-on-top-of-Metal API comes along or Apple allows driver developers to install their own OpenGL like Microsoft does. You can implement a Metal interface specific to MacOS, port all your shaders to Metal SL and maintain them both indefinitely (Houdini has about 1200). Or, you can drop the platform entirely. None of those seem like very satisfactory solutions. I can't say the deprecation comes as much of a surprise, with Metal development ongoing and GL development stalling on the Mac. It seems like GL was deprecated years ago and this is just the formal announcement. One thing missing from the announcement was a timeframe for when OpenGL support would end (or if it will end). It does seem like Apple is herding everyone toward Metal, though how long that might take is anyone's guess. And there you have it, the state of Graphics APIs in 2018 - from a near convergence of DX11 and GL4 a few short years ago, to a small explosion of APIs. Never a dull moment in the graphics world20 points
-
Hello, since last week i can play with houdini again to keep going my tests ... and bellow , some of my latest hip files from this video: torus+wrinckles+.hiplc stick man rbd+ .hiplc bubbles- rbd+cloth-2.hiplc20 points
-
Turkish Houdini artist Alican Görgeç is producing amazing knitting work - using SideFX Houdini! If you'd like to find out more about his technique, you can read our new Gridmarkets artist profile: http://www.gridmarkets.com/alican-gorgec.html
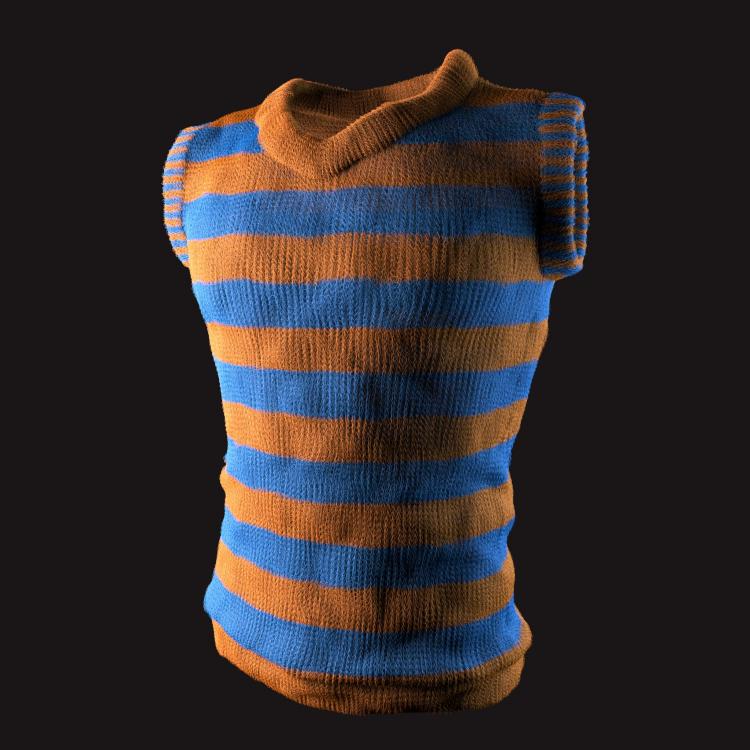
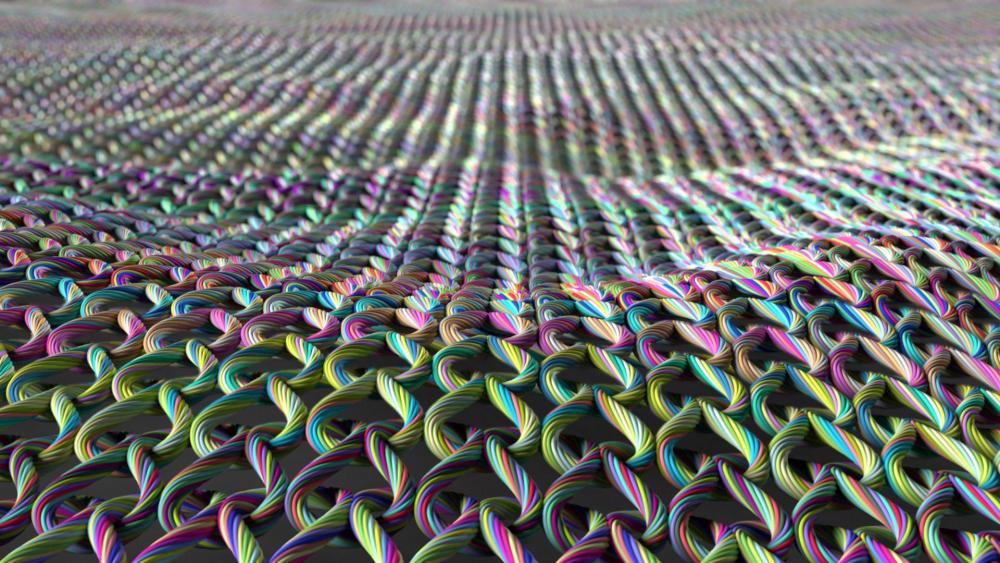 20 points
 -
please take a look at the attached file. it´s an example how you could create bezier curves with arbitrary degree and another one relying on beziers in hermite form since you wrote about blending curves... petz curves_vex.hipnc20 points
-
Hello, dear Houdniks! Realizing that at the moment I tend to code more than use Houdini at work, and not wanting to lose my edge, I made a belated New Year's resolution to try to open up Houdini every evening and do a little something, anything, every day. While at it, why not put the daily sketches up; https://dailyhip.wordpress.com/20 points
-
And by 'tiny' I mean 'animated gif, hip file, paragraph of text'. What more could you want? Little self-learning thing going from basics to slightly-more-than-basics. Much credit has to go to the long suffering work colleagues who keep answering my idiot questions. http://www.tokeru.com/mayawiki/index.php?title=Houdini20 points
-
I thought it fitting to post this here too ;). For better or worse, I'm launching a vfx and animation studio at the end of the week. Some of you may recognize some of the name (if you squint and look at it just right). http://theodstudios.com19 points
-
Anything I can do in Houdini is thanks to the great community of people helping and sharing their knowledge. Thank you everybody, you guys rock! This is my first job done fully in Houdini (+AE) and my client let me share the source files (attached in this post). Rendered animation is here on vimeo The included network is quite simple and I hope it can help beginners to learn Houdini. I have tried to avoid slow for each loops and copy stamping, so you can find few small tricks in there. It was rendered in one afternoon on Redshift and two 1070s (cca 1.8K pixels res). And also warning: some of the effects and glows are done in AE. Used VEX if, vertexindex, smooth, rotate (matrix), setpointattrib addprim, addpoint, addvertex, removepoint user-defined functions Used CHOPs lag, math, spring, geometry, envelope, area, trigger jiggle (even for single channel) chop() expression Used VOPs dot product (to control the linear falloff), cross product primuv, volume samples VDB vdb activate, custom masked advection (clouds) nearpoint (to sample the mask advection offset) SOPs uv texture(rows&columns) to control the ramp (color&pscale) along u attribute interpolate, attribute transfer, solver polyextrude (with local controls) RedShift volume shader, light instancing point and vertex attributes odforce - project - v1.zip
 19 points
 -
I just gotta share this for inspiration - I could watch this for hours...19 points
-
Hey, thought I'd share this here. Preview of tree and foliage creation and layout tools now available on Gumroad. I've released them as "pay what you want" as my contribution to the community. I plan to keep supporting and improving these tools in future as well as releasing other tools. Let me know if you have any feedback/suggestions and I look forward to seeing what people create with them. Enjoy! https://gumroad.com/l/zWFNX18 points
-
Basic smoke solver built within SOP solver, utilising openVDB nodes. Happy exploring & expanding =) P.S. DOP’s smoke solver still solves quicker in many cases though. vdbsmokesolver_v1.hipnc vdbsmokesolver_v2.hipnc
 18 points