Search the Community
Showing results for tags 'game'.
Found 22 results
-
 Hi, Skrice is looking for a Lead VFX Artist | Game Asset Supervisor | Lead Concept Environment for www.mavia.com. Please email me at jericte.va@gmail.com with your portfolio so I can send the job description. All the best, Jeric Te
 -
 Hey all. Just posting a new tool I recently wrote in case anyone is interested. It's an HDA for saving attributes into either data textures or mesh vertex channels for use in realtime shaders. I needed to do some fancy pivot caching and mograph type stuff in a Unity shader and after hacking together a solution with a python SOP I figured I'd package it up nicely for future projects. https://github.com/pixel-ninja/packChannelsHDA/releases/tag/v1.0
 -
Houdini was getting bored doing hours of simulation, so I gave him something to play with. - Done in Houdini, script in VEX, rendered using Karma.
-
 SHOUT OUT & Thank you to David CGMK: we have a new Houdini video posted by author David CGMK on our CGCircuit tutorial website, so if you were looking for a great "Intro to Terrains for Games in Houdini and Unreal" tutorial - check it out!! ; )) and thanks David CGMK awesome work! http://bit.ly/2jRl7ss
 -
Hi, I'm trying to import a houdini character to ue4. I'm following Varomix's tutorial > https://www.youtube.com/watch?v=o8A2U3jmng4. I can't seem to get any animation sequence when importing the simple female walk cycle, using identical settings as the video. I've attached a screen recording of the settings. If anyone has any tips for importing to ue4, that would be a huge help. Thanks in advance RecordingEdited.mp4
-
Hi there! I have quite stupid problem with attributes baking to texture... I need to bake high poly on low rez: I am using the "old school" way by using bake texure operator, not game tools (because the pipeline must be stable without any beta tools involved. Result is good enough except edges sharp edges on Normal map: I wouldn't make a flat source as Rohan advised here: http://www.rohandalvi.net/baking Can you advise me please how to avoid that "tiling"? This is my scene: ProceduralBaking.hip Thank you in advance!
-
Hi! Can anyone point me in the right direction for how to determine on air-tight geometry the distance it would take to push each point inward along the normal (like the Peak nodes does, if you give it negative numbers) until it hits the other side, getting pushed in at the same rate? Right now if you use the Peak node with negative numbers of increasing magnitude on a mesh that has parts of variable thickness, the thinner parts will eventually start turning inside-out. What I want is for them to stop right before that happens and stay at a thickness of zero, so they squeeze down to invisibility, while the thicker parts of the mesh continue to push inward. Specifically what I need is a value that is that distance, which I can transfer over to vertex colors, because this is for a game asset where the actual squeeze along the normal direction will take place in the game engine, not in Houdini, and I need a value to clamp the push distance for, on a per-vertex basis. Thanks!
-
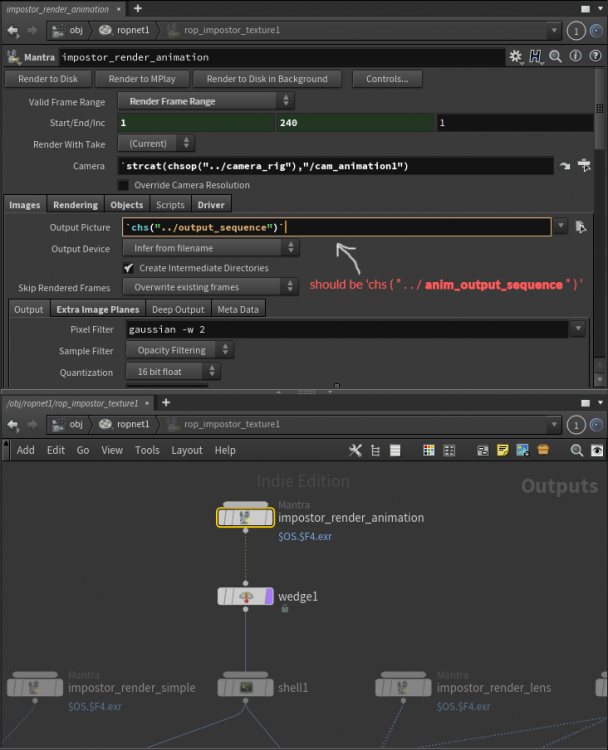
Hey All, I've been trying to work out a simple pipeline to generate a crowd from impostors for use in Unreal 4 using models from Fuse with animations from Mixamo. Creating characters in Fuse is extremely fast and simple, and the one-click option to send it to mixamo to rig it and load in animations opens up a lot of potential for easy crowd generation. However, with a lot of projects shifting towards VR / AR these days we need more and more efficient crowds. The impostor workflow offers a great solution for that, and the GameDev Impostor Camera Rig + GameDev Impostor Texture ROP really set it up to be really nice and easy to generate the output - but I'm running into some issues and could use some outside opinions. For reference, I'm following Mike Lyndon's documentation here: https://www.sidefx.com/tutorials/generating-impostor-textures/ So far, the following steps are working out pretty well - 1) Create Character in Fuse 2) Rig and Animate Fuse Character with Mixamo 3) Import FBX to Houdini 4) Extract FBX Geo to new Geo node 5) Create new Mat inside new Geo node, remap existing materials 6) Create GameDev Impostor Camera Rig at obj level 7) Create ROP Network, create GameDev Impostor Texture inside ROP network 8) Direct Camera Rig towards Impostor Texture, Direct Impostor Texture towards Camera Rig 9) Set Impostor Texture to 'Animation' mode and render out to $HIP/TEST/${OS}_${WEDGE}.$F4.png (or appropriate directory / filetype, this is for testing purposes) The problem I run into is at render time; the ROP is intended (afaik) to render out the frames of animation, rotate the camera, and then render out the frames of animation again from the new angle. It does exactly this, but overwrites the first frames of the animation each time the camera rotates. I thought the _${WEDGE} portion of the file naming would handle this but it doesn't seem to be appended to my filenames. Right now I'm getting "rop_impostor_texture1.0006.png" where 'rop_impostor_texture1' is the name of my impostor texture and '0006' is the frame. Any thoughts as to why this might be happening or possible solutions would be appreciated. Please let me know if any specific screenshots would help (ie. the ROP, Camera Rig, etc). UPDATE 001) **NOTE: This only applies to non-production build 1.20; the naming is set up properly in production build 1.12** Solved the naming / output issue, it turns out the GameDev_Impostor_Texture rop was looking for the wrong output picture parm. This is the field that needs to be re-directed for the output to work as expected: Also worth noting is that if you assemble the sprite sheet expecting the Unreal shader template to work, be sure to have the animation frames in the Y axis and and camera rotation in the X axis. The next major hurdle for me is to try to reduce the camera rotation range to 180 degrees, since I don't need the back views of my crowd characters, and to limit the animation frames... which I'm more concerned about at the moment. I need to retarget a 64 frame animation down to ~16 frames or less. The fewer I can get it down to, the potentially higher resolution I can let the individual sprites be. More updates to come.
-
TRIXTER Berlin is currently looking to hire experienced Unreal Engine Artists. Booking time: ASAP - end of September Location: Trixter Berlin Description: The product we're creating is not a game - we are creating fictional in-game scenes for a live-action film, and we are using Unreal as the Game-Engine. The shots created will not require live-rendering. We are not striving for Photo-Realism – the look of the shots will be comparable to late PS3-generation games, or early PS4-generation games. Responsibilities: Importing rigged and animated characters from Maya into an existing Game world running in Unreal Engine. Staging the characters and placing cameras. Optimizing the shots within the context of a given scene. Tweaking textures/materials and the existing lighting. Minor simulations. Exporting the shots as image sequences. Comfortable in working with deadlines. Ability to work in a collaborative environment. Requirements: Excellent knowledge of Unreal Engine and Maya. Knowledge of CG and Game industry is a major plus. Self-driven, good communicator, and a great-team player. Excellent organizational and communication skills Ability to perform multiple tasks, set priorities and problem solving Able to organise own workflow in a meticulous manner. Good communication, organizational, time management and interpersonal skills. German and English language skills. Valid EU-working permit. If your experience matches above description, we are looking forward to hearing from you! Please send your CV, demo reel and earliest commencement date by email to jobs@trixter.de. Trixter | Recruitment Team
-
Hi guys, Just want to showcase our work in progress and ask everybody's opinion. The demo is HERE. In short, were able to transfer Houdini vertex animation to a Web Browser. To accomplish that we used Houdini texture cache tools, 3js library, and tinyexr loader which was compiled to JavaScript. We are exited about the result and looking for a project to apply it. Kirill and Snay
-
Hello ! I'm learning houdini and tries to bake a simple position make texture using either the bake texture rop or the game baker shelf tool. Either way I get both error when rendering to disk. I'm using pighead geometry . Everything goes just fine when rendering to Mplay strangely. Here are the errors I get : Baketexture ROP : Error Command Exit Code: 1 [15:36:16] mantra: Mantra tile imager open failure: Tiled Image File: 0 file [] File: C:/temp/H16TextureBake/test.tga File: C:/temp/H16TextureBake/test.tga [15:36:16] mantra: Could not open imager [15:36:16] mantra: UV rendering failed for object /obj/geo1 Using rop_game_baker Error Error rendering child: /out/rop_games_baker1/baketexture Error Error rendering child: /out/rop_games_baker1/pre_bake0 Does anybody have clues about it ? Where I could get more information about texture baking ? Thanks PS : I'm using Houdini apprentice
-
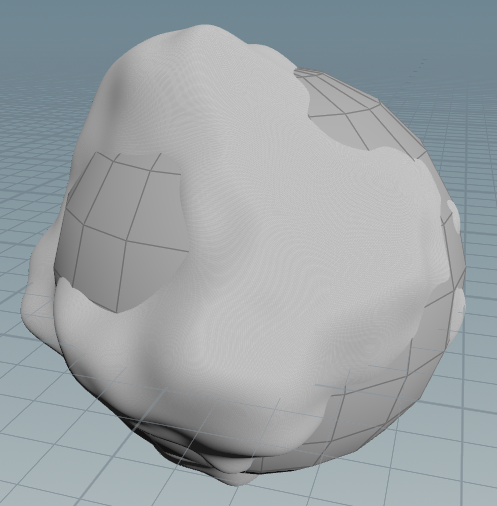
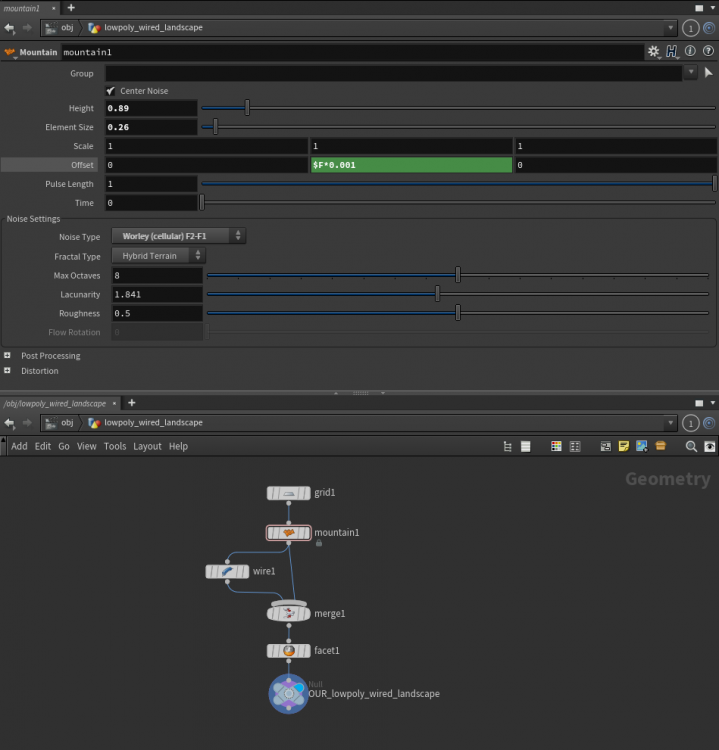
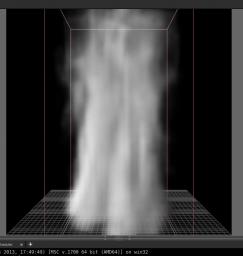
Hello everybody! I have a simple grid animation like this: The animation is driven by a $F*0.001 expression in mountain node offset channel: Is there a way to: 1) Loop this animation seamlessly And the most important: 2) Is there a way to export this animation to Unity? If yes, what format is better for the task and what export/import settings should I use? Thank you for your time.
-
Hi ! I was trying to do some Vector Field or Velocity Grid for Unreal. And during my research, many forums redirected me on the asset Velocity Grid Exporter by Benny Yang on Orbolt. That's an amazing tool but it doesn't work on H15.5 with Particle Simulation. I don't know why, I tried to look through the code, but I can't see what's wrong. Do I make a mistake in using it ? Is there another solution to export Vector Field or Velocity Grid to Unreal ? Any help is welcome ! Cheers, Gaël.
-
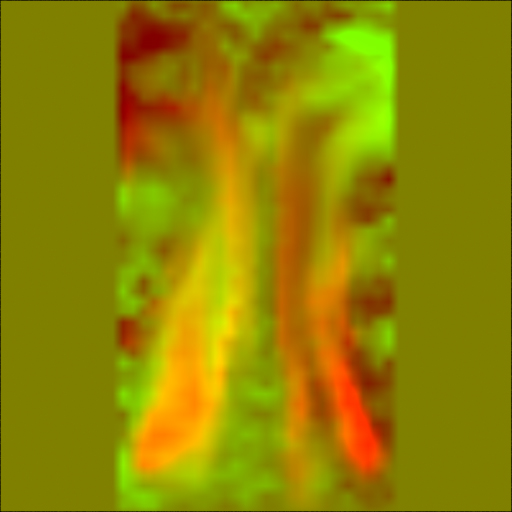
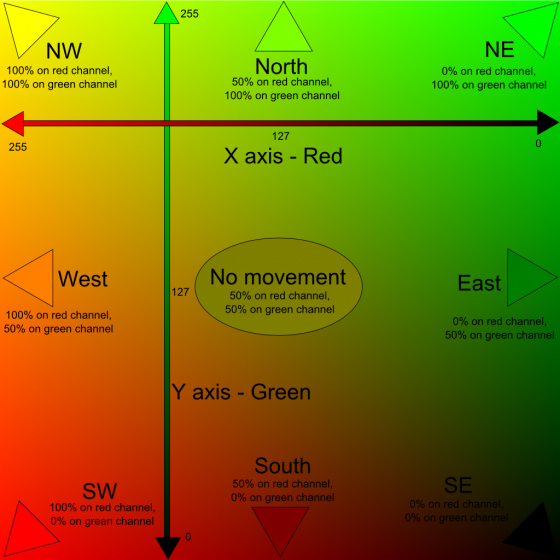
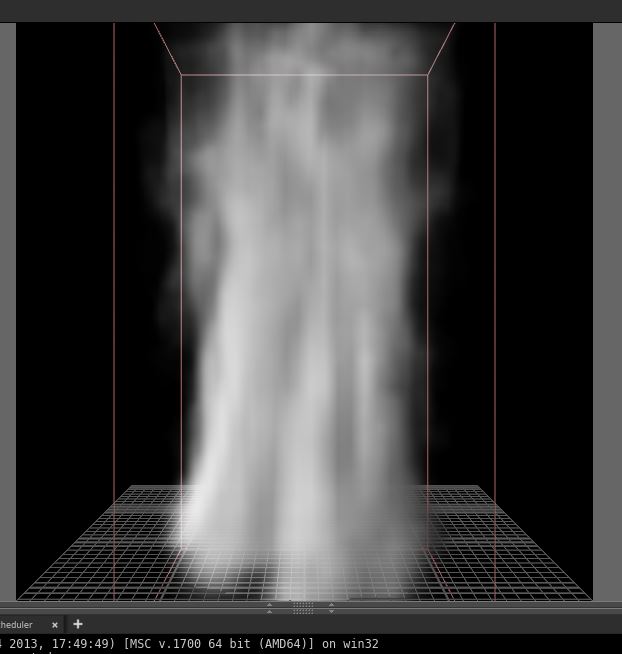
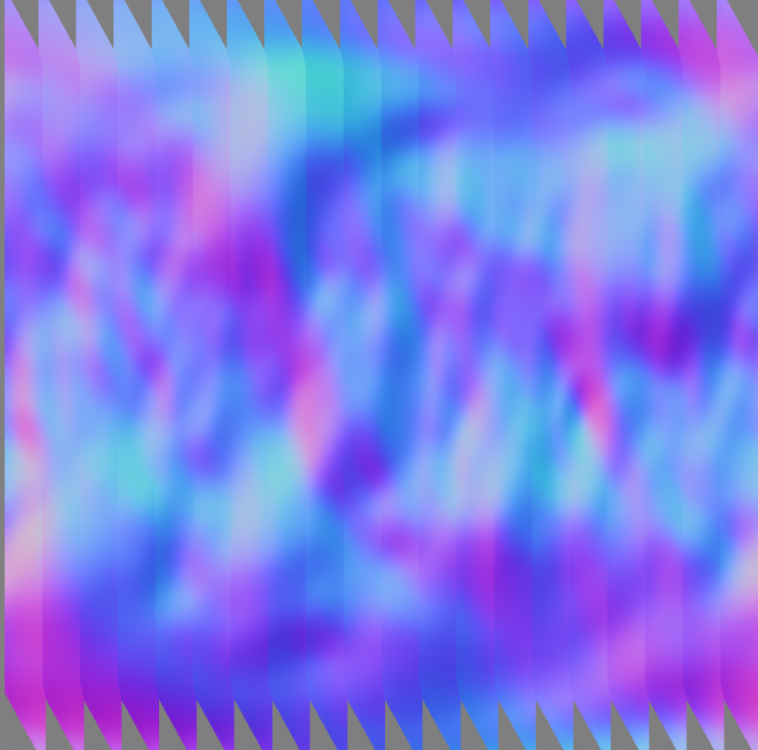
Hello everyone, I've seen a couple of post about this but not exactly what I'm looking for. A little background on what I'm trying to do. I'm trying to export a 2d image of a fluid to animate the UV coordinate of an texture in a game material ... not super clear I know, these guys might explain it better : http://www.valvesoft...s_waterflow.pdf This way I can add detailed motion to a sprite with only 2 textures, and not use ginormous sequence of animation. But in Valve instance they "paint" their texture to add flow motion to a river or pond. I would like to generate that image procedurally with a fluid for FX work. right now here is what I do: - have a fluid animation that I like -cache it -DOPI/O all the info I need back into SOP -use a Point VOP -use the velocity info to color points on a grid -render that grid but my problem is that the velocity field is (naturally) all over the fluid container, so I was wondering how can I use my density field as a "mask" for my velocity? In VOP, saying something like where my density is zero, set my velocity to zero, ... make any sense? In the 2 images attached you can see how it works. when a pixel is 50% red, 50% green and 0% blue no motion. 100% red, 0% in G and B pixel are moving south west ...etc. The flow test images show you what I have, so you can see that I have no motion (R=50%, G=50%, B=0)outside the container, but inside I have motion all over.... And last an image of the density field.... where I want my motion. so can I use density to "mask" out my velocity? any help or question would be really appreciated. flowmap_test.hip


-
recently i wached some demo of game engines. it looks fantisic. so do you think will us use game engine to render filme in future? if this became true, how can our clastic renders such as renderman mantra Arnold survival? and any one know compare to unity unreal cryengine which game engine is better?
-
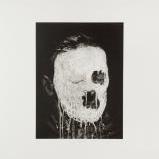
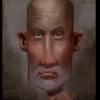
I am trying to imitate the pyro effect made by Mannoraoth in this Blizzard cinematic. I am getting nowhere figuring this out by myself. I got the color scheme down in the shader but past that, i do not know where to go. I am not sure if i should use a pyro fx shelf tab flames, explosion or fireball. If you know of a better way, please tell me. i am willing to learn and listen to the communities knowledge base. I am going to use it for a game i am working on. Please help. timecode: 2:15-2:21 PS: I am working in Houdini 15
-
Lune from Feline Arts talks about how Houdini was used to create procedural game art for his indie game DragonMaze. Learn more about DragonMaze at: http://www.felinearts.net The Procedural Art of DragonMaze
-
You might have already seen this when it was published back in January, but here's a Gamasutra article about procedural workflows for games written by Side Effects Software President and CEO Kim Davidson. http://www.gamasutra.com/view/news/233899/Sponsored_Go_Procedural__A_Better_Way_to_Make_Better_Games.php
-
Learn more about Houdini is playing a growing role in game development in Quebec-based Frima Studio. Houdini for Games - Frima Studio
-
Learn about how Guerrilla Games used Houdini to create effects for the PS4 launch title, Killzone: Shadow Fall, in this SideFX customer story. Killzone: Shadow Fall - Guerrilla Games
-
Hi, my name is Ben and I am the Games Community Manager at Side Effects Software. If you are using Houdini to make game art, assets, animation, VR, etc. I'd like to talk to you! Don't hesitate to contact me via PM or email at ben@sidefx.com. Cheers