Search the Community
Showing results for tags 'substance'.
-
Hey! I'm Daniel, Long time fan of OdForce forums. Here's an open-world procedural environment I made in Houdini | Unreal! All of the tools and assets were created from scratch: https://www.daniel-mor.com Open to work offers, Thanks!
-
Im trying to establish better link with Substance and Houdini , trying to get the best of both worlds. Basically, if I create and get some asset a look made in substance of a given procedural shader like an edge and scratch procedural wearing material recreat live the mesh dependency map directly in Houdini, without any export, baking in substance, importing back blablabla... When I link that AO and curvature with an external prebake EXR map it's work (after I have to fix a naming error in the Lab tools) but not when I try to "live" connect. Like shown above The image plane doesn't seem to be recognized and taken into consideration in the SBSAR processing? Ideally at the end, processing every asset with PDG... Anyoen has done PDG map baking for an all scene ? Im joining my hip and test substance file I quickly created.. Maybe it's a limitation of substance archive? It can't only take baked, but I guess if so we should be able to trick it isn'it? Many thanks guys ________________________________________________________________ Vincent Thomas (VFX and Art since 1998) Senior Env and Lighting artist & Houdini generalist & Creative Concepts http://fr.linkedin.com/in/vincentthomas Substance_automation_vince.hip testhoudini2.sbsar testhoudini3.sbsar
-
Hi Everyone, last night I decided to put an end at 'not knowing how to use .sbsar texture files' in Houdini. So , I checked this and the workflow looks pretty straightforward https://www.sidefx.com/tutorials/sidefx-labs-substance-plugin/ I have been unable to get Mantra to load the maps from Cop somehow Could someone take a look at the test hipfile below and maybe try with a proven healthy .sbsar. Mines seem a bit doubtful as I get very few parameters and often if I hit one of them I crash instantly. SBSAR_COP_workflow_1.hipnc WoodGraph.sbsar
-
Hello After my voronoid fracture (with Manhattan approximation) , i will like to give each cell a different ramp attribute to drive and build my displacement. Like in substance. I have trouble to implement this in vex directly, and i want to use the lab ramp. I unlocked the had, but once again ,i failed to drive the circle prim arc value with my attribute generated before, unique per piece. i definevely have trouble with that, to drive my local variable with a attribute @.. I could do in a transform by using : point(opinputpath(".",0), $PT, "fRotationAngle", 0) but not in the subnetwork of the lab gradient tool... it doesn't recognize my attribute... it's what i wrote below Any idea for a fix, or in a brute force vex approach please guys? cheers, vincent* @konstantin magnus
-
Hi guys. I'm working on a game asset. In short: I would like to find a solution for detecting stacked UVS of multiple same objects, and then group those UVs except the UVs of the first instance. Example: Imagine 20 knobs in an airplane cockpit. They all have the same UVs, and when I use the UV layout, with Stack Identical Islands, all 20 knobs share the same exact UV Island. However, when I then go to bake the textures for this in Substance, Substance will bake 20 times into that same one UV space. So for that reason, I am trying to find a way in which I can detect stacked UVs, and then hopefully also group 19 of them. I will then change the UVs to zero so that Substance doesn't bake the textures into that again. Possible solution (?): In the process of writing this, I found out that the UVLayout node can output a @target prim attrib. Now it seems that this is either 0 or -1 and initially it seemed that it actually does exactly what I needed, it applied 0 to non stacked UVs and -1 to stacked UVs except one. However this does not seem to work always, sometimes the target misses stacked things, and sometimes it applies it to also nonstacked things. Plus, it doesn't apply target=0 to only islands from the first object, but rather it picks UV islands from random instances and then puts 0 on those. I attached a simple example of what I need and what I am getting right now. Hopefully, that will make things clearer. 2 questions: Does anyone know what is the actual "target" and how does it work exactly? If not, can anyone think of any better solution? I've been trying to solve this for years and so far I've been having to group the objects manually. And there are hundreds of objects... Anyway, thanks! Stacking UVs.hipnc
-
Hey pals, I'm trying to use the Substance Archive COP (https://www.sidefx.com/tutorials/sidefx-labs-substance-plugin/) node and connect the op:`opfullpath('/img/img1/img_OUT{color}')` to the arnold standard surface colour input in shops. On the principleshader in the demo you can use the mentioned path to achieve this but with Arnold I cant quite figure out how to link this up. Maybe another node is needed to be plugged into the shader? Thanks, as always!
-
Hey pals, I'm trying to use the substance texture node and connect the "op:/img/img1/img_OUT{diffuse}" to the arnold standard surface colour input. On the principleshader in the demo you can use the mentioned path to achieve this but with arnold I cant quite figure out how to link this up. Maybe another node is needed to be plugged into the shader? Thanks, as always!
-
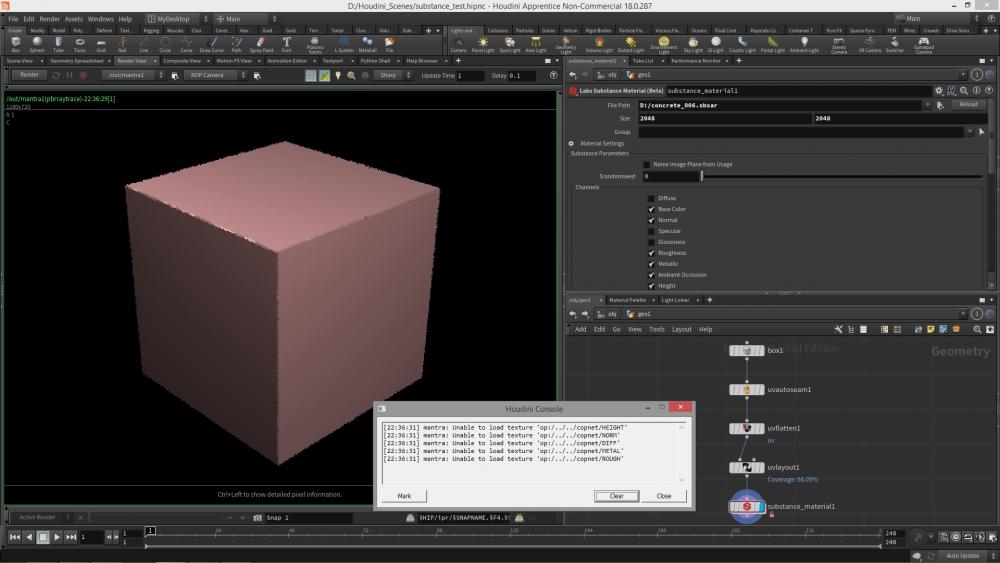
Hello! I'm trying to render the new substance material node in H18 and I get the following errors on the console: [22:31:44] mantra: Unable to load texture 'op:/../../copnet/HEIGHT' [22:31:44] mantra: Unable to load texture 'op:/../../copnet/NORM' [22:31:44] mantra: Unable to load texture 'op:/../../copnet/DIFF' [22:31:44] mantra: Unable to load texture 'op:/../../copnet/METAL' [22:31:44] mantra: Unable to load texture 'op:/../../copnet/ROUGH' It just renders that weird red brown color with that error. I've attatched a screenshot. In the viewport the material and node work fine. Any ideas? Thanks in advance!
-
I am trying to bake textures into a new uv layout. I created uv2 attribute on vertices, but don't know how to tell baker to use it. An example of this in blender: https://www.youtube.com/watch?v=h880hxH-BC8
-
Hi everyone, I've been tasked to lay down a decent workflow pipeline plan for my team revolving around creating motion graphics or key visuals for advertising in houdini and I was hoping to find some help/suggestions for it. I chose houdini as the core element just to avoid extra plug-ins that from my experience were creating a wast amount of issues in the long run, but I feel I won't be able to do everything I need quick enough using it alone. My first idea was to get license for zbrush, substance and redshift to complement houdini, so basically it would be like this: start by modeling non procedural things in zbrush, texturing them in substance, animating everything in houdini and finally render in redshift. When I started testing the workflow, I immediately noticed that substance designer plugin is not compatible with latest versions of houdini and my biggest fear came back, since I was hopping to achieve something at least slightly more seamless. I am now considering making all maps and textures through photoshop and zbrush only, skipping substance altogether and sticking as much as possible to procedural shaders in houdini if I can produce them quick enough. Anyway, what kind of workflows do you guys have or recommend? Could you give me any tips on how I could make things go smoother and avoid unexpected compatibility issues? How was your experience using Substance painter or designer within the workflow so far? Cheers!
-
I've made this to save time loading shaders from Substance Source, but should work for any substance material. Just select the parent folder of the texture you want. Figured some others might find it useful too. It has proper viewport handling of Base Colour, Roughness, Metallic, Normal, Emission and Displacement. Not 100% perfect, but pretty damn close. Hdalc for now. Tried to upload to orbolt but kept getting an error (Invalid node type name). Don't think it likes redshift nodes. If anyone has any experience with this let me know! MT_RSSubstance_1.0.hdalc
-
Not available
-
Do any of you experience with replicating 1 to 1 the look you have in Substance Painter in Houdini 16 using the Principled Shader? The PBR metal/rough workflow with the metallic and roughness maps seems to be straight forward, but plugging in my maps from Substance Painter as is, produces a render that is much darker than what I have in Substance Painter. Perhaps the colour space is off?
-
Hi, the plugin doesnt seem to work for me at all... I can load the sbsar file (which takes a ridiculously long time btw), I can see material parameters but changing those does nothing - render is always just sort of gray color and viewport shows nothing, as opposed to what I've seen in presentation videos. Due to zero posts complaining about plugin not working at all, I assume mistake must be on my side. And probably it's gonna be something trivial. I tried on two different workstations with two different Houdini 16 builds (no difference). Thanks for any help. D.
-
Hi, Can someone tell me how to link substance painter generated PBR texture maps (albedo/transparency, Metallic/Smoothness, Normal) to Principled Shader? I have Albedo, Metallness, Roughness, and Normal maps. I linked Albedo to base color on the surface textures tab and it seems to work fine along with the normal map on the Bumps & Normals tab. My problem is with metallic and roughness. If I link these to the corresponding channels on the Surface textures map, it is not rendered correctly. Metalness is not visible at all and roughness is also incorrect. What is the proper way to use these maps? Thanks a lot for any advice!
-
Anyone know how to embed a substance into an OTL? I know it can be done and be able to use the parameters of the Substance within an HDA in Unreal, but can't figure out WTF to do and no help in the documentation. 1. I import the substances into a shop net inside the HDA graph 2. Add materials via material nodes in Houdini 3. Add unreal_material with paths to the materials - trying both channels and actual hard paths - ie paths to the substance file itself AND Material'Game/HoudiniEngine/Temp/Material.Material' do not work for me. 4. Add the Substance files to the operator type graph... Nada, just two blank materials imported. Houdini 16.0.600, Unreal 4.15 and the latest Houdini 16.0.620 with Unreal 4.16 both same issues Anyone know how the embedding works? I don't want to set up materials from scratch as I do want my Houdini files to render outside of UE4 as well, so hence, why I want to embed them vs. re doing it in Unreal.
-
- houdini engine
- unreal
-
(and 1 more)
Tagged with:
-
Hello VFX community! We (PopcornFX & Real Time VFX) are organizing a VFX contest! Send your submission until April 13th to be one of the 3 winners of our sponsored VFX challenge! Huge thanks to our partner #RealTimeVFX & our great sponsors HoudiniSideFX Substance by Allegorithmic NVIDIA Jury & prizes to be announced shortly! Stay tuned Follow the link and take your chance to get cool prizes! https://realtimevfx.com/t/competition-the-great-transm…/1841
-
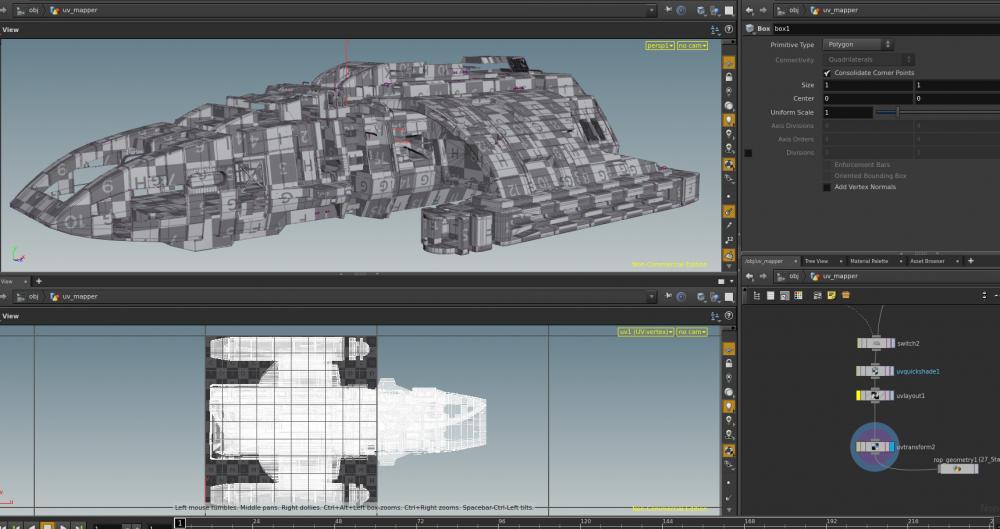
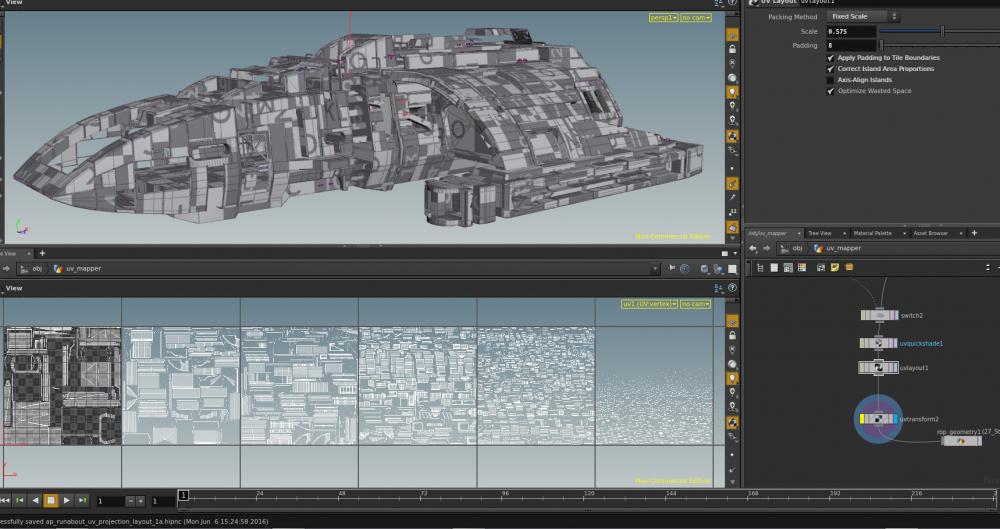
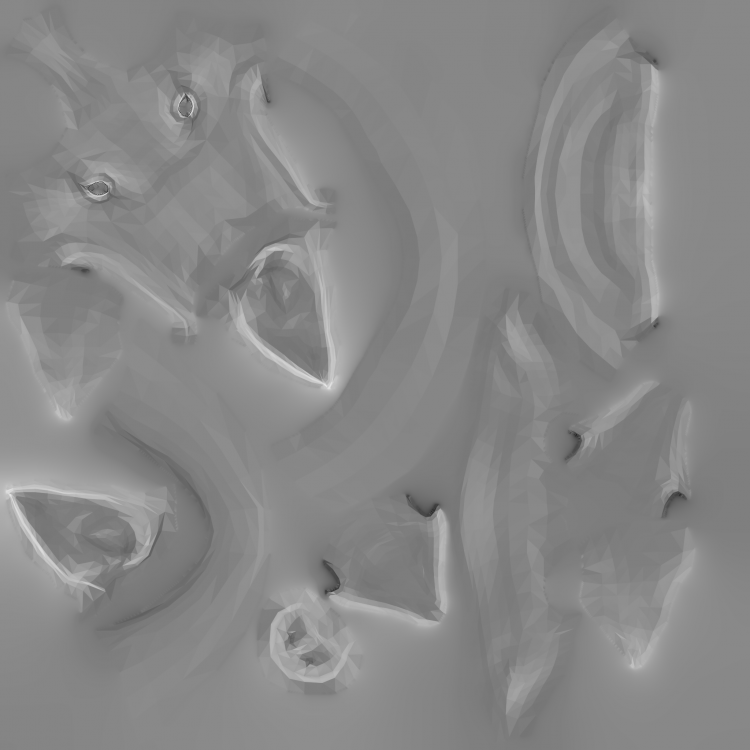
Hi All, I am trying out Mari NC to see what kind of workflow is needed to get UV models out of Houdini and into Mari. In this image I have nice a Box projection that provides a decent looking UV grid across the object. However, if you examine the UV grid you will see that there are a lot of overlapping areas which will not work with Mari. Overlapping areas mean if you paint on one face color may appear on another unintended face. So I have tried out the Houdini UV layout tool and set the scale to limit my UV layout to the maximum of 6 UDIM squares that Mari NC allows. And while this fixes overlapping faces and makes a UV set that Mari can work with it destroys the ability to select associated faces via a UV island. Also there is a ton of wasted space. It looks like the algorithm finds the largest area and populates all the large UV areas on one UDIM tile then moves on to the next UDIM tile, not considering that it could actually use 6 UDIM areas to start with. As you can see the UV faces get smaller and smaller as the UDIM count increases. This ultimately limits paint resolution in Mari when you have to paint on slivers. If the Houdini UV Layout area distribution were smarter I could increase the scale and reduce the number of sliver elements generated. Also, selecting faces in Mari is fairly primitive yet selecting UV islands is quite possible but with the islands split into so many tiny areas selecting by UV areas becomes quite tedious in Mari. I am just wondering if anyone has any tips on UV layout workflow? This probably applies to Substance Painter users as well. ap_runabout_uv_projection_layout_1a.hipnc
-
Hi Guys, After painting a lot of edge scuffs/rust/drips in I was fed up with the tedious labor of doing everything by hand. Especially when the stuff you do is almost always the same 'trick'. Is it possible to recreate something like this in vops? http://www.artonbit.com/cinema4d-corner/cine-tools/item/45-surface-curvature-shader This is btw the closest I could get in my search: http://www.sidefx.com/index.php?option=com_forum&Itemid=172&page=viewtopic&t=13855&postdays=0&postorder=asc&start=25 Thanks in advanced guys!
-
In this polycount topic: http://www.polycount.com/forum/showthread.php?t=132334 there is one interesting line in main post Now the question is, does it mean that there will be Substance Designer support in Houdini or is it about already existing Unity support? Anyone heard something more?
- 6 replies
-
- 1
-

-
- mantragora
- substance
- (and 7 more)





.thumb.png.49b41fb05aa5e3ead314bd23c847da67.png)
.thumb.png.e13fa34c456e90f4ff10d9a25133ad65.png)

