Search the Community
Showing results for tags 'beginner'.
-
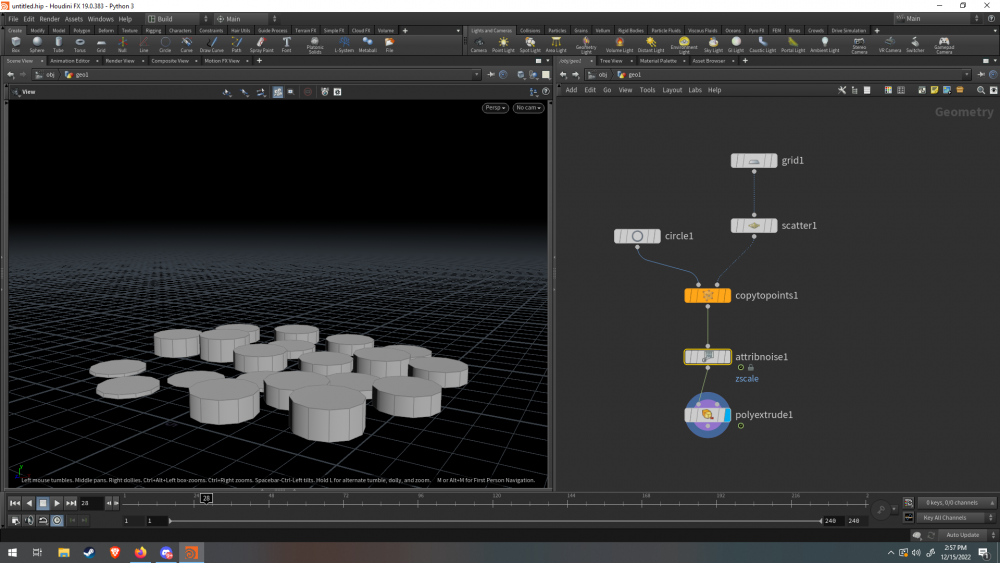
Hello, I am trying to learn houdini, and doing personal experiments. Today I was experimenting how to emit rope. As you can see from my setup below, I am using a noise to control the zscale of my poylextrude. My issue is that the circles are growing taller and shorter since the noise is being animated. What I want is for the noise to trigger the growth of these cirlcles, so it will look like I am emitting tubes or "rope". Any help is appreciated, Thank you.
-
My documentation of learning Houdini and the procedural method of working in 3D.
-
 Hey there, after years I finally decide to study Houdini more seriously. I'm starting again with the Particles course from Applied Houdini, I just finish my first run with the 2nd vol. and I'm really interested in GPU rendering because of rendering time. It's not that I don't like Mantra (actually sounds super interesting to have a native renderer so robust), but for example the last scene I worked, with like 50M particles, took me more than 10 hours to render like 4 seconds at 1280x720. So I would like to take some advices from you: since I'm just a beginner, is it interesting to already try to work with a GPU renderer, like Redshift, so my rendering time will be faster and I'll be able to explore and study more things quickly as well? Or should be better to keep with Mantra and get more knowledge about it? Thank you!
 -
Hi all, As some of you may know I have recently started a youtube channel where I am sharing some techniques, setups and tips. My goal is to first cover some of the fundamental tools/setups and then build more elaborate setups. I wanted to share this with the odforce community too as this community will always have a special place in my heart :). Thank you for watching & have fun learning! The channel: https://www.youtube.com/channel/UCZMPkkgnAFghvffxaTh6CsA My first video:
-
 Hi everyone! I recently started working with the HDK and have been trying to set my project up to use an external library, but I don't have a lot of experience with dependency management in C++. It seemed to me like setting something up with a cmake file was the way to go, but I'm having a hard time figuring out the best way to set something up to work with the Houdini environment. Is this something that is even possible, or am I going about this the wrong way? Thanks!
 -
Check it out at https://www.cgforge.com/course/houdini-for-the-new-artist-ii
-
Hey hey I was wondering if I could get a job knowing only Vellum ( +DOPs and SOPs, maybe some VEX ). Would I have to be a master at it or could mid-level be appropriate? Thanks
-
After a couple of weeks playing with vellum. I really tried to get a membrane tearing look on the "slime" , which pretty much worked for me.. https://youtu.be/5oPvkRtXkPo
-
Hello, My issue I am facing is getting geometry(mushrooms) to interact with grains (soil). I've tried setting the geometry to a RBD hero object and the grains as collision geometry however this is not working. Any solutions would be greatly appreciated thanks:) Mushrooms.hipnc

-
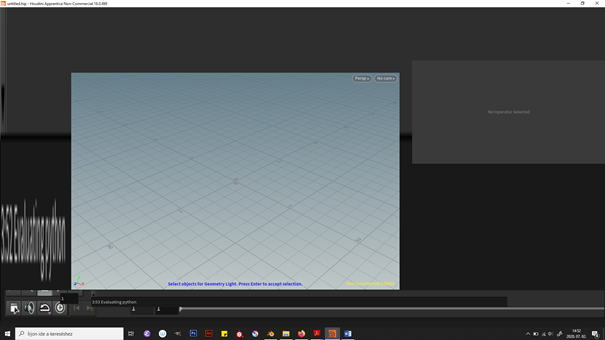
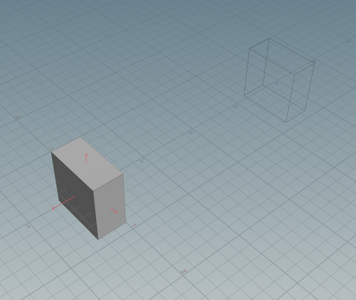
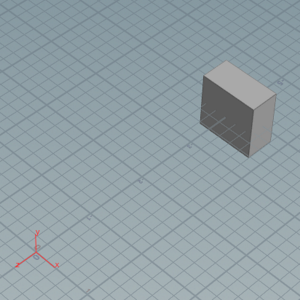
I just downloaded Houdini's free version for the 1st time, and it does not look like as in the youtube videos or other places where I saw it. So it looks like that: and i don't know why. I deleted Houdini and install again and again and it is looks like this again and again. Please help me.
-
Hello all ! On a shot like this I would like to change the shape of my fire so it doesn't have this mushroom like shape when it grows but I can't figure out how. Any other tips or advice would be much appreaciated too ! Thnaks in advance ! Maho CLAQUIN
-
 Hello, Let me preface this by stating that I'm new to Houdini. For the purpose of this exercise, I have a simple cube. For the following sides of the cube, I would like to instance a premade object that has its own controllable parameters. I've set up a folder in my tool with 5 toggles for: front back left right top Ideally, when I toggle one of these on I would add a copy of the object to the selected side. This isn't the hard part, I can achieve this with a switch node. What I would like to do is make the object show up in the parameter list with controllable parameters. But with how I set up my network, I don't know how to let the object maintain it's own parameters. I hope I made myself understandable! Thank you.

-
I'm sure this is really simple, but i've been having a pretty hard time wrapping my head around how to create rig up two rigid bodies like a hinge. I'm trying to create an object that has "legs" that attach to the underside of the object and rotate in one plane about their connection joint. I was hoping that I could just make all of the pieces (including the pin that hold the two pieces together) rigid bodies and then just let the simulation figure how they will move (the thing is being dropped into a bed of rbd grains) without needing to constrain or rig anything, but the result I get is that once forces are applied to the "legs" the pins move out of place and the simulation breaks. Any help would be great. I have been trying to find tutorials for this but nothing seems to quite address the problem I have been running into, plus I don't exactly know what it is i'm looking for. Thank you!
-
-
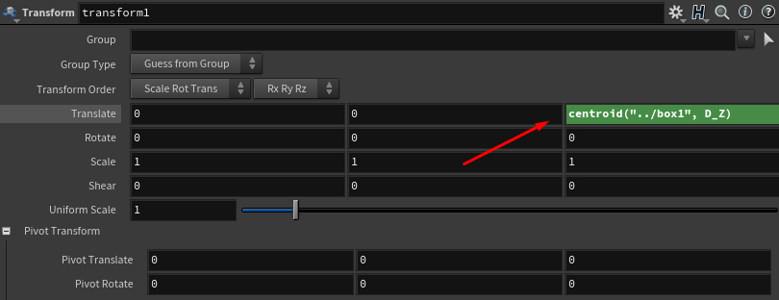
Hello! I am new to coding. I assume my problem is that I don't fully understand Hscript's syntax and also I seem to struggle with explanation provided by official documentation. 1) First, just to make it clear, does "returns" mean: This function "gives/provides/sends"? 2) By "centroid information" it implies world coordinates of the object's centroid? 3) And by "surface node" it implies individual parameter cell where I write in my values? (btw how should I properly call those "cells/windows", are those parameter channels? confused...) 4) centroid type D_Z, what does "D" stand for? a. I placed a box and move it -4 in Z direction; b. I created Transform node and wrote centroid function in Z translate parameter cell: centroid("../box1", D_Z) = -4; c. -4-4=-8...; d. Oh... Ok... So when I put (-) before this function it looks like that -(-4) = +4 Which translates box into the world center. It means that I kind off answered to the first 3 questions myself. Right? : D 5) What is the difference between centroid and $CEZ? Why would I use one over the other? What are those "Global variables" and how do they differ from "Expression functions"? 6) Is bbox type D_ZSIZE just the distance value between D_ZMIN and D_ZMAX? Thank you!

-
Sorry, kind of new to Houdini here & surprised I can't figure this out: How do you stop smoke from being emitted within a dopnet? I have a scene where the smoke from an object ( a cube wired into an object merge wired into a fluid source node that creates smoke density) and then I use a suction target to make the smoke form into text when it rises. The thing is I only want the source to be emitting smoke for about 24 frames, and then I just want to watch the emitted smoke form into words. Does anyone know how I can do this? Thanks!
-
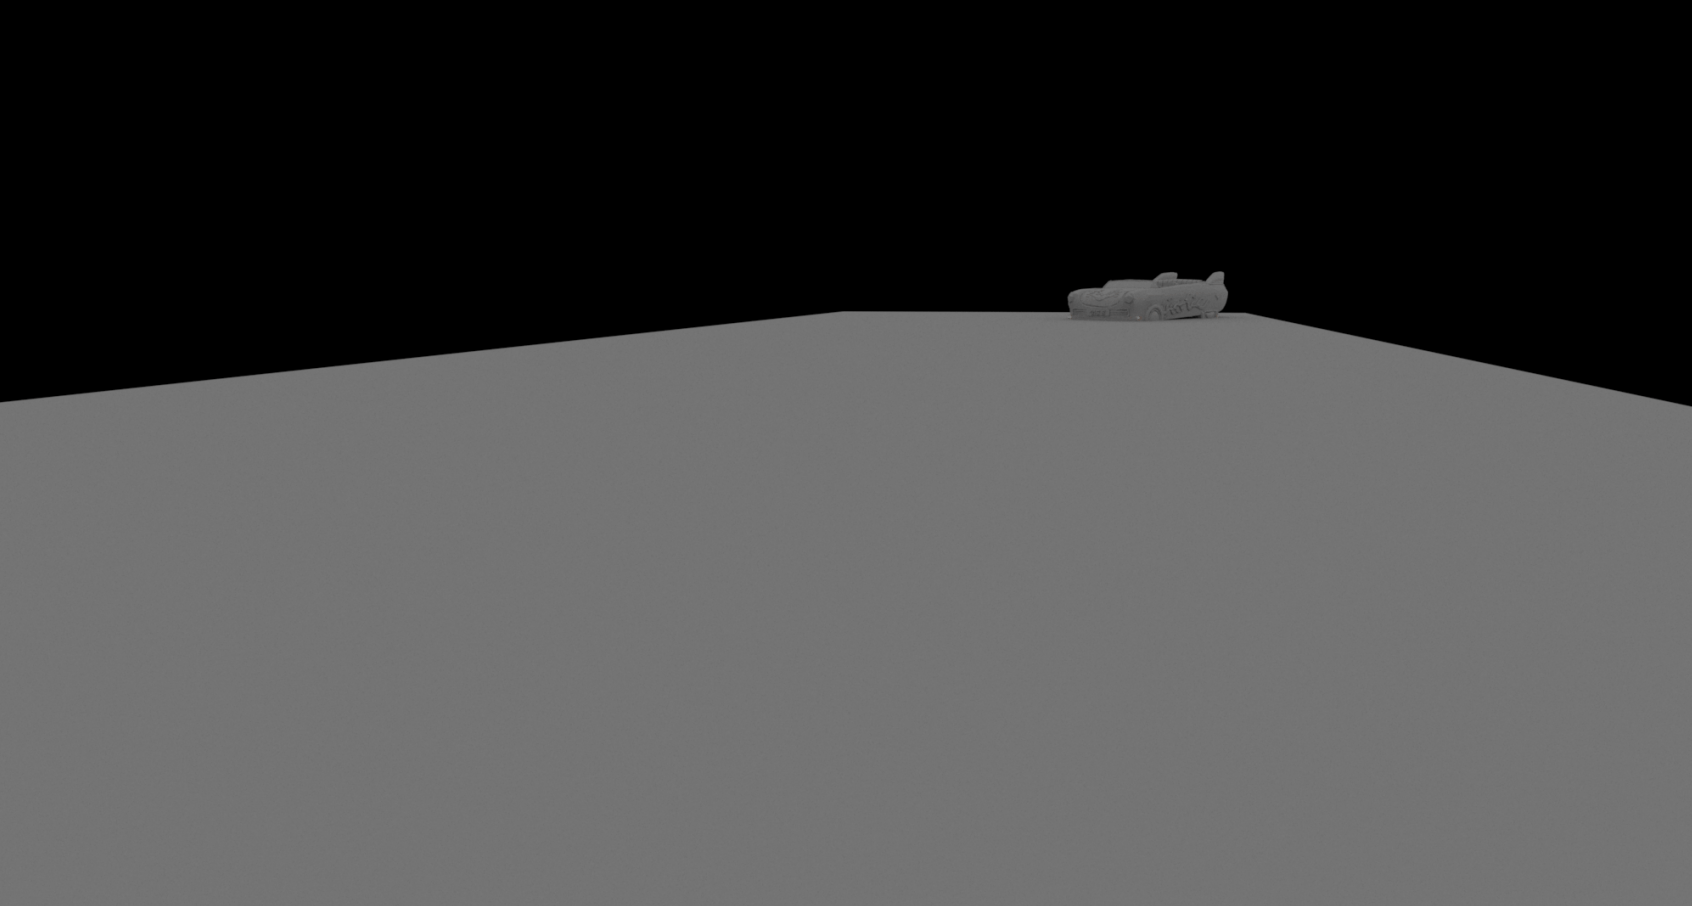
Greetings all, This is my first post as I'm a relative noob to Houdini. I would like to know how to turn the triangulated primitives yielded by PolyLoft SOP into quads. Further, I am using a Copy SOP and a Circle SOP to create the loft, and getting a missing strip of primitives in my PolyLoft output. Is there a way to avoid getting this by making adjustments or appends ABOVE the PolyLoft node? If not, what SOP would work best to connect the exposed edges along this strip? Attaching .hip file in case anyone can take a look. Any help on the matter is greatly appreciated! NpF R&D-PolyLoft-Cave.hipnc
-
Hi, I'm trying to learn shading and rendering in Houdini, but I've just set up a simple scene with just a sphere, and it's taking up to 20 minutes to render it? Thanks
-
Hi Everyone, I am a beginner in houdini and mainly focus smoke simulation, I was wondering you can give some lead or where to search for be able to do an effect like this one, for me to effect this effect you build your geo and you make the kaleidoscope effect by vex ? of there is an other way, know hodini there is always an other way I don't want like a tuto more some technical name or node who can lead to that direction, Thanks you !
-
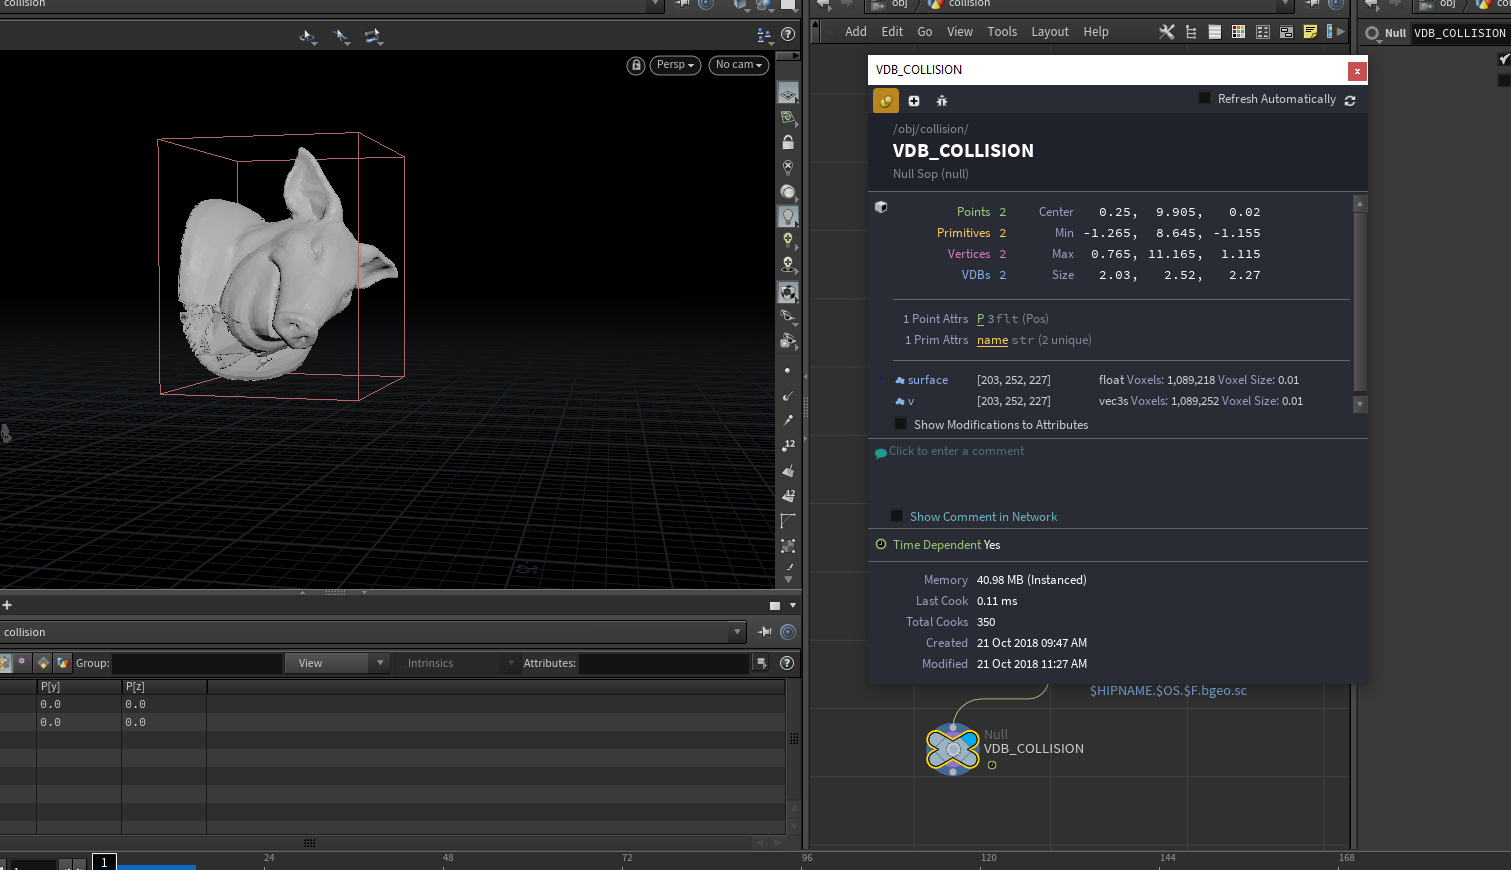
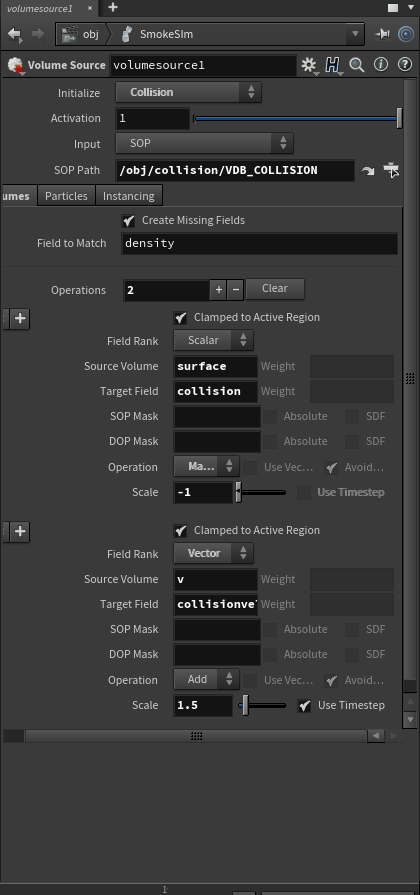
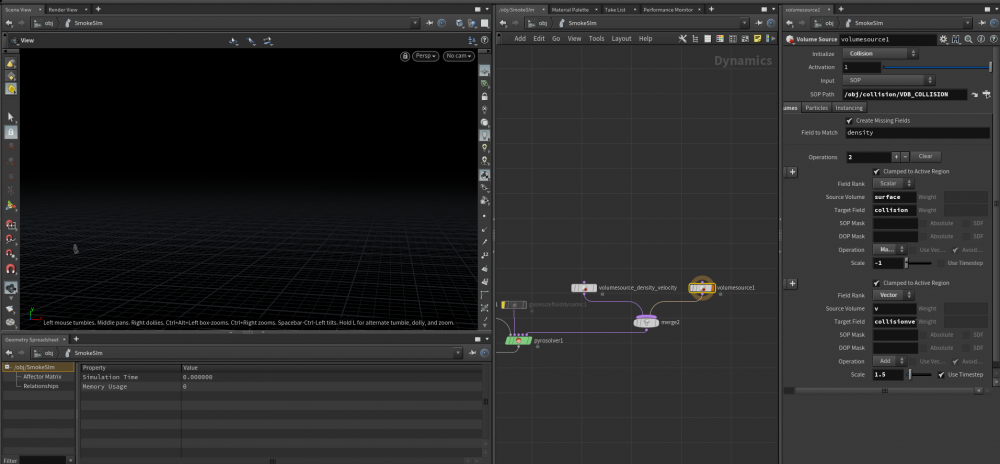
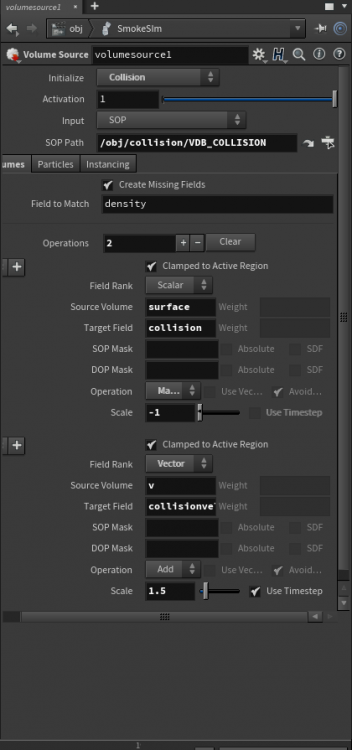
Hi guys, I'm in trouble with the new Volume Source node. I can't import a simple VDB from SOP to DOP as a collision object, let me explain better. There is a Pig Head converted in VDB by Distance, it has got two attributes: surface and v. After creating a simple DOP Network, I've tried to import the VDB object by the new node Volume Source. I set the correct path, changed the source volume initialization from smoke to collision, changed the source volume paramter, turning its name from collision to surface (to import the attribute I got in the SOP pig head), but nothing appear in the scene view, it doesn't import nothing. I also tried to modify the field to match, setting surface as field to create, nothing happens again. I'm trying to solve it for a couple of hours but I'm still stuck. Can someone help this stupid beginner? Thank you in advance.

-
 Hey everybody! I am trying to work up my skills in surfacing by competing in this month's RenderMan challenge. I am currently using Mantra (because the RfH for RenderMan 22 doesn't come out for a few more weeks) but I have a few extremely basic questions about the workflow. I am using the Lookdev desktop, and using the built-in test geometry. 1. In the light bank data tree, I am only able to change intensity but not exposure. How can I change this? Do most lighters work in intensity or stops? 2. In the object appearance data tree, I am only able to assign materials at the object level. Is it possible to assign materials to groups from this UI? 3. When you lookdev terrain, is it more normal to scale your uv coordinates in the shader network or go back to the geo and use uvtransform to scale tiling textures up and down? Or do most people just use triplanar projections on background buildings and landscapes? 4. (Technical) I was looking into light instancing and found that with the template light you can write your own light shaders. But is that only in /shops? What is the current /mat way to write a light shader? 5. (Technical) I noticed that render times are faster with packed geometry, but then I lose all my material assignments. Why is rendering packed geometry faster? What is the currently accepted way to lookdev packed geometry without losing all your material assignments? 6. (Technical) How does light instancing work? It seems a little strange to me that the instancing tool is completely separate from the copy-to-points SOP. Is the instancing tool just running a for loop at IFD creation time? Are there any other common approaches to procedural light scattering?
 -
Hi there, How are you? I hope you're fine. What is it "Houdini Rocks"? It's the first volume of more courses dedicated to Houdini in english language and in the first volume you can find some part (not the same) of my workshop "Houdini for Artist" is started last 3rd september, but you're still in time for join wih other student if you want... By the way here I don't talk about the rocks or how to create rocks (it's only the title). In this course I cover a variety of material and I introduce you to Houdini. In the first lessons I talk about proceduralism and interface, but we touch also advanced subject like VOPs and VEX. Finally you have a good approch to Houdini and you can start to work with it. All you need is Houdini Gumroad - gum.co/leOq Cubebrush - cbr.sh/z6utbt CGCircut - https://www.cgcircuit.com/tutorial/vfx'n'go---houdini-rocks---volume-1 Udemy - https://www.udemy.com/vfxngo-houdini-rocks-volume-1/learn/v4/overview have a nice day Matteo
-
Hello! I'm an advanced beginner in houdini and in cg at all. After 6 months learning i feel that i can help some beginners to start. Or we can just exchange information if you the same lvl as me (i know well sop/chop vex, cameras, lighting). For me it's a good possibility to consolidate my knowledge while explaining, and maybe improve my English lvl(if you English speaker of course:)) For you it's a possibility overcome the threshold faster or get new knowledge. Email me or add me in skype: 333robert3337@gmail.com
-
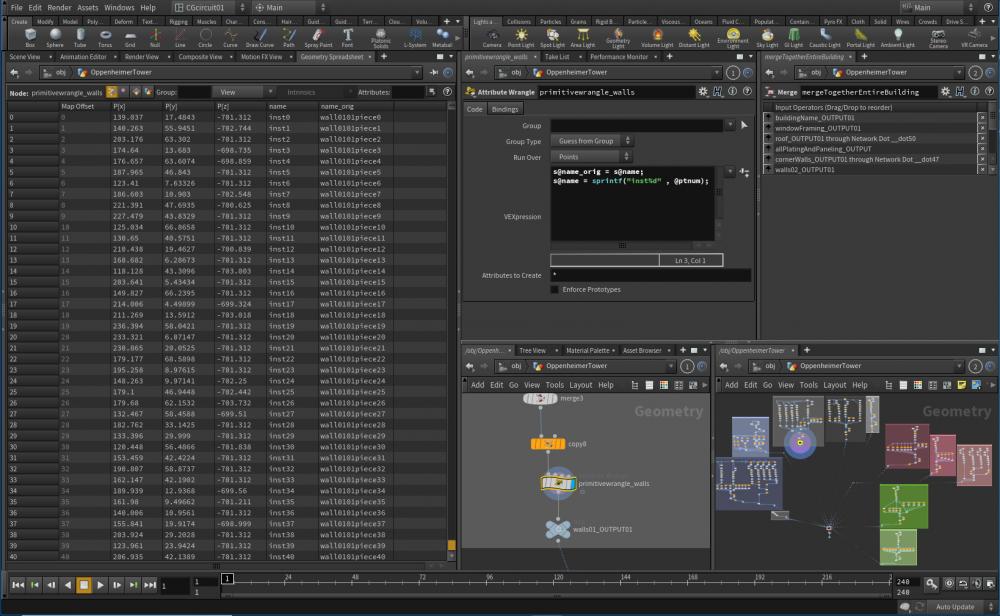
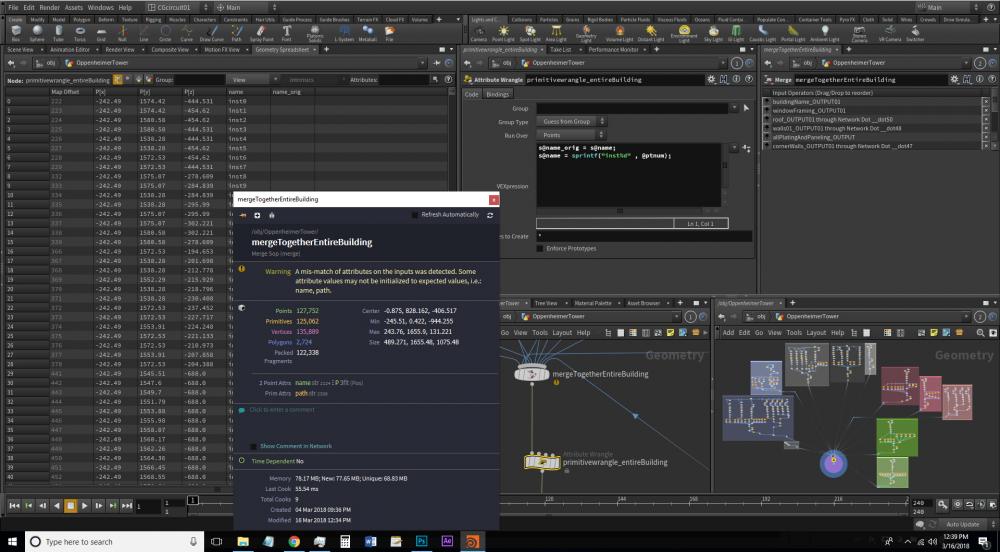
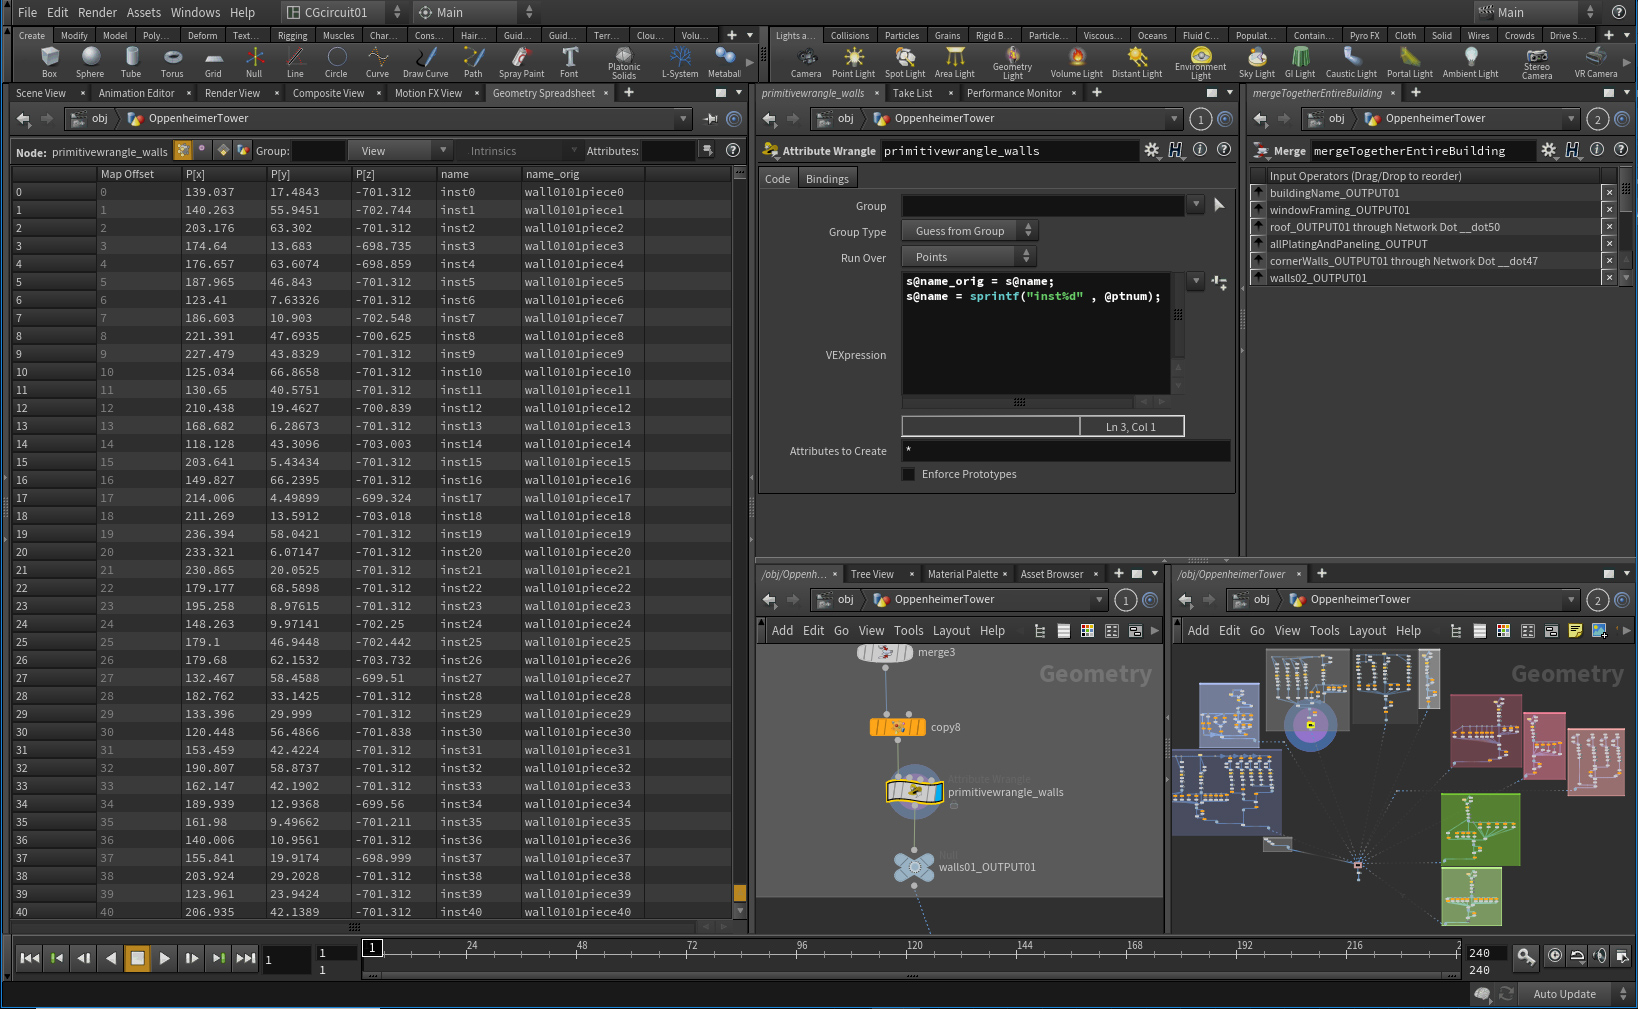
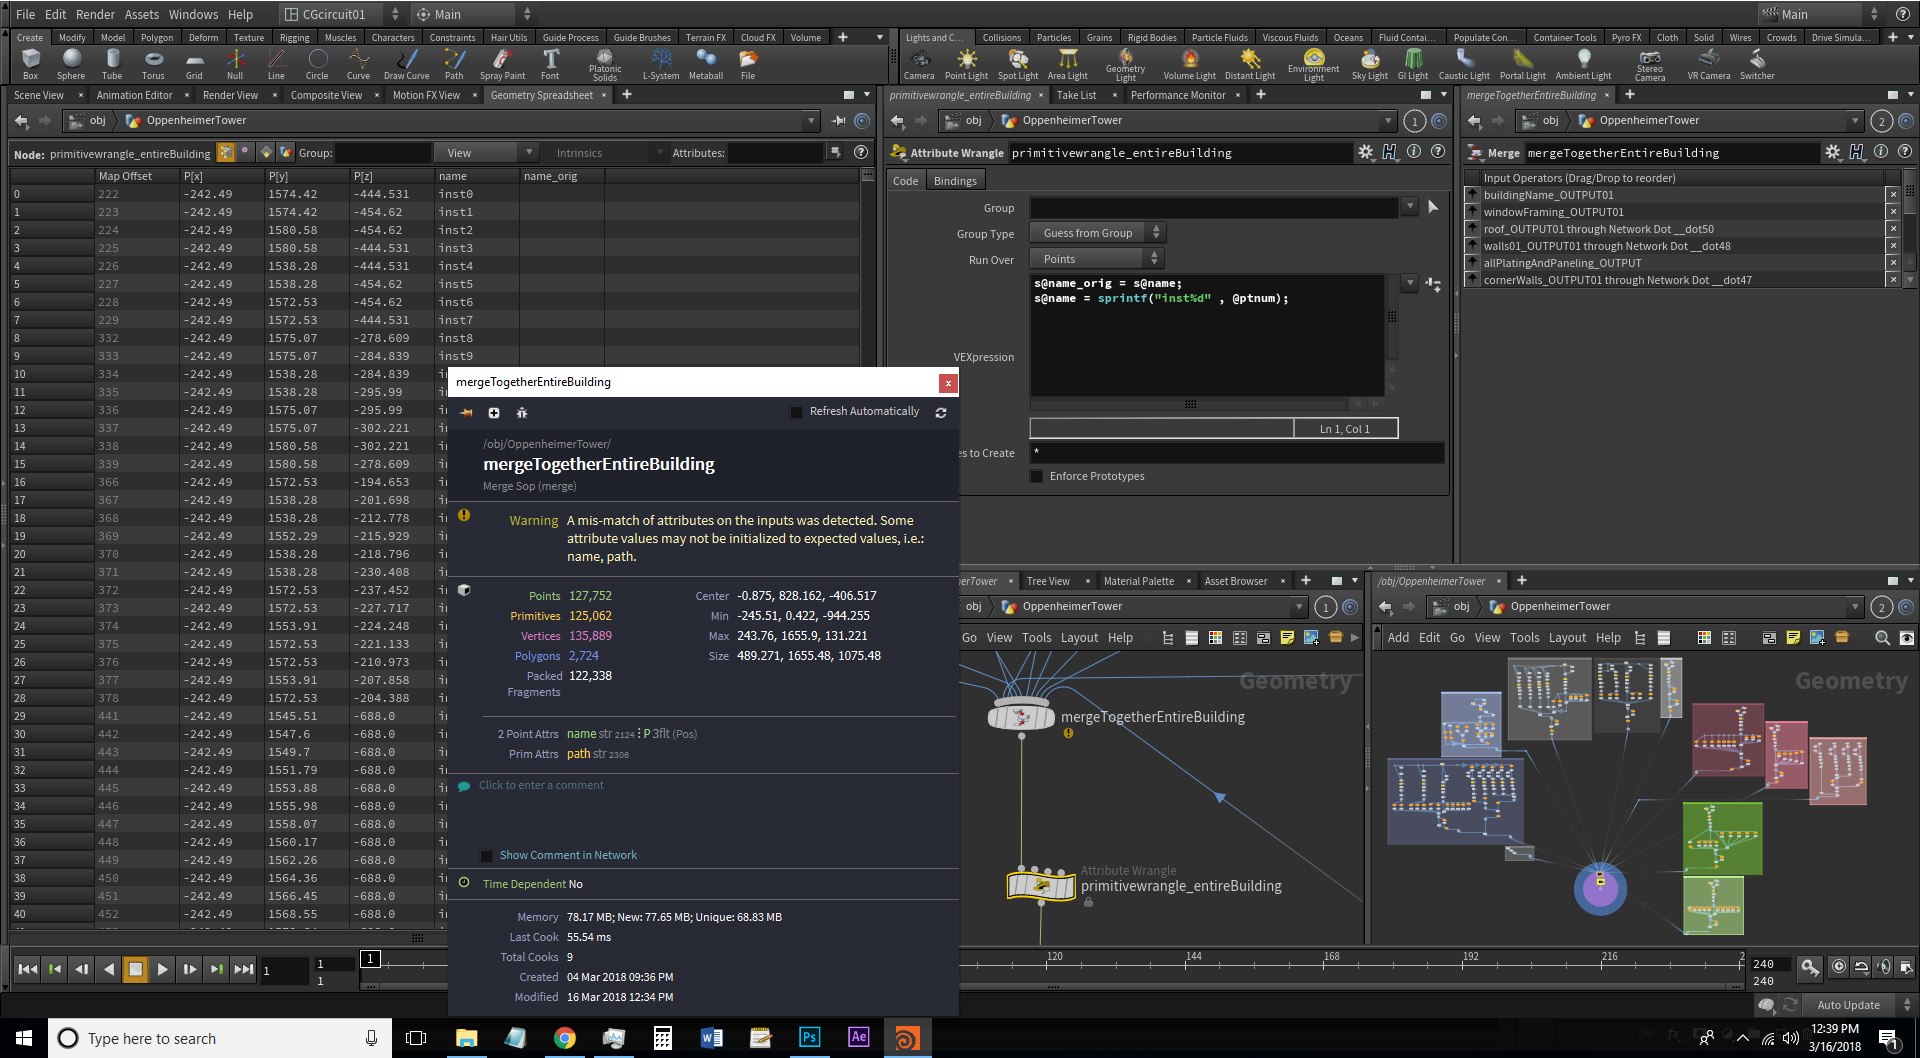
Hello all, noob question here: I'm trying to follow along with the Steven Knipping tutorials (Rigids II - Structure Destruction). In video 4a he talks about adding primitive wrangles to re-name the points generated by packed geometry, while at the same time adding a variable inside that primitive wrangle to preserve the original name of those points (see the first image I've uploaded). Problem is, I'm using my own setup / model to try and follow along. I can get that technique described above to work just fine for individual sub-sections (walls, floors, windows) of my building, as you see below ("name" and "name_orig" attributes working as they should). However, as you can see in the second image, trying to apply this technique to the entire building, I'm still able to get new name attr's for all the pieces / fragments, but no original names ("name_orig" comes up blank). Plus the error msg from the merge node just above, "A mis-match of attributes, etc." Most of what I've googled so far is along the lines of "It's just a warning, don't worry about it." But for these particular tutorials, I should probably see this issue handled before I continue. I've tried a few attribute wranglers, but they don't bring back the "name_orig" attr I need. What to do? Hopefully I explained things somewhat clearly, tell me if you need more details before posting an answer. Thx in advance