Search the Community
Showing results for tags 'rest'.
-
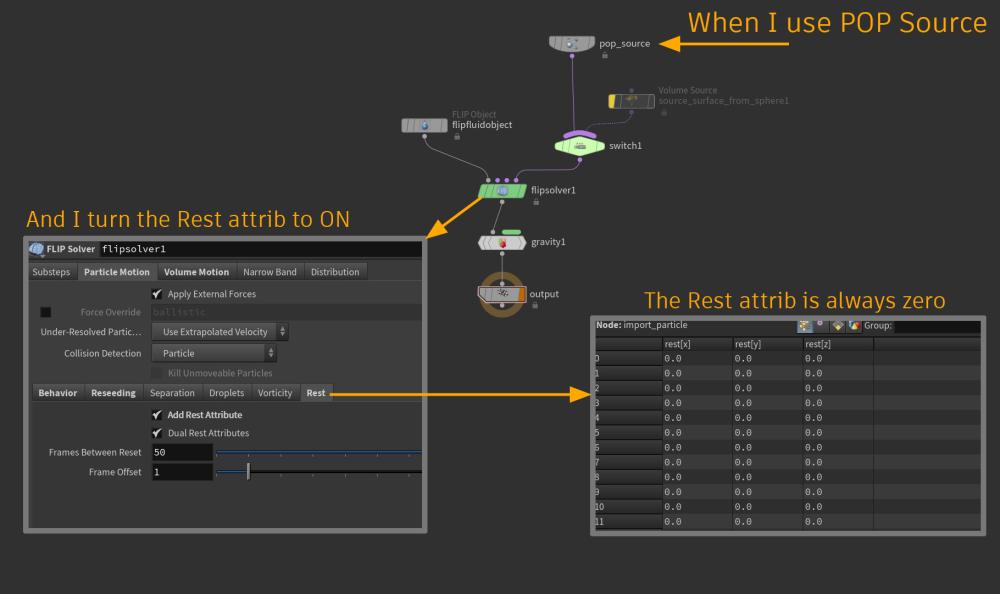
Hi guys, In a Flip-Fluid simulation I need to use a POP Source instead of Volume source. Now when I turn the Rest attribute to ON, in the FLIP solver->Particle Motion->Rest tab, the output of the rest is always zero..! How can I fix it? (I need the rest attribute to use with a noise on pscale of bubbles inside my fluid). Thanks for helping. Bubble.hip
- 1 reply
-
- flip-fluid
- rest
-
(and 1 more)
Tagged with:
-
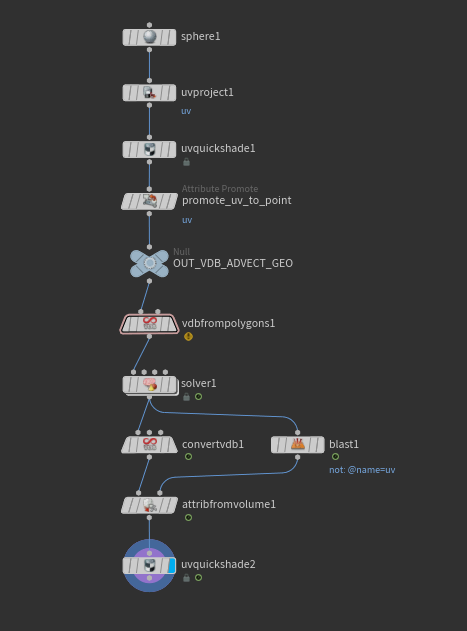
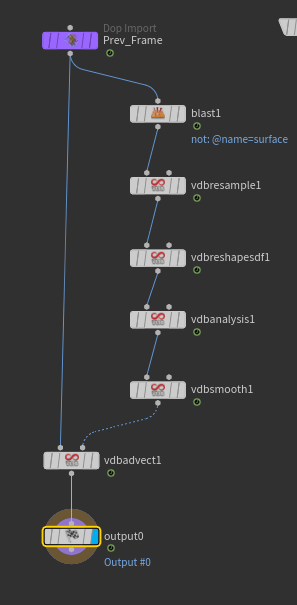
Hello all, I am struggling to get proper UVs to move along with this vdb surface advection (courtesy of artist Jose Leon Molfino). I assume you would just make the UVs the same as the rest attributes but I am not getting the same results (as the video I attached). There is not much out there for blending dual rest and adding UVs to a growth simulation. If someone knows the solution it would be a great help to my personal project!! I attached Jose's file below which I would like to figure out how to add UVs too. Thank you very much! https://x.com/Jose_Molfino/status/1585375392101064704?s=20 ssstwitter.com_1697331574695.mp4 vdb_advection_withoutUVs.hipnc
-
Hello For a cloth set up I need to have the same remesh (via Remesh SOP node) result of an object on each shot. The object to remesh is the same in all shots, but is Position change. I can not dive in the Remesh node but it seems that while translating an object, is remesh result change. What I want to achieve is to have the same remesh result for each object base position. My ideas was to use a rest pose, or find a VEX function that does the same as the Remesh node but I can't figure it out. Thank you for ur time
-
Hi, I'm trying to export rest attribute from pyro(Sparse) sim, but it looks like Sparse solver doesn't have rest/dual rest anymore. Have anyone tried it? How can I get rest position if I'm using sparse solver? Thanks!
-
The gist of the effect I need done is this. I need this Logo to start out fractured into a ton of pieces and off screen in all directions then I need the pieces to kindof suction in towards the screen center where they come together to form the full logo My current workflow is basically run the sim backwards (the logo starts off fully formed and i explode it outwards, then reverse the RBD sim) The problem when I reverse the sim I get a very harsh stop on each piece once the piece gets to its start pose I fix this sort of by running a jiggle or lag CHOP motion effect over the points after i reverse the sim, adding some overshoot to the sim so it overshoots the rest pose and then settles back into the rest pose the issue is now i get intersections with the pieces. Was hoping someone might know how i could maybe run another simulation on top of the reversed sim? Like have it follow the same motion but adjust for self collisions?
-
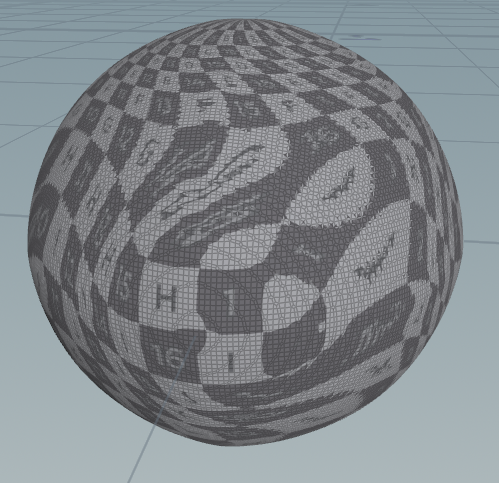
Thanks in advance for the help! I'm advecting a vdb so it grows over time. Once turned back into polygons, I'm hoping to stick UV's on it. The setup - I promote my uv's to point attribute and in the initial "VDB from polygons" I created a new surface attribute to store the uvs - I advect both vdb volumes in a sop solver, and then convert the vdb to polygons. - I then use an "attribute from volume" node to transfer the uv's from the volume onto the mesh. This works for the first frame, but as expected distorts and breaks down pretty quickly as the volume grows. I've researched and found examples of using the "dual rest fields" option in the Pyro and Flip Solver and then blending between the two rest states to "reset" the texture distortion as the mesh grows. There is a great example of this by Jesper Rahlff here (https://forums.odforce.net/topic/49461-lava-flow-question/?do=findComment&comment=227475). Great! I can create a rest field but... - What exactly is rest2? how is it different from rest1? - And how would I go about setting it up here without using the pyro or flip solver? If you have a better way to achieve this always open to that too VDB_Advect_UV_rnd_v02.hiplc
-
Hello all, I'm looking to do some basic volume displacement using dual rest (something I've done before in the past), however I'm stumbling at the first hurdle now, when revisiting it a few years on: I cannot get a working rest_ratio and rest2_ratio out of a pyro sim. I could calculate it manually using the frame offset and blend length params, but I seem to remember simply being able to grab it from the solver. I have initialized the rest field in the smokeobject DOP, as well as dual rest mode in the pyrosolver advanced tab, however the ratio detail attributes don't appear to move. Looking inside the sim at the smokesolver_build2/record_sim_settings_to_initialization_data script I can see that the ratios are being correctly calculated, however this isn't being exported properly when I lay down a Dop Import Fields SOP. I've attached a really basic hip file. pyro_dual_rest_ratio_not_working.hip Can anyone help me? edit: using 18.5.633 Thanks in advance.
-
Hello all, I have a simple question after trying hard and also looking into the web and SFX help cards with no success... I have a simple quad mesh with unshared edges, then I connect that to a rest sop, pipe that into a bend sop for deformation and connect that to an attribute vop where I use an anti-alias noise to create displacement on the model. After the part is bent and with displacement applied, I would like to have it back to its original shape before the bend but keeping the displacement intact. I'm doing that as a way to have more control over the noise transformation. Tried using a wrangle sop with @P = @rest; but "duh" enough.... the part comes back to the rest position and the displacement is gone. If I try that same procedure with Cd instead of displacement, it works. Does anyone knows how to get the mesh back to its original shape after the deformation and displacement were applied to it? @mestela mentioned this in his amazing cgwiki page, something like this: Measure deformation Can measure the distance between @P and rest with a wrangle like @d = distance(@P, @rest); And use that to colour the surface, or enable a displacement map to drive wrinkles, or push points along their normal to do hacky squash and stretch. However, I don't have a clue on how to keep the displacement after the deformation and back to its original shape. Any help is greatly appreciated.
-
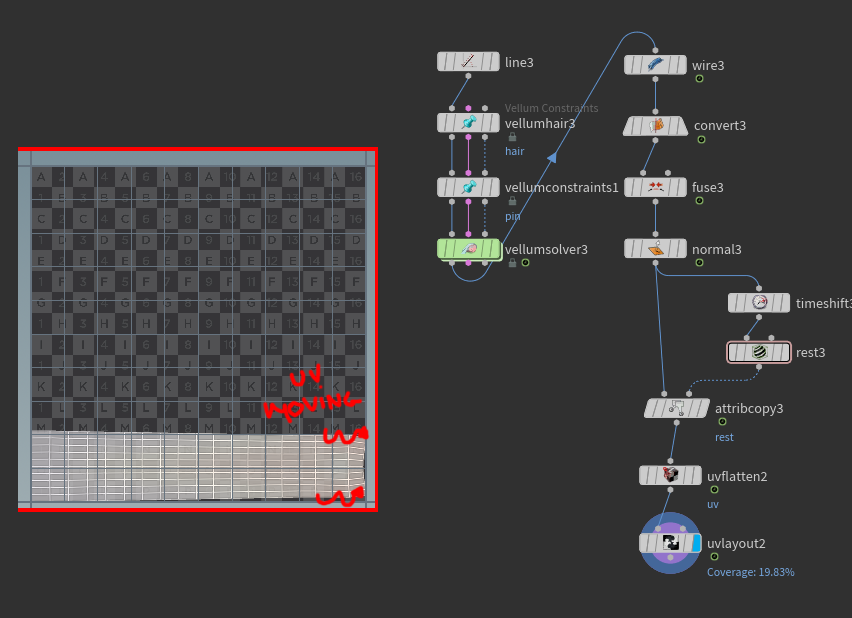
Hello, I'm struggling one more time with the rest position. It's something I really have problem to assimilate. So I have my vellum hair simulation. Then I applied a wire to create thickness to my rope. I then applied some UVflatten/layout. And then the UV doesn't stick to my rope. I assume I should use rest for that. But it's an eternal misunderstanding between us. Any help ? Thanks
-
I know this question has been asked on here a few times but I still cannot seem to get a straight answer. I watched the 16.5 FLIP masterclass on how to use the dual rest solver but the thing is Jeff Wagner never actually got it working. If you open his scene files and disable/enable the VOP node you can see he actually didn't do anything- it's the same UV result either way coming from the UV Quickshade. Then I tried to read up on the Dual Rest and Dual Rest Solver nodes, to which there is essentially no explanation in the Houdini help. And while I understand the concept of the Rest SOP measuring the distance between initial positions and deformed positions on points, I still don't understand how to translate that into UV space. So I want to just put this to bed by asking a straightforward question and hopefully receiving a straight answer! (Please no links to other threads I literally have been down a rabbit hole on this several times with no good answers). I want to take the rubber toy test geometry, add it to flip with simple fluid source and FLIP object, use gravity to smash it against a floor plane. Outputting dual rest attributes from the flip solver. In this scenario, how can I- a - take the initial UVs from the geometry and have them deform with the sim b - take the dual rest attribs and use those to UV on my own with a procedural texture
-
I have a problem with the rest field. When I tried to render just popup on every 20 frames which is Frames Between Solves settings on PyroSolver. The simulation starts at 4. frame so I paste that value from dop network node to pyro solver in frame offset as a relative reference. In addition, I attached settings images and flipbook video I appreciate any help! rest problem.mp4
-
Hi everyone, I got a flip sim with a hero object Floating on top of it. Now I want to make sure, the object floats but kinda stays on a specific spot. So I used the rest Attribute and subtracted to Position from it (in the dop net). If the distance is getting bigger the force should increase as well. Unfortunately the force is pulling the object to the Center of the Scene. Maybe any quick solution for that? Added a supe rsimple hip file heroforce.hiplc
-
When I use shelf tools like about destruction or pyro, Houdini makes rest node and rest field. and I don't know where can I use it. I think rest node for destruction and rest field in pyro are completely different but I don't know how can I use it. I'm the beginner of Houdini and so .. help me ! Sorry for my English btw TT
-
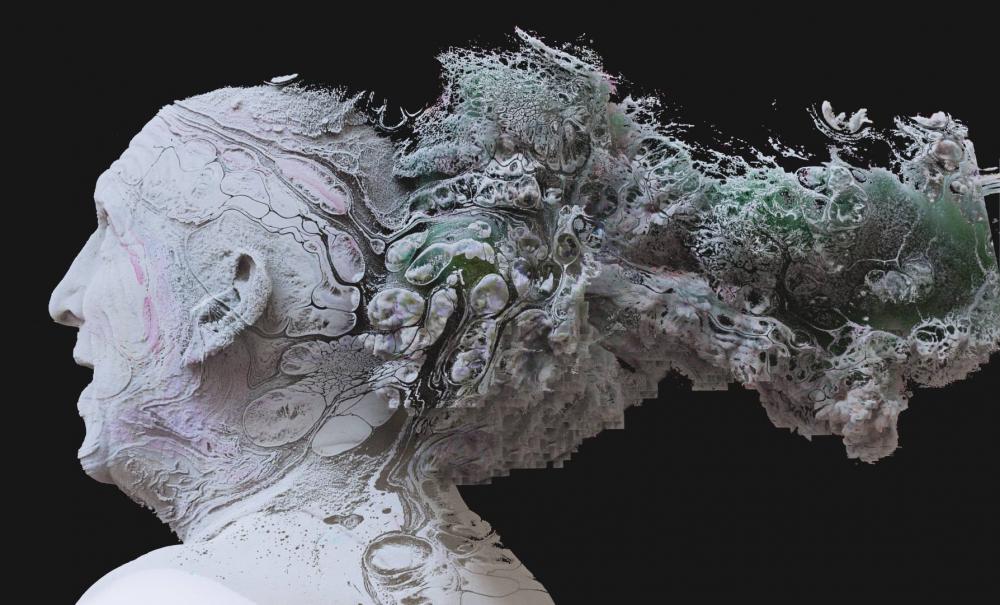
Hello everyone! Please tell me who engaged in the creation of lava in the Houdini. I need to create a procedural texture of magma so that it follows the surface of the geometry. Also, perhaps you know how to create dark folds on the surface of the lava as it cools. Thank everybody in advance! The dark folds
-
I'm accustomed to adding additional detail to smoke using the Pyro Shader by creating dual rest attributes and using those to generate Noise with the shader. It seems though when I adjust the Scale Time on the DOP Network node, something becomes off. In my attached video, you can see that the Noise of the Pyro Shader is causing a popping every 30 frames. I'm not sure how to resolve this issue and any tips would be much appreciated. Thank you. smokeTest_001.mov SOLVED: simply use the pyro solver's time scale instead of the DOP's
-
Hello magicians, I saw a great image by Lee Griggs the other day and I tried to replicate, here is the original effect He did it with Arnold (i think in maya), by projecting a texture into a volume density, here is some explanation https://support.solidangle.com/pages/viewpage.action?pageId=55710284 I didnt know how to project a texture into density, so I projected a texture, the deleted by color and converted that into vdb > fog, but that way I don't get any depth, any ideas? I've read about a rest field that does something like UV on volumes but cant figure out how Here are my attempts: Hip file attached, Cheers! volnoise3.hip
-
Hey guys recently I saw that rest field inside pyro solver, that I read at Stalingrad Article to create flames in SideFX site, but I dont have any idea how to use that , anyone have a document/explanation for this? Thanks
-
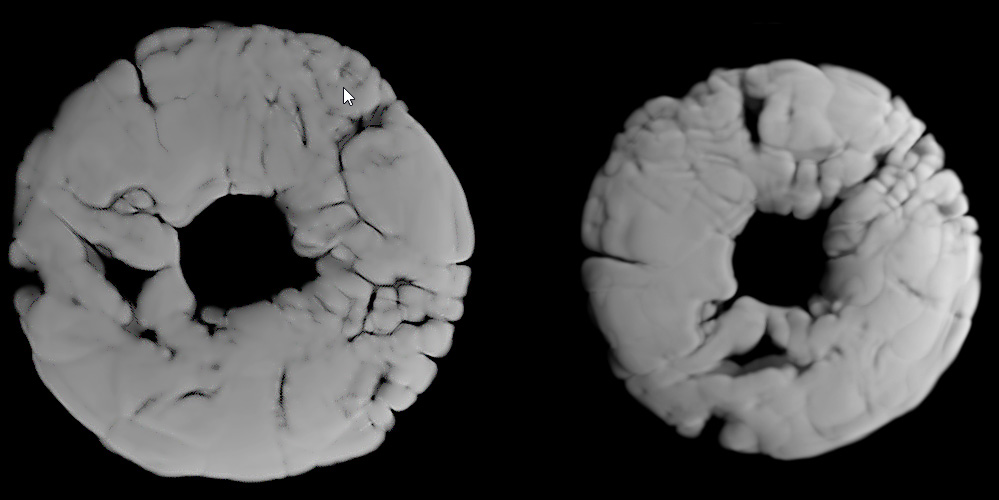
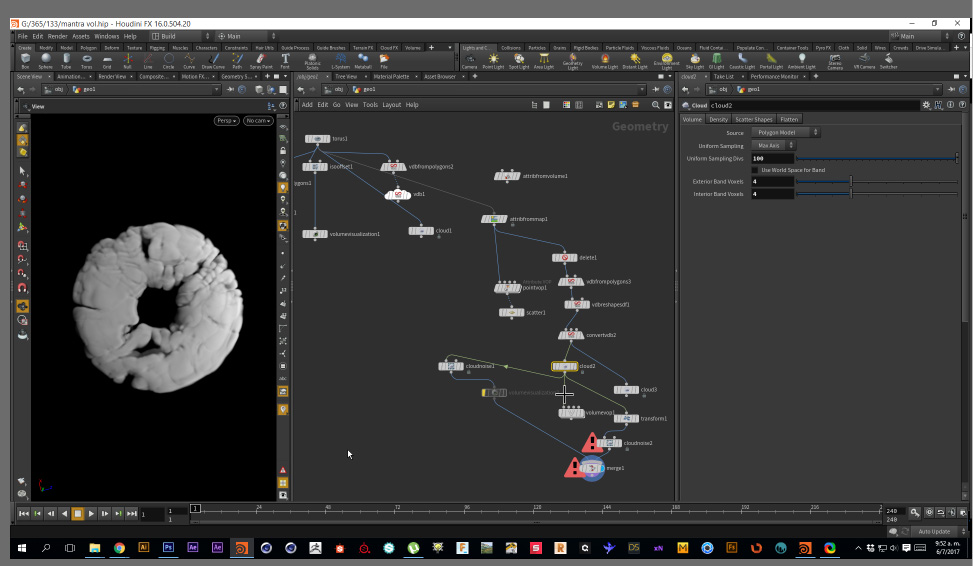
I have a question about noise texture I use rest POS to give noise material If the size is very small there will be flashing Now I don't know how to solve, Or other way to make this kind of small dot I hope that the master to help me rest noise.hip
-
I have a question about noise texture I use rest POS to give noise material If the size is very small there will be flashing Now I don't know how to solve, Or other way to make this kind of small dot I hope that the master to help me rest noise.hip
-
I have a question about noise texture I use rest POS to give noise material If the size is very small there will be flashing Now I don't know how to solve, Or other way to make this kind of small dot I hope that the master to help me rest noise.hip

