Search the Community
Showing results for tags 'shading'.
-
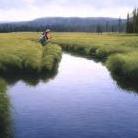
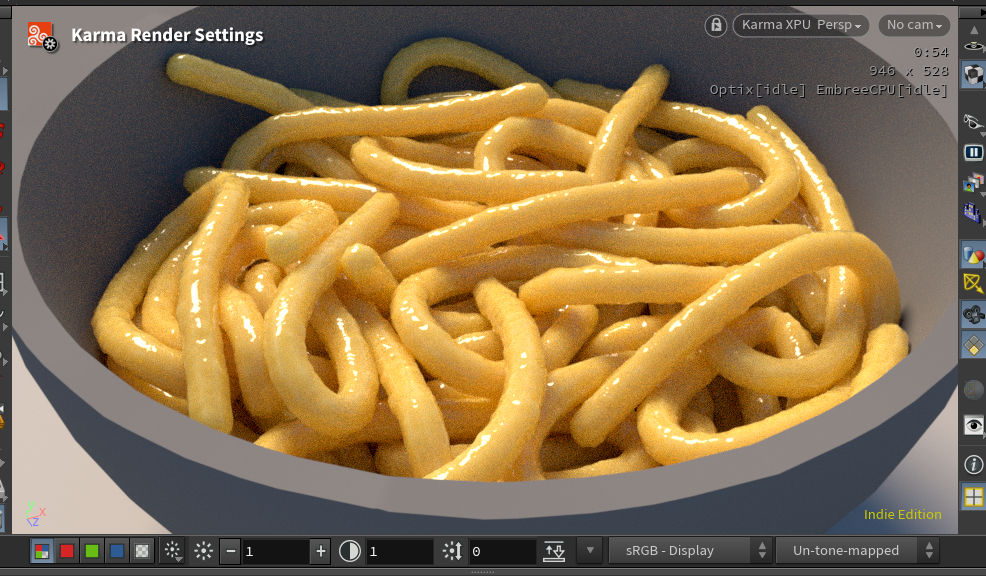
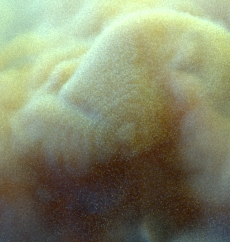
I'm trying to nail the look of pasta (personal project). I believe this is a good reference. This is what I have so far: What do you think about it? Is it working? How to improve? I have limited experience with shading and rendering and lighting. Here i'm using displacement to get the variation in the reflection. Is it a good idea? Is it the way? Or are there smarter/faster solutions? Any kind of feedback is much appreciated. Feel free to play the supervisor here pasta_shader.hiplc
-
Hello, everyone! I'm very excited to share my Procedural Lake Houses tutorial series, where I show how to generate the houses all the way from base silhouette to final shading. Example of the Generated Content: Link to cmiVFX page: https://cmivfx.com/products/494-procedural-lake-house-building-creation-in-houdini-volume-1 Thank you for watching and have a good day!
- 46 replies
-
- 7
-

-
- procedural modeling
- mantra
- (and 4 more)
-
 Hello everyone! I'm currently working on a Uni project where I would like to create a natural environment. I've followed few tutorials, some uses COPs, Substance and others. But I'm getting a bit confused about what could be the best way, considering how fast these tutorials get outdated. I would like to use Karma, or even better, an external Render engine. I would like to use the masks generated by the erode node mixed with something custom. I'm having some issues when using "Import from SOP" from the COPnet, Houdini just freezes. Scene File Prev Image Also, please let me know whatever suggestions you might have. Thank you in advance
-

shaders Layering Shaders With map ? (Mantra)
quentin posted a topic in Lighting & Rendering + Solaris!
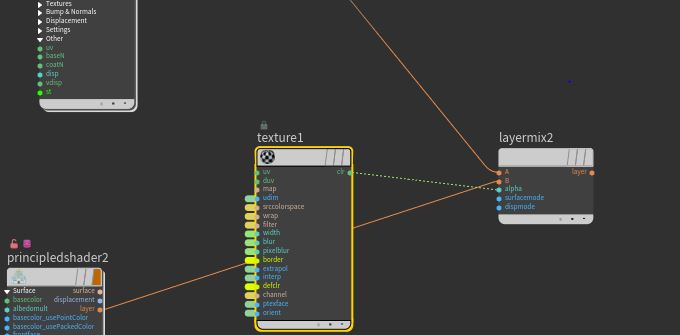
Hi everyone, I'm currently working on a material who mixes 2 shaders and I'm facing a stange issue. How to layering 2 shaders using a map in houdini ? I tried using the layermix and it works but only using a noise as alpha (pluged in alpha) But when i'm trying to use a map there is only the shader 2 who is render the map I want to use is a .pic sequence has alpha and using as mask for wetmap. Does anyone know the right way to use a map as mask for shaders ? maybe I'm not using the layermix correcltly or maybe using a texture node plugged in alpha is not the good way to do it..I don't know. There is not much information about the layermix in Houdini Help... Thans for your help !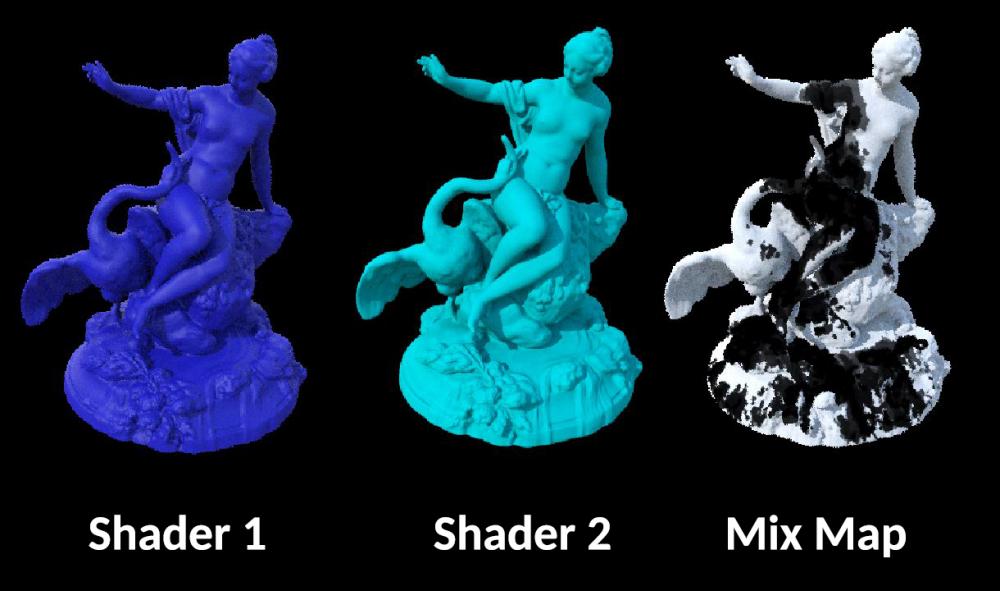
-
Hello everyone, This series will cover all the patterns and textures available in Houdini in VOPs and use those to modify geometry, heightfields and VDBs and also to create various motion graphics effects. For more information you can visit my website https://www.rohandalvi.net/patterns The first 100 sales will get a $25 discount. Discount code is "pattern" You can see a free lesson from the series down below and also watch the trailer to see what is covered in the training series. Trailer
-
Is it possible to use point normals for displacement shading? I'd like my grid to displace in the same direction as the normals are in this video. Houdini Tutorial #7 (Point Normal) - YouTube
-
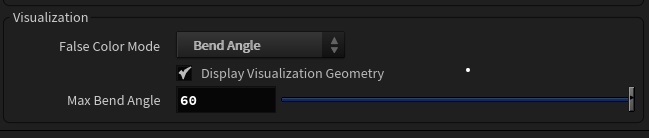
I would like to take this value out so I can create a colour gradient out of it and use it in my texture thereafter. I know how to do it with the stress attribute as it appears in the constraints attributes, but I do not have a Bend angle attribute in my solver. Cheers!
-
 I would like to take this value out so I can create a colour gradient out of it and use it in my texture thereafter. I know how to do it with the stress attribute as it appears in the constraints attributes, but I do not have a Bend angle attribute in my solver. Cheers!
 -
Hi, This is something I really don't understand and I didn't find anything in the Houdini help. Can anyone explain it in simple terms? Is it only useful in shading? Thanks
-
 Hey everyone, so I've set up a scene with a principled shader and it rendered fine when I exported it to ifds and rendered it on our farm. But then I needed an extra AoV for an attribute to mask out parts of the object that has the shader assigned. In order to get that to render, I opened the principled shader and did a simple bind->bind export setup for that variable which then rendered fine locally. But from then on, no matter what I tried when exporting the scene to ifds, the object with the open principled shader would always render as if it has no material assigned. I tried forcing VEX shader embedding, which made the ifds quite a bit bigger and made me hopeful, but to no avail, all I get is grey shading. For now, I render the mask as a constant material in a separate mantra node but there has to be a way to output an attribute in an AoV when using the premade shaders. Any help is very welcome!. Thanks in advance, Paul
 -
Hey guys. This shading effect was originally made on Redshift. Does anyone know how to achieve the same effect on Mantra? . I’m new to Houdini and this is way beyond my knowledge. Any help would be much appreciated. Here's the hip file just in case. LiveScalingBulletsSetup01.hip
-
Hello and welcome to this post. Synopsis: In nature, we see a phenomenon called tropism (the way a leaf orients itself towards the sun). I need help building a rig that will simulate this effect. These are the objectives: Create a source object acting as the reference point for tropism Get the leaf to orient itself in relation to the source Additional challenge: It would be ideal to shade the front and back face of the leaf with a different texture. What is a neat VOP setup which would simulate this? Here is a basic HIP file to begin messing around with. leafShading_Orient.hipnc

-
Just out of curiosity, can I build a fur shader using VOPs? https://www.sidefx.com/docs/houdini/shade/build.html
-
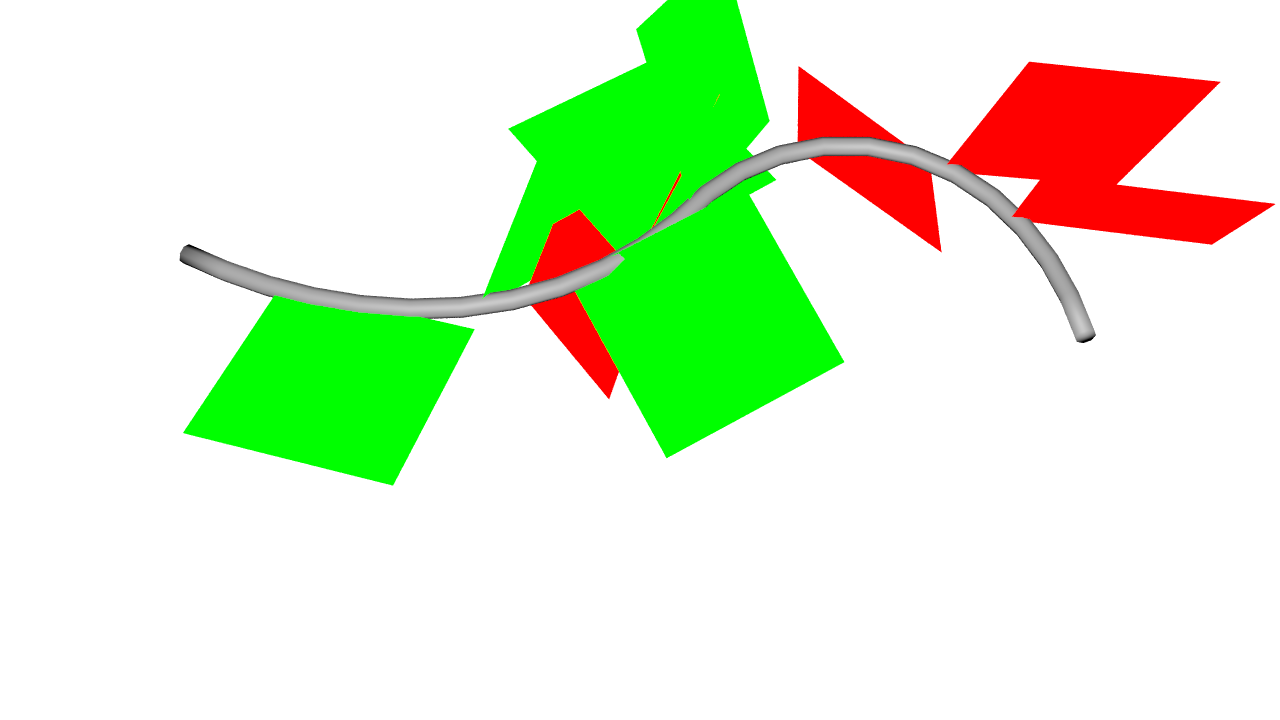
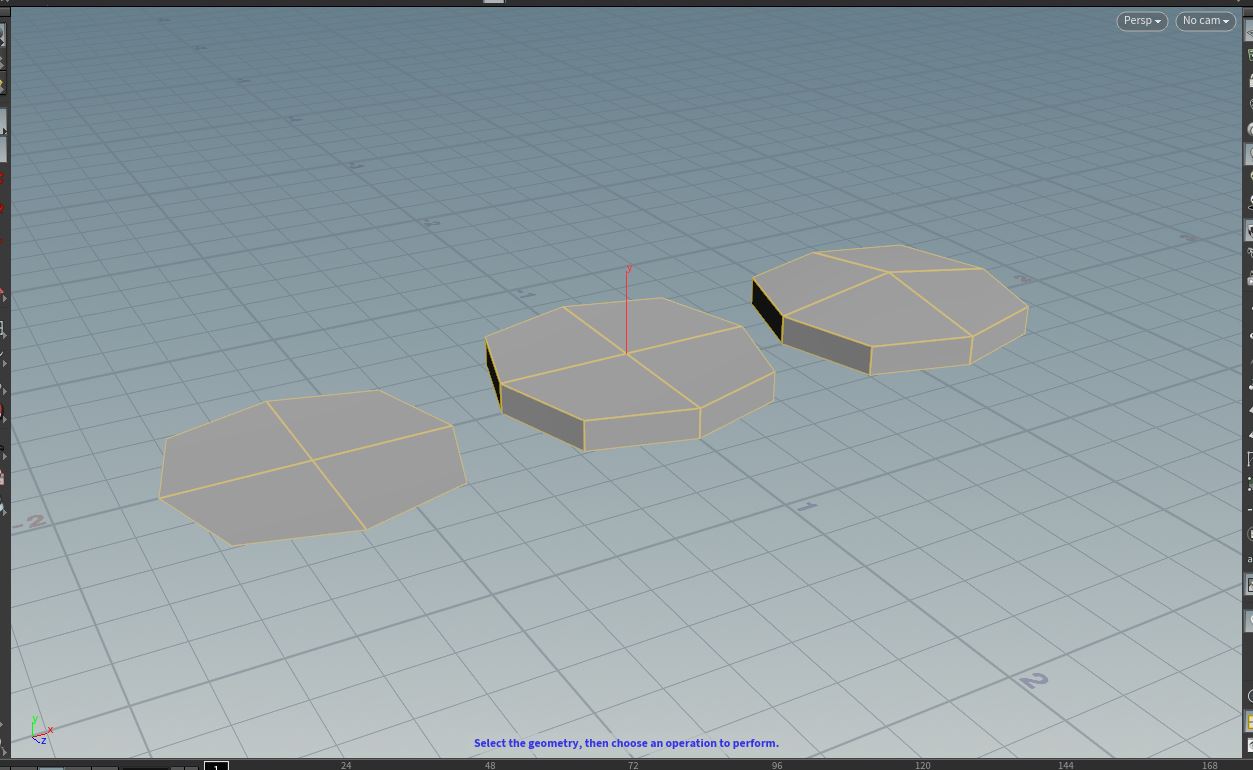
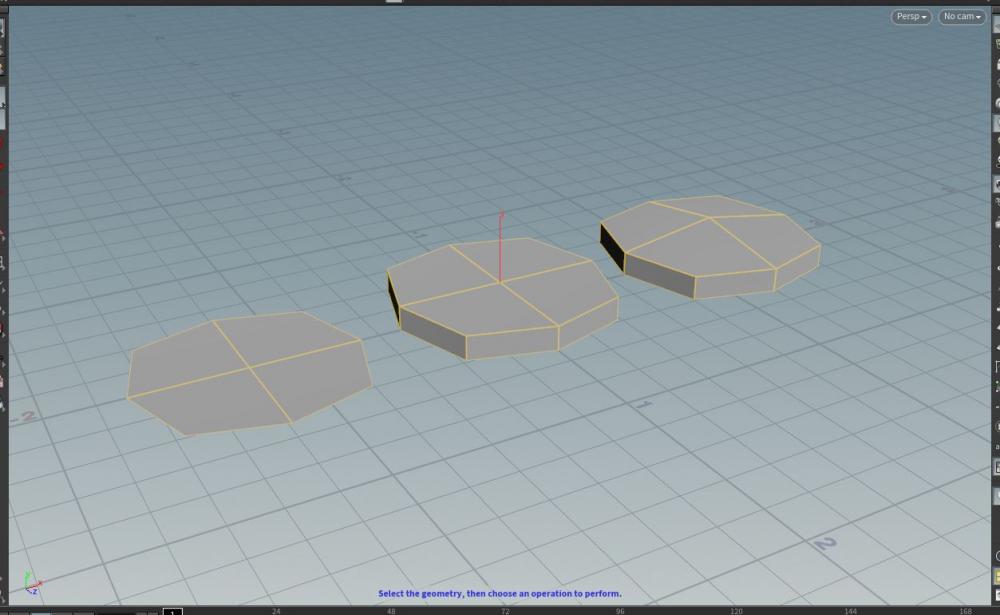
I saw this video where you can turn geometry into displacement. https://www.youtube.com/watch?v=rwzo8LD4Tac I want to know how I can turn modeled geometry into a displacement shader. I'd like to turn the modeled geometry on the right into parameters for a displacement shader for the plane on the left shown in the picture.
-
Hi everyone, so I have been working with some renders of particles that have a material assigned to them with 0 opacity. The problem comes when I try to render out as well a Deep Camera Map and bring it to Nuke. Using the usual workflow with deep images, I am able to see the particles only when I use the DeepToPoints node in Nuke - prior to that I don't even get an Alpha nor I can see them. Is there any way I can export a map for the deep so I can make holdouts with this? Thank you!
-
Check out the course at: https://www.cgforge.com/course?courseid=shading-techniques-iii Thanks for watching!
-
Hi everyone, did a pyro sim along with a collision object. When I up the density from 1 to 4 in the pyro shader, the voxels are getting visible (attached an image to the post showing the issue). Is there any way to prevent that or soften the voxels on the outside in a post process or something? Cheers, Christian
-
 Hi people, Disclaimer: I'm pretty new to houdini and I'm probably using it in a way more basic way that most people. I really like the basic Color SOP node, using that to apply a color to geometry. However, if I want to apply a texture map to geometry, I've been using the UVQuickShade SOP. My question is - if create two cubes and apply a color 1,0,0 using Color SOP to one, and I apply UVQuickShade using an image that is constant color 1,0,0 to the other, why do the two cubes look different in the viewport and in renders? Render Hip
 -
Hello Odforce! I just released a new course - Shading Techniques I, and this one is all about improving your shading & texturing skills by exploring a variety of techniques. Part I mainly revolves around tri-planar workflows, and you'll also get an awesome wizard tower scene to practice with. Check it out a cgforge.com
-
I'm happy to announce that I've teamed up with SideFX to release a new free course! - Shading Theory with Karma. These videos are designed to teach you the fundamental ideas behind shading/texturing while utilizing the principled shader, karma, and my dear friend - Shaderbot. Visit CG Forge to download shaderbot along with access to the videos for free. https://www.cgforge.com/course?courseid=shadingtheory Have a nice day,
-
Hello, my name is kalata and I am an experienced Houdini Artist. I also have solid experience in 3Ds Max, Nuke, After Effects and Photoshop. You can check my demo reel here: https://www.behance.net/gallery/96292145/Procedural-Apartment-Blocks https://www.behance.net/gallery/93554753/Procedural-Neighbourhood-Generator
-
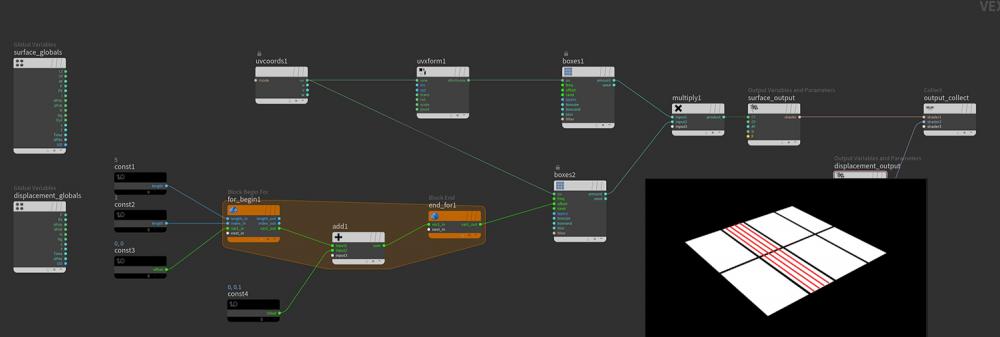
Hi, I try to offset a texture with a For Loop in a shader. In the example file you can see I iterate 5 times and offset the texture 0.1 units with each iteration. Is it possible to combine all of the iteration steps and show the result of that in the rendered image? Like in the attached picture where I painted in the desired result with red. kind regards Jon forLoop_VexBuilder.hip
-
Hi Guys, is it possible to go ROP > COP > ROP I have a displacement from COP {noise} baked to texture, I would like to shading Color based on P.y but after displacement. Is there a way? I basicely using the same noise for Cd as for Displacement just shifted with ramp into some colors. The only way I found is "ramp from attribute" {from displacement Cd} and than take it back to COP and write textures. But the color is point color so I have to subdivide the mesh way to high. [using Arnold] B.
-
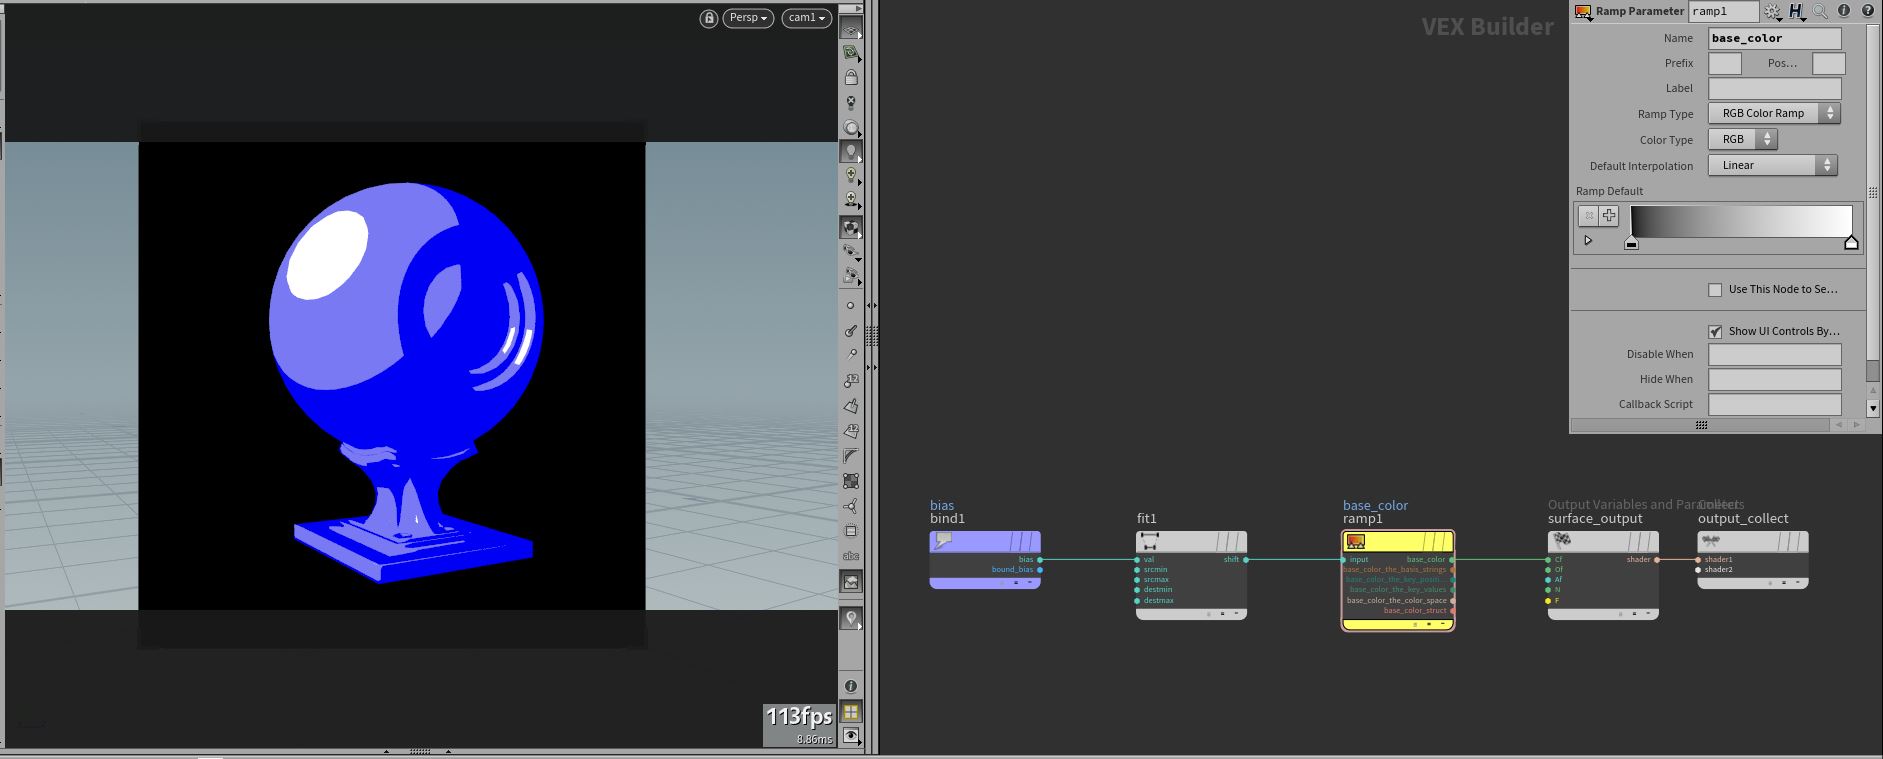
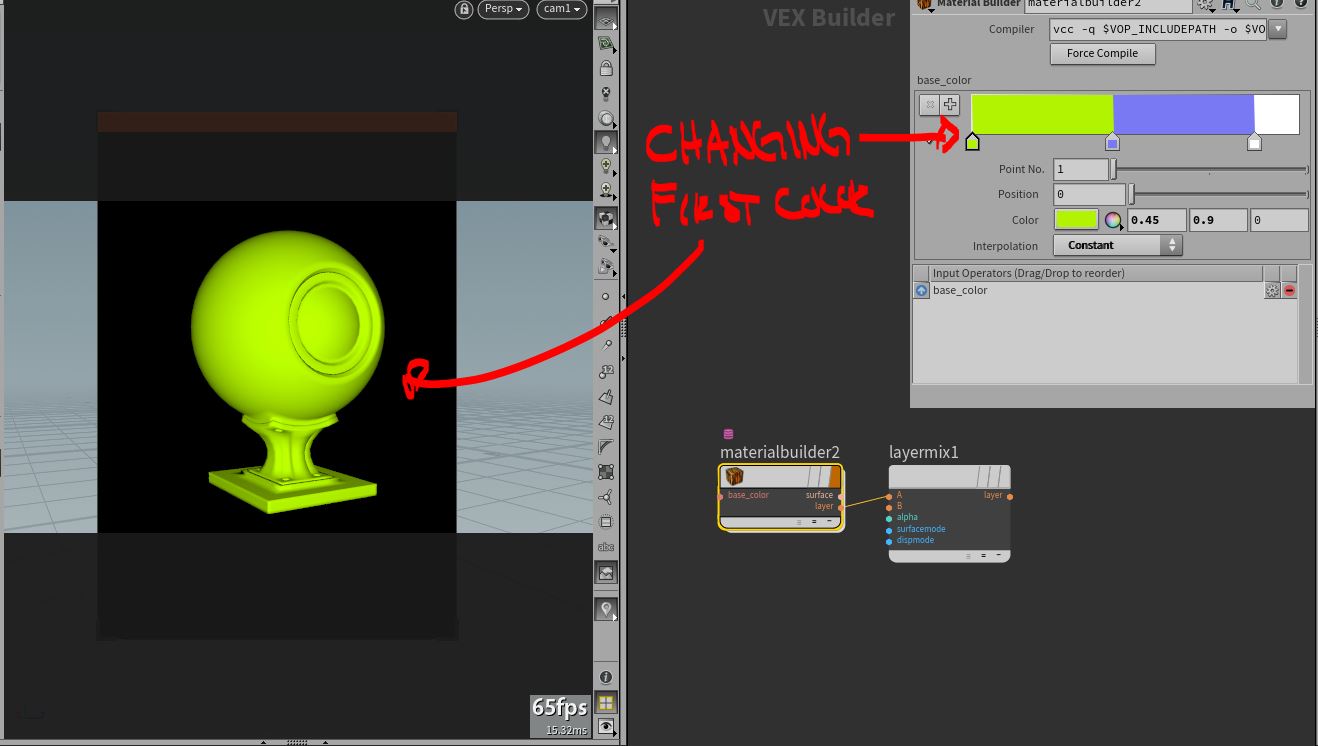
Hey guys, I'm trying to get a custom material to export a layer properly so I can combine other shaders. I've attached the .hip file below. This is the material I built. As a simple example, it works as intended. However, there's no layer yet: So, I dove into the principle_core shader and was able to (unsuccessfully) create a pbrdiffuse node, plug that into the layerpack and then export the layer for mixing: But unfortunately when I assign the layermix to the object, I lose the ramp. It seems to take just the first input of the ramp: It's probably very simple, but this is driving me crazy. Any ideas? material_help.hipnc cw
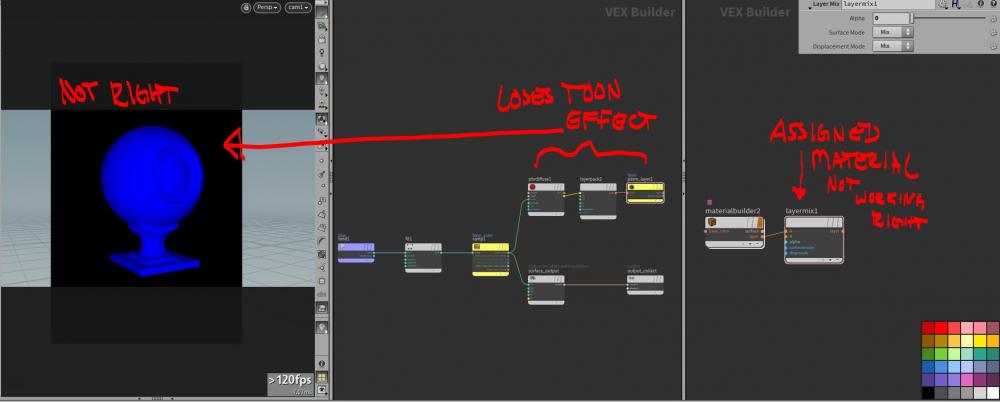
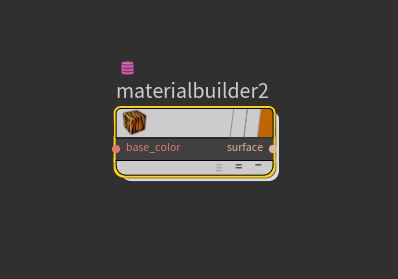
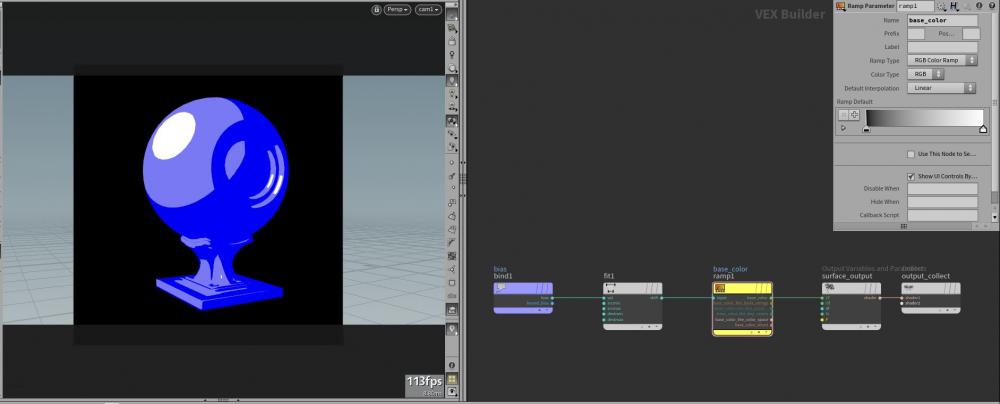
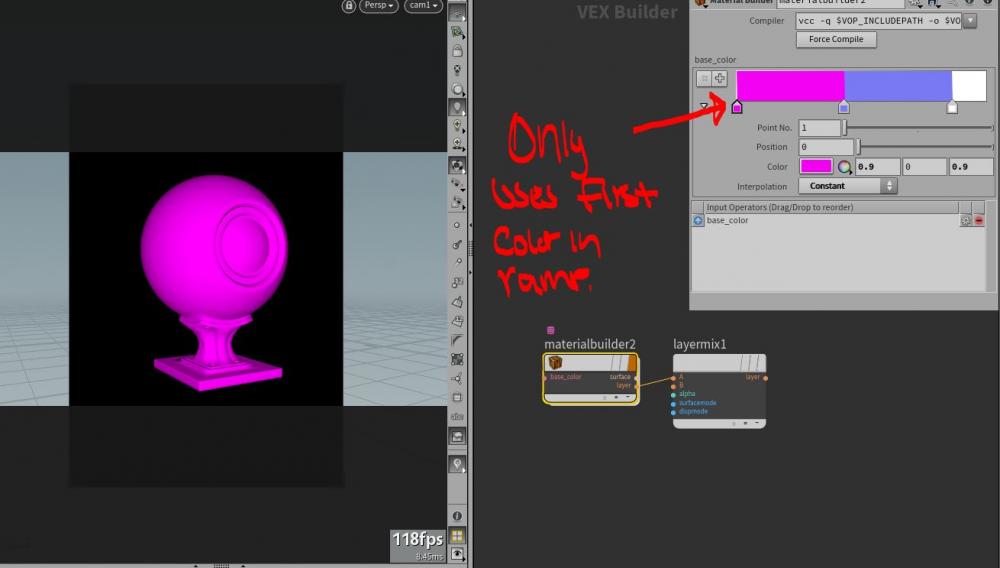

-
Hello, Here is short video showing how volumes can be used to shade and texture semi-translucent organic things. Volumes For Organic Assets This approach allows to achieve close-up realistic organic look for semi-transclucent assets where SSS or colored refraction is not enough. An object with UV's is converted to signed distance volume with UVW grid. Then volume is used to set density and perform uv lookup in rendering. This way density can be adjusted by depth. I.e. not so dense near the surface and very dense at the core. Or not very dense, then dense patch like island of fat, then not dense again. UVW grid is used to texture volume. Different textures can be used at different depth. This approach allows very flexible yet powerful way to place any texture at given depth. Texture X at depth Y. I.e. big veins are 5mm under the surface. This approach is best for close up organic hero renders where SSS or refraction are not looking good enough. Attaching example file volumetric_textures_example.hip