Search the Community
Showing results for tags 'shader'.
-
Hello guys. As title says, I'm created an grayscale procedural texture in Cops network. I'm made it work as displace map, however it comes as huge cost, needing an ultra high detailed grid. I'm would like to use it as bump, since the ideia it's to use that as fine details. I'm couldnt make it work by writing the path of copy into texture path in Bump & Normals tab. Not clue what's suppoed to do. Please help me. bump_v00.hipnc
-
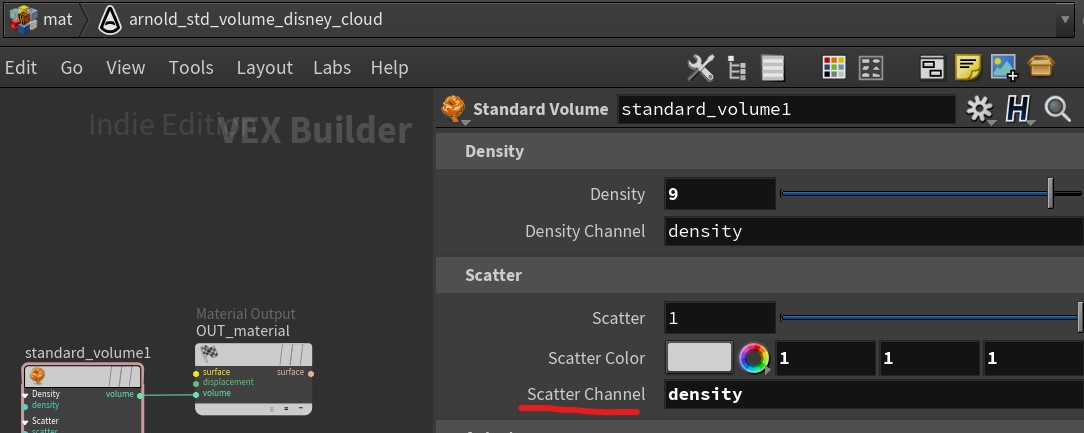
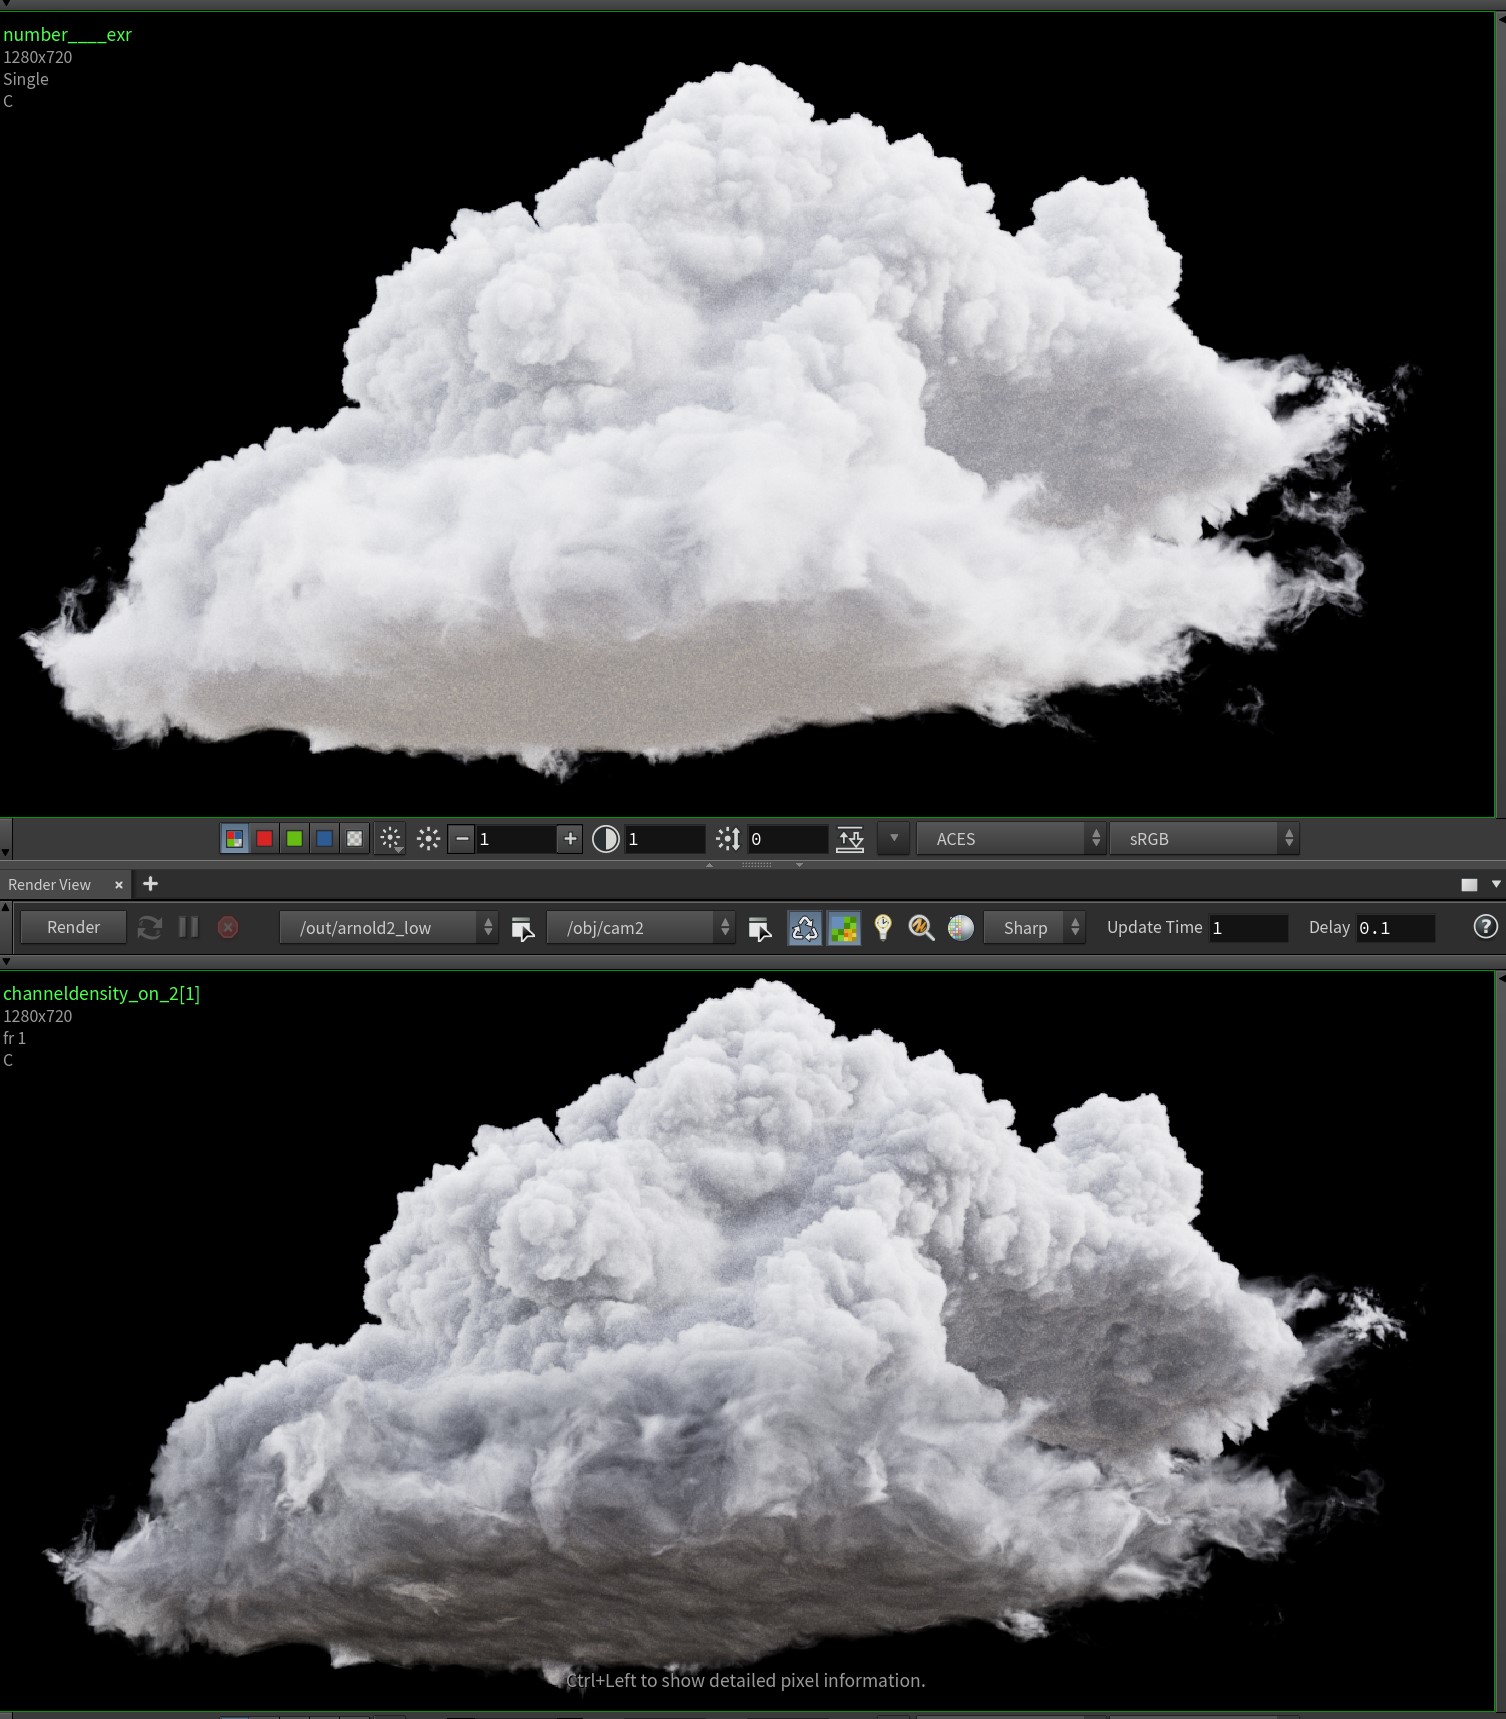
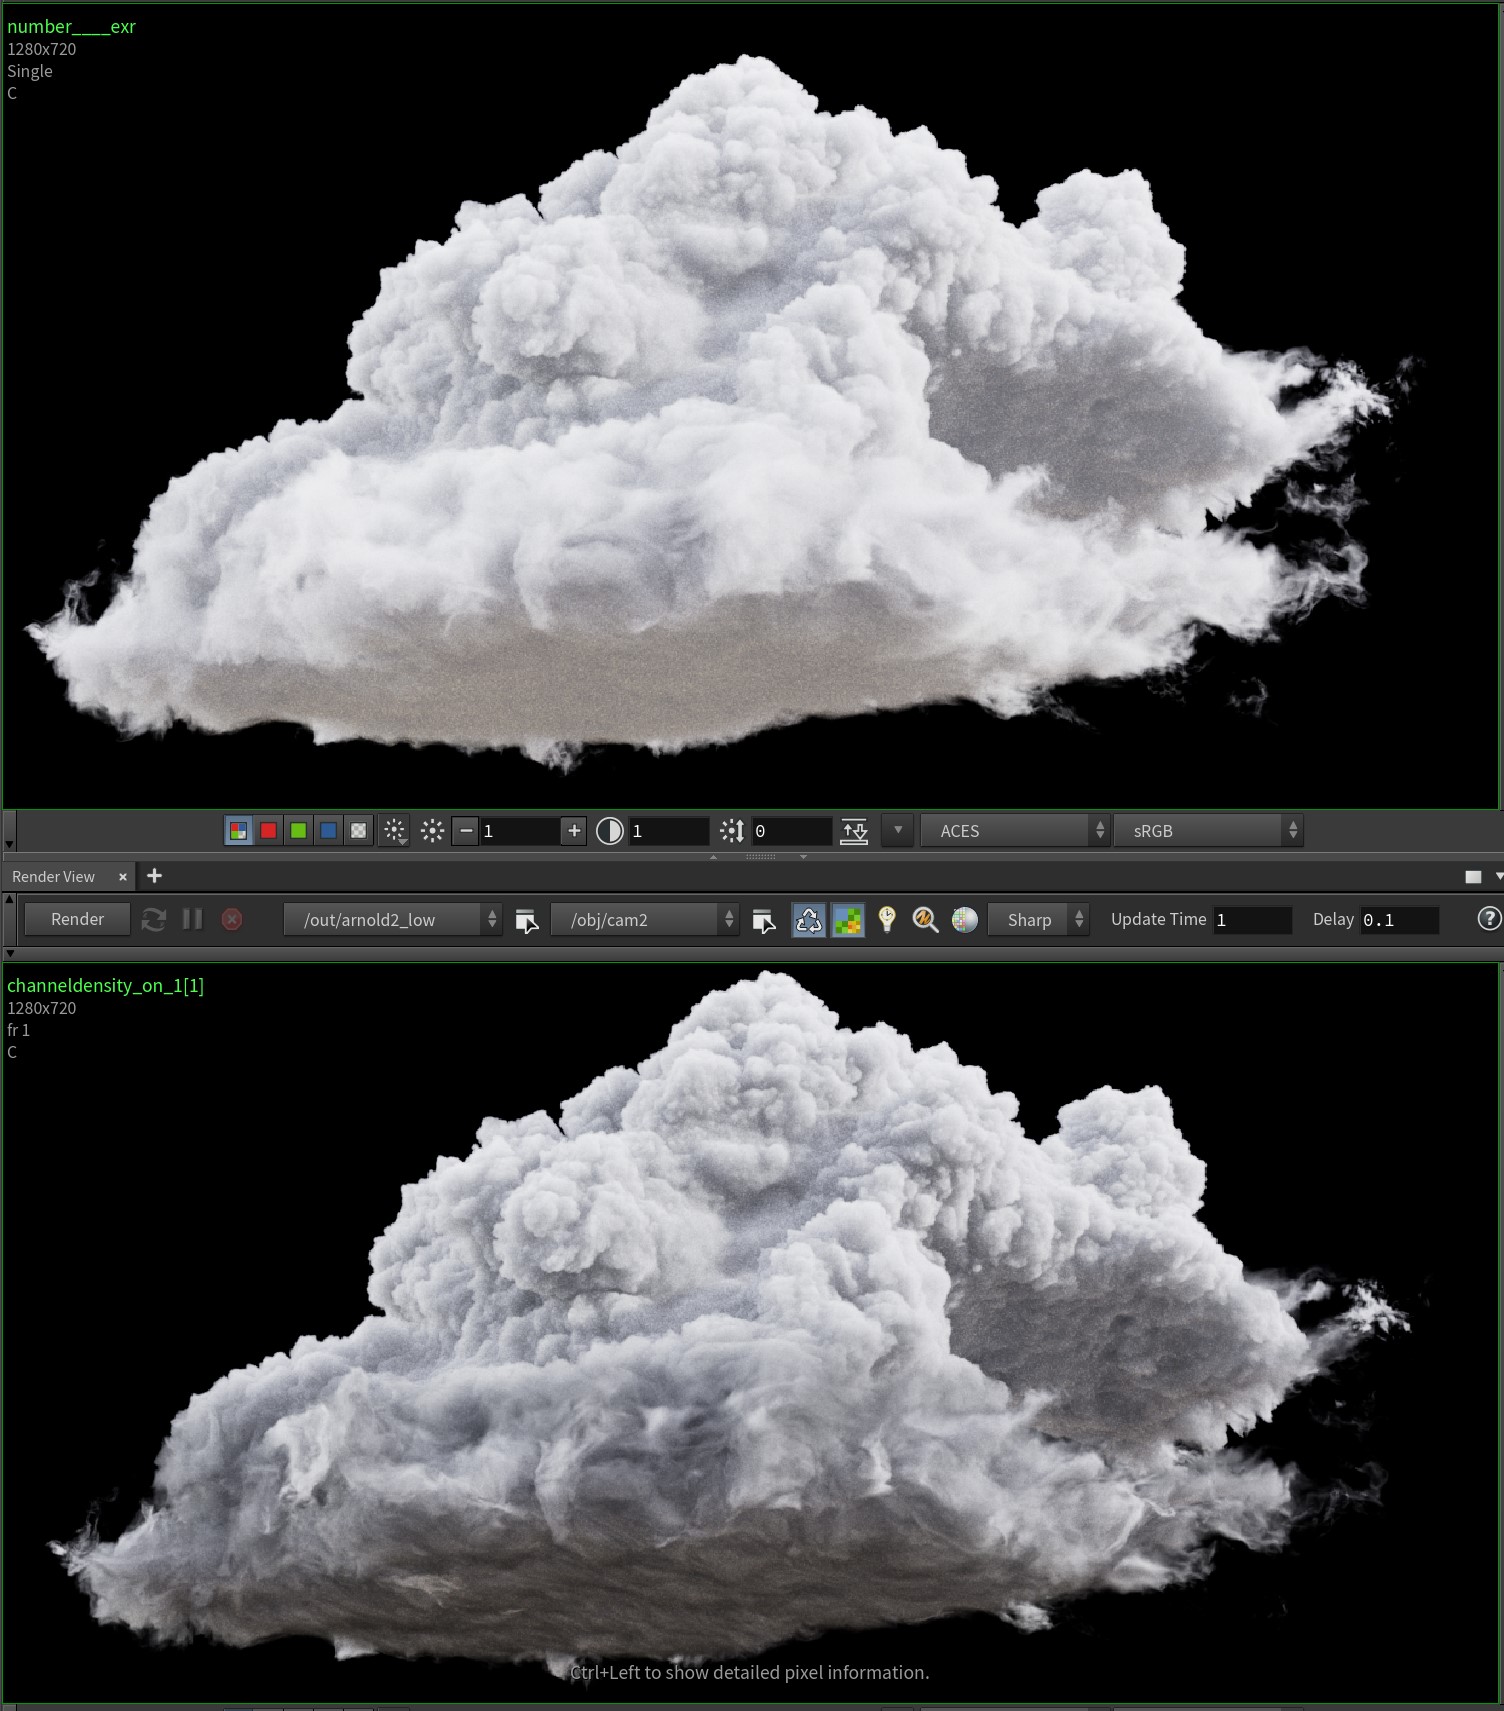
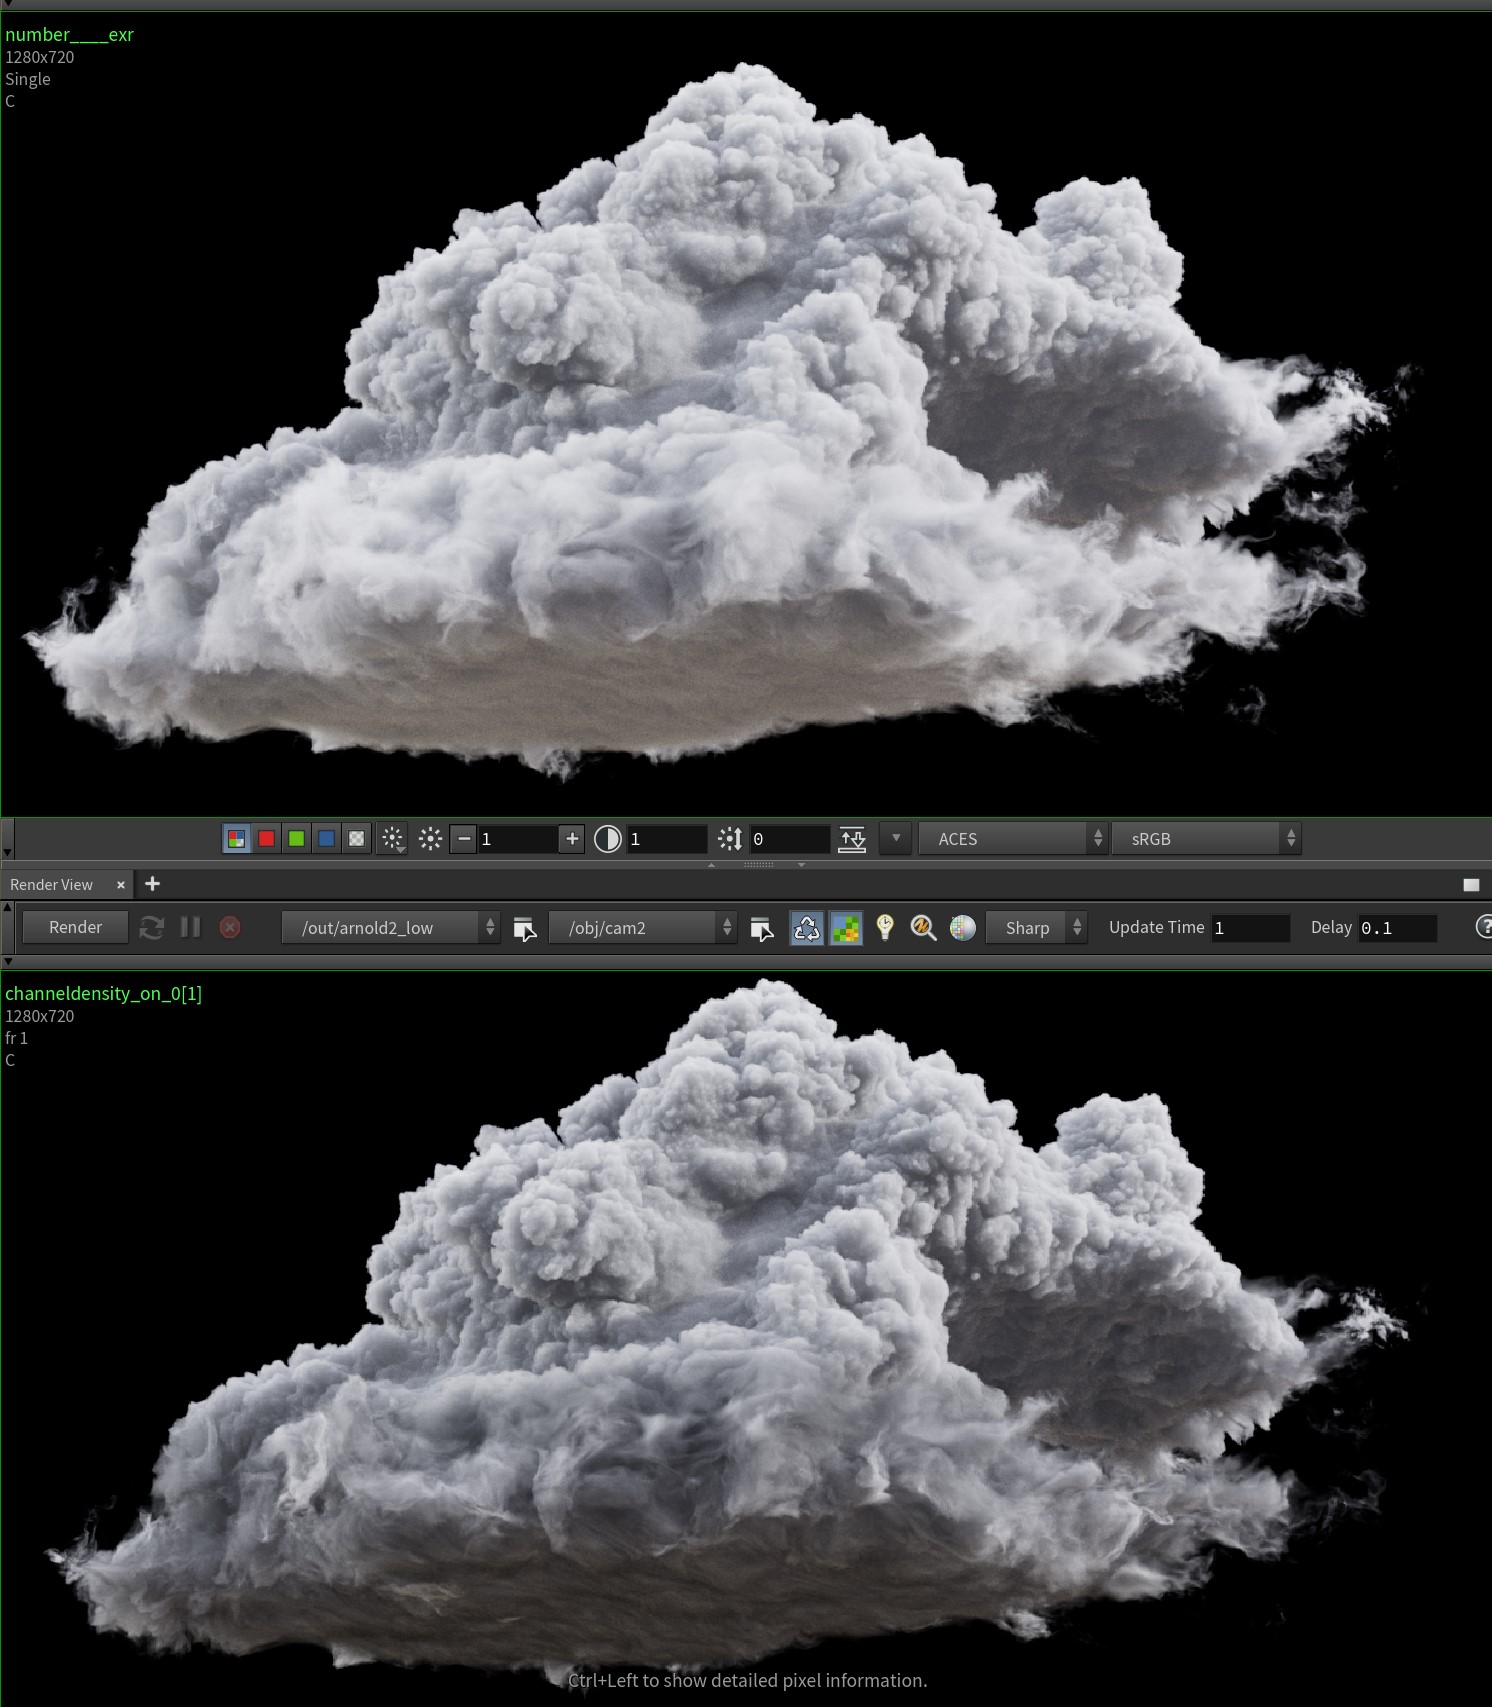
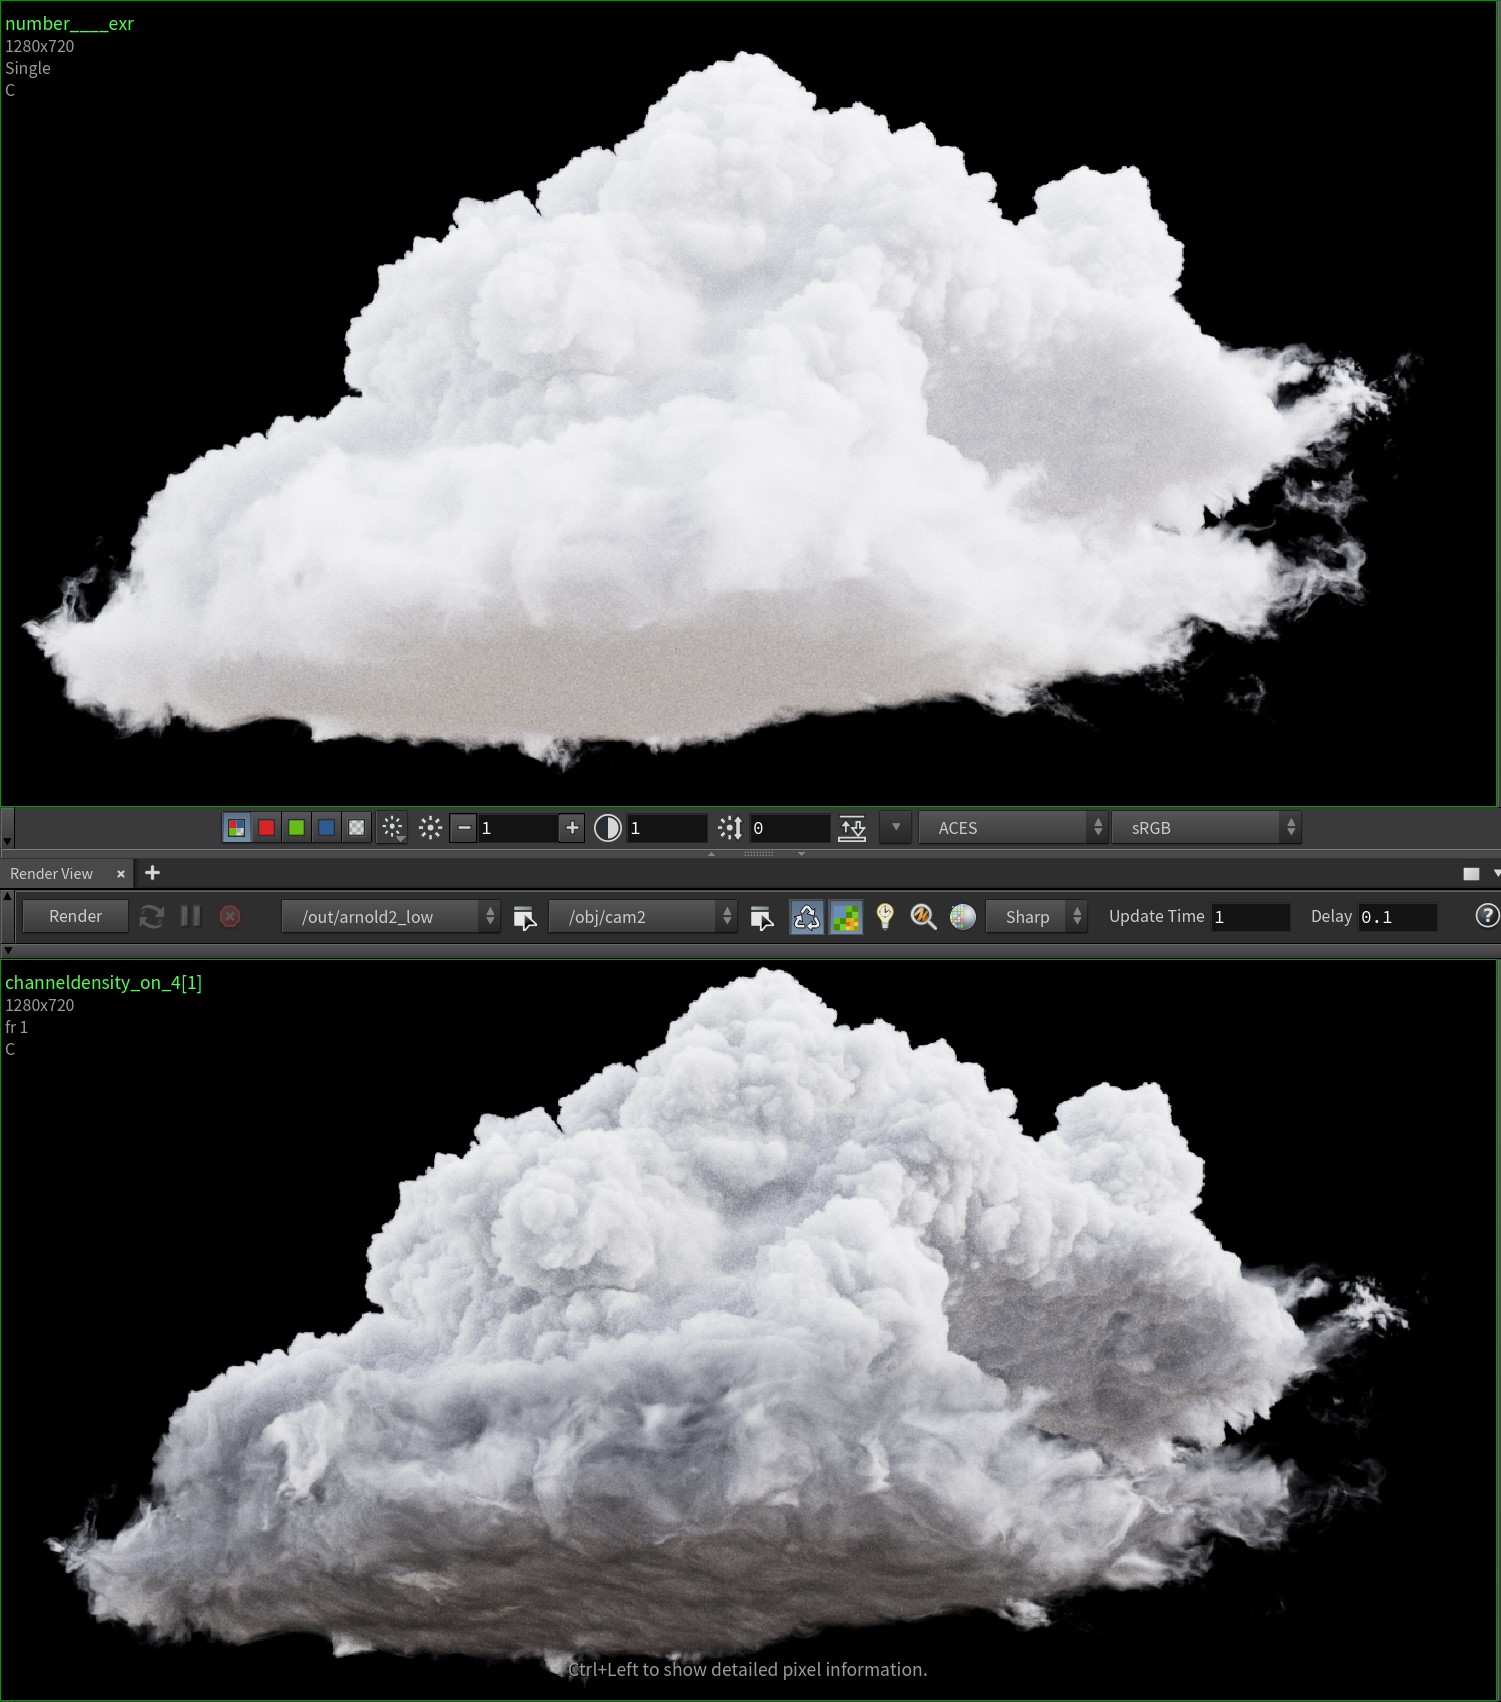
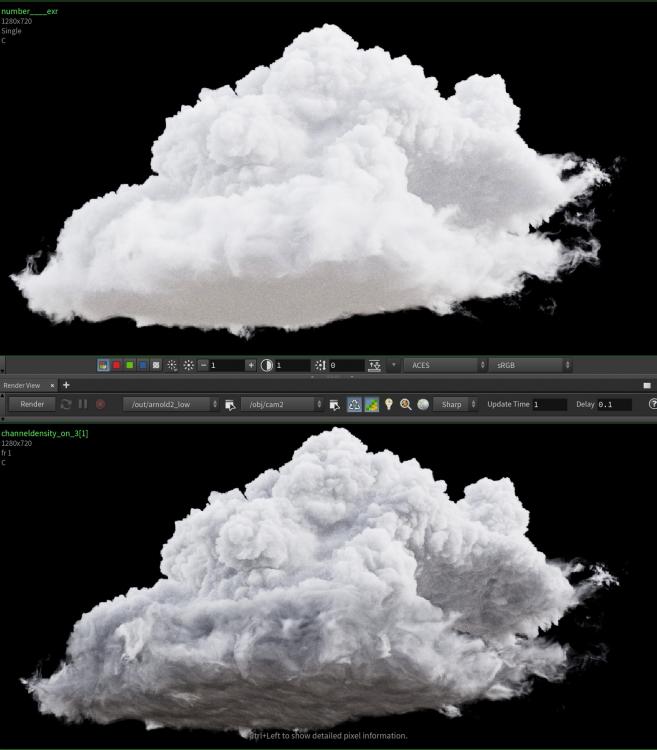
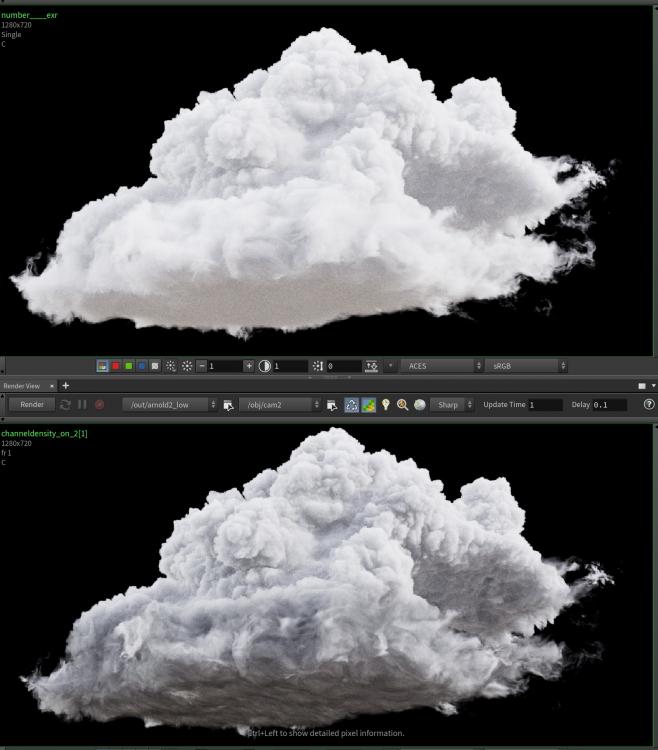
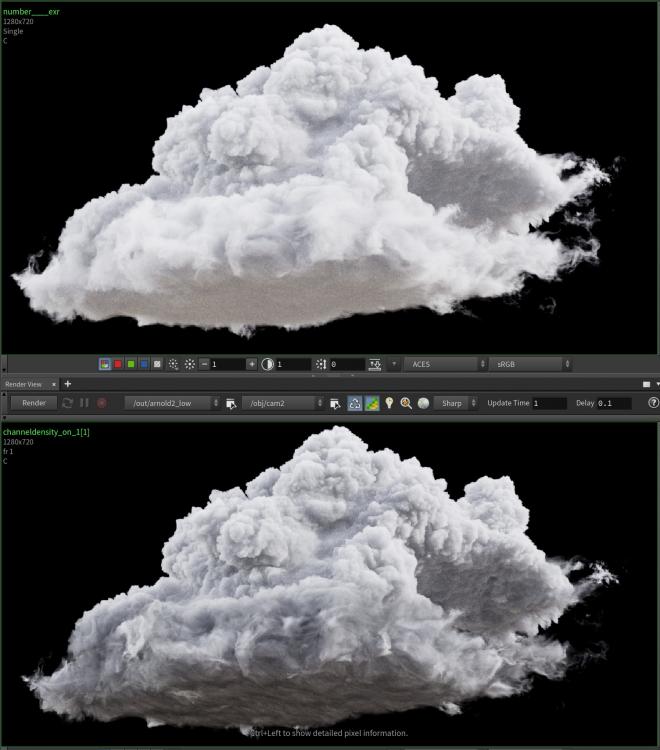
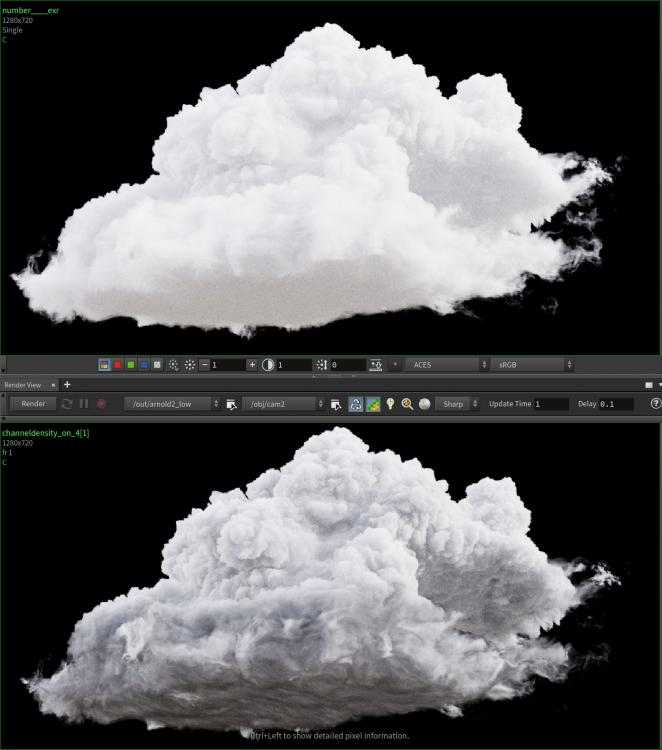
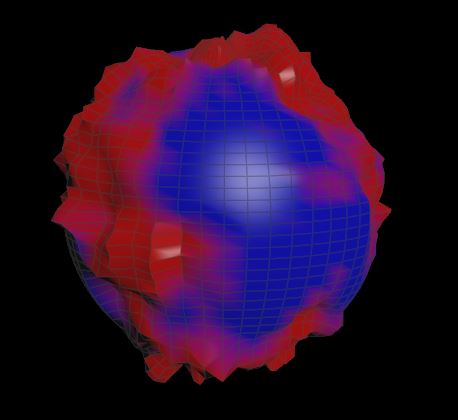
 it says in the docs: "Scatter channel to read from the volume object. This acts as a multiplier on the scatter color, to texture the color of the volume." https://docs.arnoldrenderer.com/display/A5AFMUG/Standard+Volume What multiplication is that? 1 (colour white) * density? There is a big mess in the bottom of the cloud so I'd like to know what is the formula used? what's multiplied by what? If my volume is 9 times denser and the colour is 1 (white), does it mean the denser the brighter? I've included comparison (top: empty channel, bottom: channel is density)

-
My company (PRENAV - www.prenav.com) is looking for freelance support for the next 6 months (and potentially more) to help us with several rendering projects in Houdini. PRENAV is focused on the inspection of civil infrastructure (bridges, dams, cell phone towers, etc.) with drones and AI. We use Houdini to help simulate damage on some of the assets we're inspecting, and to train our AI models. We have an expert here who is already doing this work, so you'd have someone to partner with, but we need more help. The work is mostly SOP-based procedural geometry setups and shader creation, plus rendering through Karma. If interested, please email nate@prenav.com with your reel and hourly rate, and I'll get back to you. - Nate
-
 Hi, how can I use the same node between different shading networks. In Maya every node exists on the same level so I can connect it to the multple shaders or as a mask. Coppying node between Material builder or building shaders in one MAT context, is not useful. And whether coppying it uses more RAM or processing power? Global MAT context Separate Material builders
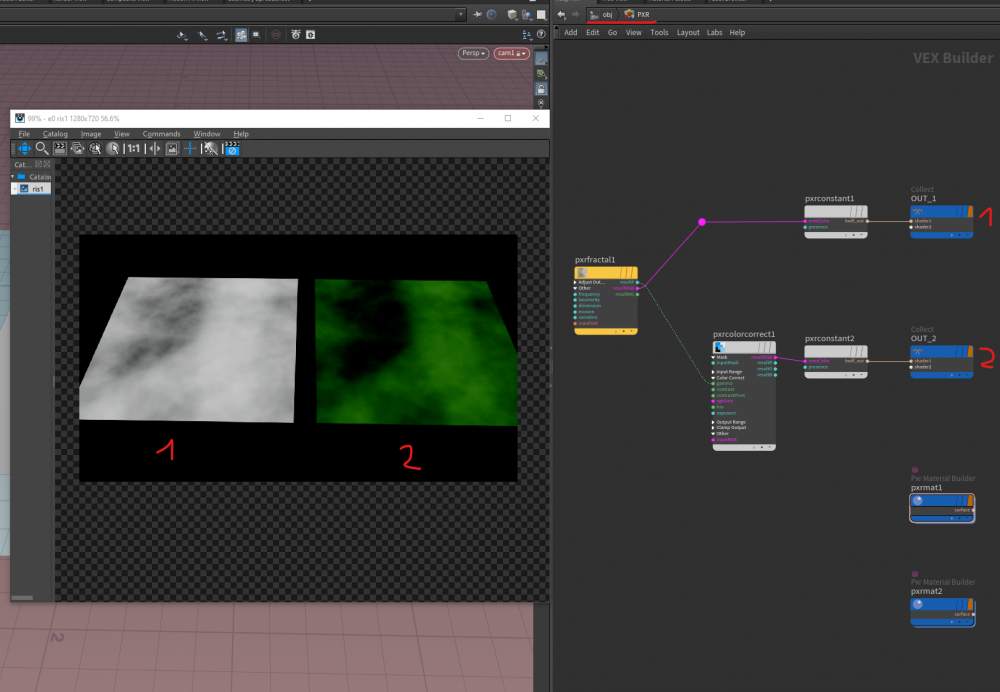
-

Using Shader output as a texture/map
MaximGehricke posted a topic in Lighting & Rendering + Solaris!
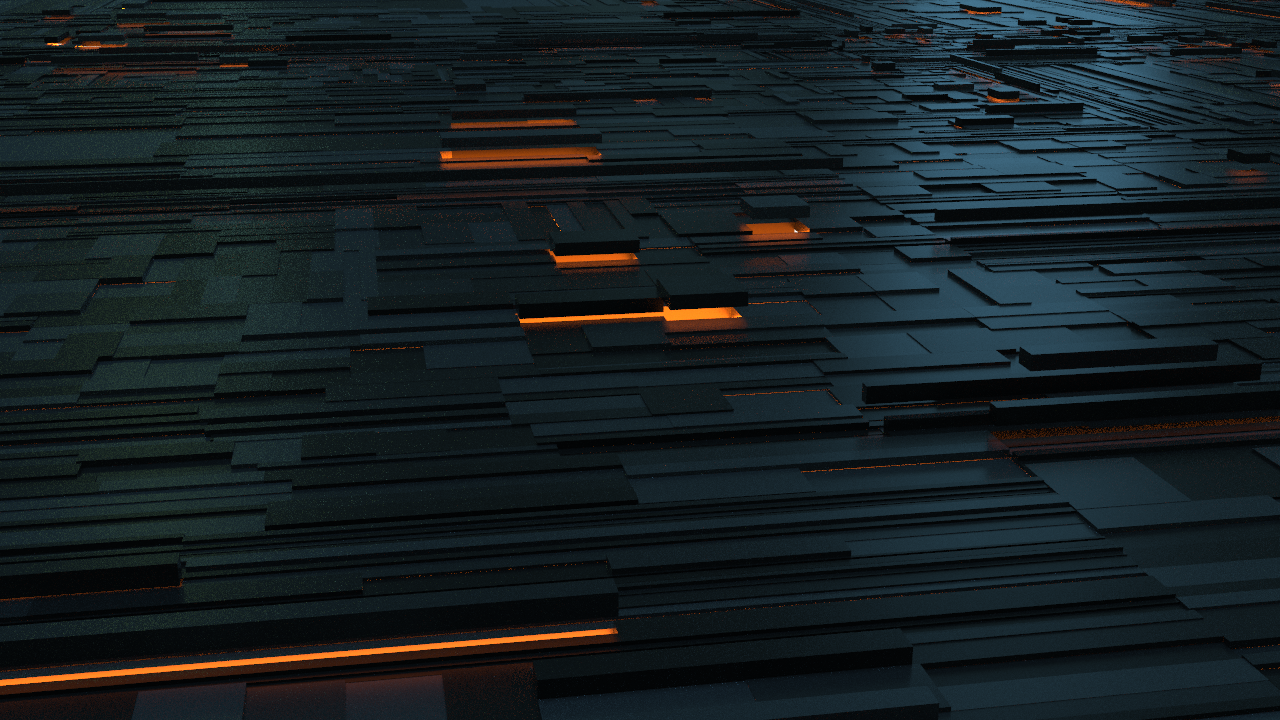
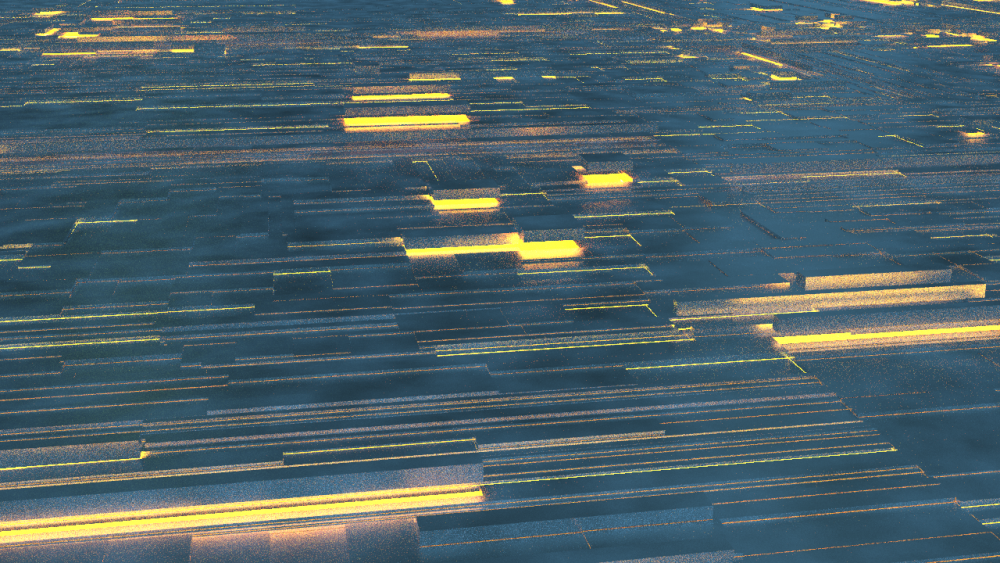
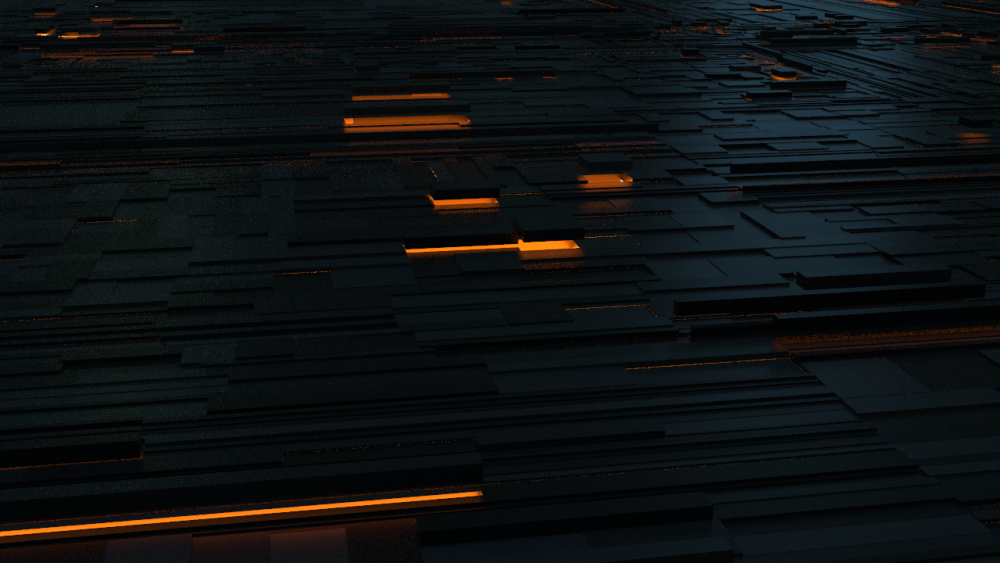
Hi, this is probably very unusual, but I am aiming for an abstract environment and had this idea: Basically, I want to have a chrome shader inform the map attribute of another shader's emission. So: result from chrome shader -> into emission color of another shader. The reflections should be responsive - changing on view direction like usual. I guess baking is out of the question. What is the best way of going about this? I have Mantra, Karma and Arnold (htoa) available, whatever works. -

shader Where is the Mantra Specular Edge Color ?
Elistan posted a topic in General Houdini Questions
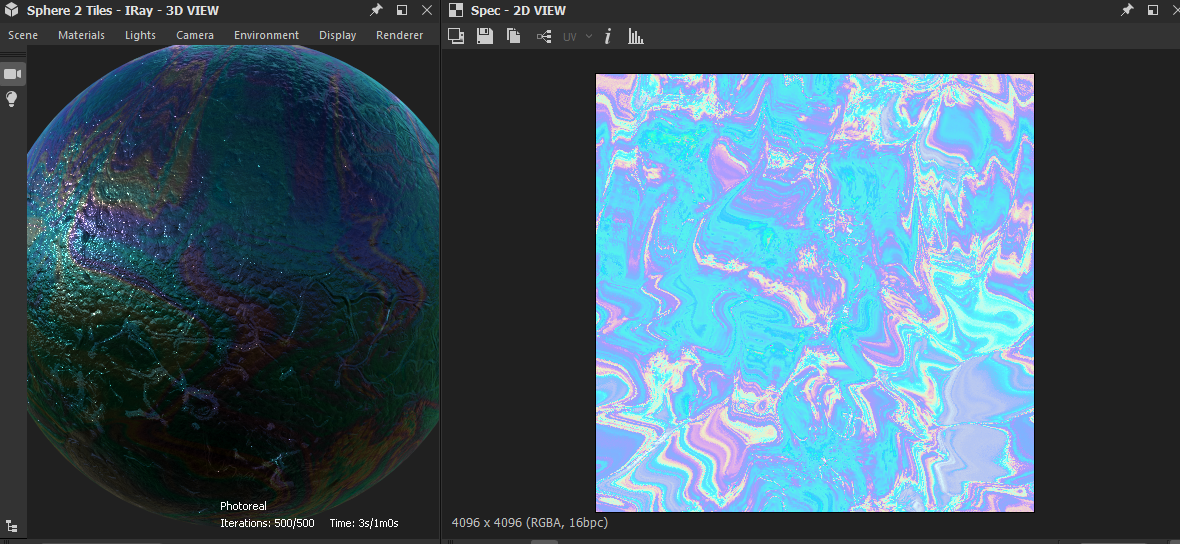
Hi, I can't find a way to get what I can get with a colored specular map in Substance Designer. I'm basically trying to get a fake iridescent effect by coloring my specular map, but in the principled shader, the specular is a float type, so no way to put some colors in there.. In the past I was on Maya with Renderman and there was a specular and an edge color parameter, in wich I was able to put some color, but no parameter is a color in the principled color. I'll put some screenshot of the desired look I want. It's done in Substance designer, with a black diffuse, a normal, a white specular and the colored map in the specular edge color. It'll be used in a movie project for my school so I really hope to get some help , please help !
-
I've start test Houdini 18 and Arnold 6. the first test was simple splines rendering, 250.000 splines instanced 25 times. it loads a 140MB alembic file. rendered in 6 core Xeon CPU and Nvidia Quadro RTX 5000. (windows 10 pro) the startup for Arnold GPU is slow, it renders faster, so it seems but for clear up the final image it takes for forever or just dropped /crashed, hard to tell on the GPU. the CPU is quite fast but much slower then GPU if it ever would finish. (adaptive sampling was on) As soon as Arnold finishes rendering the scene, it stops and do not refresh any more on parameter changes. so far i am not impressed with the Arnold GPU rendering. here is the same scene Arnold CPU with only direct Lighting. (on my MacBook) some test with Arnold GPU. it performed much better with just direct lighting.
-
Hi everyone! I've been stuck on a particular problem today. I've been using a simple voronoi in Houdini to fracture a rock, but I'd somehow like to bake a layered texture or vertex map so you can see the lines emanating from the shell of the model. I've attached a picture of some agate so you can get a better understanding. This is so I can export the alembic into C4D and apply different textures to these 'ridges' using the vertex map, or just a baked texture outright. I'd only need a couple of bands at the outer edges, not going all the way to the center I initially tried converting the rock before the fracture to a volume and baking a ridged texture using the depth from this, but I just can't seem to figure it out. I also tried copying the rock a couple of times, sizing it down a little, then used these copies to bake the vertex colour, but it still wouldn't budge! I'd be very helpful for any tips as it'd be great to get a procedural solution to this problem
-
The help for "computenormal" (link below) reads: "However, when the VEX variables are changing with a high frequency (for example, a high frequency displacement map causing high frequency changes to the P variable) ... ". Since this mentions displacement, it suggests that "computenormal" (in a disp. shader) gives the normal to the displaced surface. It sounds too simple: to know this normal, the shader would need to know the partial derivatives of the disp. surface, i.e. for each shaded point, the shader would need to compute or "remember" two other shaded points. Is it really what's happening? https://www.sidefx.com/docs/houdini/vex/functions/computenormal.html
-
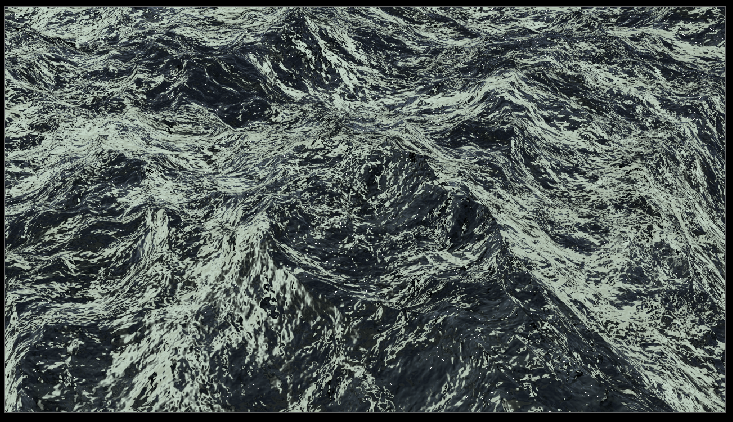
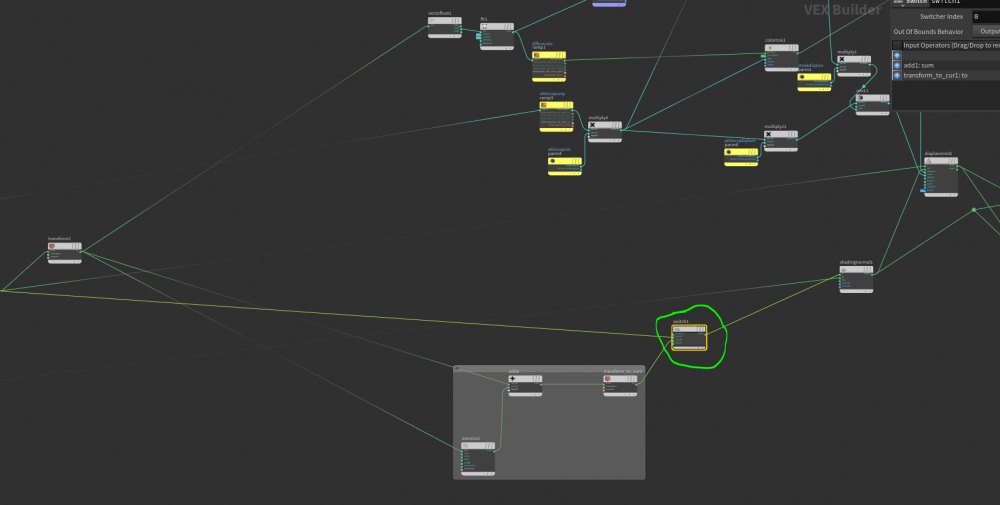
say i have a ocean ,i need do some deform in the ocean surface shader , transform the space from current to object ,then i did some deform work ,then transform it back to current space ,give the new surface position to shading normal , the render have this prob , i think my way is wrong , someone who familiar about it pls help me . appreciate it . i did a simple hip file show this question , you can download it ,in the shader ,put a aanoise plus with object position ,you can switch it between normal and wrong . you can regenerate you ocean spectrum . thanks ! deformOcean.hip
-
Hi, I've some experience with VEX in SOP land but I'm new to Mantra shading and I want to get better at writing vex shaders. What would be the modern way of doing that? In particular, I'm not entirely sure if I could simply write my code and hit compile (the way I would with OSL in RenderMan) without ever leaving Houdini or restarting the renderer for that matter. For instance, I managed to compile the following from a vfl (a modified sidefx example) into an HDA (.\vcc -l "%HOME%\houdini18.5\vex\hcartoon.hda" "%HOME%\houdini18.5\vex\hcartoon.vfl") and it's available under /SHOP/Digital Assets and it works. #include <shading.h> #pragma opname hcartoon #pragma oplabel "HCartoon" #pragma opicon SHOP_surface #pragma label colora "Color A" #pragma label colorb "Color B" #pragma hint colora color #pragma hint colorb color #pragma hint Cd hidden surface hcartoon( vector colora={0.2, 0.5, 0}; vector colorb={0, 0.2, 0.8}; vector Cd=1; ) { vector Cx; illuminance(P){ Cx = Cl; shadow(Cl); if (Cl == Cx){ Cf = colora; } else{ Cf = colorb; } } } However, isn't there a more straightforward way? Do I always have to compile to HDA and write all those pragmas? I was hoping for something like an attribute wrangler approach. So, there's the Surface Shader Builder (vopsurface) that I have to admit I don't quite get as far as writing code goes. Snippet? Inline? How about inputs and outputs in it? Surely not with pragmas in there, right? I tried with a snippet, got a compile error 'Invalid return type (surface)'. If anyone can help me with it, that'd be awesome! Thanks, Hristo
-
Hey guys, I'm copying this post from Reddit to get more exposure. Since you guys are pros, maybe you'll know the answer: I'm having an issue with my landscape material. I've got an HDA pulling in a landscape with six layers. I've setup each layer as a material function so I can blend each function in a material based on their layer name. The problem is the material only works with three layers at a time. I can't do more. This is what it looks like with three layers as expected: Three layers with blend mode set to Opaque The shader fails when I plug in more than three. It shades in a tiny square on the terrain (not shown here), the rest of the terrain is the standard checkerboard: Six layers fail with blend type set to Opaque The only way to view all layers is to set Blend Type to Alpha Composite, however I completely lose my directional lighting: Six layers with blend type set to Alpha Composite (no directional lighting) It must be something with my layering weights.. I just can't figure this out for the life of me. Here are my layer settings: Layer Blend settings Let me know if you've run into this issue; I'm sure it's an easy fix. Thanks guys, Colby
-
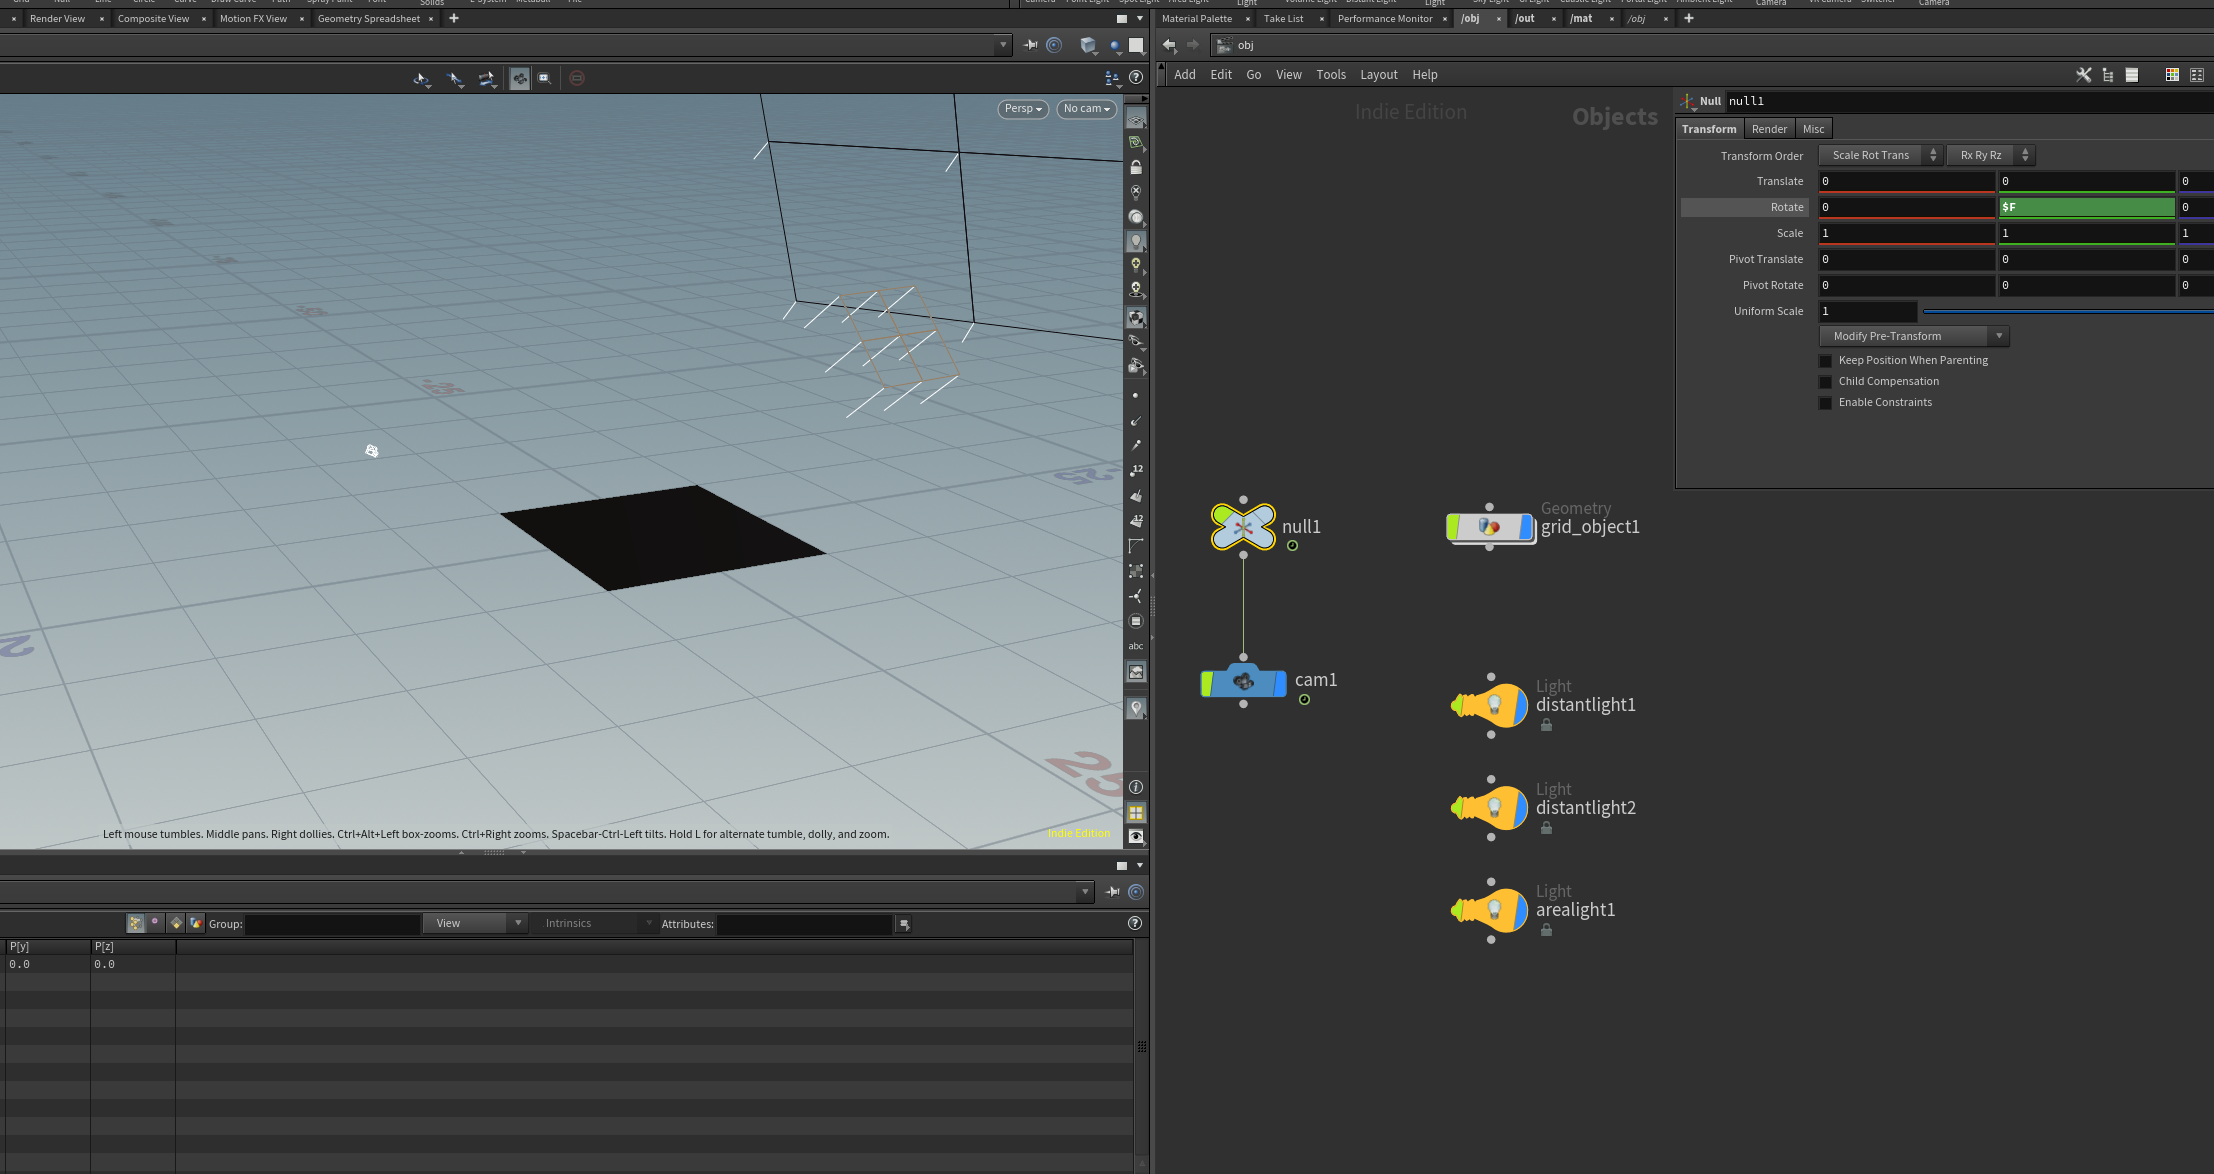
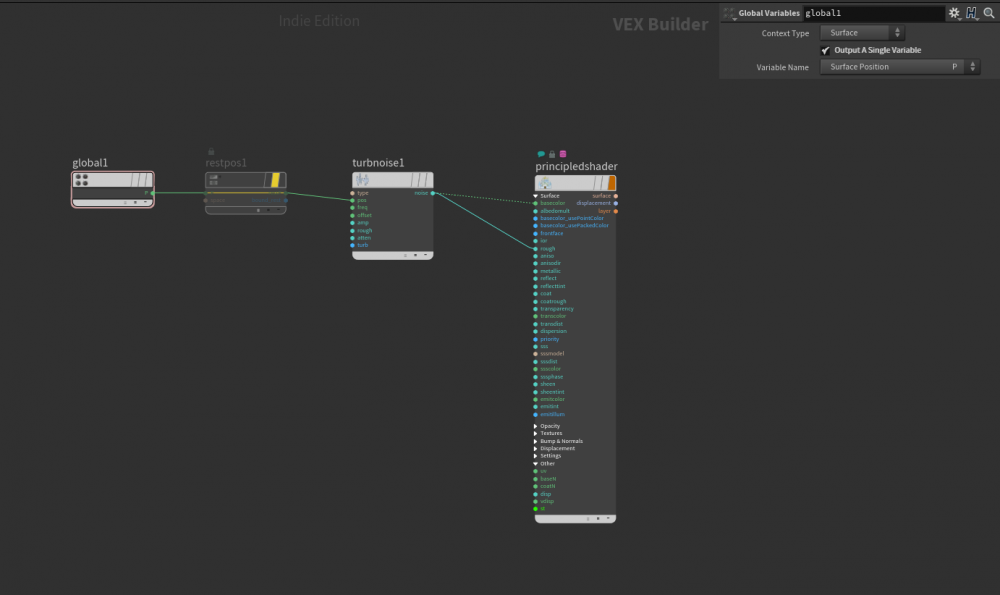
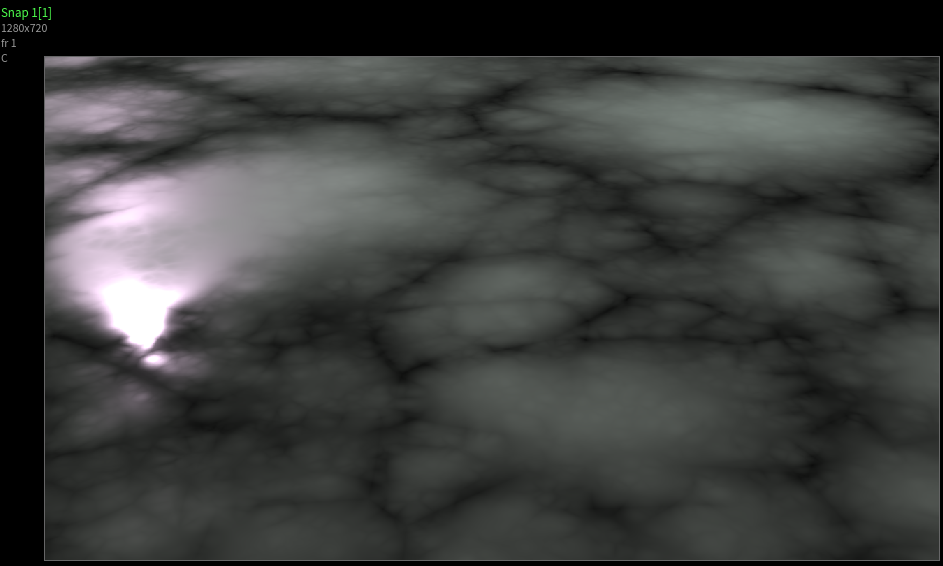
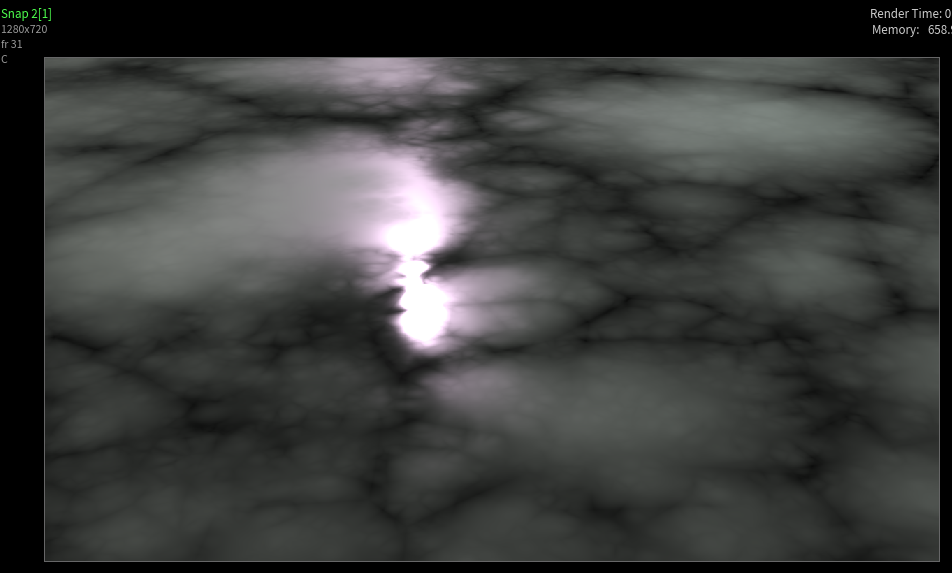
 Hello, For all my time in Houdini I have never shaded a lot. I however have played with pointVop quite bit, so I was surprised when I tried to make a noisy shader and I kept following the camera ? Let me explain what the scene is : - a grid, that has a principledshader - a rotating null, parenting a camera - 3 lights In the shader, I take the position of a Global Variable, plug it into a noise, and in the basecolor of the principledshader. Why is that, that when I render different frames (so the camera has moved), the noise stays the same. I can see the lights are not coming from the same angle, which is normal since the camera moved, but the noise is pixel for pixel displaying the same way. I fixed it by pluging a restpost between the Global Variable and the input of my noise, but I can't wrap my head around why I have to do this in the first place ? Normaly everything makes sense in Houdini but this doesn't. As I said I know my ways around Point Vops, so should I expect other different behaviors in the shader context ? shader_must_rest.hiplc
-
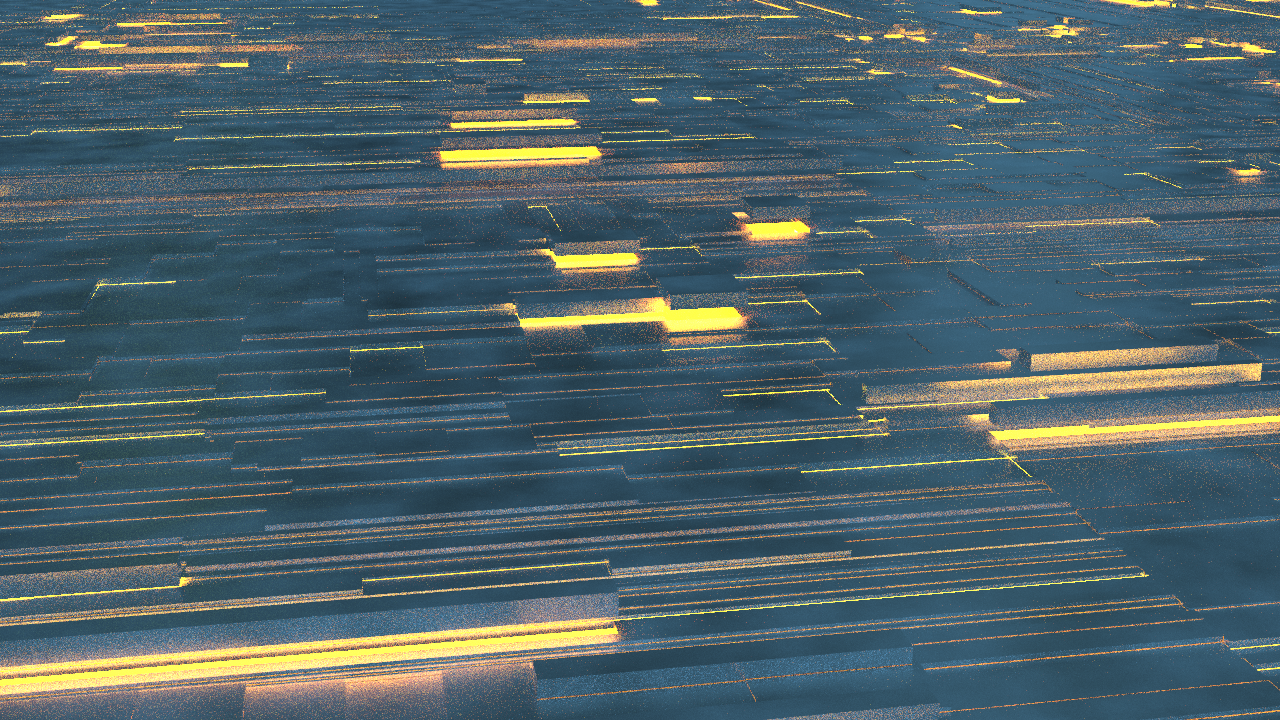
Hello! I am struggling to get what I want from a lens shader. It is somehow a math challenge. Let's see if there is someone who can figure it out... Simple scenario: - Perspective camera looking towards a grid made of 4 points (corners). - I want the camera to render the grid taking each corner as a reference to fill the frame completely with the grid (not more or less). Details: - The grid should be able to rotate on 3 axes and the camera should keep framing it. (So aspect ratio won't do it, since it has some perspective). - I have managed to do it in one axis, but additional axes seem to start acting weird, the results are close but not enough. Since it is math it should be perfect! (I does not have to be foolproof, looking towards the Z direction always and not handling more than 180-degree rotations is ok). Code of my lens shader #include "math.h" #pragma opname lens_shader #pragma oplabel "Lens_shader" #pragma hint x hidden #pragma hint y hidden #pragma hint Time hidden #pragma hint dofx hidden #pragma hint dofy hidden #pragma hint aspect hidden #pragma hint P hidden #pragma hint I hidden cvex anamorphic_lens( //Inputs float x = 0; // X screen coordinate in the range -1 to 1 float y = 0; // Y screen coordinate in the range -1 to 1 float Time = 0; // Sample time float dofx = 0; // X depth of field sample value float dofy = 0; // Y depth of field sample value float aspect = 1; // Image aspect ratio (x/y) //Outputs export vector P = 0; // Ray origin in camera space export vector I = 0; // Ray direction in camera space export int valid = 1; // Whether the sample is valid for measuring //Grid corners converted to camera space vector corner0 = 0; vector corner3 = 0; ) { float xmin_bounds = corner0[0]; float xmax_bounds = corner3[0]; float ymin_bounds = corner0[1]; float ymax_bounds = corner3[1]; float zmin_bounds = corner0[2]; float zmax_bounds = corner3[2]; float new_x = fit(x, -1, 1, min(xmin_bounds, xmax_bounds), max(xmin_bounds, xmax_bounds)); float new_y = fit(y, -1, 1, min(ymin_bounds, ymax_bounds), max(ymin_bounds, ymax_bounds)); // Calculations Z axis in relation to X float offset = min(zmin_bounds, zmax_bounds); float relation_x = (max(zmin_bounds, zmax_bounds)-offset)/min(xmin_bounds, xmax_bounds); if(xmin_bounds > xmax_bounds){ relation_x *= -1; } float relation_y = (max(zmin_bounds, zmax_bounds)-offset)/min(ymin_bounds, ymax_bounds); if(ymin_bounds > ymax_bounds){ relation_y *= -1; } float z = (-relation_x * new_x) + (-relation_y * new_y) + offset; P = set(0, 0, 0); I = set(new_x, new_y, z);
-
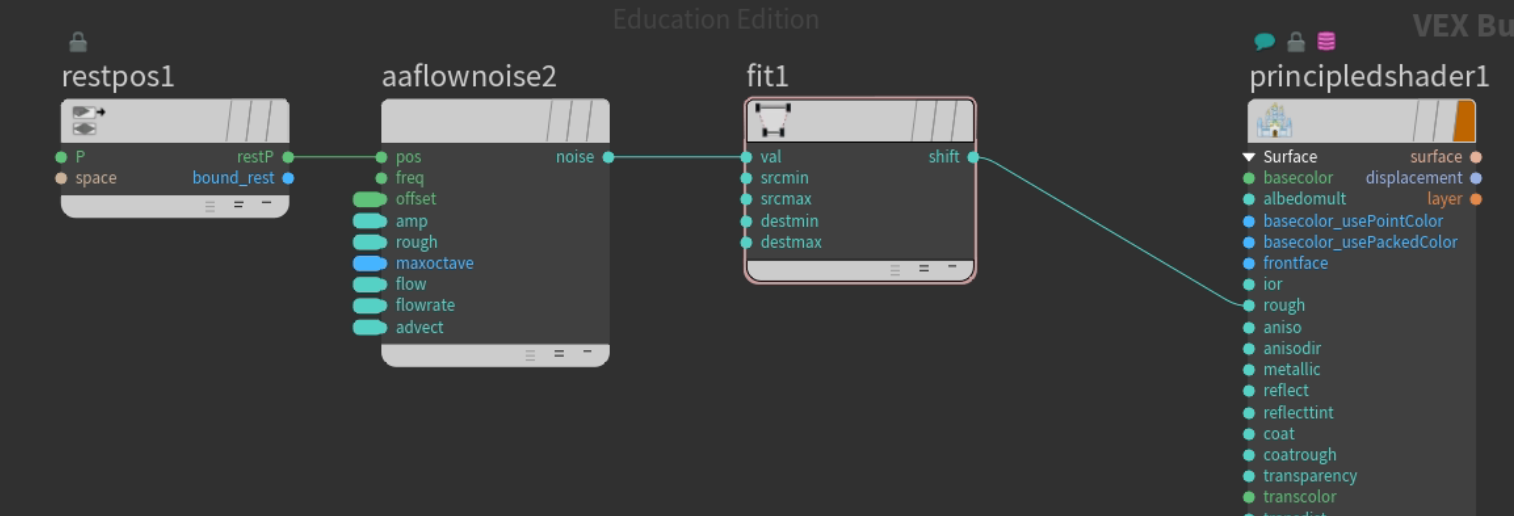
Hi all, First post on here on Odforce, hope someone can help me out. I've been using noises in the material network before to pipe them into parameters however; I got an unexpected result today. I've included a screenshot of the graph (just simple aaflownoise -> fit(noise,-0.5,0.5,0.25,0.35); -> roughness parameter) but got an extremely long and grainy render that was also a lot too light (the lightest frame I included). The other two frames are with roughness just set to 0.3 on the principled shader itself (The darker one has all other settings in the project exactly the same, the lighter one I bumped up the env light a bit). Feel like I'm missing something here. What's going on? Thanks in advance!


-
Hi, I'd like to visualize the optical effect of looking through a procedurally generated faceted glass object in the viewport. Karma works but I'm wondering if there is a faster option with OpenGL? I know it's easy to setup a refraction material in Unreal Engine, is there maybe a simple recipe in Houdini too?
-
Hi, I try to find the way to mix two diffuse based on point color and input that in the material diffuse. What's the best way. And, does someone know a good tutorial that cover the material and shader in Houdini ? thank you
-
Hey party people, Has anyone developed a solid worklflow for getting .sbsar files to work with redshift inside houdini? Did some research on it, but it seems like I am not the only one struggling with it! Excited for your opinions Cheers, Felix
-
Hi guys! I've been hitting this wall project after project. I am not good at scripting, but i was wondering if a script or a function could be done, or if it's a crazy idea. Well, usually when I recieve a model from a modeler, the guy has already assigned materials to the model, that houdini will read like shop_materialpath. Ok, now, if the model has 10 or 20 different shop_materialpath, it's really painful to check 1 by 1 the names and make 1 by 1 the shaders with the same name under the mat context. Do you think there is a workaround in scripting to make this process automatic? What is your workflow about this subject? Have a good day guys, if I get anything working I'll post it here, since I think it could be a really cool tool for everyone!
-
Guys, I guess it might be a veeery silly question but I just can't do it. How do I display textures on viewport? In this case I have this ramp applied (not an image texture) Thx! Alvaro
-
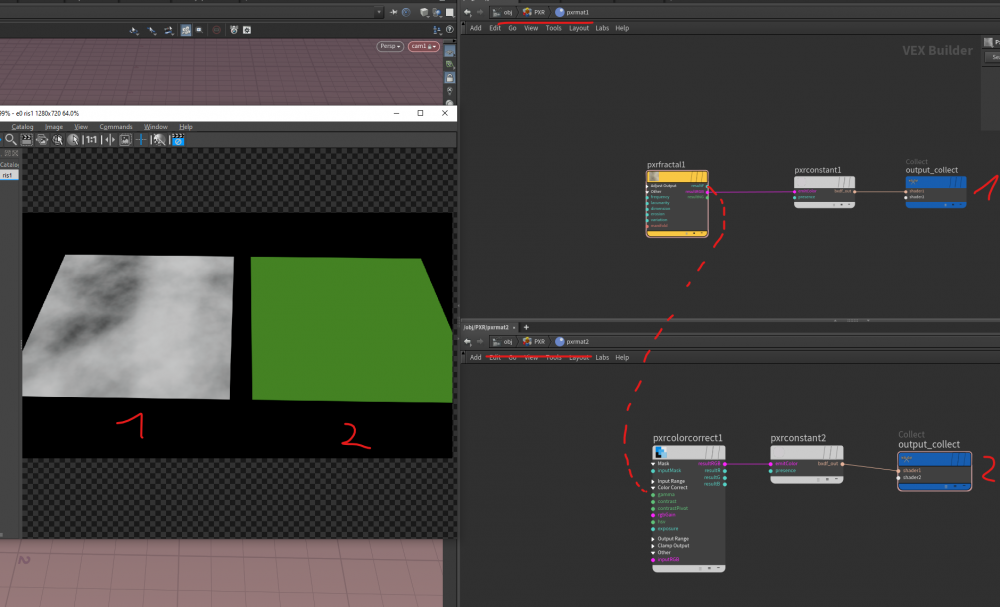
Hi. I want to apply displacement to the area I want. For example, I want'dis' to be applied only to the red area as in the image. But I am not sure how to do it in the shader. Could you please let me know? Or maybe it's a reference address. The example file is also good. Thanks in advance.
-
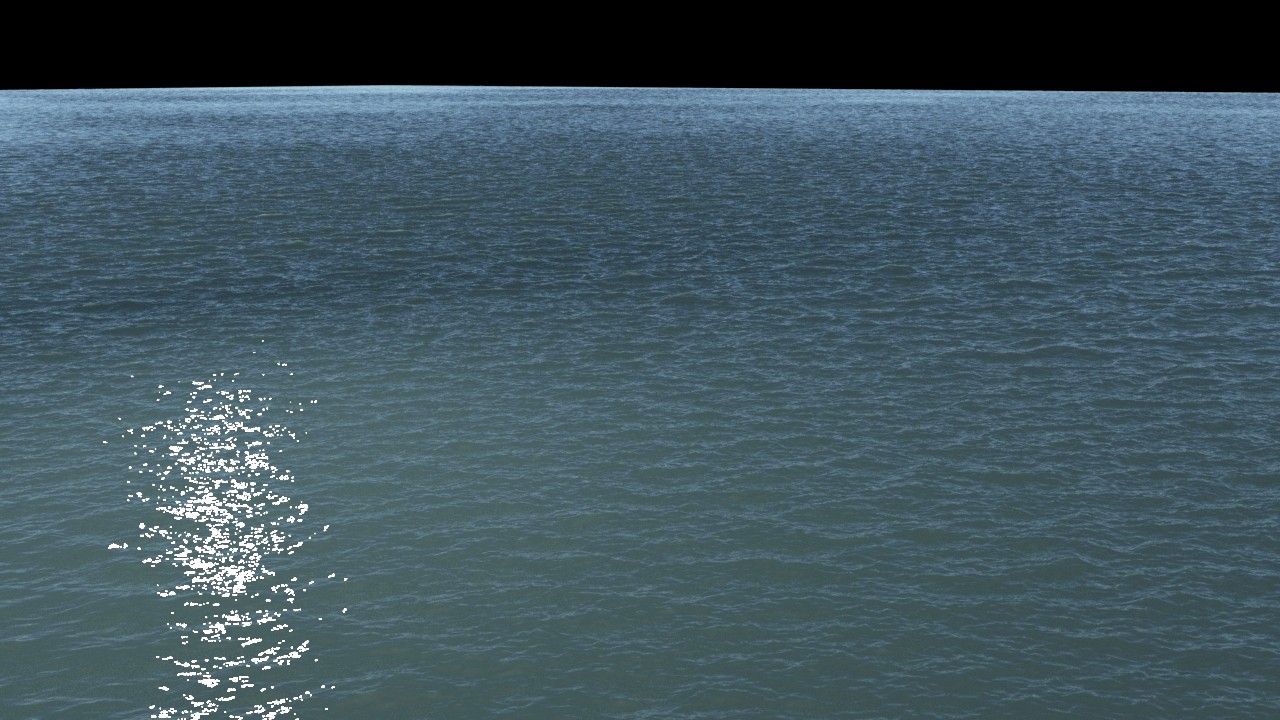
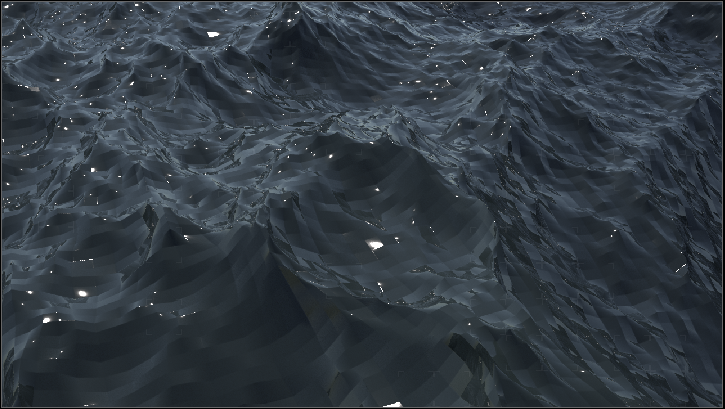
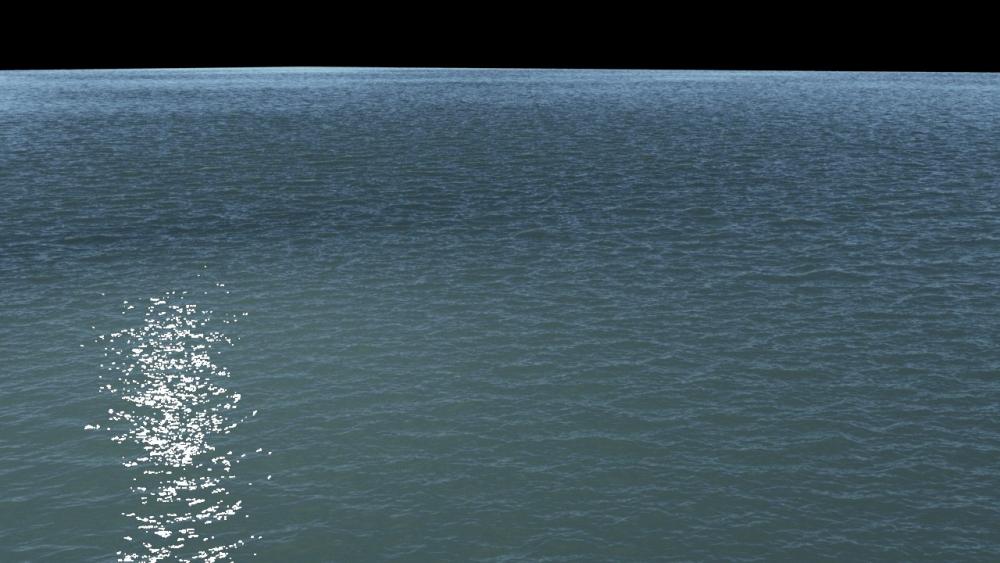
HI My extended ocean have very high specular and I couldn't reduce it or ged rid of it. My lighting rig is Sky Light light, rendering in Mantra using the default ocean surface shader. I tried everything i know the specular is still there, even when when lights are off , I have turn off the "reflect lights" option, the specular is gone but I end up with a flatten not nice look.. Attaching frame example Thank you!
-
Hi I am absolutely new to houdini, so sorry for my ignorance. I'd like to give a mist-like shader to my particle animation which made me struggle whole day..... I dropped billowy smoke shader to spheres, and suddenly my particle object wasn't seen in the render view. How can I make it looks more realistic? I have attached my scene file. Help me.........(༎ຶ⌑༎ຶ) +) I think my particle effect is far from the perfect aerosol spray effect, so please feel free to give me some advice to make it better. I'm trying to make it as a volume with a VDB node, but not sure that it is the significant try. Thanks for reading. aerosol spray.hipnc
-
hello there! I have a procedural noise in mat context and I want to assign the output of the noise to point attributes of the surface. how can I do that?
-
I've started playing around with the Mapbox Noce in the SideFX Labs Tool Box and its fantastic. But I've found a bit of a problem that I can't work out. Is there a way I can extract the texture or Cd into a compositing node then into a shader while keeping it all within Houdini with exporting anything? I'm using Houdini Apprentice anything I export out is limited resolution wise.