Search the Community
Showing results for tags 'tool'.
-
Getting a zoom blur or spin blur in a COP network means writing the same wrangle: work out the aspect-corrected @P coordinate space, build the radial sampling loop, use volumesamplep so alpha doesn’t drop. It’s 30 lines of boilerplate for a basic result. Zoom / Radial Blur COP is that node. Connect an image, pick a mode, done. Blur modes: Zoom Blur (radial scale streaks from center) or Radial Blur (spin/arc smear at constant radius) Center control: Screen Space (−1..1, 0 = image center) or Pixels (absolute coordinates, Y=0 at bottom-left) Samples: 1–256, slider with strict minimum — raise for finals, lower for layout speed Both modes share the same center controls. Switching modes hides the irrelevant parameter (Blur Pixels vs. Blur Angle). Alpha is preserved throughout via volumesamplep. docs and download: https://kleer001.github.io/funkworks/zoom_blur_cop [kleer001.github.io] Houdini 20.5+, any edition. FX users: a build script is included to compile the HDA clean under your own license. More free tools at FunkWorks Home [kleer001.github.io].

-
 Houdini's built-in Resample COP only does Stretch. If you want a letterboxed fit, a fill that crops to the canvas edge, or a tiled repeat with mirroring, you're chaining nodes and computing UV offsets by hand — and redoing that math every time a resolution changes. Scale COP is a free HDA that wraps the whole thing in one node. Pick a target resolution (preset, explicit, or pulled from a size-reference input), choose a fit mode, optionally tile, pick a filter. Done. No manual offset math. Fit modes: Distort, Fit (letterbox), Fill (crop to fill), Width, Height, None (1:1 pixel) Tile modes: None, Repeat, Mirror X, Mirror Y, Mirror Both (with UV offset) Filters: Point, Bilinear, Box, Bartlett, Catmull-Rom, Mitchell, B-Spline, Auto Size reference input: connect any upstream node to drive the output resolution automatically — no manual width/height entry when your canvas size changes Free download: https://github.com/kleer001/funkworks/releases/tag/scale_cop-v0.1.99 Houdini 20+, any edition. FX users: a build script is included so you can compile the HDA under your own license and avoid the Indie/Apprentice flag. First Houdini release from Funkworks — a small open-source collection of free DCC tools built from real workflow problems. Feedback and bug reports welcome! More free tools at https://github.com/kleer001/funkworks
-
Every frame tells a story. But it’s the smallest details in composition that separate good from unforgettable. That’s exactly what Frame Lab is for! It’s not just an overlay. It’s a new way to see your scene: • 14 customizable composition guides (Rule of Thirds, Fibonacci, Perspective & more) • Single / dual-tone overlays with adjustable thickness & opacity • Image references dropped straight into your viewport • Camera Snap to keep overlays locked across views • Depth Swapping to move guides in front or behind geometry • Resolution-friendly, adapts automatically to any aspect ratio Meet Frame Lab: https://johnfanny.gumroad.com/l/framelab
-
I am excited to present the latest version of my modeling addon for Houdini. The core and tools have been practically rewritten from scratch, with the main focus on moving away from a separate, foreign UI and fully utilizing Houdini’s native features for tool interaction. Modeler now operates based on Houdini's radial menus, hotkeys, and shelf tools. Release video
-
Grab Modeler 2025 at 40% off — the exclusive way to model directly in Houdini 21 https://alexeyvanzhula.gumroad.com/l/jaoest/86yivk9
-
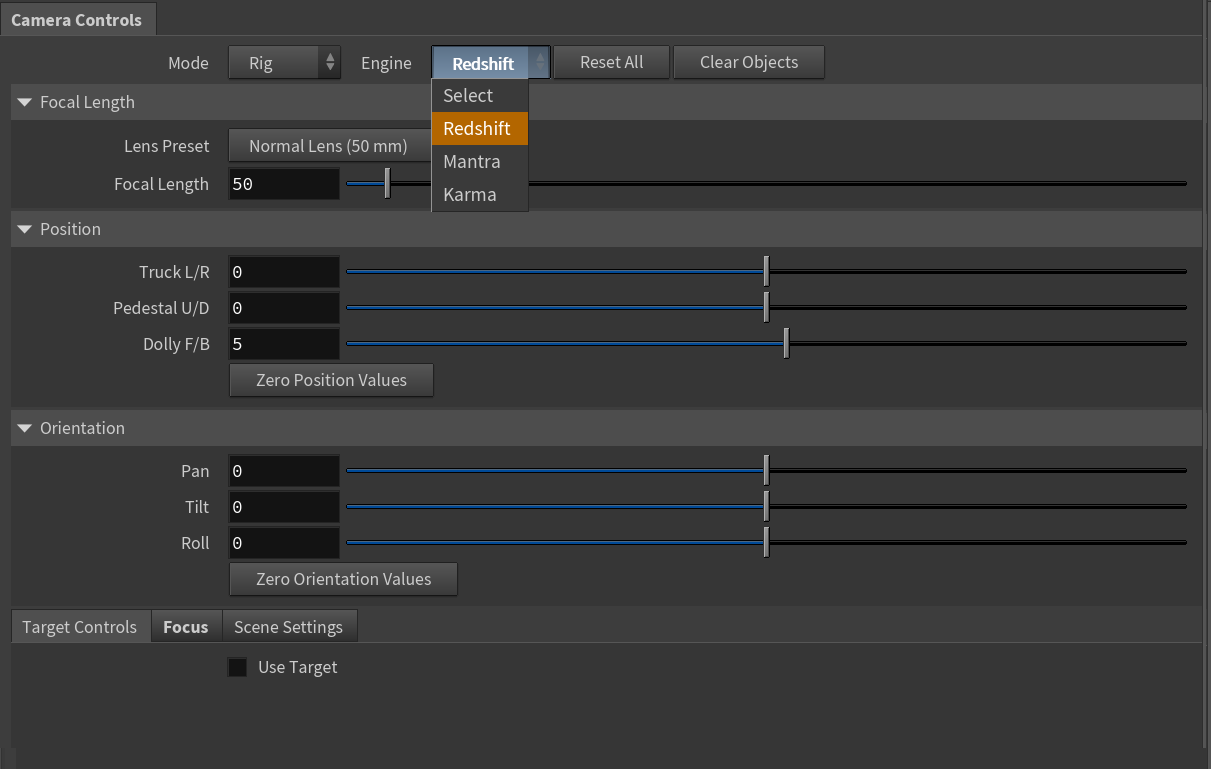
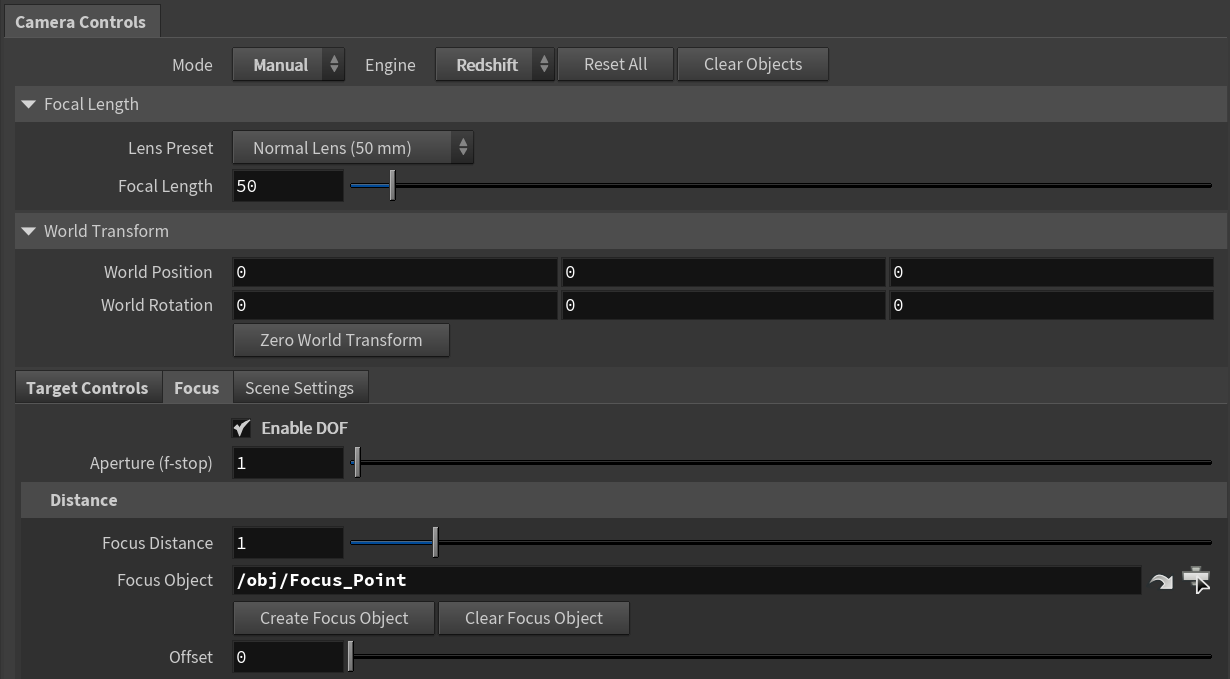
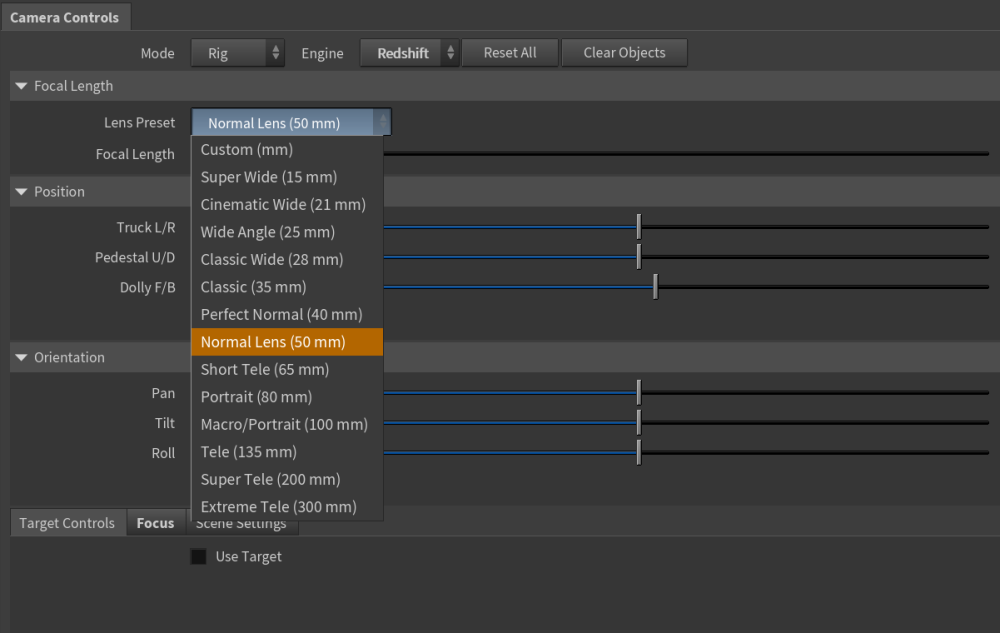
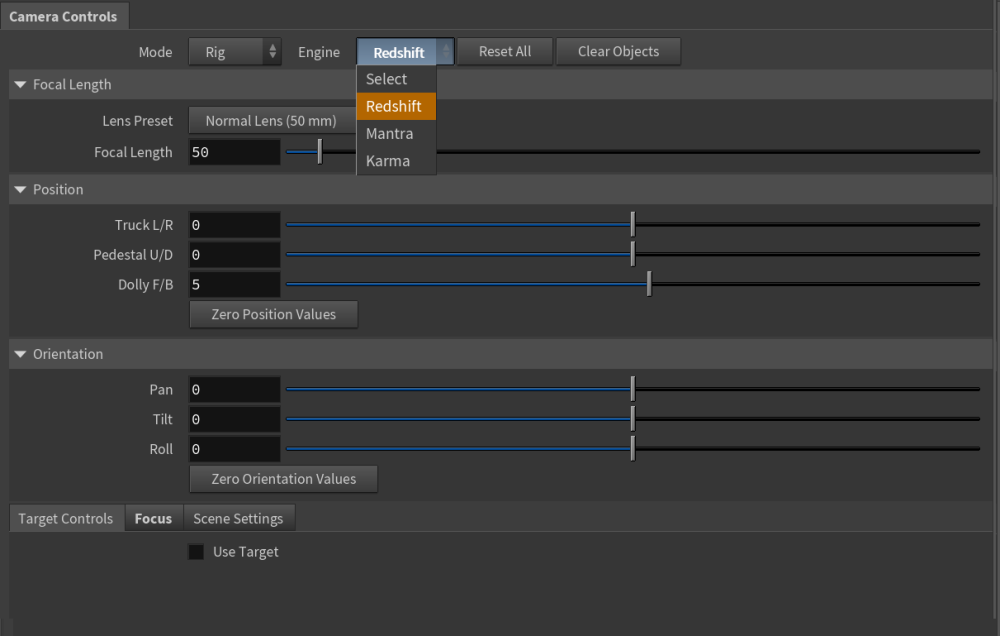
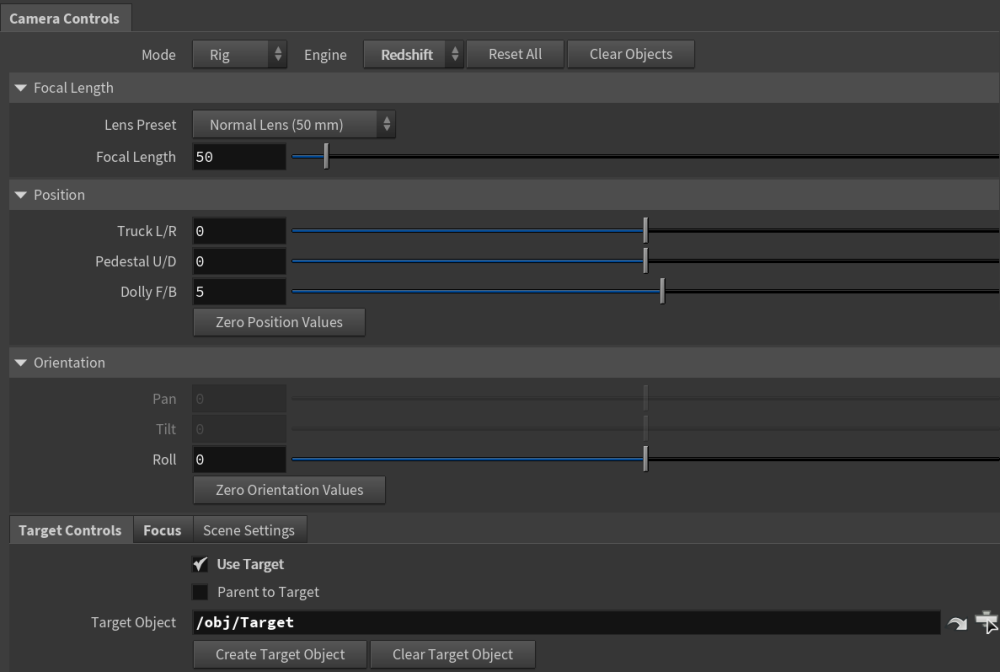
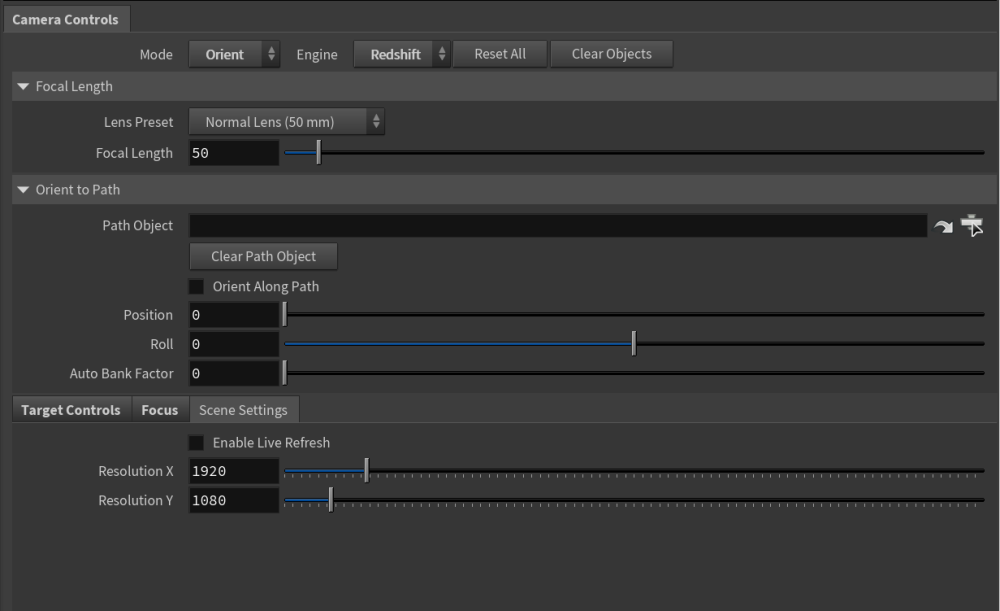
 CamRig Pro A dynamic camera system for Houdini, designed for fast setups, flexible rig modes, and multi-renderer DOF management. Get it here: https://shirmanor.gumroad.com/l/camrigpro Promo_2.mp4 Features One-click creation of a complete camera hierarchy 13 Lens Presets 3 Render Engines - Redshift, Mantra & Karma Supports both OBJ and SOP-based look-at targets Preserves camera orientation and position when switching targets Three rig modes: Rig – dolly, truck, pedestal, pan, tilt, roll Manual – direct XYZ transforms with the CamRig Pro null Orient to Path – align and animate the camera along curves All rig modes support look-at targets and focus nulls Rig mode has an added Parent to Target mode for camerawork base around a moving target DOF controls for Redshift, Karma, and Mantra (focus distance, aperture for Karma/Mantra Only) Generates renderer-specific ROPs when selected (Redshift, Karma, or Mantra) Import to Solaris Auto-assigns the camera to the scene viewport Supports multiple rigs with auto-numbering and non-destructive setup Utility buttons: reset transforms or clear objects using Zero All & Clear Target/Focus + Global Reset buttons Fully written in native Python — no HDAs or external dependencies making it easy to share Shelf/Tab menu integration for one-click access inside Houdini Includes 2 optional custom node shapes, CamRig Pro node and a minimal connecter Requirements Houdini 20.5+ Python 3.11 Included CamRig Pro Python tool Instructions for use inside Houdini Compatible with Redshift, Karma, and Mantra
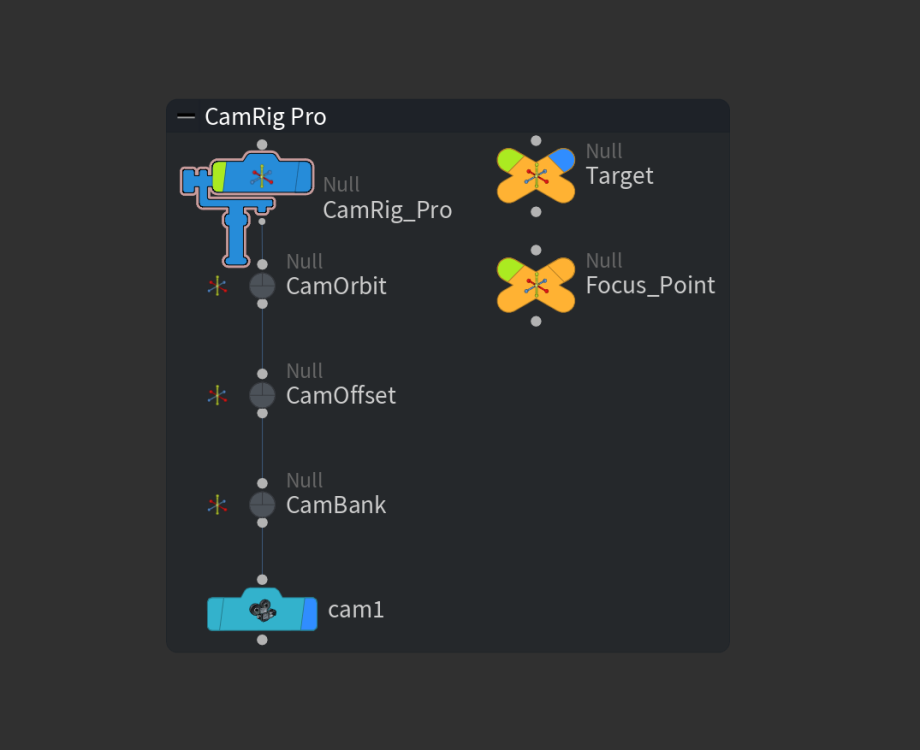


-
VM_Promo.mp4 VEX Manager 1.0 Snippet manager and code editing tool for H20.5+ The VEX Manager is a user-friendly tool for managing and editing VEX code as well as saving notes all within Houdini. It simplifies loading, creating, editing, and organizing VEX expressions, making it essential for artists working with VEX scripts. Download it here https://shirmanor.gumroad.com/l/vex_manager_v1
-
Introducing the VEX Manager, a user-friendly tool which is an alternative from the existing Recipes, Gallery or Preset Dropdown Menu within Houdini. This tool is built solely for managing and editing VEX expressions while also storing notes within a light-weight python shelf tool. Simply click the VEX preset title and instantly view your expression outside of your current wrangle, Edit, Create, Load, Group, Save Variations and Apply your VEX expressions or append small saved snippets to different sections of your current wrangles code. You can also load a vexpressions.txt file from anywhere on your PC including a cloud to enable you to bring the snippets anywhere! This out of wrangle workflow makes it a handy companion for artists working with VEX looking for a non destructive and easy to predict process. For more details click the link. https://shirmanor.gumroad.com/l/vex_manager_v1
-
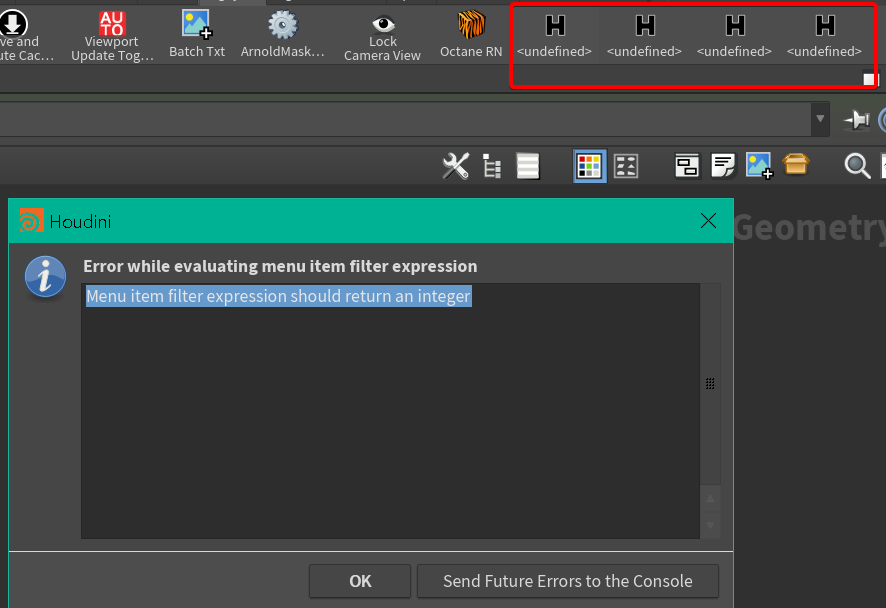
Hello there, I use a lot of python tools to speed up my workflow. But lately for some reason my Houdini shelf got messed up and a few turned into undefined? Is there any way to fix this? when I left click it said "Menu item filter expression should return an integer" Thank you for your time
-
 Hi, I have recently created a set of 70+ HDAs called the IPOPs that aim at creating AOVs, Mattes & features for rendering. IPOPs are operator workflows designed to streamline shaders and AOV development in Houdini. With our toolset, artists can easily standardise their networks and access specially developed nodes for various renderers and presets, increasing efficiency and creativity. Get the IPOPs here! Renders in Karma & Mantra. 1. The Standard Library: Set of HDAs that help artists create quick shaders and AOVs and contain useful Utility Nodes such as Fresnel for Karma (CPU & XPU), Mask Falloffs in Shaders etc. The HDA library is constantly updated with new nodes to assist artists in speeding up their workflow and creating a streamlined system thereby increasing efficiency and creativity. 2. The Geometry AOVs: A set of remade common geometry AOVs for artists to quickly generate AOVs, Mattes & Utility Passes for Compositing. 3. The Particles AOVs: A set of remade useful particle AOVs for artists to quickly generate AOVs, Mattes & Utility Passes for Compositing. 4. The Volumes AOVs: A set of remade volume AOVs for artists to enhance their FX using AOVs, Mattes & Utility Passes for Compositing. We have a wide range of Bundles available for various workflows & we support both Houdini Apprentice & Houdini Indie! For any enquiries please email support@chakshuvfx.com I will be posting constant updates and developments here. IPOPs Master bundle: 1. Houdini Apprentice 2. Houdini Indie IPOPs Geometry AOVs bundle: 1. Houdini Apprentice 2. Houdini Indie IPOPs Particles AOVs bundle: 1. Houdini Apprentice 2. Houdini Indie IPOPs Volumes AOvs bundle: 1. Houdini Apprentice 2. Houdini Indie
 -
These are some basic ideas that I used when creating the Saliva for movies like Hellboy (2019) and Manikarnika: Queen of Jhansi (2019). The main goal was to be able to Art Direct everything anytime as there were over 14 shots where the Supervisor and Director had very specific notes. Visit my blog for more articles on Houdini Blog: https://sharanvaswani93.wixsite.com/s... Email: sharan.vaswani93@gmail.com
-
Getting closer to a new surreal idea I had in mind for a long time...Walls with Eyes! Here is my initial test for a small section of the wall. hoping to add in more detail and deformations to the rig the wall skin rig. I made the entire model and rig process combined into a single HDA. May need to optimize the HDA further to speed up things. Instead of using deformers to the bend the grids I started off with using curves and a combination of ray intersects and vex to create the eyelids, after creating the initial shape I was able to skin the curves using the Skin SOP, this gave me more control on how I can design the character, without worrying about intersection polygons and normals. The curves also acted as representatives for each loop on the wall and so I was able to control them in wrangles through multiple technics in vex.
-
LookAt Setup in SOPs, VEX, VOPs. Having used the Houdini default tools several times, I wanted to achieve the same effect in SOPs. Here is a detailed post to understand better how the LookAt works and how it can be used in creative ways https://www.sharanvaswani.com/single-post/2020/09/27/Using-VEX-and-SOPs-to-make-a-LookAt-Setup
-
Hi everyone, I have developed an HDA that can adjust attributes and fields based on camera proximity. The Calibrator Toolset is a comprehensive HDA (Houdini Digital Asset) designed for intricate attribute and field control based on camera proximity. Its primary functionality includes dynamically scaling particles or reducing density as they approach or move away from the camera and can be customized to adapt to any attribute or field. It operates seamlessly with animated cameras, facilitating complex visual adjustments. Key Features: 1. Dynamic Controls: The Calibrator Toolset enables precise data manipulation. This functionality works seamlessly across different attributes and volumes, allowing for versatile adjustments in visual compositions. 2.Camera-Based Clip Adjustment: It provides the capability to adjust both far and near clip planes dynamically based on the camera's position or movement, ensuring consistency and accuracy in visual representation. Users can adjust settings based on individual attributes and volumes and enable global settings when needed. 3.Adaptability with Animated Cameras: The tool seamlessly integrates with animated cameras, maintaining functionality and accuracy even in complex animation setups. 4.Custom Clipping per Input: The tool allows users to customize settings based on the input attribute/field or use a global clipping setting throughout the tool. This gives artists control to adjust values based on requirements of the shot. 5. Easy to Use: An intuitive shelf tool and menu system simplifies complex processes for effortless integration into production pipelines. Users benefit from user-friendly functions and accessible guides within the viewport, enhancing usability and streamlining their workflow. The underlying code leverages various calculations and attribute/field manipulations to achieve these dynamic adjustments. It operates efficiently across particle and volume/vdb data, employing distance calculations, attribute mapping, and conditional operations to precisely modify while allowing artistic liberty. I have used this tool in several projects when making setups and executing sequences with multiple shots. The goal is to never have intrusive elements in the camera from the get go. Its handy when corrections need to be made on the fly and can be used in multiple scenarios such as adjusting motion blur and velocity which is too close to the camera, adjusting exposure values for shaders and even creating handy AOVs based on camera proximity.
-
 In case you want to try it, this is the link to the repository - https://github.com/aniketrajnish/MeshToPointClouds-Houdini Do hit a star if it helps you!!
 -
https://alexeyvanzhula.gumroad.com/l/modeler2023/black_friday
-
Hi, I am a senior Houdini artist, but a intermediate about python script. I am looking for flipbook tool because original one is so inconvenient that every time we need to type file name and saving path. Thus, I wonder if we have the following tool: 1 click a shelf tool. 2 pop up a custom UI. 3 type rez, frame range, and automatically create a default image file name and its path in the UI, based on hip file. 4 click a button and start playblast and save the image seq. 5 Ideally it has option to save mp4 with ffmpeg. (I have no idea how to plugin this external software!! ) I cannot make such a tool from full scratch, but am capable to customize it. So far, I found useful article, and can read it but don't know, for instance, I can create a custom UI but don't know how to link those values to actual flipbook parameters. I really appreciate if you have python shelf scripts for 5 steps, or more hints to create the tool.
-
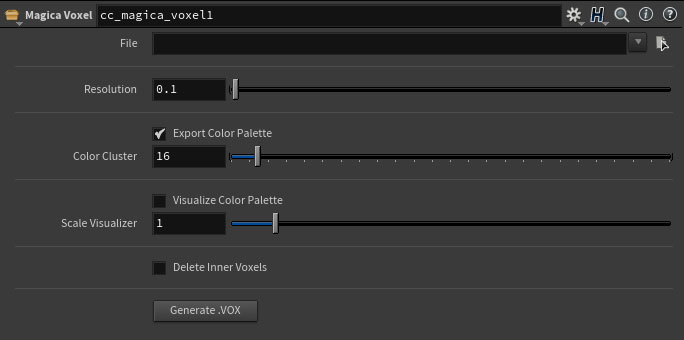
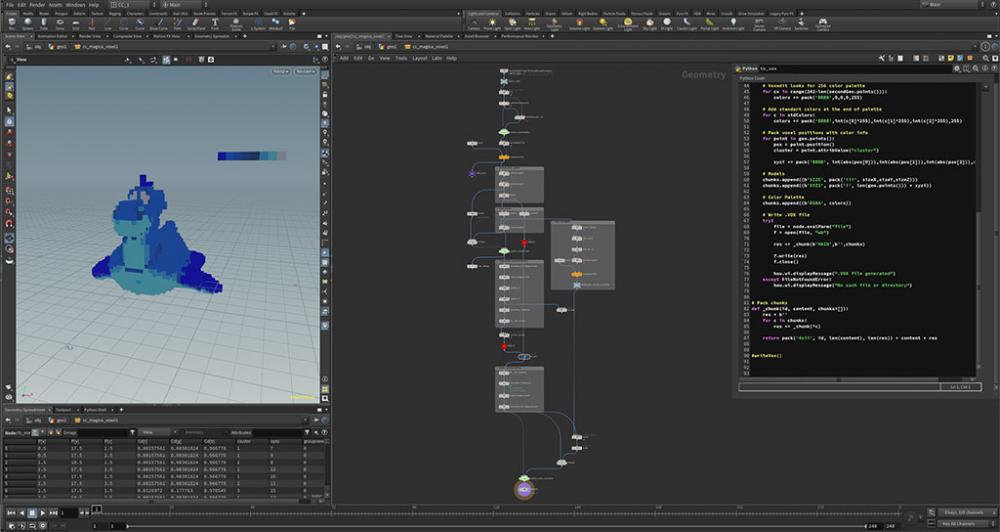
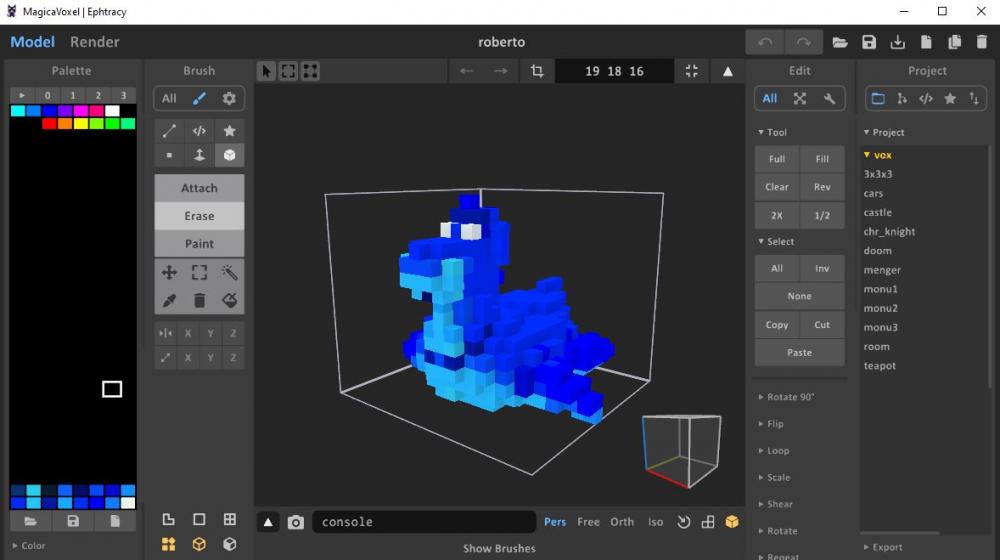
Hi All, I've been working on the .vox exporter for a while. After some improvements I decided to publish it on github. The HDA generates .VOX Magicavoxel file from given inputs. If interested you can get it from here; https://github.com/caglarcomez/Houdini_to_Magicavoxel
-
LAST CHANCE TO BUY MODELER FOR HOUDINI AT A DISCOUNT BEFORE THE NEW V2022 RELEASE. THE UPGRADE TO V2022 WILL BE FREE IF YOU BUY AT A DISCOUNT NOW. THE DISCOUNT IS VALID FOR A COUPLE OF DAYS: https://alexeyvanzhula.gumroad.com/l/mdNet/Discount
-
Z allows you to simultaneously edit geometry in Houdini and ZBrush. The toolkit is designed for modeling and animation artists and divided into four parts: 1. Data exchange between programs without using files. The function may be of interest not only to Houdini users but also to ZBrush users who want to improve their workflow by an order of magnitude 2. Blend Shapes creation in Houdini and ZBrush. Tools optimized for high-poly animated geometry 3. Converting FiberMesh to Houdini Curves 4. Built-in remeshing with ZRemesher. Provides a convenient way for partial remeshing and clean mesh with smart relaxing Product link: https://alexeyvanzhula.gumroad.com/l/nuBwF Lightweight version: https://alexeyvanzhula.gumroad.com/l/RaNuJ
-
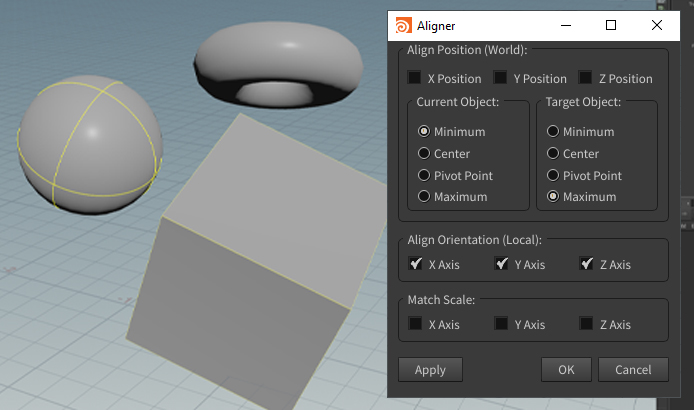
Now you can align multiple objects with Aligner like in 3ds max. Just select object or objects, press button and select the target. https://gumroad.com/l/Aligner Installation: 1. Create new shelf 2. Add new shelf tool 3. Copy and paste script from aligner.py 4. Edit ui_file path to the file aligner_gui.ui P.S. Asign the tool on Shift+A hotkey. Enjoy!
-
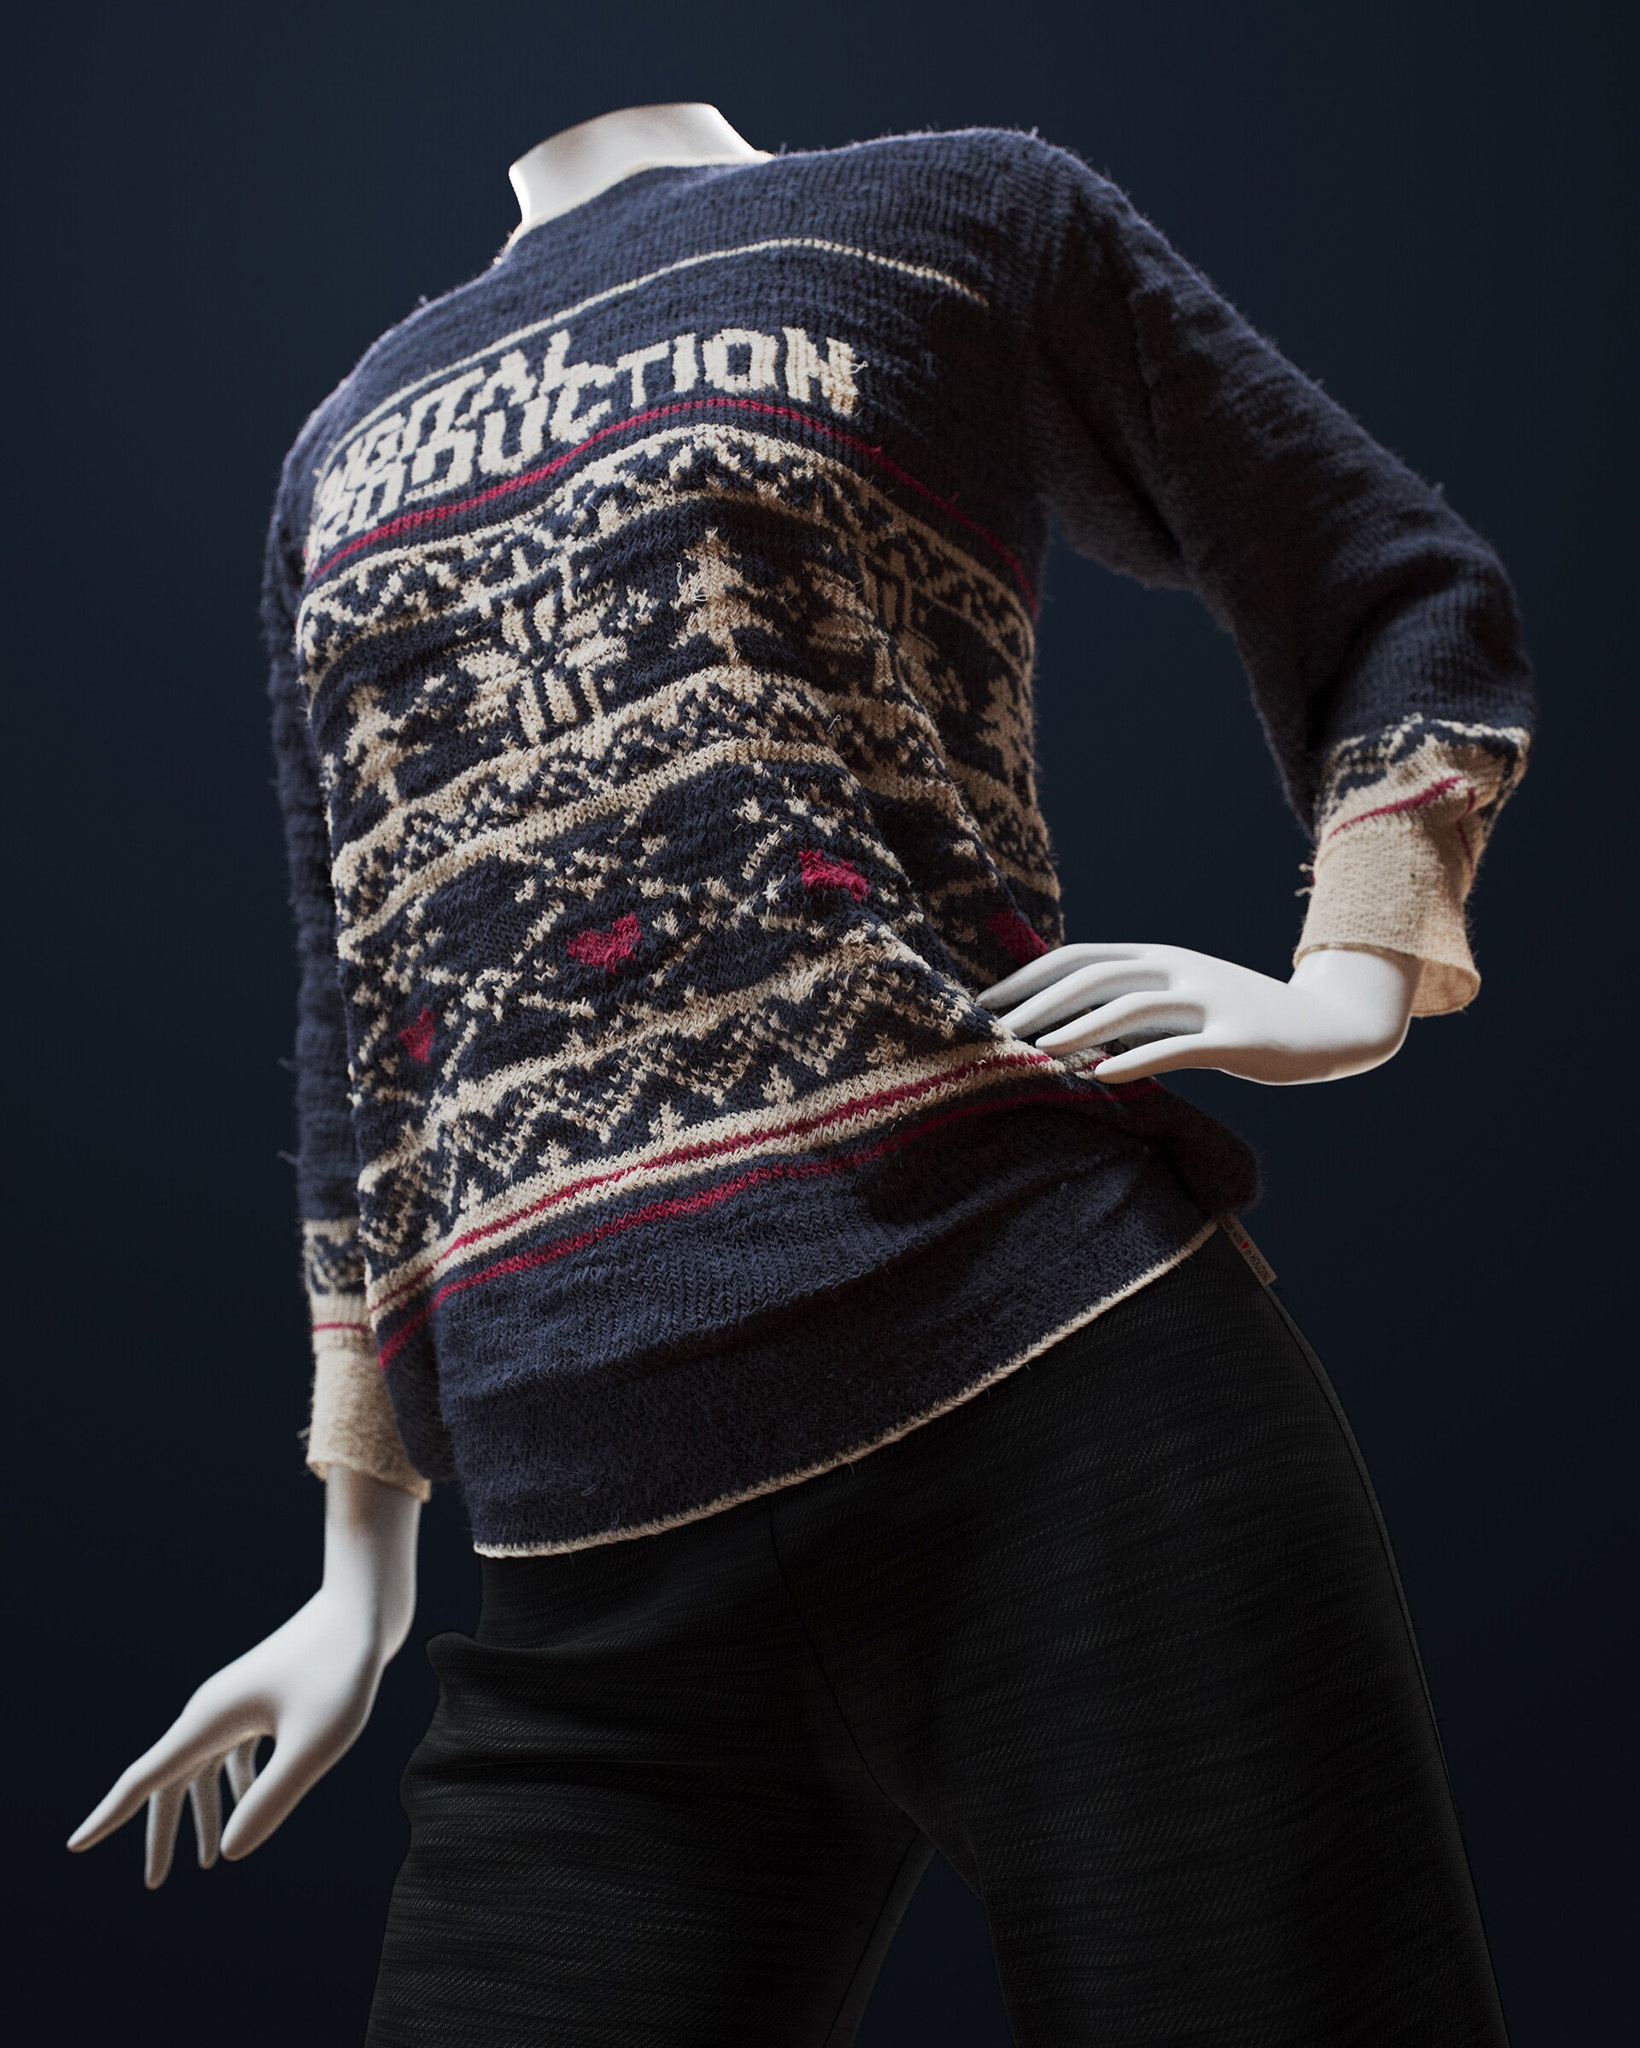
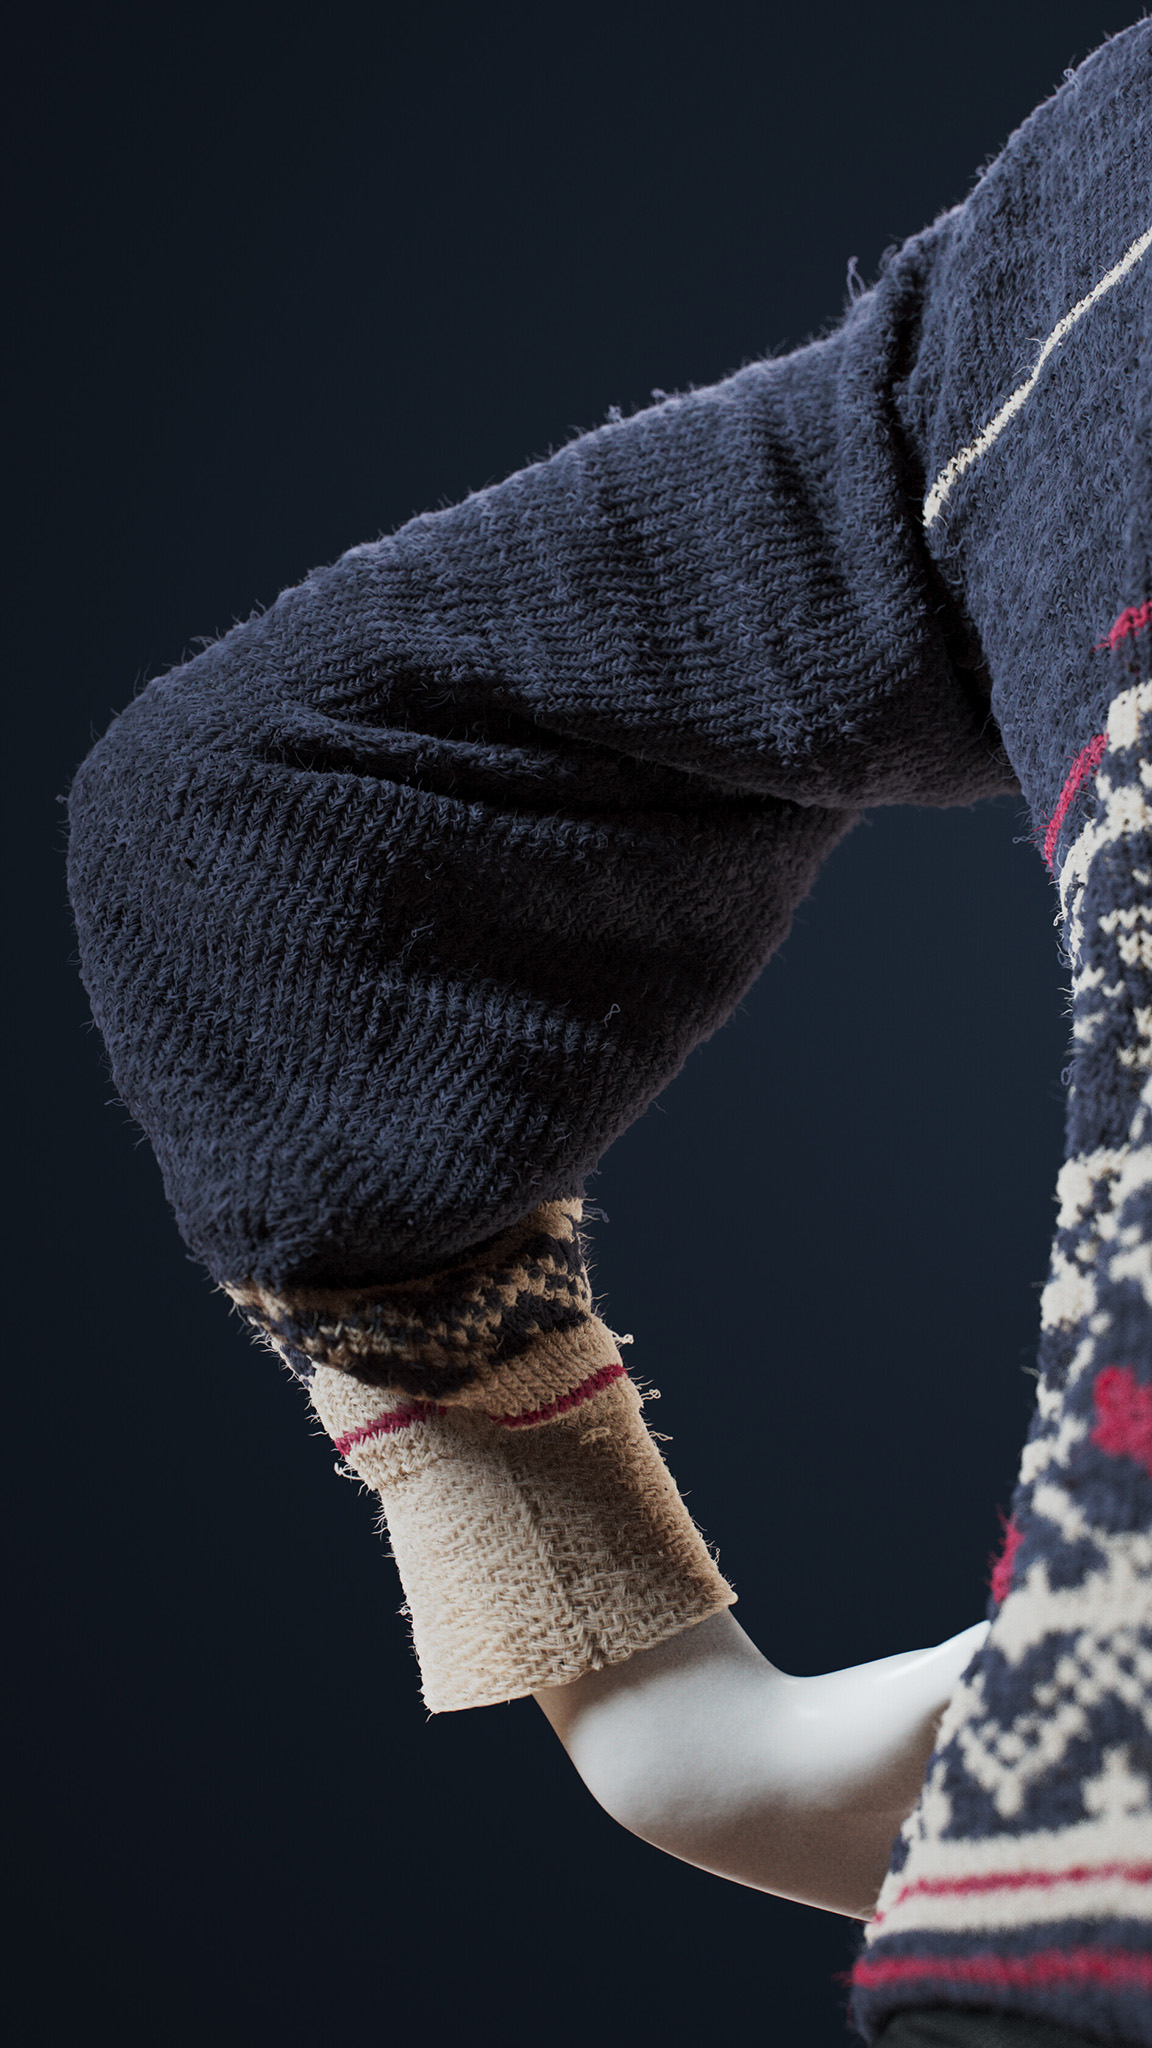
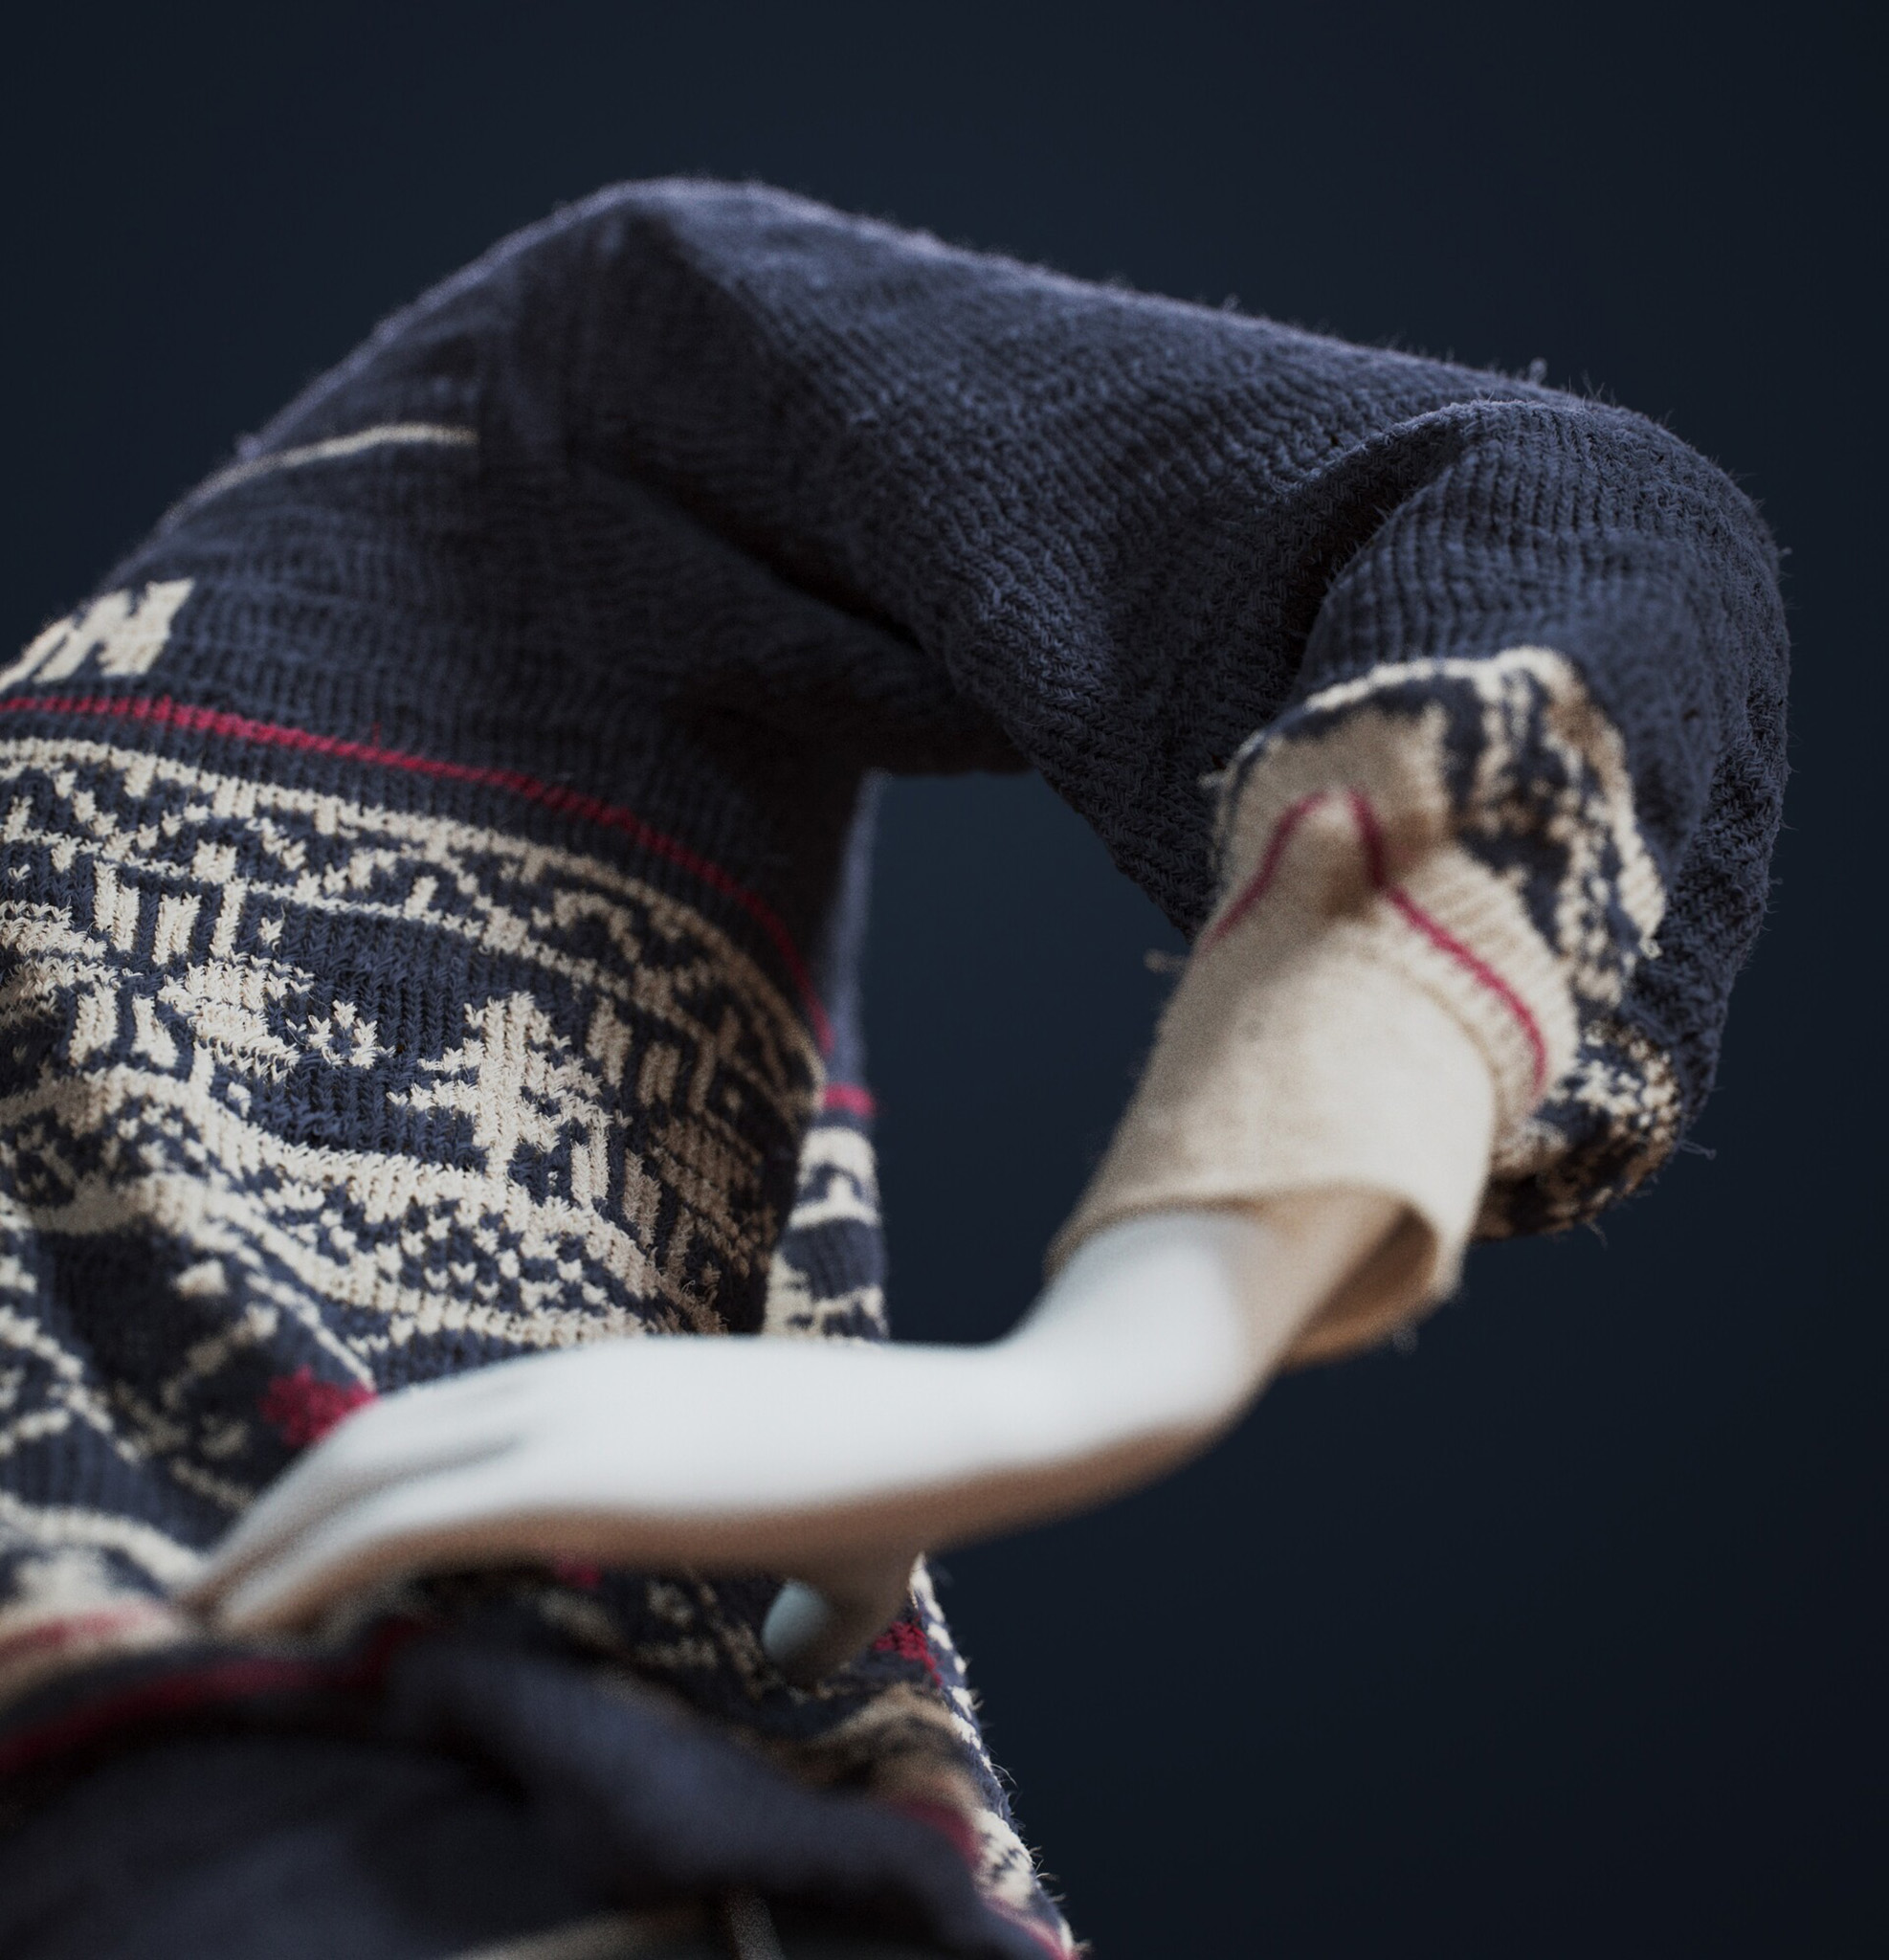
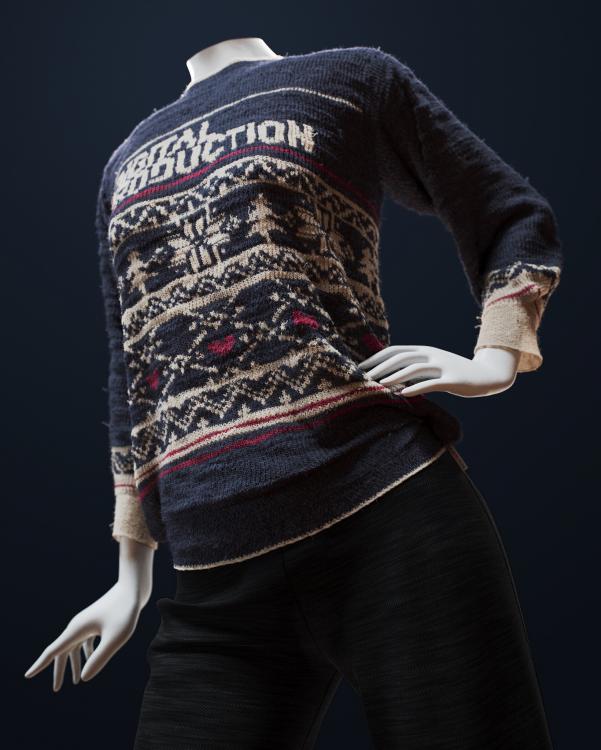
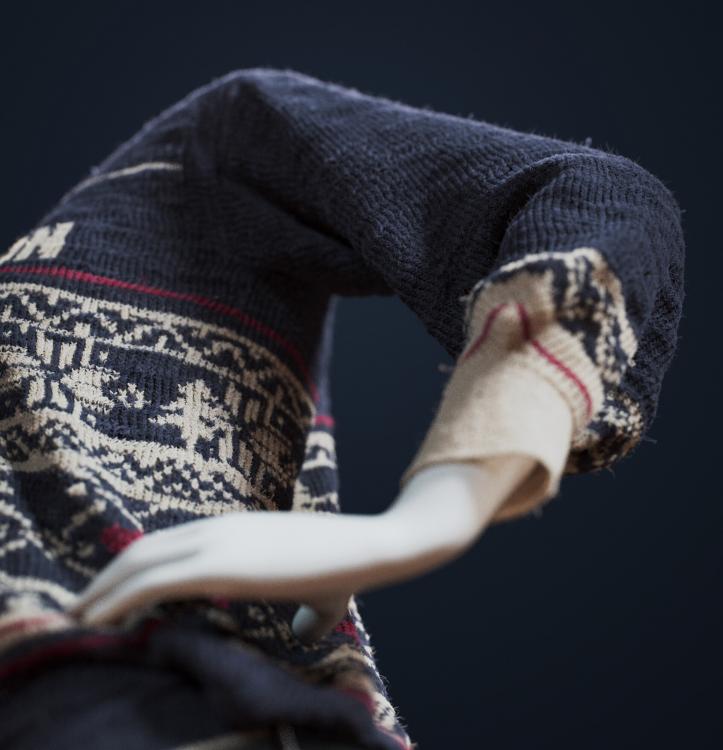
 Hi, thought I'd share this in this section too: I wrote an article for the german “Digital Production” magazine about my free LYNX VFX toolset. For the article I made a couple of renderings using the LYNX fabric tools. Luckily it even made the cover Here are my personal favorites, the rest of the images can be found on Artstation. You can also find the complete scene on GitHub under the Demo Files. So now anyone can design an ugly Christmas Sweater;) Looking forward to seeing what you guys come up with, enjoy! Links: LYNX VFX Toolset Odforce Thread: https://forums.odforce.net/topic/42741-lynx-free-opensource-vfx-pipeline-tools/ LYNX VFX Toolset (Sweater Scene File included): https://github.com/LucaScheller/VFX-LYNX Artstation (HighRes Renderings): https://www.artstation.com/artwork/OyeY6g Digital Production Magazin: https://www.digitalproduction.com/ausgabe/digital-production-01-2020/ Alternatively view the article in my latest blog post: https://www.lucascheller.de/vfx/2019/12/15/ynybp7wpiqtshoy/
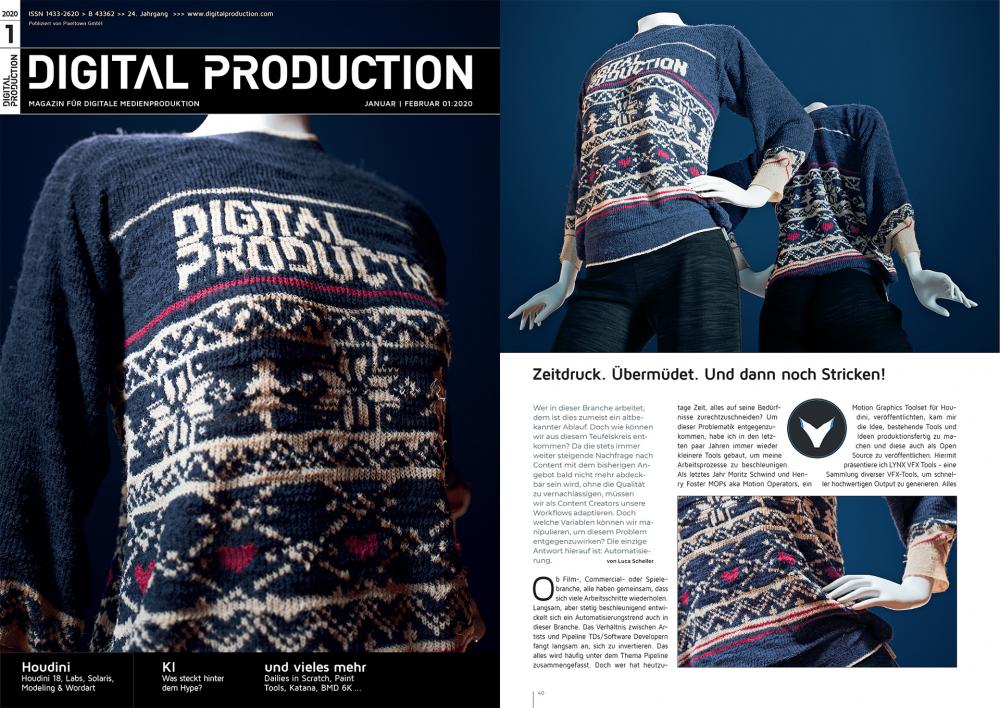

-
Hi, there. I'm releasing an "early version" of a tool I've been working on. The Wormhole Content Browser is a custom UI for Houdini that enables quick browsing, previewing, and importing of content into Houdini. Some existing features: File browser within a pane tab for easy integration with your desktop. Access browser through parameter context menu to set parameter to a selected file. Easily generate geometry previews using the viewport or mantra. Thumbnails are cached to disk for quick access, especially for previously loaded large images. Import files into SOPs, COPs, or CHOPs. Plus more! Note: This tool is in development, but the functionality currently provided is complete. I am offering this version for free to get people to bang on it a bit. I will continue to fix bugs and make limited improvements to this version. I am planning on adding more features like improving workflow interactions with Houdini, and tools to search through content in a future version that may not be free. Here's a link to the gumroad project page: Wormhole Content Browser Peter.